Top 10 Essential Mac Tips and Tricks for 2020

1. Speak to your Mac!
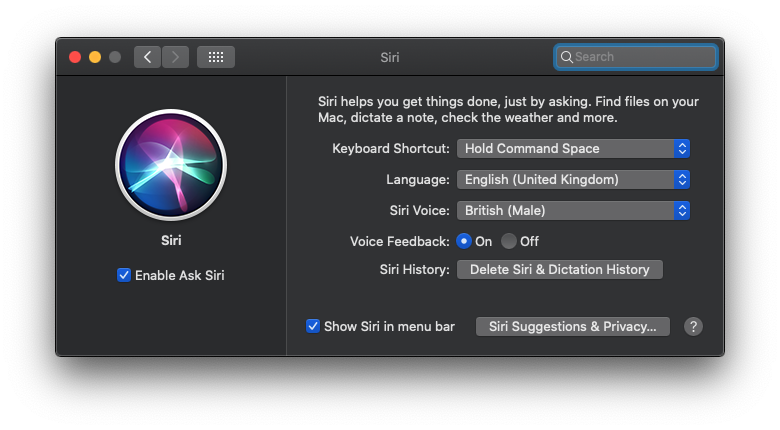
The Mac’s ability to listen and talk is excellent using Dictation. Since Siri’s launch on the Apple line-up this has eclipsed the Dictation feature.
Hold Command-Space for a few seconds, or press Command-Space and type Siri, if you are using a recent Mac (any Mac since 2018 pretty much) say ‘Hey Siri’.
You may need to open System Preferences > Siri and make sure it is enabled.
Siri on the Mac is more powerful in Mojave and Catalina; Siri can even control system functions hold Command-Space and talk to Siri.
2. Show or Hide the Menu bar
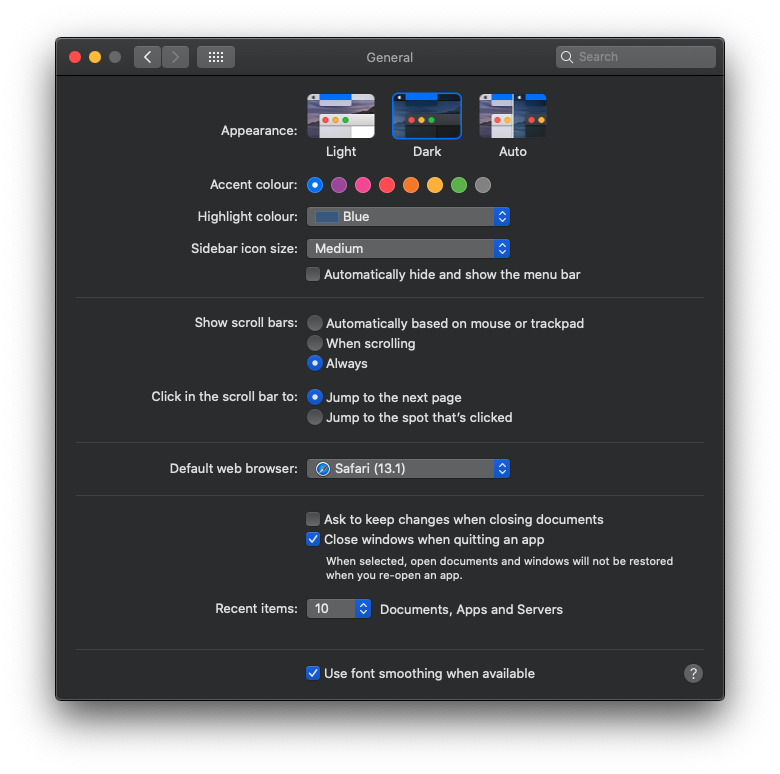
Since the launch of the Macintosh nearly 40 years ago there has been a Menu Bar, from OS X El Capitan & up you can choose to not show the menu bar giving you a little more screen space should you need it.
Go to System Preferences > General & look for “Automatically hide and show the menu bar.”
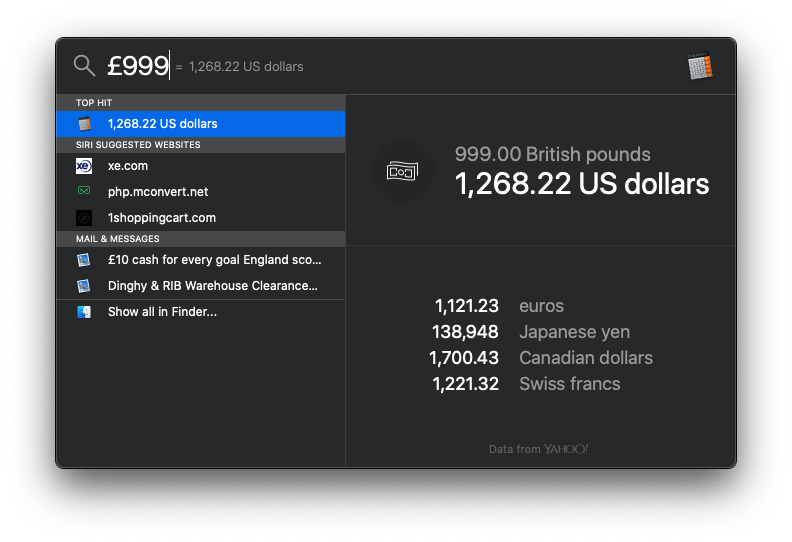
3. Unit conversion & calculation from Spotlight
Type 1 + 2 into Spotlight (Command Space)
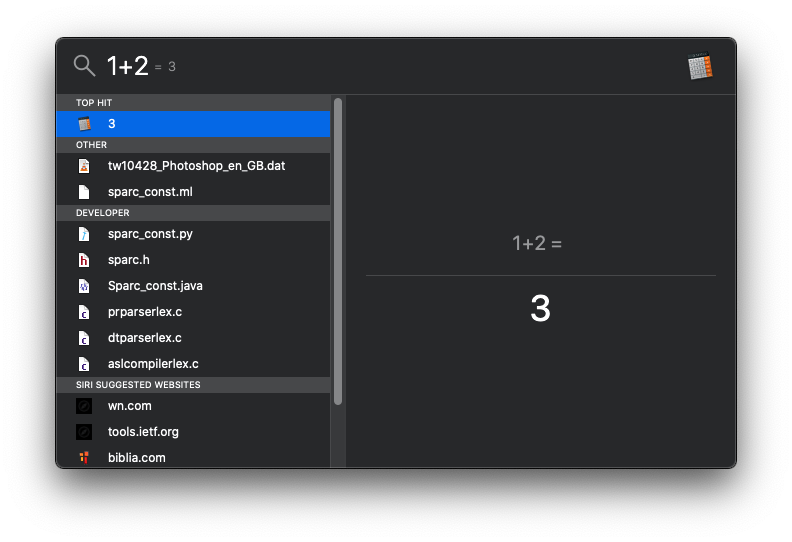
And hey presto it gives you the answer!
You can also convert currencies, weights etc.
Type £999 which is the pounds sterling symbol and it will give you the USD equivalent.
4. Use Glyphs & Emojis
You may be using some already such as accented e’s é; type Option+E then E again, however there are many more.
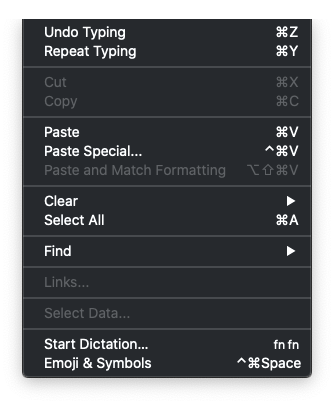
Look in the Edit menu of apps and you'll find “Emoji’s & Symbols or Special Characters”.
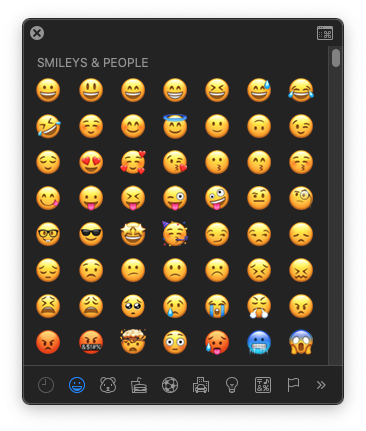
Here you can access a large array of symbols & Emoticons you can use in your documents.
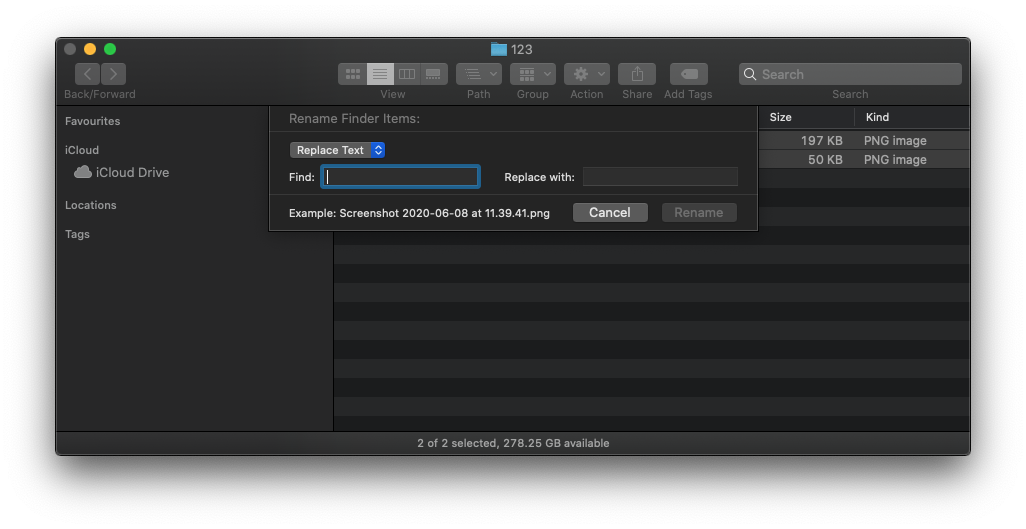
5. Rename multiple files at once
From MacOS Yosemite & above you can select a range of files & then select Rename from the right-click menu or using the drop-down “Action” menu in Finder windows.
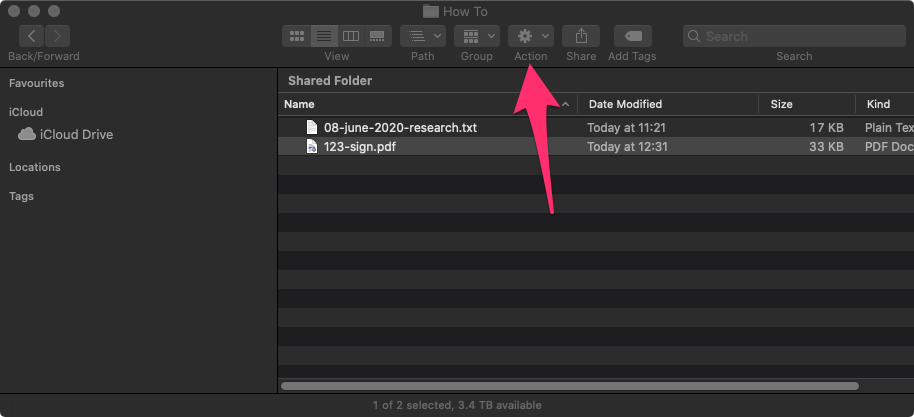
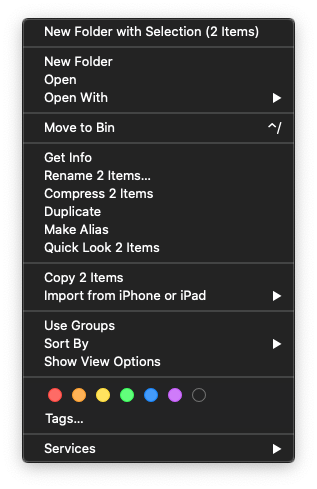
After that you will be presented with the options of replacing text, adding text, or applying a format.
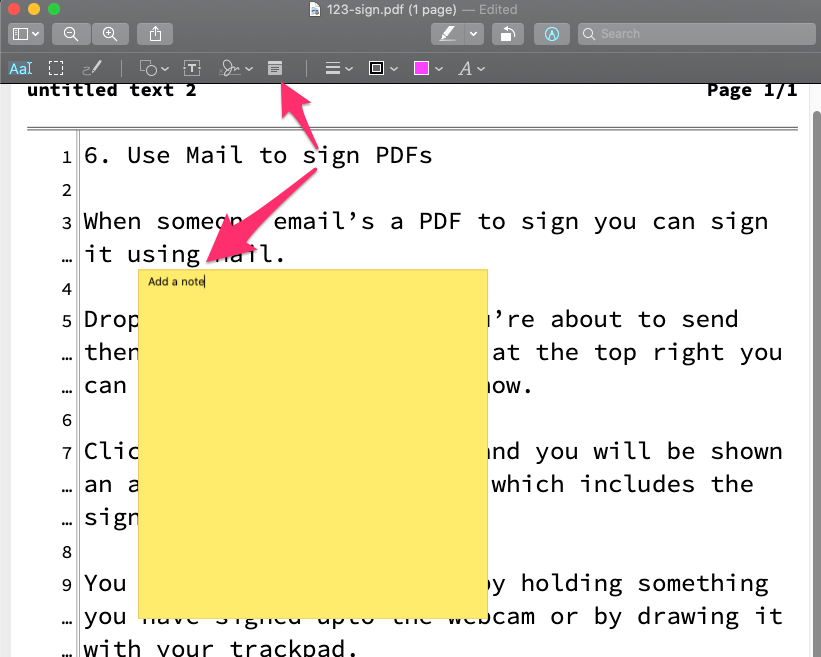
6. Use Mail to sign PDFs
When someone emails a PDF to sign you can sign it using Mail.
Drop an PDF into your email and then when you hover over it at the top right you can see the markup button show.
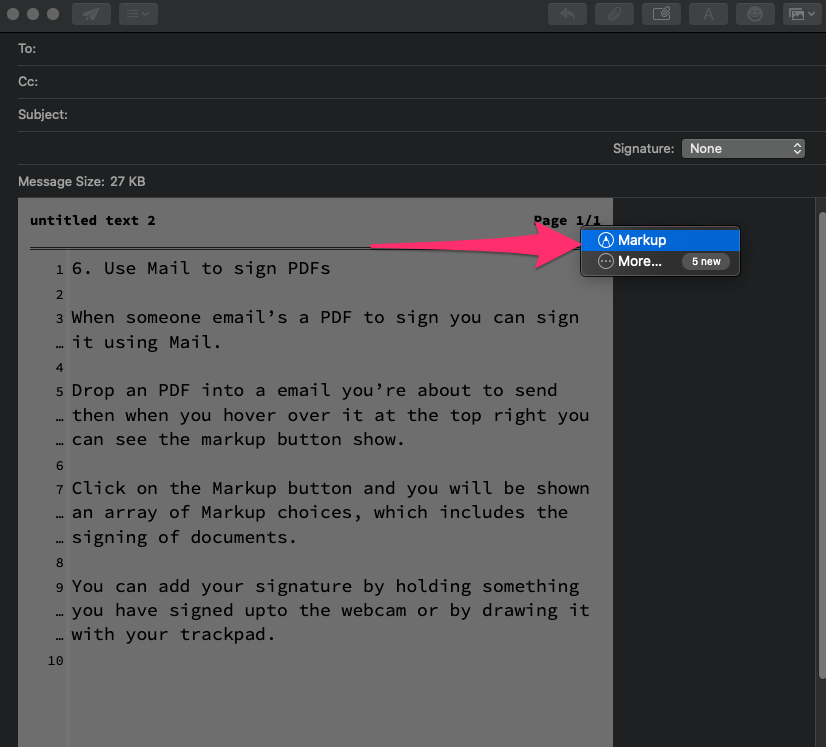
Click on the Markup button and you will be shown an array of Markup choices, which includes the signing of documents.

You can add your signature by holding something you have signed up to the webcam or by drawing it with your trackpad.
7. Share things straight from your Mac
All over macOS you will see the share button.

Click the share button and choose the method you would like to share the thing you are currently looking at.
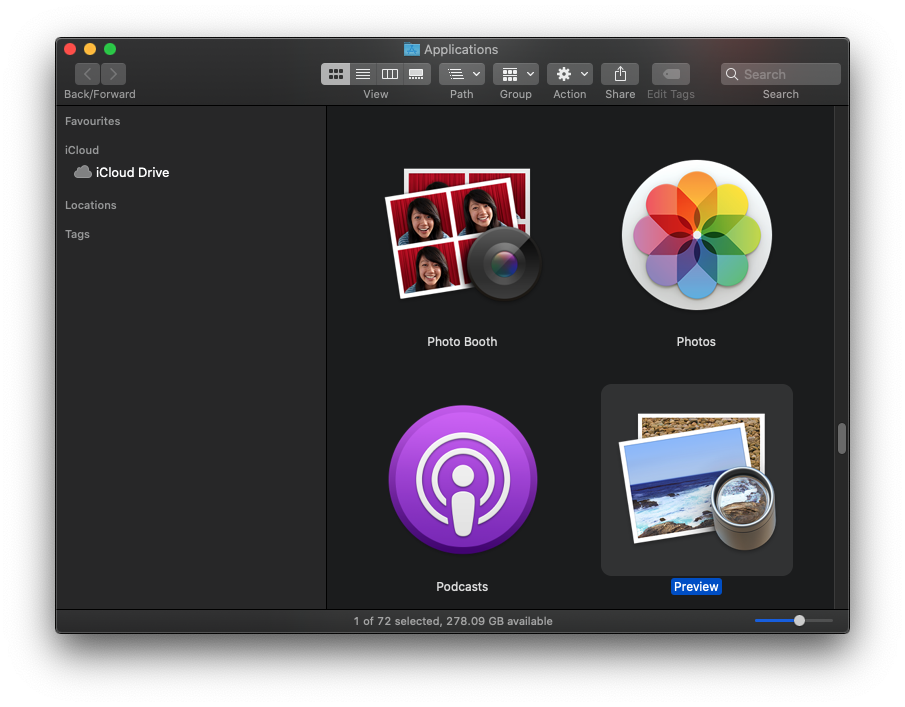
8. Use Image Capture to grab items from your camera / Sd card or
other imaging device.
MacOS has a great built in utility you will find in Applications > Image Capture.
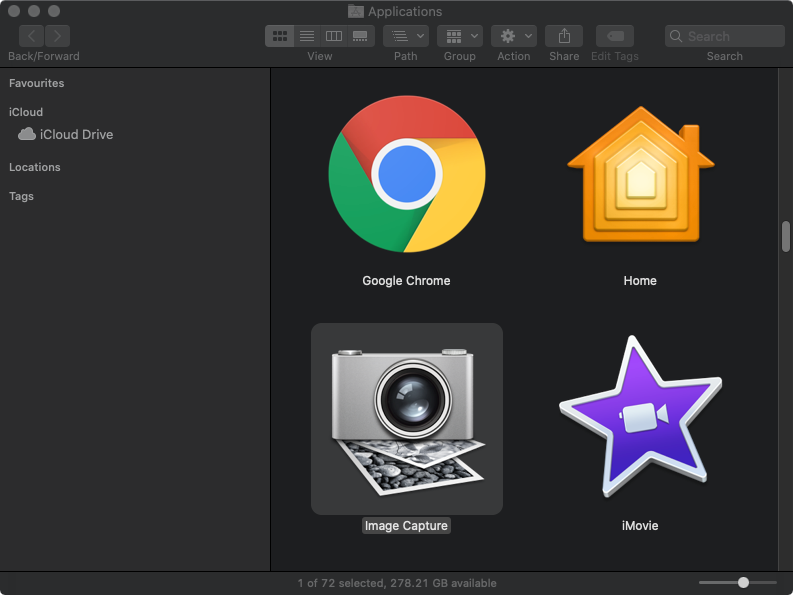
Image capture can pull images and videos from almost any connected camera / scanner or imaging device. It can even import images from networked or “shared” scanners.
9. Split Screen
Since MacOS El Capitan Split Screen view allows you to use Apps side by side very efficiently.
On Mojave and previous versions of MacOS, hold left-click on an app's green maximize button then drag the app to the left or right-hand side of the display.
Using macOS Catalina things have changed slightly; left-click and hold on the green maximum button and this will show a menu in which you can choose how you want that window positioning.
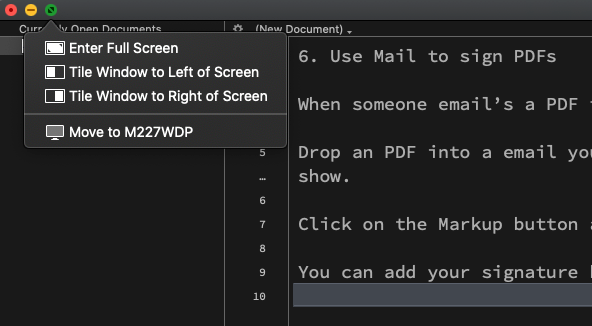
With a secondary monitor attached you can even send that window to the secondary monitor, these are listed at the bottom in this example it shows “Move to M227WDP”.
10. Use preview to markup (annotate) Pdfs and more
You will find Preview in the Applications folder, Preview is often the default App when you open PDFs and images on your Mac.
Once you have opened your PDF in preview make sure the Markup bar is showing by selecting “Show Markup toolbar” from the View menu. Shift + Command + A
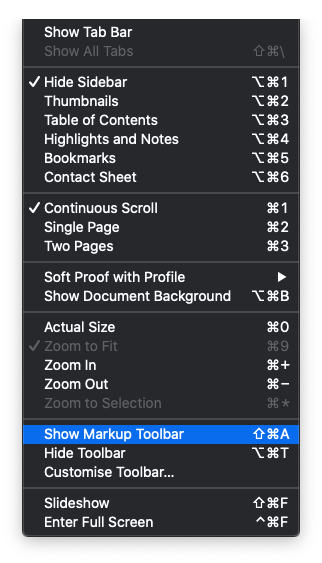
From the Markup toolbar there are many useful tools to add notes, annotations, sign, draw, & highlight text.