How to restore deleted photos in iCloud

With cloud integration, it is easier than ever to share the same file across multiple devices. Once you have enabled your iCloud Photo Library, you can see the photo that you just took on your iPhone, on your Mac computer as well. However, once you delete a photo on an iOS device or Mac computer, the photo is also deleted everywhere. Can you restore photos? If you delete a photo from your iCloud Photo Library, can you restore it? These are two frequently asked questions about photo syncing and storage in the iCloud Photo Library.

By default, a photo deletion on any device is also deleted on all devices that are connected to the cloud. So for example, if you had retained high resolution images on your desktop computer’s iPhoto library, you would lose those images if you delete them from your iCloud Photo Library intentionally or by accident.
The best way to prevent a deletion would be to set up a separate user account on your desktop computer with limited access. This would prevent accidental deletions by family members, friends or even yourself.
However, even after you have deleted a photo, you still have it temporarily in a folder called your ‘Recently Deleted’ album. The media is typically retained in here for a maximum of 30 days and shows how may days you have access to any item in here. After 30 days, the file is gone forever. Thus you can restore any item in here by clicking on Recover located in the upper right corner or also via the Control button on your Mac and pressing Recover. Then the photo is added back into your library.
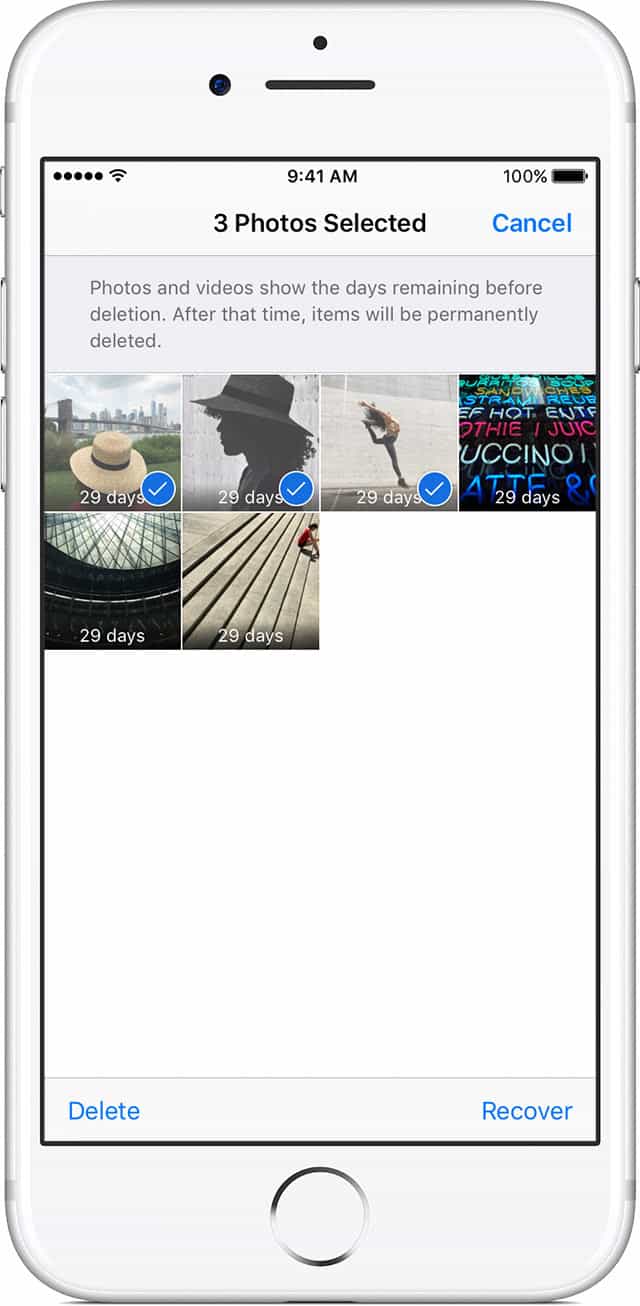
For your iOS device (iPhone or iPad), follow these steps
-
Go to Photos > Albums > Recently Deleted. If you see the missing photo, you can move it back into your All Photos album.
- Tap Select.
- Tap the photo or video > Recover.
- Confirm that you want to recover the photo.
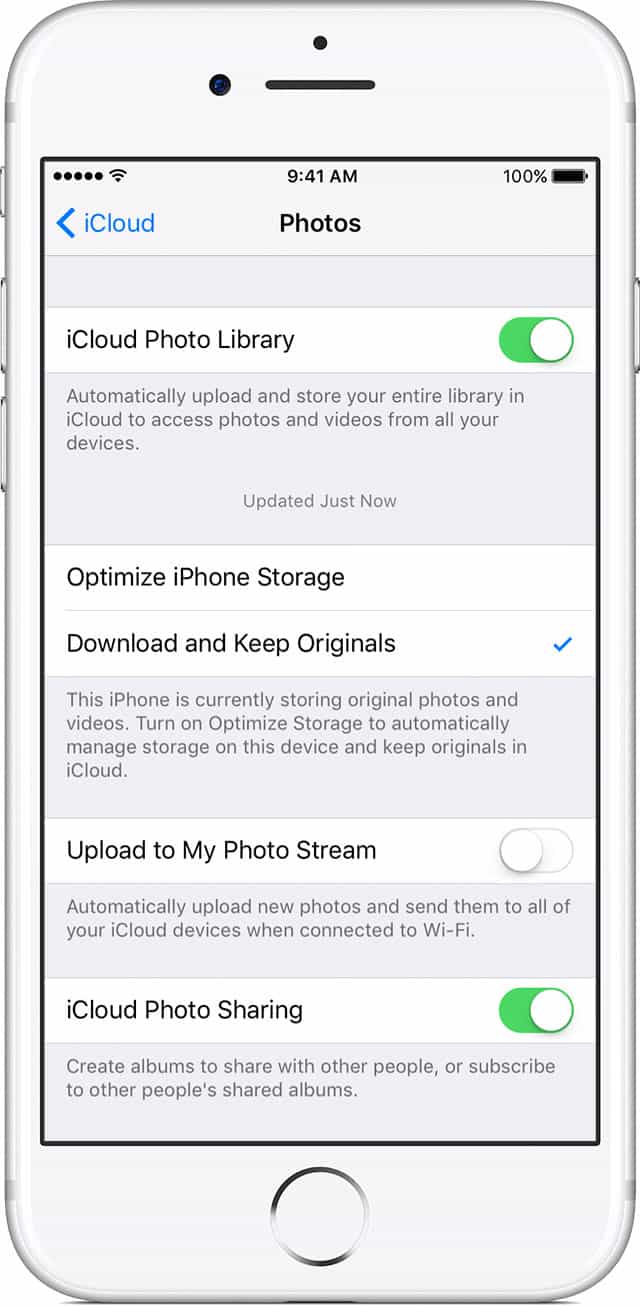
Check that Your iCloud Photo Library is turned on
If you took a photo on your iPhone or iPad, but don’t see it on your other devices, check your settings.
- Go to Settings > [your name] > iCloud. If you’re using iOS 10.2 or earlier, go to Settings > iCloud.
- Tap Photos.
- Turn on iCloud Photo Library.
On your Mac:
- Go to System Preferences > iCloud.
- Next to Options, click Photos.
- Select iCloud Photo Library.
After you have turned on iCloud Photo Library, connect to Wi-Fi and wait a few minutes. Then look for your photos again.

Next, Sign in with the Same Apple ID
- In order to keep the same photos and videos on all your devices, be sure to sign in to iCloud with the same Apple ID on every device.
- Check which Apple ID your device is using in Settings or System Preferences. You’ll see your name and email address. Your email address is your Apple ID.
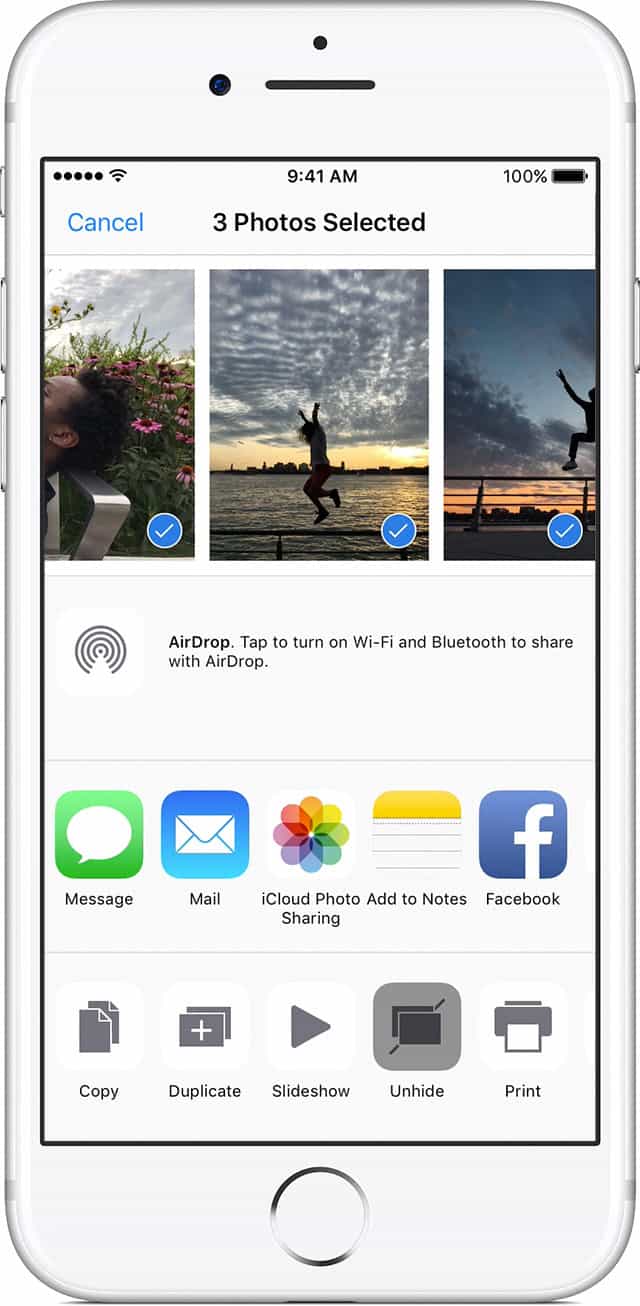
Unhide Your Photos
Finally, find any photos and videos that you hide previously in your Moments, Years, and Collections view iin your Hidden album. You can easily unhide your photos and videos from the Hidden album.
On your iPhone or iPad:
- Open the Photos app and go to the Albums tab.
- Tap the Hidden album.
- Select the photo or video that you want to unhide.
- Tap > Unhide.
On your Mac:
- Open Photos and in the menu bar, click View > Show Hidden Photo Album.
- Open Albums view, then open the Hidden Photos Album.
- Select the photo or video that you want to unhide.
- Press Control and click on the photo.
- Click Unhide Photo.
Also if you use iCloud Photo Library, the photos that you hide on one device are hidden on your other devices too.
