

Back Up Before Upgrading to Mojave or iOS 12!
Poll a room of Apple experts about the one topic they can’t stop talking about and many will launch into frustrated rants about how too few people back up. Backups are always important, since you can never predict when your Mac or iPhone will be lost or stolen, melt in a fire, or just break. But one time when backups are especially important is before you upgrade to a major new operating system. If you’re thinking “What could go wrong?” the answer is, “Lots, and wouldn’t you like to be able to revert instantly if something does?”
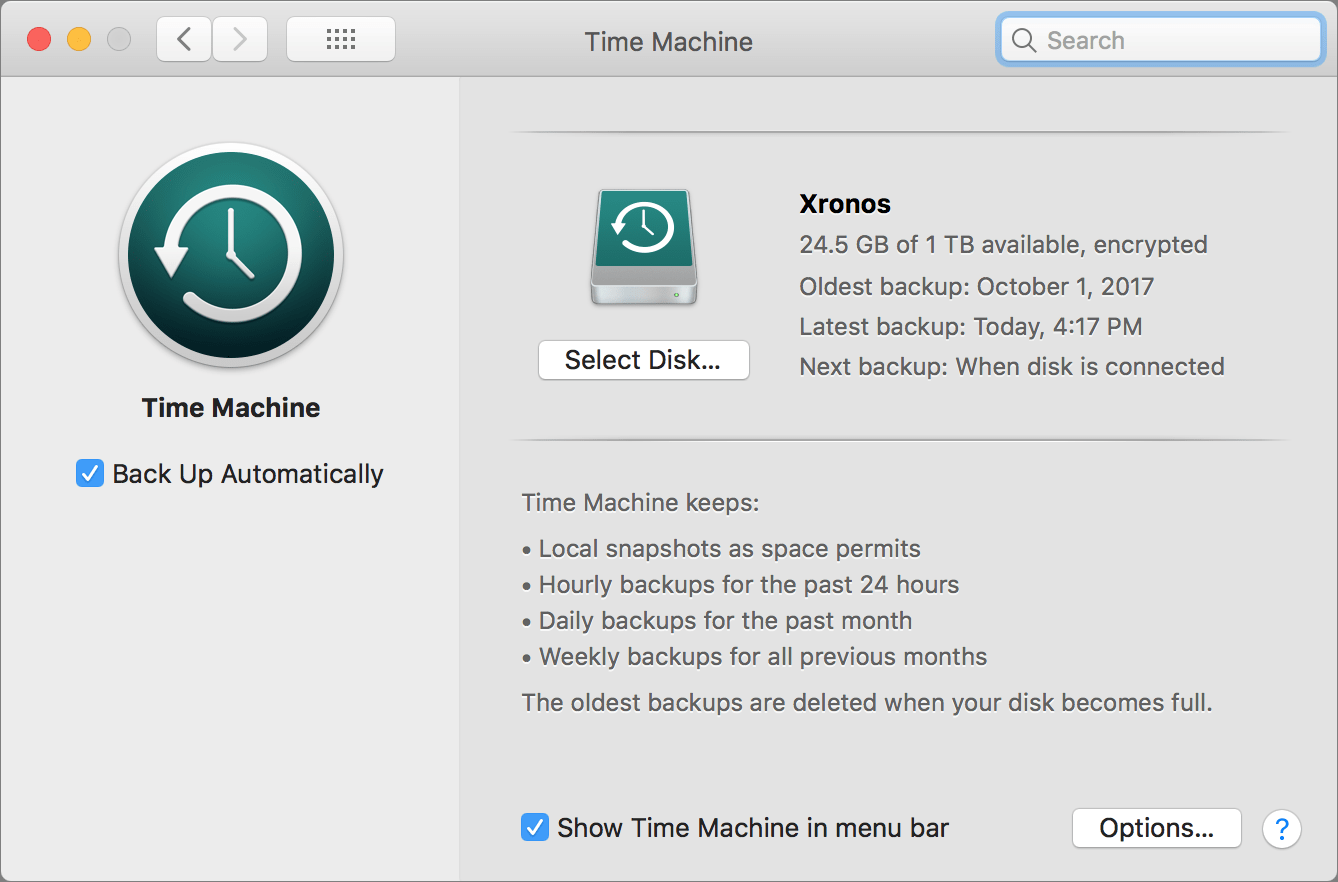
Mac Backups
On the Mac side, there are plenty of ways to back up, and a bootable duplicate made with SuperDuper or Carbon Copy Cloner is the best insurance right before you upgrade to macOS 10.14 Mojave. More generally, backing up with Time Machine ensures that you can not only restore your entire drive if necessary, but also easily recover a previous version of a corrupted file. Finally, since a fire or flood would likely destroy your backup drive along with your Mac, we always recommend an offsite backup made via an Internet backup service like Backblaze.
What happens if you don’t back up and your Mac gets damaged such that you can’t access important data? That’s when things get expensive, and if you have a 2018 MacBook Pro, you have even fewer options.
Historically, it was relatively easy to remove a drive from a broken Mac and recover the data from it. Data recovery got harder with solid-state storage, and even more so with the introduction of the first MacBook Pro with Touch Bar, thanks to Apple’s new T2 encryption chip, which encrypts data on the drive. To simplify last-ditch data recovery, Apple put a special port on the MacBook Pro’s logic board and provided a custom recovery tool for Apple Authorized Service Providers. With the 2018 MacBook Pro, however, Apple removed that port, so only data recovery specialists like DriveSavers can recover data from such damaged machines, and only then if they have the user’s password.
So please, back up your Mac before something goes wrong. It’s fast, easy, and inexpensive to get started, and we’re happy to help.
iOS Backups
We’ve all seen, if not experienced, a broken iPhone or iPad. They’re durable little devices, but they won’t necessarily survive a drop onto a sidewalk or into a toilet (yeah, it happens). And it’s way too easy to forget your iPhone at the gym or in a restaurant. So a backup is necessary if you don’t want to risk losing precious photos or having to set up a new device from scratch. Plus, just as with a Mac, things can go wrong during major iOS upgrades.
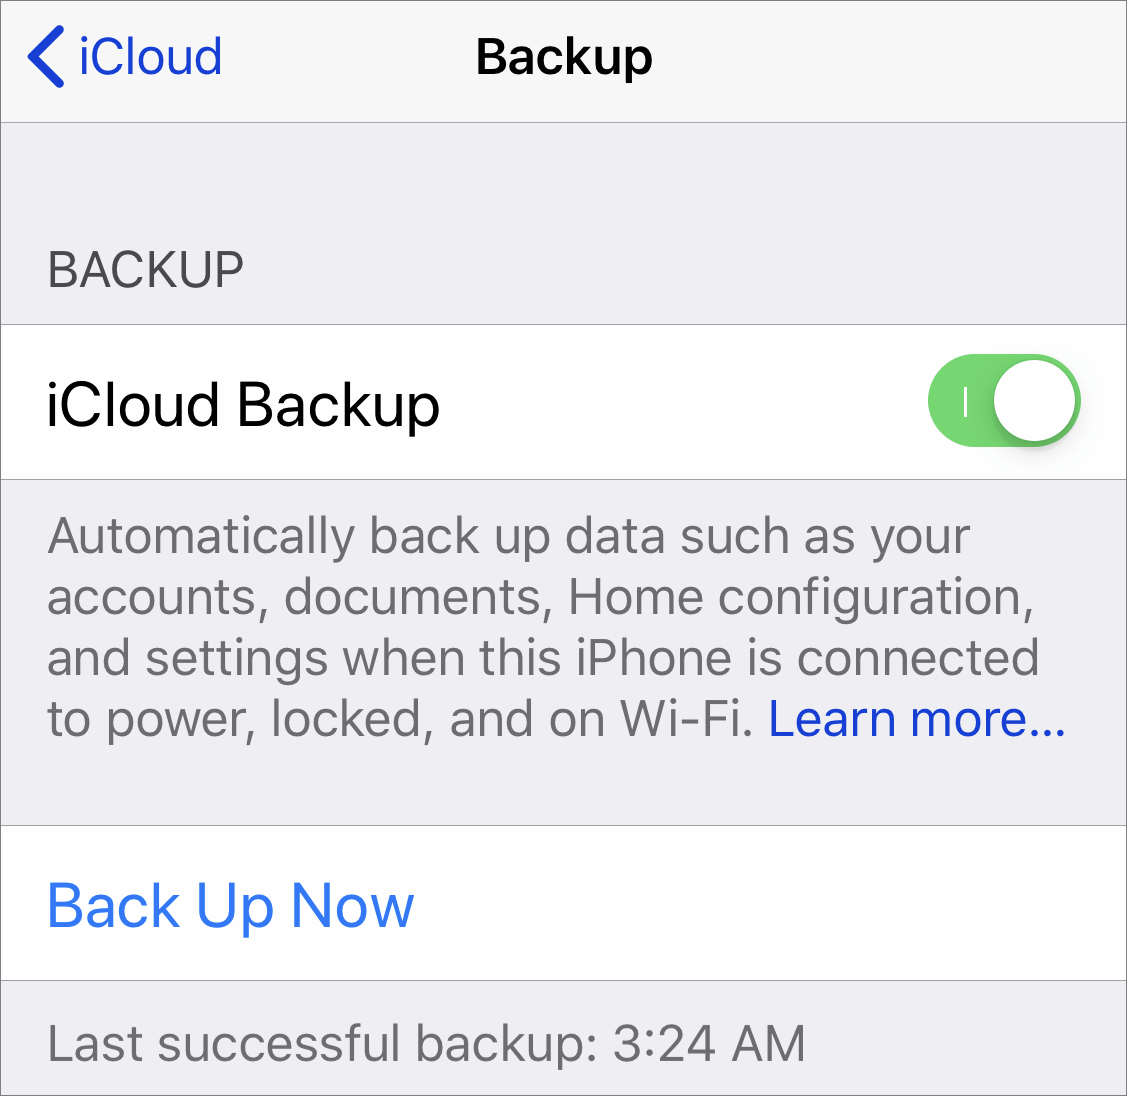
With iOS, though, you don’t need extra software or hardware. Apple provides two ways of backing up your iPhone or iPad, iTunes and iCloud. Neither is necessarily better or worse, and you can—and should!—use both for added safety. We’ve seen situations where an iPhone would refuse to restore its files from iTunes but would from iCloud.
To back up to iCloud, go to Settings > Your Name > iCloud > iCloud Backup, turn the switch on, and tap Back Up Now. For backups to happen automatically in the future, you must have sufficient space in your iCloud account (you get 5 GB for free and can buy more), and your device must be on a Wi-Fi network, connected to power, and have its screen locked.
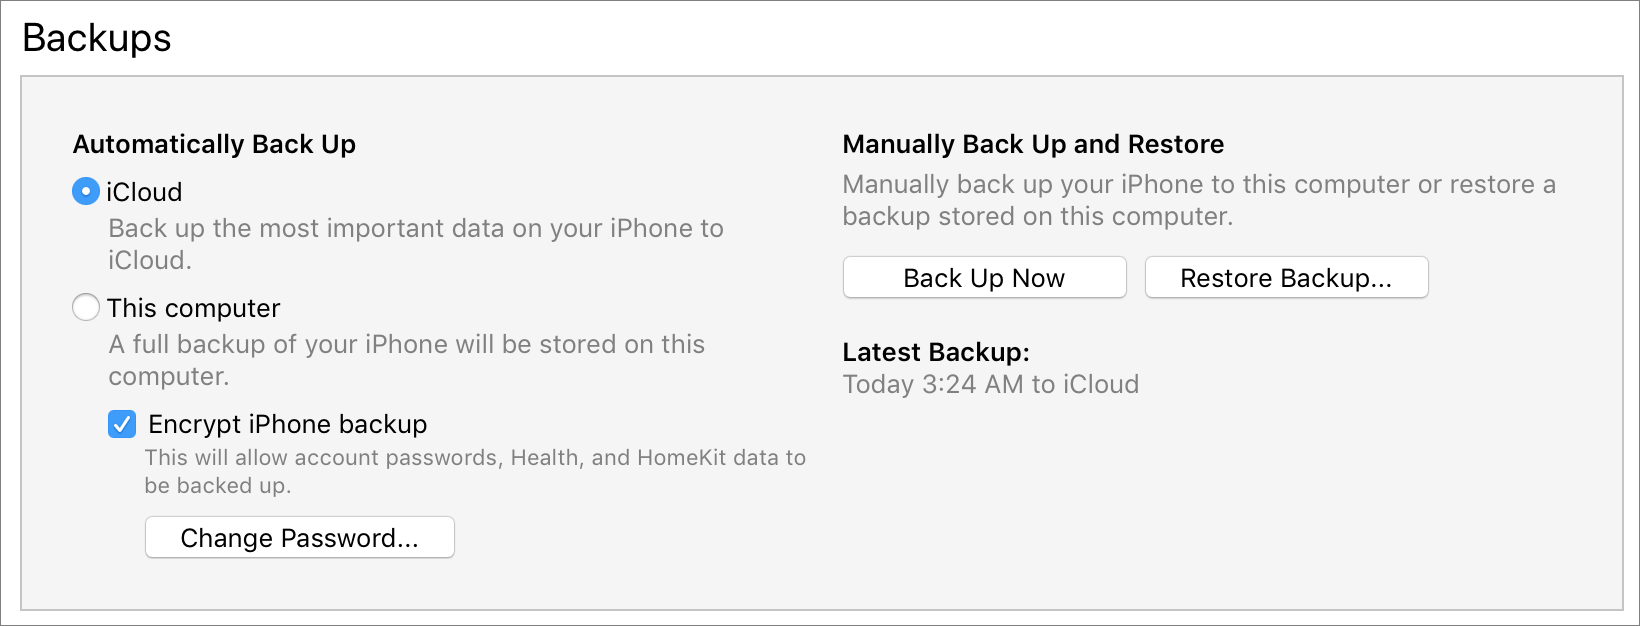
To back up to iTunes, connect your device to your Mac via a Lightning-to-USB cable, launch iTunes, and click the device icon to the right of the media menu.

Then, in the Backups section, click Back Up Now. If you’re prompted to encrypt your backups, we encourage you to agree since otherwise your backup won’t include passwords, Health information, or HomeKit data. For automatic backups via iTunes, select This Computer. After that, every time you plug into your Mac, it will back up.
If you have sufficient iCloud storage, we recommend backing up automatically to iCloud because its automatic backups work well at night when you’re charging your devices. Then, make extra backups to iTunes whenever you think you might need to restore, such as when you’re getting a new iPhone or iPad, or when you’re about to upgrade to a new version of iOS.
AI Usage Transparency Report
Pre-AI Era · Written before widespread use of generative AI tools
AI Signal Composition
Score: 0.05 · Low AI Influence
Summary
Back up your Mac and iPhone before upgrading to Mojave or iOS 12, as data recovery can be difficult and expensive if you don't.
Related Posts
The new Mac Pro Tower: Wheels optional
So happy to see that Apple is going back to its ability to allow users to upgrade and customize their Mac Pro tower experience. There was much much love for the old Cheese Grater style Mac Pro and many are still in use because of their overall upgradeability and customization. Not saying that the Trash Can approach was bad. It was in line with their motto, think different. Coming up with a new and unique approach to power computing.

MacOS 10.15 Catalina Releasing this Fall
Wow things move quickly from year to year. No surprise here. MacOS Catalina brings a whole new level of cool back to the Mac in my honest opinion. I am so happy that Apple has decided to break out iTunes into multiple apps. iTunes back in the day was so awesome, easy to use and simplistic. Now it tends to be a power hungry and semi confusing app to use as its the defacto app for everything. How about that annoying feature that automatically launched iTunes when your phone was...

Thanks to our wonderful clients for a great 2018
--- This year was a year of Growth here at Grove Technologies. Our company changed brand, re-defined its core strategy and competency. During this time of transition we learned a lot about what we want to accomplish moving forward and the new direction that we will be moving in. That said I want to thank all of the passionate and amazing clients that trust us with their technology. We are proud to be able to claim that we are helping further many social justice, climate and advocacy movements as well...

Top Features of iOS 12 to Take Advantage of Right Away
Feeling left behind because you don't have the latest iPhone or iPad? Don't worry, because Apple has a present for you in the form of iOS 12. The new operating system promises to increase performance, particularly for older devices as far back as the iPhone 5s and iPad Air. This means that your device will be able to run more smoothly and efficiently, making it feel like a newer model again.

Seriously Cool Features of macOS 10.14 Mojave You Won’t Want to Miss
With last year's macOS 10.13 High Sierra, Apple made no sweeping changes, instead focusing on refinements and bug fixes. In keeping with the company's alternating cycle of releases, this year's macOS 10.14 Mojave boasts a range of new features that build upon the previous version. As expected, these additions are incremental rather than revolutionary, allowing users to gradually adapt to the updated functionality without feeling overwhelmed by drastic changes.

When Should You Upgrade to macOS 10.14 Mojave, iOS 12, watchOS 5, and tvOS 12
When Should You Upgrade to macOS 10.14 Mojave, iOS 12, watchOS 5, and tvOS 12? --- It's that time of year again, when an Apple user's thoughts drift to new versions of macOS, iOS, watchOS, and tvOS. Apple announced the new versions in June, and public betas have been available since. But once Apple makes macOS 10.14 Mojave, iOS 12, watchOS 5, and tvOS 12 available for free download, you'll need to decide when to install each.

How to Deal with macOS Server Losing Many of Its Services
For many years, Apple has sold macOS Server (previously called OS X Server) for those who wanted to run various Unix-based Internet services on a Mac. Server became popular because it put an easy-to-use graphical interface on top of the Unix apps, allowing Mac users to avoid complicated configuration files and reducing the need to work at the command line. This made it accessible to a wider range of users, including those without extensive technical knowledge, who still wanted to manage their own servers.

Sneak Preview of What’s Coming from Apple This Fall
At Apple’s Worldwide Developer Conference keynote on June 4th, the company unveiled the first developer versions of all four of its operating systems: macOS 10.14 Mojave, iOS 12, watchOS 5, and tvOS 12. They won’t be available until this fall, likely in September or October, but here is a glimpse of what you can expect from these upcoming updates. The new features and improvements will be detailed further at the conference, giving developers a head start on preparing their apps for the new operating systems.
Apple Pay Is Faster, Easier, More Secure, and More Private Than Using Credit Cards
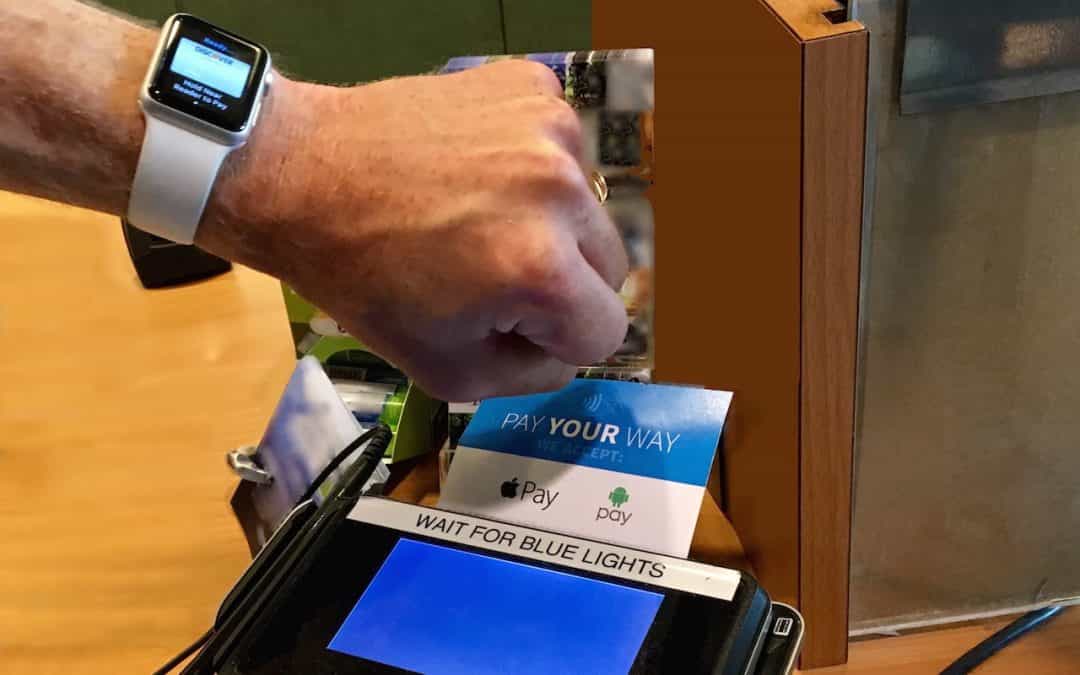
You’ve probably heard of Apple Pay, but have you set it up so you can use it to pay for purchases at checkout? If not, give it a try, since it’s one of those living-in-the-future Apple technologies that feels like science fiction every time you use it. Simply put your iPhone, iPad, or Apple Watch within an inch or so of a compatible payment terminal (look for an Apple Pay or contactless payment logo), put your finger on the Home button to use Touch ID (or double-press the iPhone’s side...

So long AirPort, been nice knowing you
AirPort products have not seen a significant update since 2012, and the Time Capsule has not received an update since 2013. In 2016, news sites began reporting that Apple had reassigned its developers who were working on AirPort to other projects, which some interpreted as a sign that the product line was nearing the end of its life cycle.
