
Option #1: Reverse Proxy with NGINX-PROXY
Ok so I’ve done a lot of research on reverse proxys and they are great at protecting your internal assets but there are some inherent security flaws that you have to live with if you want perfect security. Lets face it there is no such thing, but we can get pretty close.
Some of the flaws of a reverse proxy are that you still need to open ports up on your firewall to get them to work, in most cases. Sure you can run a VPN to secure the ports but even then in many cases the VPN needs to have their own ports exposed on your firewall. We will cover a method below that eliminates this risk.
So then how do you implement a reverse proxy on Docker? Luckily there are many Docker images that offer dynamic proxys that automatically bind to new containers and sit between you and their services so long as you configure each container properly. One such proxy is called NGINX-PROXY and its really awesome let me show you how it works.
First step is deploying the reverse proxy service. You can do that in Docker like so.
version: "3.8"
services:
  nginx-proxy:
    container_name: nginx-proxy
    image: nginxproxy/nginx-proxy:latest
    restart: always
    ports:
      - "80:80"
      - "443:443"
    volumes:
      - "/var/run/docker.sock:/tmp/docker.sock:ro"
      - "/data/certs:/etc/nginx/certs"
       - "/data/vhost:/etc/nginx/vhost.d"
    networks:
      - internal

networks:
  internal:
    name: internal
    driver: bridge
A huge call out here that had me struggling for hours. You must make sure that you put the NGINX-PROXY on the same network as your other services so in this case make sure you have like I do the same network referenced in the network section in the NGINX-PROXY section as well otherwise you will not be running the proxy on the same network.
You can inspect exactly what is running on your networks by running this command and you can see all the containers running on the network.
docker network inspect <network name>Ok so next step here we must create some drives and map them for the NGINX-PROXY container. You will see that in the above configuration we are mapping 2 volumes.
version: "3.8"
services:
  nginx-proxy:
    container_name: nginx-proxy
    image: nginxproxy/nginx-proxy:latest
    restart: always
    ports:
      - "80:80"
      - "443:443"
    volumes:
      - "/var/run/docker.sock:/tmp/docker.sock:ro"
      - "/data/certs:/etc/nginx/certs" <-------------
       - "/data/vhost:/etc/nginx/vhost.d" <-------------
    networks:
      - internal

networks:
  internal:
    name: internal
    driver: bridge
So we must now create 2 folders and we must put items in these folders based on the information we created in the last post. Remember in the last post we picked a domain for our Portainer instance, I chose container.jonbrown.org and so that will be the domain we will be using in this instance.
Ok so first step we must create the certs and vhost folders
cd /

cd /data

mkdir certs
mkdir vhost
Ok now that we have these folders we must populate these folders with some default certificates. The NGINX-PROXY server needs 2 sets of certificates to work properly. Remember in the previous blog post we created a wildcard certificate which means we must add the certificate in the certs directory in the following format
domain.tld.crt and domain.tld.key and we also need a duplicate copy of those certificates called default.crt and default.key
Make sure to copy the files from the /etc/letsencrypt/live/
cp /etc/letsencrypt/live/<yourdomain>/fullchain.pem /data/certs/domain.tld.crt
cp /etc/letsencrypt/live/<yourdomain>/fullchain.pem /data/certs/default.crt

cp /etc/letsencrypt/live/<yourdomain>/privkey.pem /data/certs/domain.tld.key
cp /etc/letsencrypt/live/<yourdomain>/privkey.pem /data/certs/default.key
Now that we have the certificates in the directory we can move on to the vhost folder. We must add a file in the vhost folder to disable SSL verifiation. This is because sometimes the proxy can fail to load websites if the certificate chain is off and it happens from time to time, even when the certificate is valid.
cd /

cd /data/vhost

sudo nano domain.tld_location
Once in NANO mode (Edit mode), you will be able to add the following
proxy_ssl_verify off;and save the document in the volume. Thats it. All of the volumes now have the information needed and we are ready to add the final information to the portainer container.
version: "3.8"
services:
  nginx-proxy:
    container_name: nginx-proxy
    image: nginxproxy/nginx-proxy:latest
    restart: always
    ports:
      - "80:80"
      - "443:443"
    volumes:
      - "/var/run/docker.sock:/tmp/docker.sock:ro"
      - "/data/certs:/etc/nginx/certs"
    networks:
      - internal

  portainer:
    container_name: portainer
    image: portainer/portainer-ce:latest
    command:
      -H unix:///var/run/docker.sock
      --ssl
      --sslcert /data/certs/jonbrown.org.crt
      --sslkey /data/certs/jonbrown.org.key
    environment:
      - TZ=America/New_York
      - VIRTUAL_HOST=container.jonbrown.org
      - VIRTUAL_PORT=9443
      - VIRTUAL_PROTO=https
      - CERT_NAME=jonbrown.org
    networks:
      - internal
    expose:
      - "9443"
    volumes:
      - /var/run/docker.sock:/var/run/docker.sock
      - /data:/data
    depends_on:
      - nginx-proxy
    restart: always

networks:
  internal:
    name: internal
    driver: bridge
Notice that we are adding a lot of additional items to the portioner configuration. We are forcing https and providing Portainer the certificate in the data folder.
The environment area also is configuring the NGINX-PROXY with the following
    environment:
      - TZ=America/New_York
      - VIRTUAL_HOST=container.jonbrown.org
      - VIRTUAL_PORT=9443
      - VIRTUAL_PROTO=https
      - CERT_NAME=jonbrown.org
We are telling the NGINX-PROXY that we are using port 9443 which is the HTTPS port that Portainer uses. We are telling NGINX-PROXY that we are using the vhost container.jonbrown.org and that we are using HTTPS behind the proxy. Finally we are telling NGINX-PROXY exactly which certificate to use.
Lastly we are telling the NGINX-PROXY that Portainer depends on NGINX-PROXY
    depends_on:
      - nginx-proxy
lastly we are exposing 9443 internally, we are not opening any ports, notice that the ports are missing we are just exposing 9443 which matches the proxy port, yes they must match.
    expose:
      - "9443"
Now if you save the file and run
docker compose down && docker compose up -dthis will take down any running docker containers and restart docker with NGINX-PROXY. Great it works. NO!! Wait what?? Well here’s the rub, remember what I said with a reverse proxy yes the proxy itself is protecting and routing traffic to the internal container so that Portainer itself is not exposed.
However, we must still open ports 80, and 443 to the proxy itself that means we need to open those ports on our firewall and we have to hope and pray that our WAN (Public IP) address doesn’t change. (Yes, it changes when you reboot your router, hope you don’t have power outages). And, no I do not have as static IP and few do so what do you do?
There are two things you can do. You can create a DNS entry to your domain in this case the domain is container.jonbrown.org I could point that to my firewall IP, or I could use a DDNS provider. A DDNS or Dynamic DNS provider allows you to bind a domain name to your routers IP and when that IP changes, so will the DNS entry. Thats great, but you still need to open those ports!
So while the internal Docker Portainer container is now protected, to access it externally you must still open those ports on your firewall. Again your firewall will vary and there are a variety of DDNS providers out there. I use TPLINK Deco as my home router and they support in the router itself a DDNS called NO-IP which is a free DDNS provider. If your router supports this feel free to use it.
Look at your router settings, if it has DDNS support use whatever DDNS provider that it automatically binds with that will save you time and effort because that will automatically inform the DDNS provider whenever your router IP changes.
For me I used NO-IP and I setup my account credentials in my router. I then got a host name from NO-IP and I set up that host as a CNAME record for container.jonbrown.org.
That coupled with the open ports that are forwarding to my Rasberry PI at 192.168.64.3 I was able to load the Portainer instance. Another option for testing is to add a hostname record in the /etc/hosts file
sudo nano /etc/hosts

192.168.64.3    container.jonbrown.org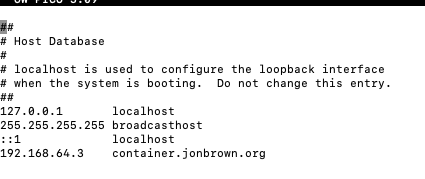
This allowed me to test the connection internally on my local computer without opening any ports because the computer looks to the host file first when resolving DNS entries.
version: "3.8"
services:
  nginx-proxy:
    container_name: nginx-proxy
    image: nginxproxy/nginx-proxy:latest
    restart: always
    ports:
      - "80:80"
      - "443:443"
    volumes:
      - "/var/run/docker.sock:/tmp/docker.sock:ro"
      - "/data/certs:/etc/nginx/certs"
    networks:
      - internal

  portainer:
    container_name: portainer
    image: portainer/portainer-ce:latest
    command:
      -H unix:///var/run/docker.sock
      --ssl
      --sslcert /data/certs/jonbrown.org.crt
      --sslkey /data/certs/jonbrown.org.key
    environment:
      - TZ=America/New_York
      - VIRTUAL_HOST=container.jonbrown.org
      - VIRTUAL_PORT=9443
      - VIRTUAL_PROTO=https
      - CERT_NAME=jonbrown.org
    networks:
      - internal
    volumes:
      - /var/run/docker.sock:/var/run/docker.sock
      - /data:/data
    depends_on:
      - nginx-proxy
    restart: always

networks:
  internal:
    name: internal
    driver: bridge
Option #2: Cloudflare with Cloudflared Secure Tunnel ZERO Trust
Ok so what if you do not want to deal with opening ports on your firewall and you do not want to deal with DDNS? Well there is a modern solution made for you. There are however a few caveats
- Its not 100% free.
- It requires you to have a Cloudflare account if you have one great, if not sign up for Cloudflare and migrate your DNS to Cloudflare.
- Now that your on Cloudflare you must enable the ZERO Trust feature which again requires you to have a credit card on file even on the free plan.
Ok now that is out of the way, lets assume you have Cloudflare setup and DNS migrated. If you do not, watch the beginning part of this great tutorial he shows you how to do it.
What you need to do is to go to the ZERO Trust area of Cloudflare.
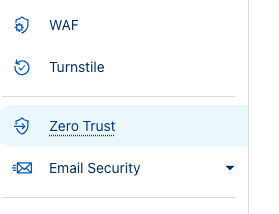
Click on Networks > Tunnels.
We are going to create a new tunnel here. Press create a new tunnel.
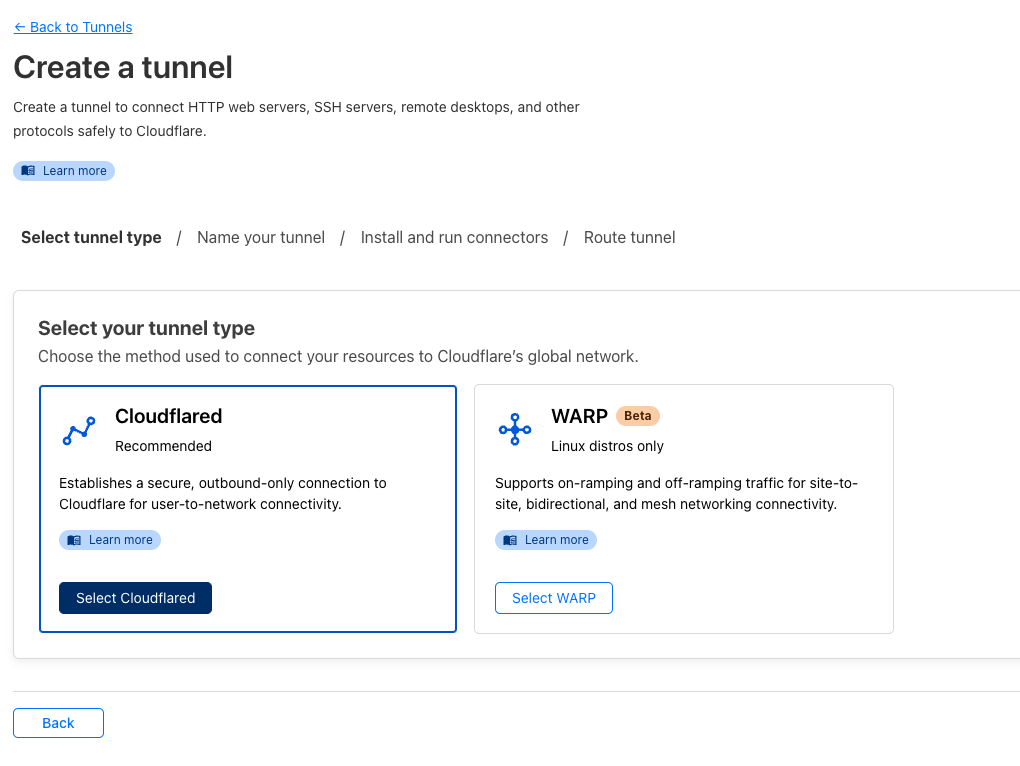
Choose Cloudflared
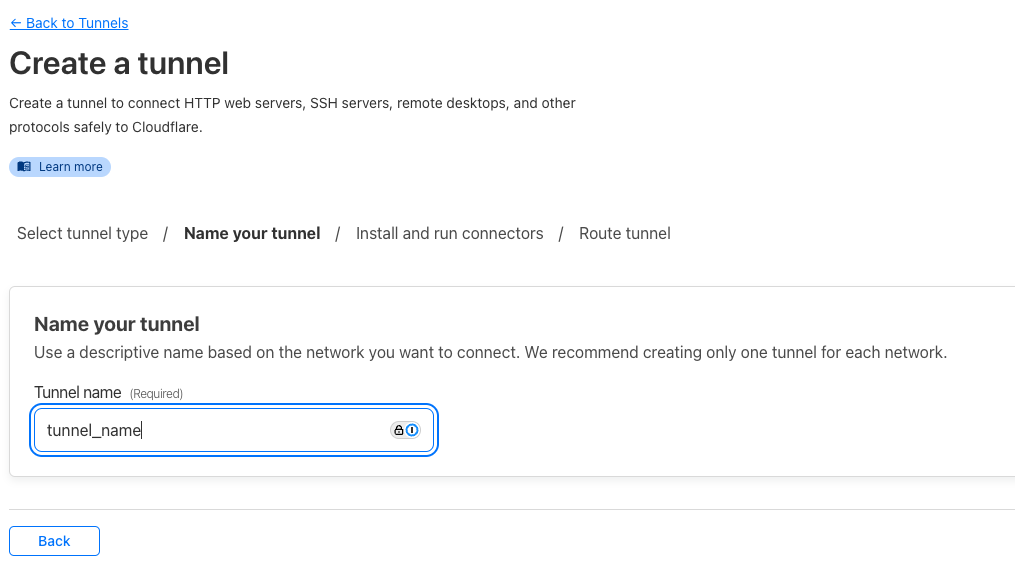
Pick a name for your tunnel

Select Docker as your environment
In the “Install and run a connector” copy the token out of the code. We will use this to set an environment variable on your Rasberry Pi. On the PI, SSH into the PI and run the following
sudo nano ~/.bashrc

export TOKEN=<tokengoeshere>
Now your token is set as an environment variable.
Ok so you have your token, now its time to add your cloudflared service. If you previously added the NGINX-PROXY you will want to remove that and all the configuration, you may want to start with a clean docker-compose.yaml file
docker compose down && docker compose up -dRunning this will take down and bring up your Docker and will run the below yaml configuration and bring up cloudflared.
version: "3.8"
services:
  cloudflared:
    image: cloudflare/cloudflared:latest
    restart: unless-stopped
    command: tunnel run
    environment:
      - TUNNEL_TOKEN=$TOKEN
    networks:
      - internal

  portainer:
    container_name: portainer
    image: portainer/portainer-ce:latest
    command:
      -H unix:///var/run/docker.sock
      --ssl
      --sslcert /data/certs/jonbrown.org.crt
      --sslkey /data/certs/jonbrown.org.key
    environment:
      - TZ=America/New_York
    networks:
      - internal
    ports:
      - "9443:9443"
    volumes:
      - /var/run/docker.sock:/var/run/docker.sock
      - /data:/data
    restart: always

networks:
  internal:
    name: internal
    driver: bridge
Notice we are exposing and opening ports here, thats because Cloudflare is acting as an actual reverse proxy. Ok not done yet, the cloudflared tunnel is running but we need to add a hostname and map the container
In the Tunnel go to Public Hostname and click on Add a Public Hostname
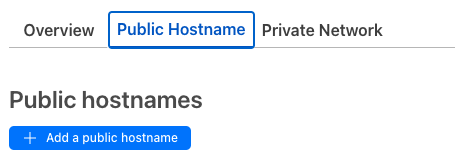
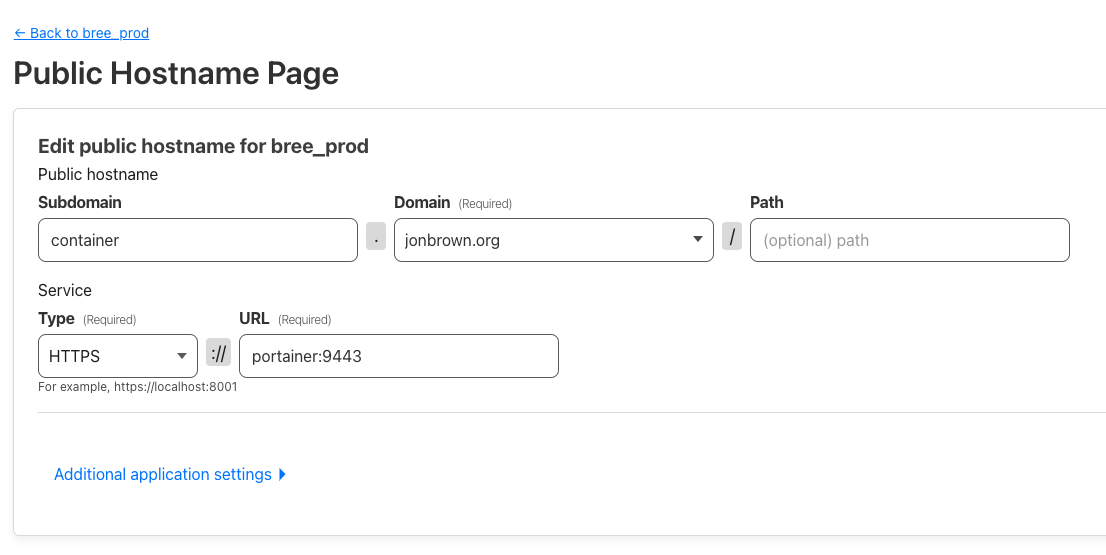
Then add in your domain, for me the domain is a subdomain container.jonbrown.org and the service type is https and the port is 9443. The URL is pointing to the container and cloudflared is on the same network.
version: "3.8"
services:
  cloudflared:
    image: cloudflare/cloudflared:latest
    restart: unless-stopped
    command: tunnel run
    environment:
      - TUNNEL_TOKEN=$TOKEN
    networks:
      - internal
Because of that we can just tell cloudflared that we are routing to the container itself and it will know what to do! Cool!
Finally we must go to Additional application Settings > TLS and turn on “No TLS Verify”
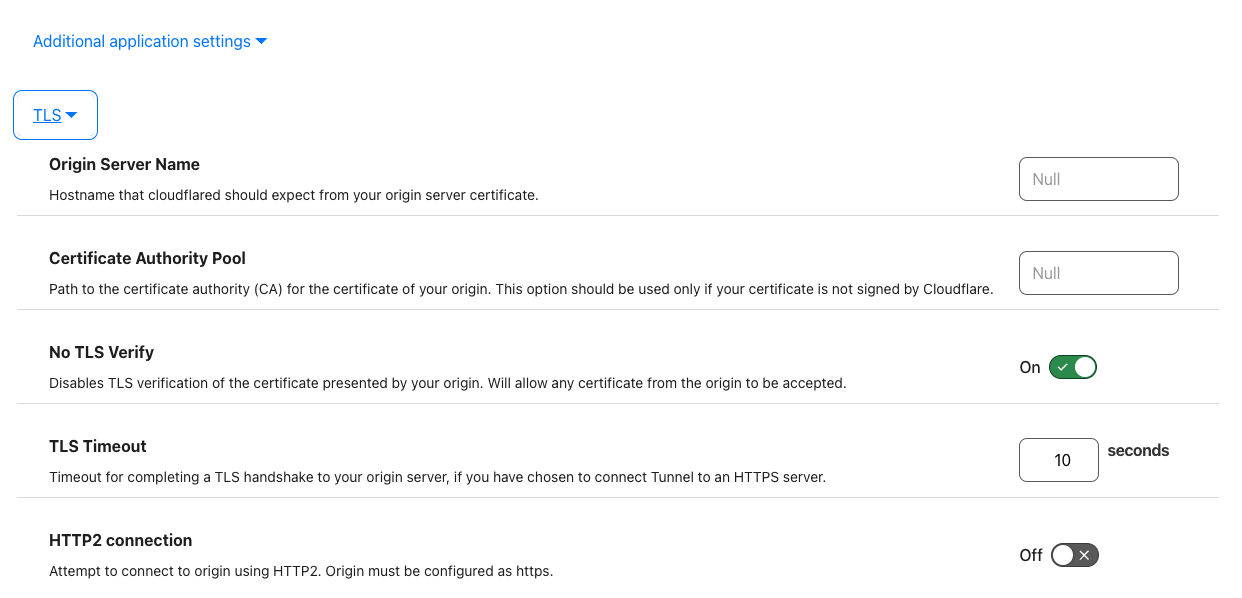
This is it. If you now go to your domain it will run through the proxy in Cloudflare, route the traffic through the tunnel to the Docker Container, and to your Portainer docker on port 9443, if you’ve been following along, the SSL certificate would have already been installed from the previous blog entry from Lets Encrypt which allows the secure connection.
If you created a /etc/hosts file entry be sure to remove it at this point if your going to stick with this method.
Sources
- https://github.com/jonas-merkle/container-cloudflare-tunnel/blob/master/docker-compose.yml
- https://github.com/nginx-proxy/nginx-proxy/issues/1465
- https://gusiol.medium.com/nginx-proxy-and-portainer-multiple-applications-in-one-domain-d82efec0750f
- https://gist.github.com/6rube/e59ced4b0e277e9d167f0c388087bb7a
- https://docs.portainer.io/advanced/reverse-proxy/nginx
- https://www.boomam.com/docs/cloudflare/cloudflare_how-to_cloudflare-deploying-a-tunnel-with-npm/
- https://github.com/nginx-proxy/nginx-proxy/issues/200
- https://www.youtube.com/watch?v=yMmxw-DZ5Ec
In the next document series were going to actually install Snipe-IT and we will use it with both scenerios, a reverse proxy and with Cloudflared ZERO Trust Tunnel to see the difference and help you decide which one is best for you.
AI Usage Transparency Report
AI Era · Written during widespread use of AI tools
AI Signal Composition
Score: 0.44 · Moderate AI Influence
Summary
Implementing a reverse proxy with NGINX-PROXY on Docker involves creating a network, mapping volumes, and configuring the proxy to route traffic to internal containers.
Related Posts
Setting up Snipe-IT on Portainer with DietPi
Ok so now that we have Portainer up and running, it's running securely so now we are ready to set up SNIPE-IT. Here are the steps to add SNIPE via Portainer. The first step is logging into Portainer. Upon logging into Portainer you will click on "Local" under Environments. This is the default Environment. Next, navigate to the "Stacks" tab and select the option to create a new stack. In this case, we'll be creating a new stack for SNIPE-IT.
Installing Docker & Portainer on DietPi for Snipe-IT
At this stage, we are assuming that you are still connected to the Raspberry Pi via a monitor. If you're already SSH'd into the machine, then you're one step ahead. In either case, please ensure that you have a stable connection and can access the terminal or command line interface without any issues.
Setting up SNIPE-IT with DietPi on a Raspberry Pi
The first step in setting up SNIPE-IT is to set up the platform that it will run on. Luckily, the best platform and most economical option is a Raspberry Pi. We are using a Raspberry Pi 3 in this case. Before we get too far, we need to pick the operating system that the Raspberry Pi will use. This decision will determine how easily we can install and manage SNIPE-IT's dependencies and requirements.

Introducing Pique - The Game-Changing Quick Look Plugin for Mac Admins
As a Mac admin, I'm always on the lookout for tools that make my life easier and more efficient. Recently, I stumbled upon Pique - a brilliant Quick Look plugin created by Henry Stamerjohann that allows you to view file contents in a syntax highlighted way.

ABM Warranty 0.4.1 Walkthrough: Wrap-Up and Beta
In this final ABM Warranty 0.4.1 walkthrough, I’m wrapping up the last features I had not covered directly in the earlier videos and then focusing on support, community, and the beta program. I also want to show where the support resources live inside the app so you know where to go if you need help, documentation, or a way to send useful feedback. Additionally, I'll be covering some of the key features that were updated since the previous version, including any bug fixes or improvements made to existing functionality.
ABM Warranty 0.4.1 Walkthrough: Managed Preferences
In this part of the ABM Warranty 0.4.1 walkthrough series, I'm focusing on managed preferences and the credential packaging workflow. In the last video, I covered multiple credentials inside the app itself. In this one, I'm showing how to package those credentials so they can be deployed securely through MDM. This process is a crucial step in ensuring that your credentials are properly configured and protected within your organization's mobile device management system.
Low Profile Walkthrough and Review
Today I’m walking through Low Profile, a utility from Nindi Gill that I use when I want to inspect profiles already installed on a Mac and figure out whether those profiles contain issues I need to clean up. The value is that Low Profile gives me a straightforward way to inspect profiles installed on any Mac. This simplicity makes it easy for me to identify and address potential problems, which is especially useful when working with multiple machines or troubleshooting complex profile configurations.

ABM Warranty 0.4.1 Walkthrough: Multiple Credentials
In this part of the ABM Warranty 0.4.1 walkthrough series, I’m focusing on multiple credentials. In the first video, I showed the basic setup and how to add a single credential. Now, I want to explore what happens when I remove a credential, what changes occur when I add more than one, and how the app behaves once there are multiple contexts in play. This will help clarify any potential issues or inconsistencies that may arise with multiple credentials.

QuickPKG Walkthrough and Review
I use QuickPKG when I need to turn an application, DMG, or ZIP file into a package quickly without wasting time in a heavier packaging workflow. This post follows the same path as my video: what QuickPKG is, where to get it, how I run it, what a simple packaging example looks like, and where I think admins need to be careful about potential pitfalls that can arise from using this tool.

ABM Warranty 0.4.1 Walkthrough: Introduction
In this first ABM Warranty 0.4.1 walkthrough, I want to show you what the app actually does before I get into the more specific feature videos. This is the broad introduction. I’m walking through the dashboard, how I think about the warranty cards, how released devices are handled, how the filters work, how to add credentials, where the data is stored locally, and what the logging and security model looks like.
