How to Downgrade Adobe Creative Cloud Apps to Regain File Compatibility

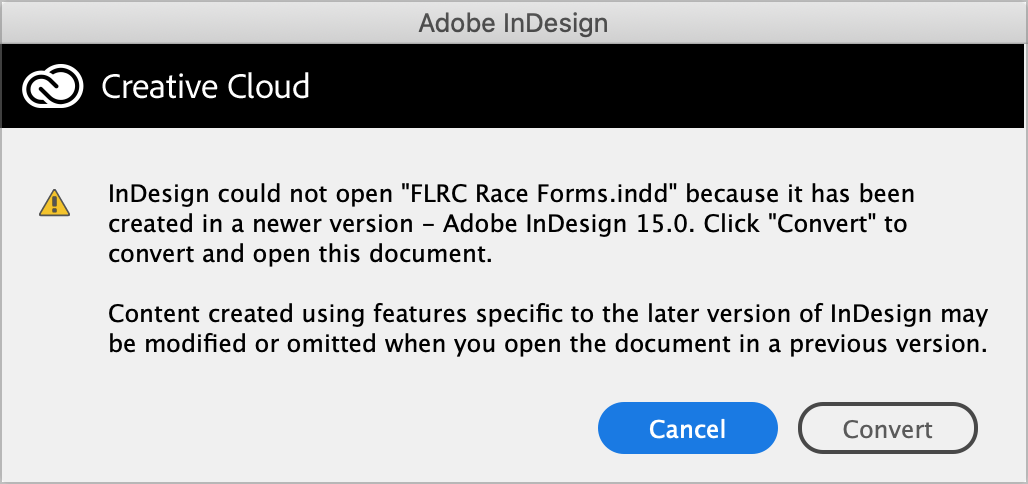
Here’s the solution to a problem that clients have run into on occasion. In a workgroup that relies on Adobe Creative Cloud apps, one person might upgrade to the latest versions of Photoshop, InDesign, and Illustrator, whereas others don’t. Suddenly, if that person opens and re-saves a file in the new version, those using the old version may not be able to open it, or certain aspects of the file may disappear.

Upgrading isn’t always possible—some people may have too-old Macs or not be running a new enough version of macOS. More commonly, however, the rest of the group is deep in a major project and quite reasonably doesn’t want to introduce potential problems by changing their software in mid-stream. What to do?
Luckily, Adobe makes it easy to download previous versions of all the Creative Cloud apps, allowing the person who upgraded to rejoin the rest of the team on the older version.
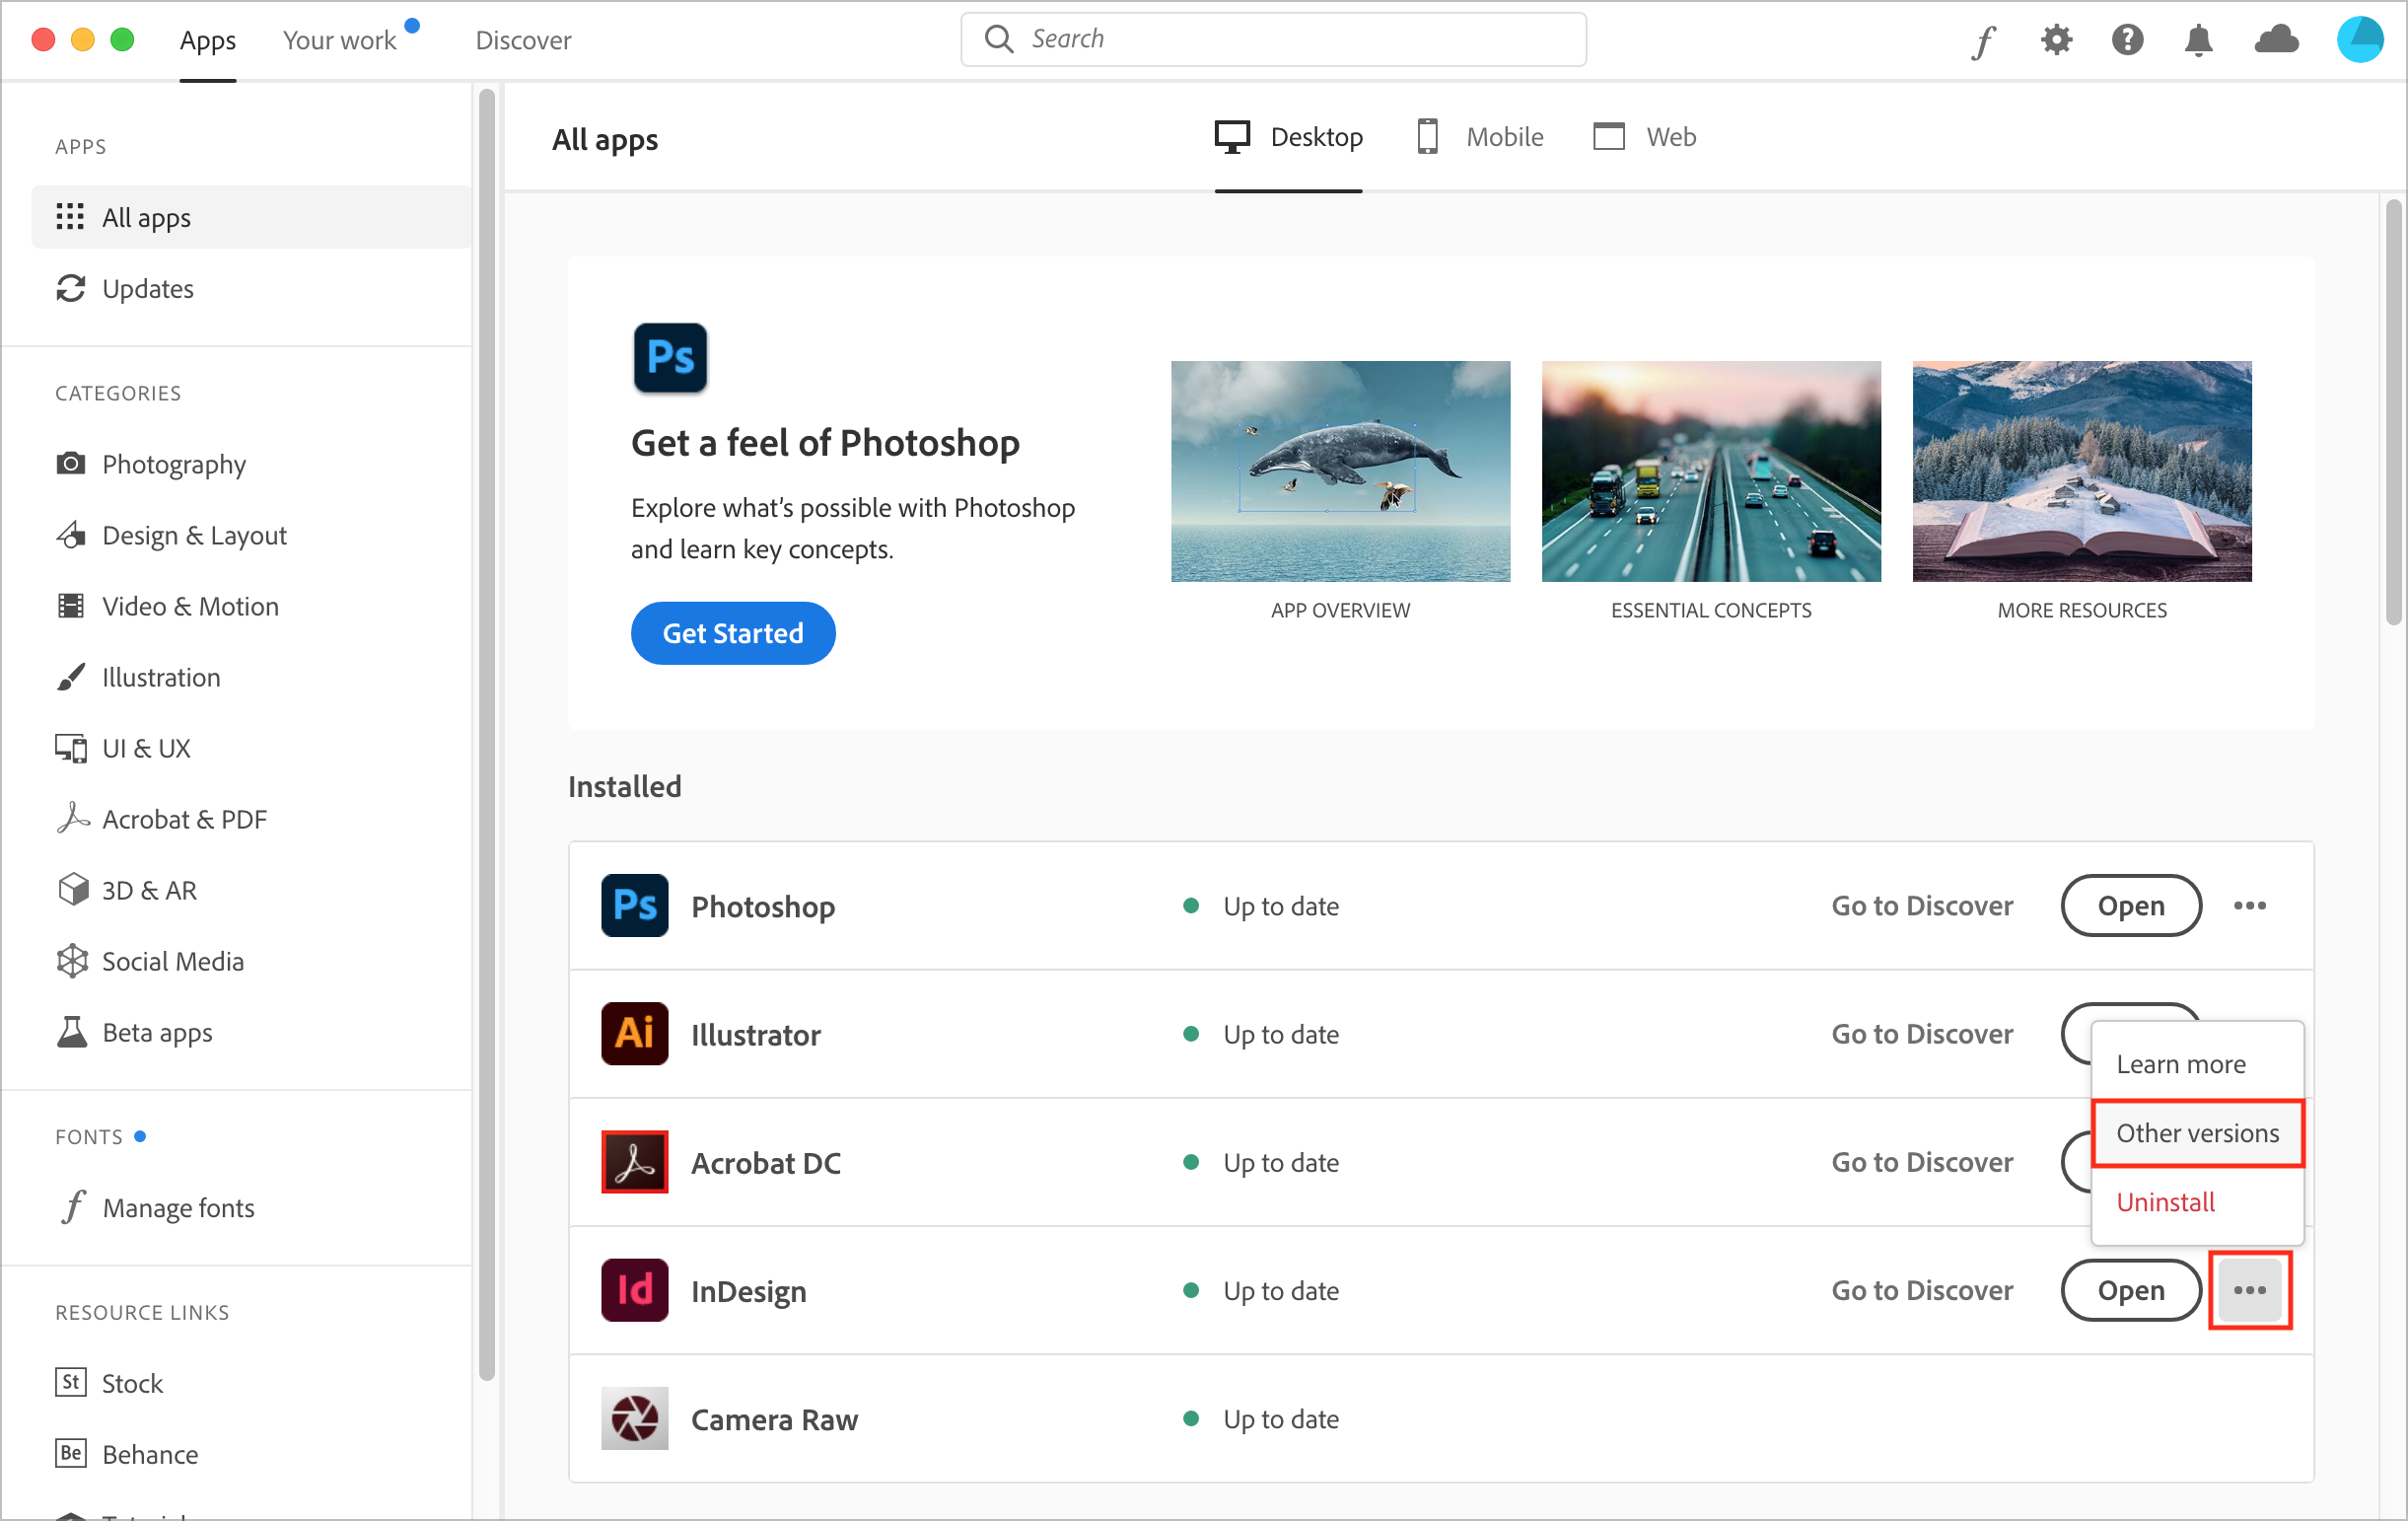
Open the Creative Cloud app, click the ••• button to the right of the desired app, and choose Other Versions from the pop-up menu.

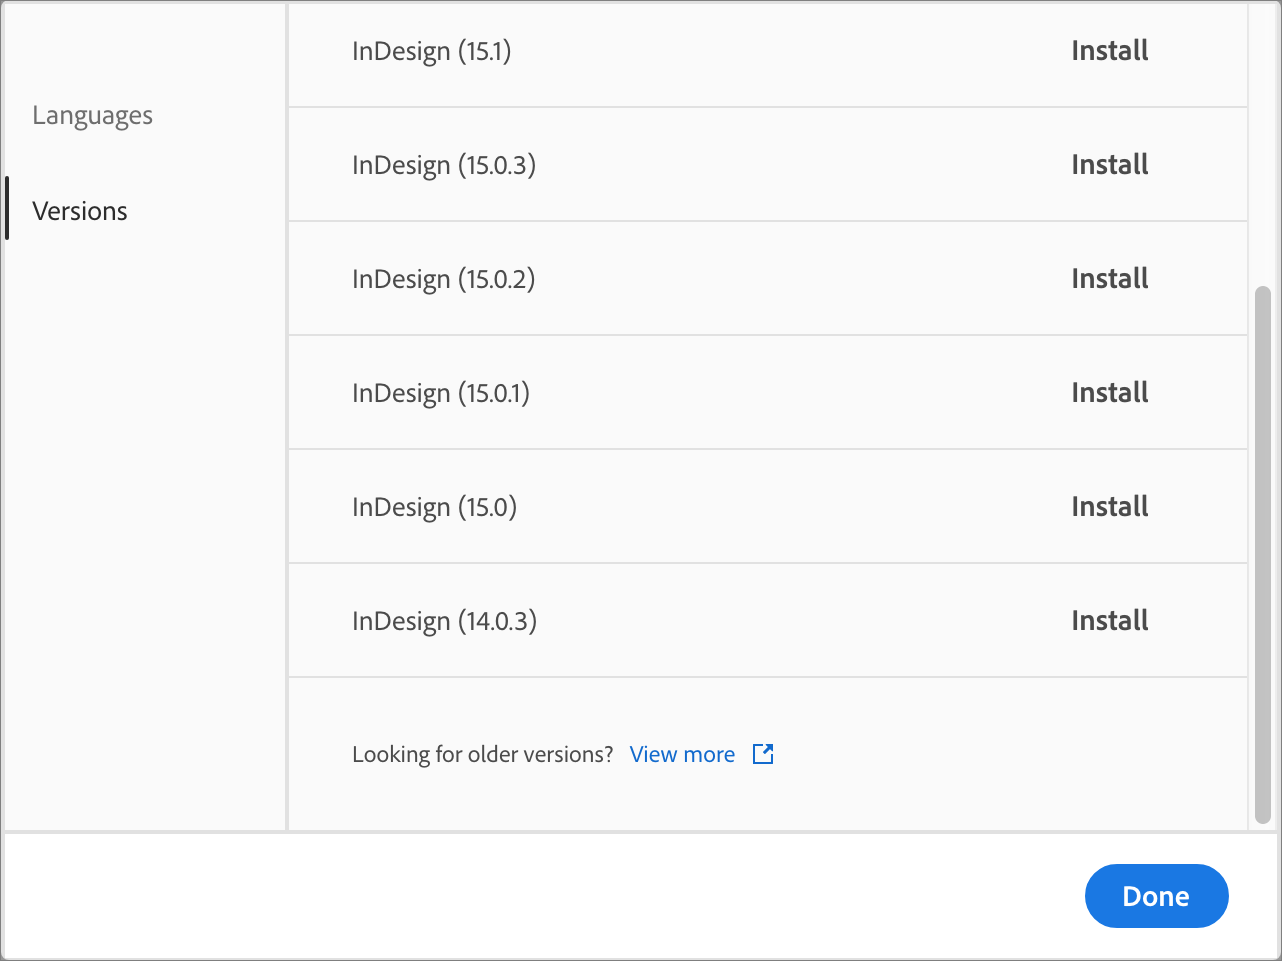
In the list that appears, find the older version you want to install—likely the version that the rest of the team is using—and click Install. Creative Cloud warns you that the app will have its auto-update setting disabled so the newly installed old version won’t be overwritten during a future update.

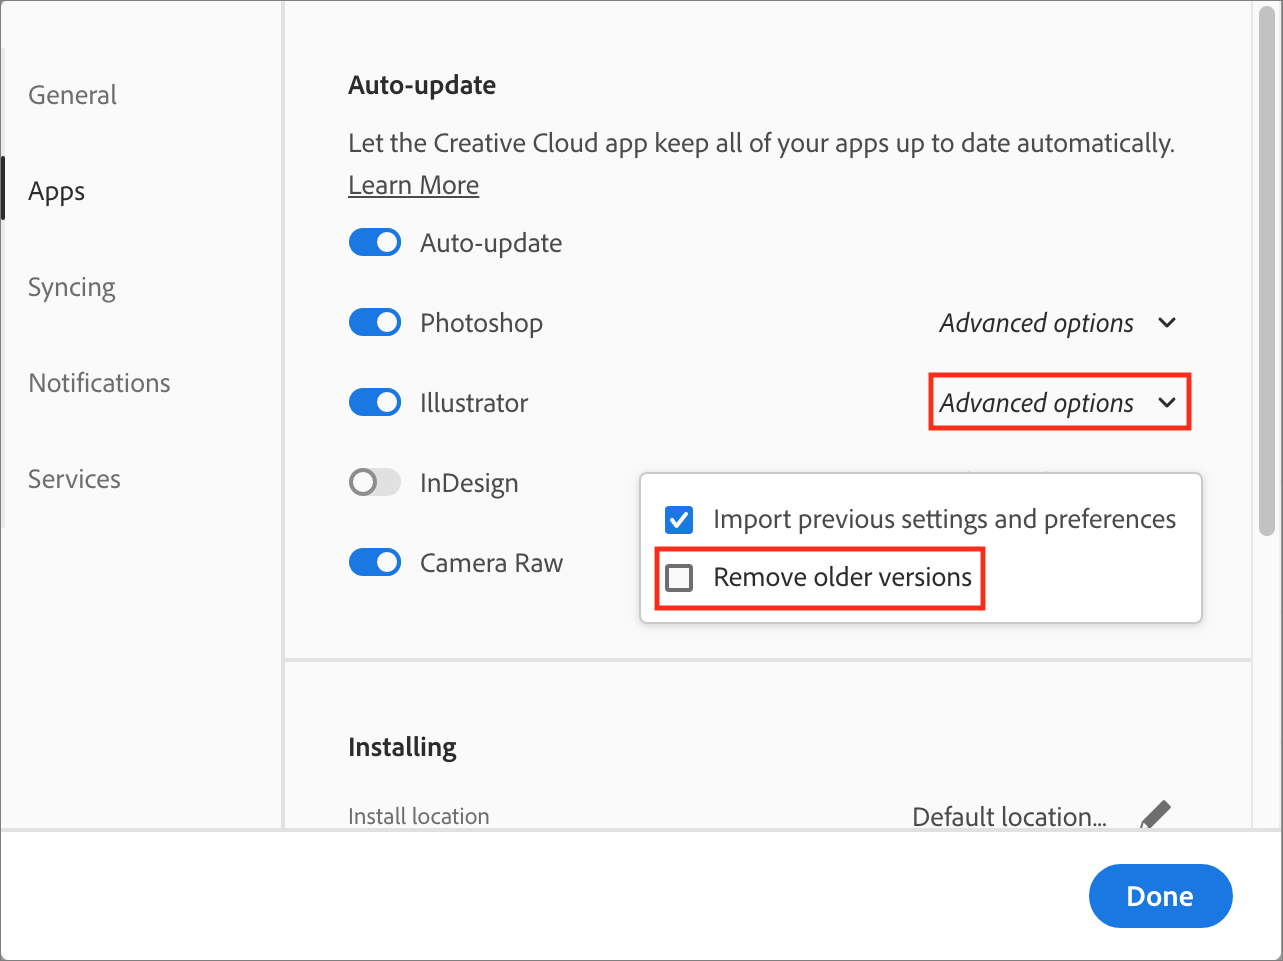
You can ensure that you don’t lose access to older versions during updates by disabling a Creative Cloud setting that automatically removes previous versions of apps when you update. In the Creative Cloud app, choose Creative Cloud > Preferences > Apps. Then click Advanced Options to the right of the desired app’s name, and in the dialog that appears, deselect Remove Older Versions. When you’re finished, click Done.

That’s it—a potentially project-stopping problem eliminated quickly and easily. Just don’t let your Creative Cloud apps get too far out of date, since you can go back only so far when downloading previous versions.
