
Most of you that use Photos on your Mac will use it to download or upload your photos and videos from your iDevice (iPad’s and iPhone’s) and maybe even use some of the advanced features for sorting, filtering and organizing your collection see: https://jonbrown.org/blog/photos-smart-albums/)
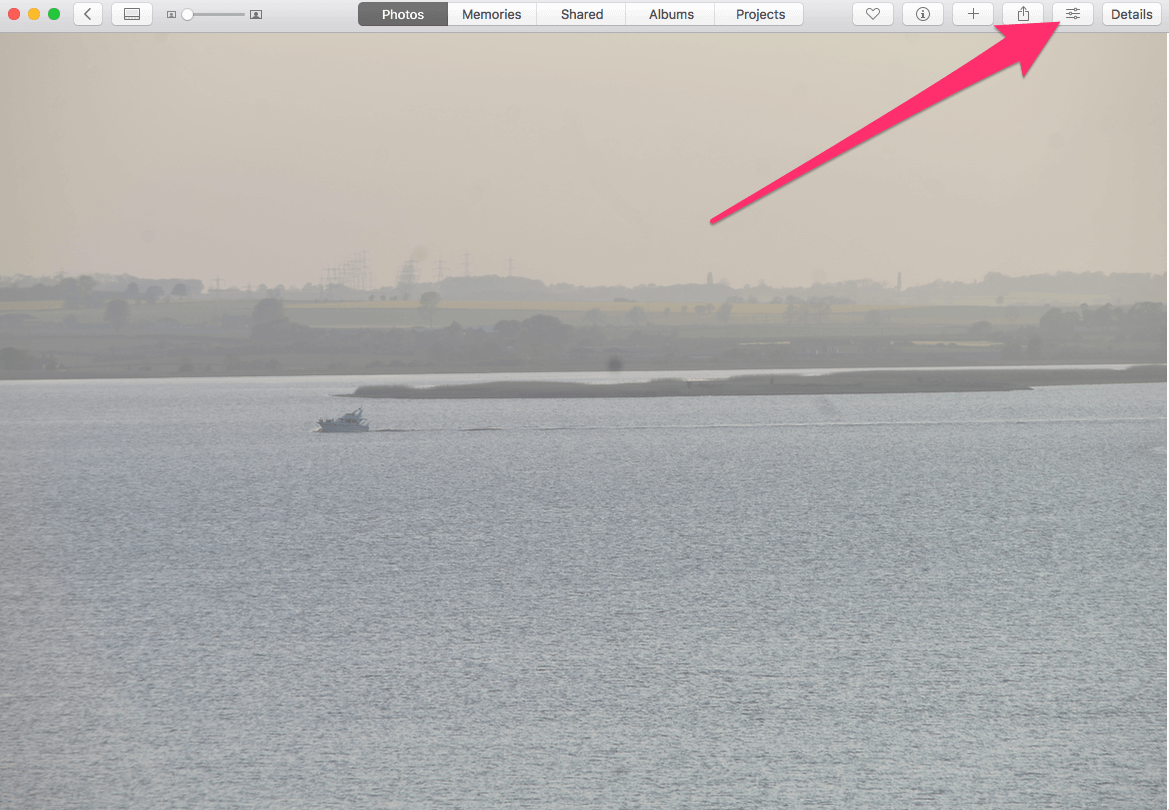
The Photos App on your Mac also comes with a range of pro editing tools allowing you to make quick edits to your photos right from the App.3 To reveal the editing tools press the “edit photo” button:
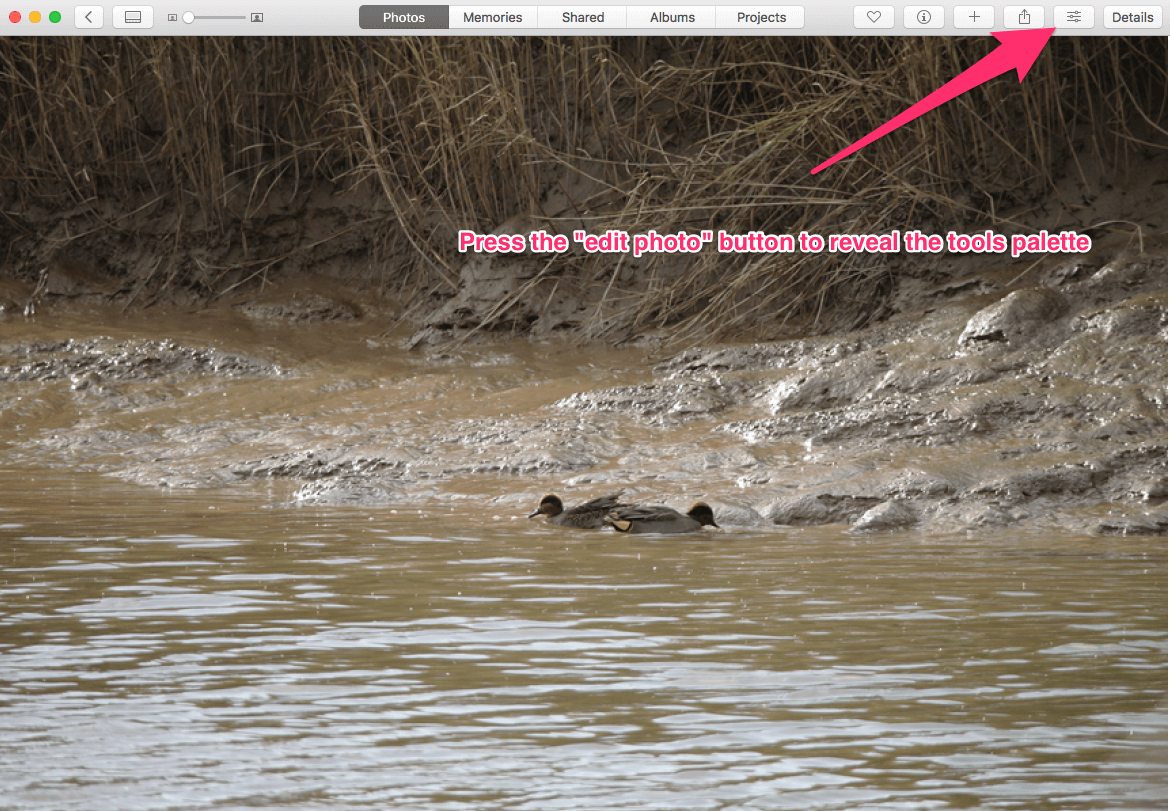
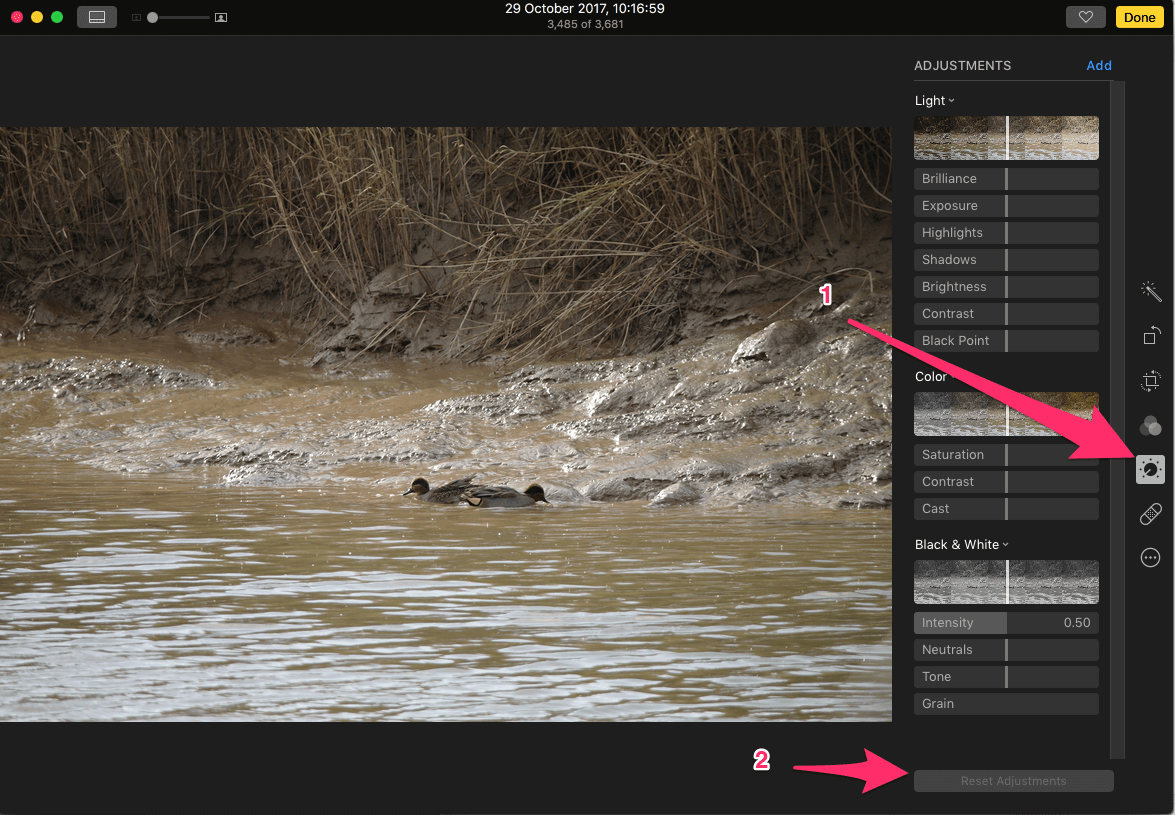
Once in the editing window a list of editing tools appears on the right hand side, one of the most useful is the Adjustments panel.
- The adjustments panel button.
- And if you’ve gone too far and need to back to square on simply press the “Reset Adjustments” button
In this photo as the image was taken later in the day in winter the color is a little washed out so we can remedy this and make the image more vibrant by increasing the color saturation:
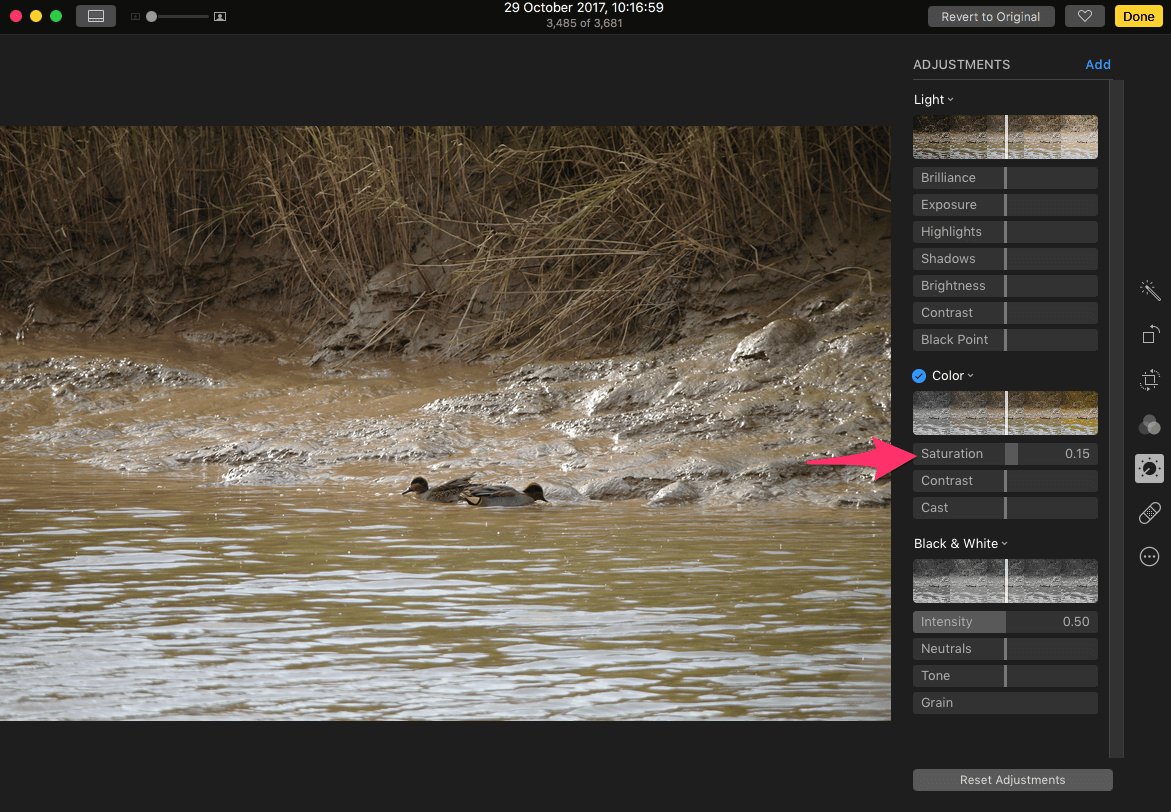
So now we have a warmer more vibrant image from the original.
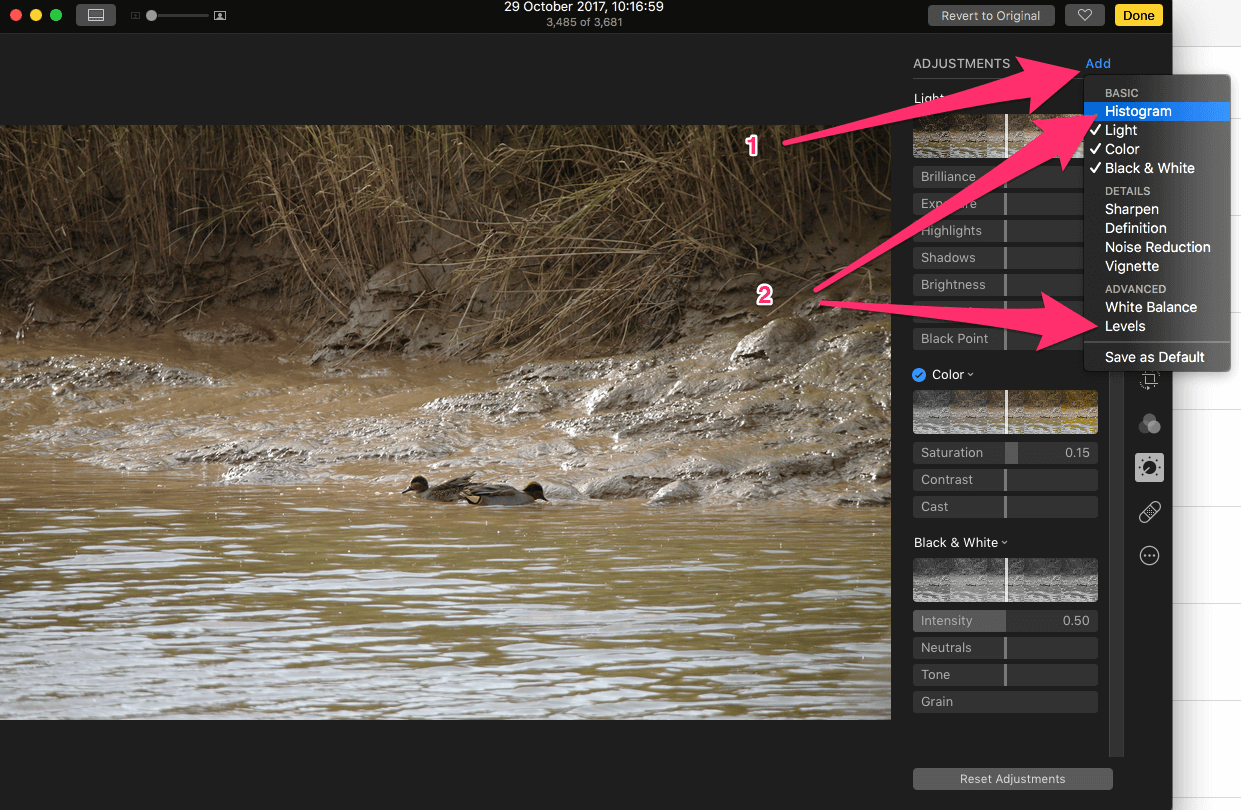
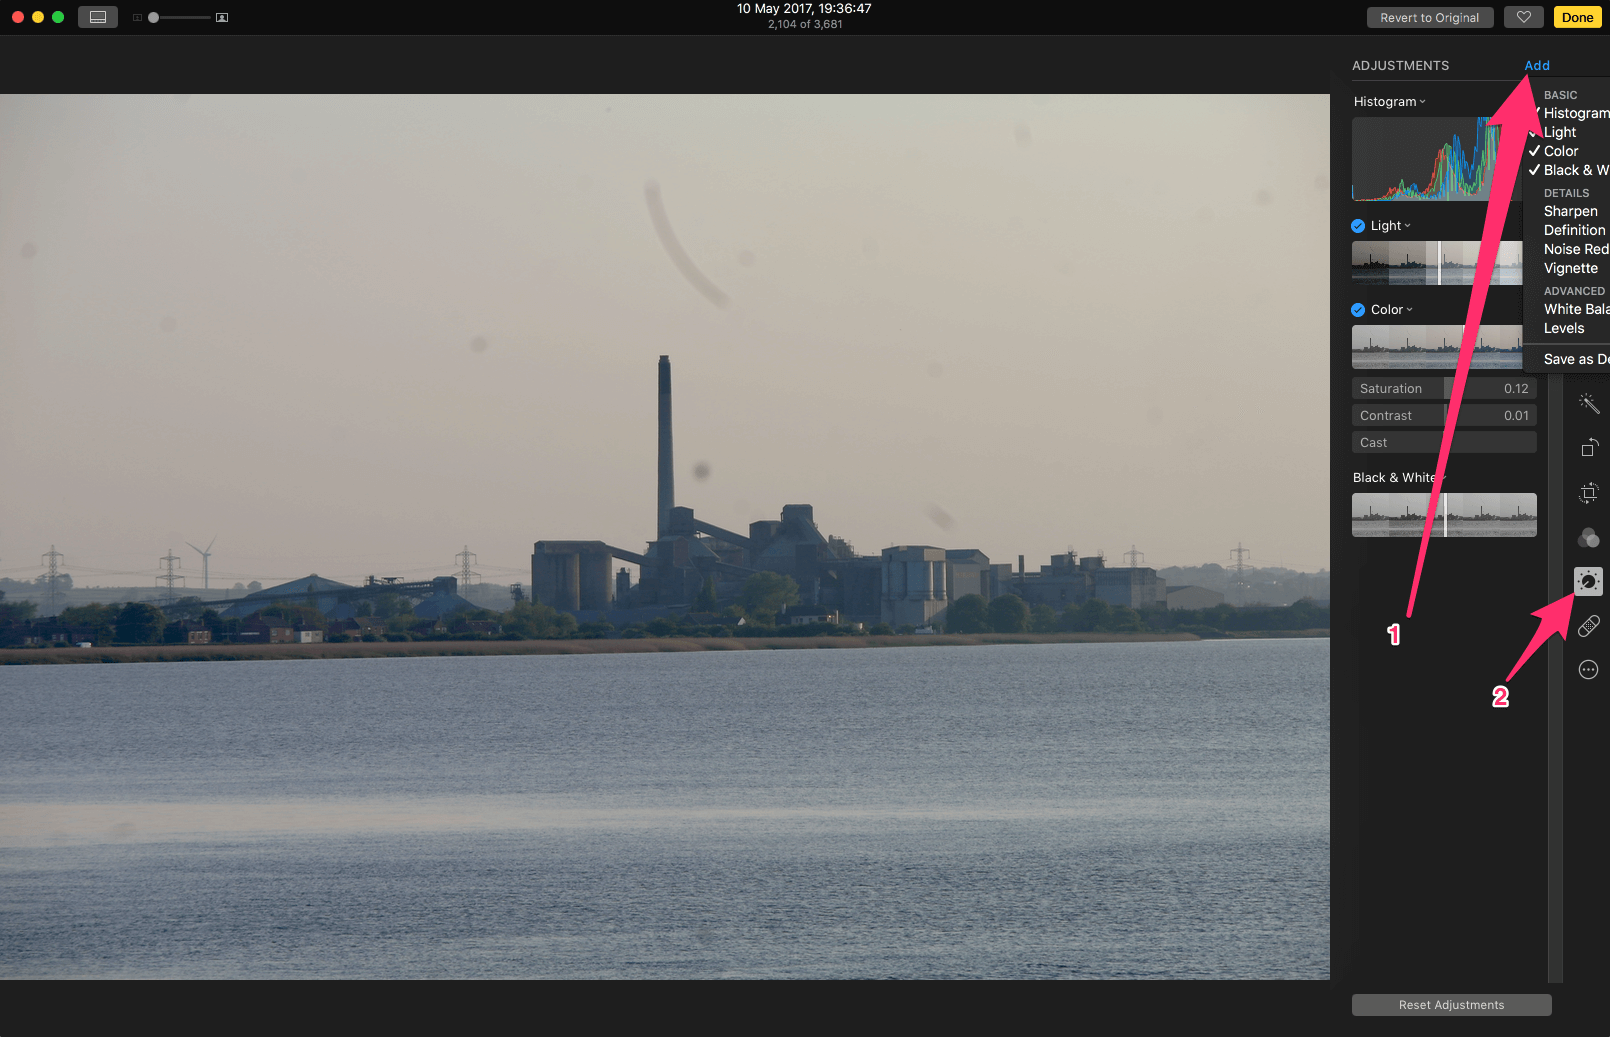
Digging deeper it is possible to adjust individual levels and also show a Histogram, click on “Add” while in the adjustments window: In this example I am going to add the “Histogram” & “Levels” tools to the window:
- Click the Add button.
- Add a check to the “Histogram” & “Levels” adjustment.
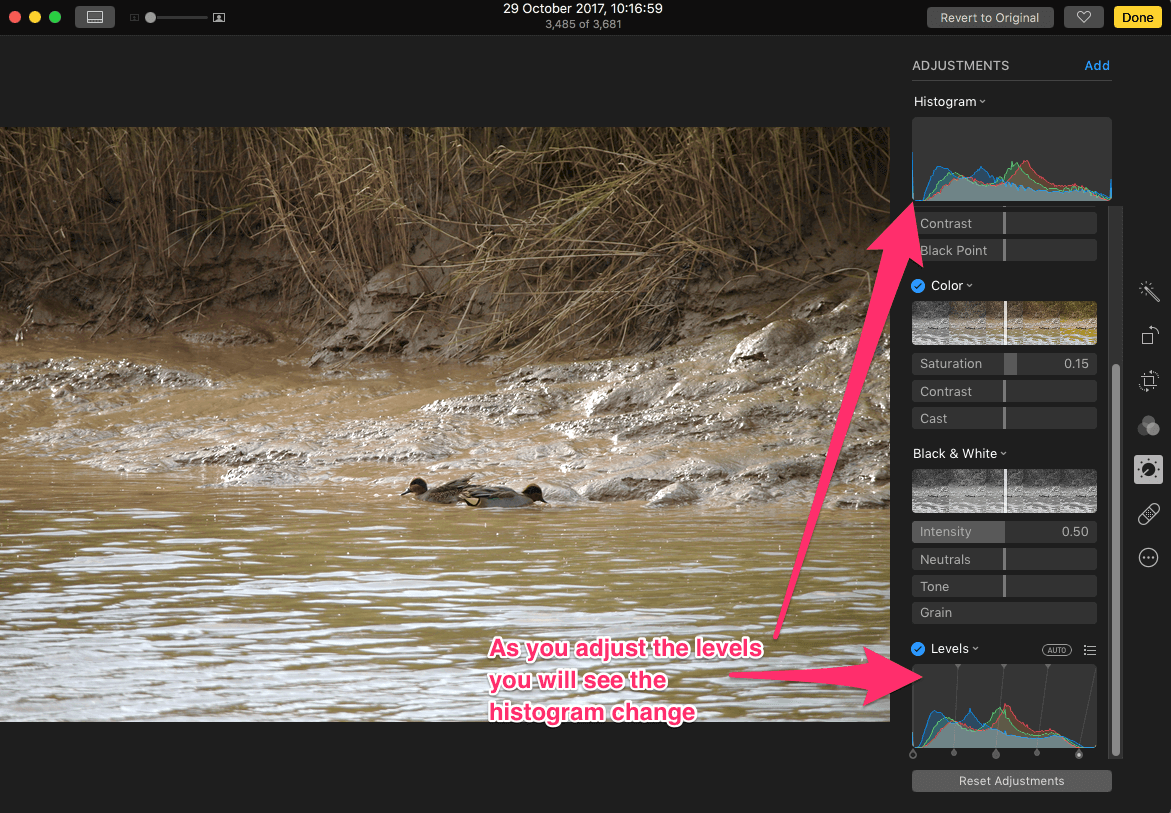
If you hold down option or alt as you adjust the levels the top and bottom handles will move together in the levels histogram.
This allows us to achieve very fine adjustments to the color and light of the image.
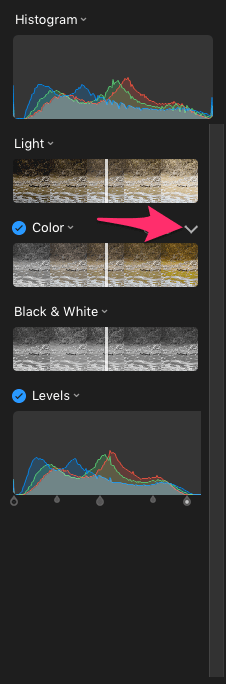
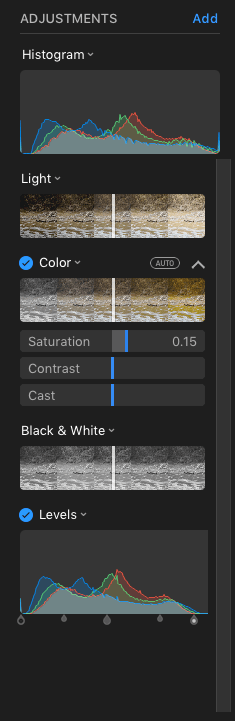
By default Photos only shows the basic Adjustments for Light, Color, and Black & White. If you move the mouse over the title “Color” in this example a drop down arrow appears, if you click the drop down arrow fine adjustments become available.
Touching up images
As well as advanced tools for light and color levels, Photos App also allows us to perform some changes to the photo beyond auto enhance, rotate, or crop:
Removing spots or blemishes, this tip is useful for removing a spot from someone’s face, here I am going to show you how to remove a dust spot from a image taken with a DSLR. If you use a DSLR camera dust spots will be a common problem.
As ever press the edit button:
Click the sticking plaster icon, which is the “retouch” button.
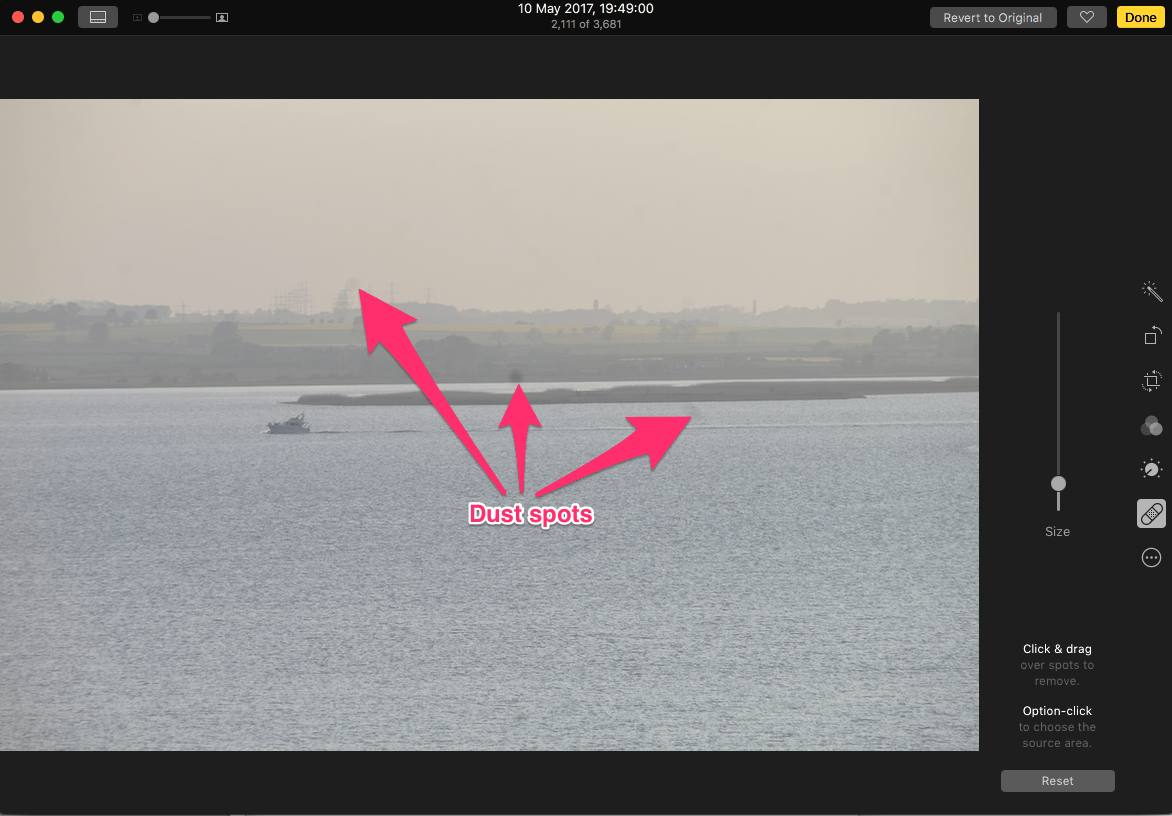
Use the slider to change the size of the retouch area, smaller is usually better, then working from the edge slowly click over the spot.
You can also move the source area by option clicking on the image.
The tool works just the same as in Photoshop if you are familiar with Photoshop or more specifically it samples a nearby area of the image and copies it to the area you are clicking on, if like in the image above there is a spot in a large area of similar background such as the water and sky you can hold down Option or Alt then click to choose an area to sample from further away from the immediate area the spot is in.
Straightening up
Images with a large horizon in them such as landscapes often do not come out square to the screen or print. The crop tool allows you to straighten images, incidentally you will want to crop the image to get it square again after straightening this usually happens automatically in Photos.
Press the crop button (1) and then use the rotation wheel (2) to adjust the alignment of the image.
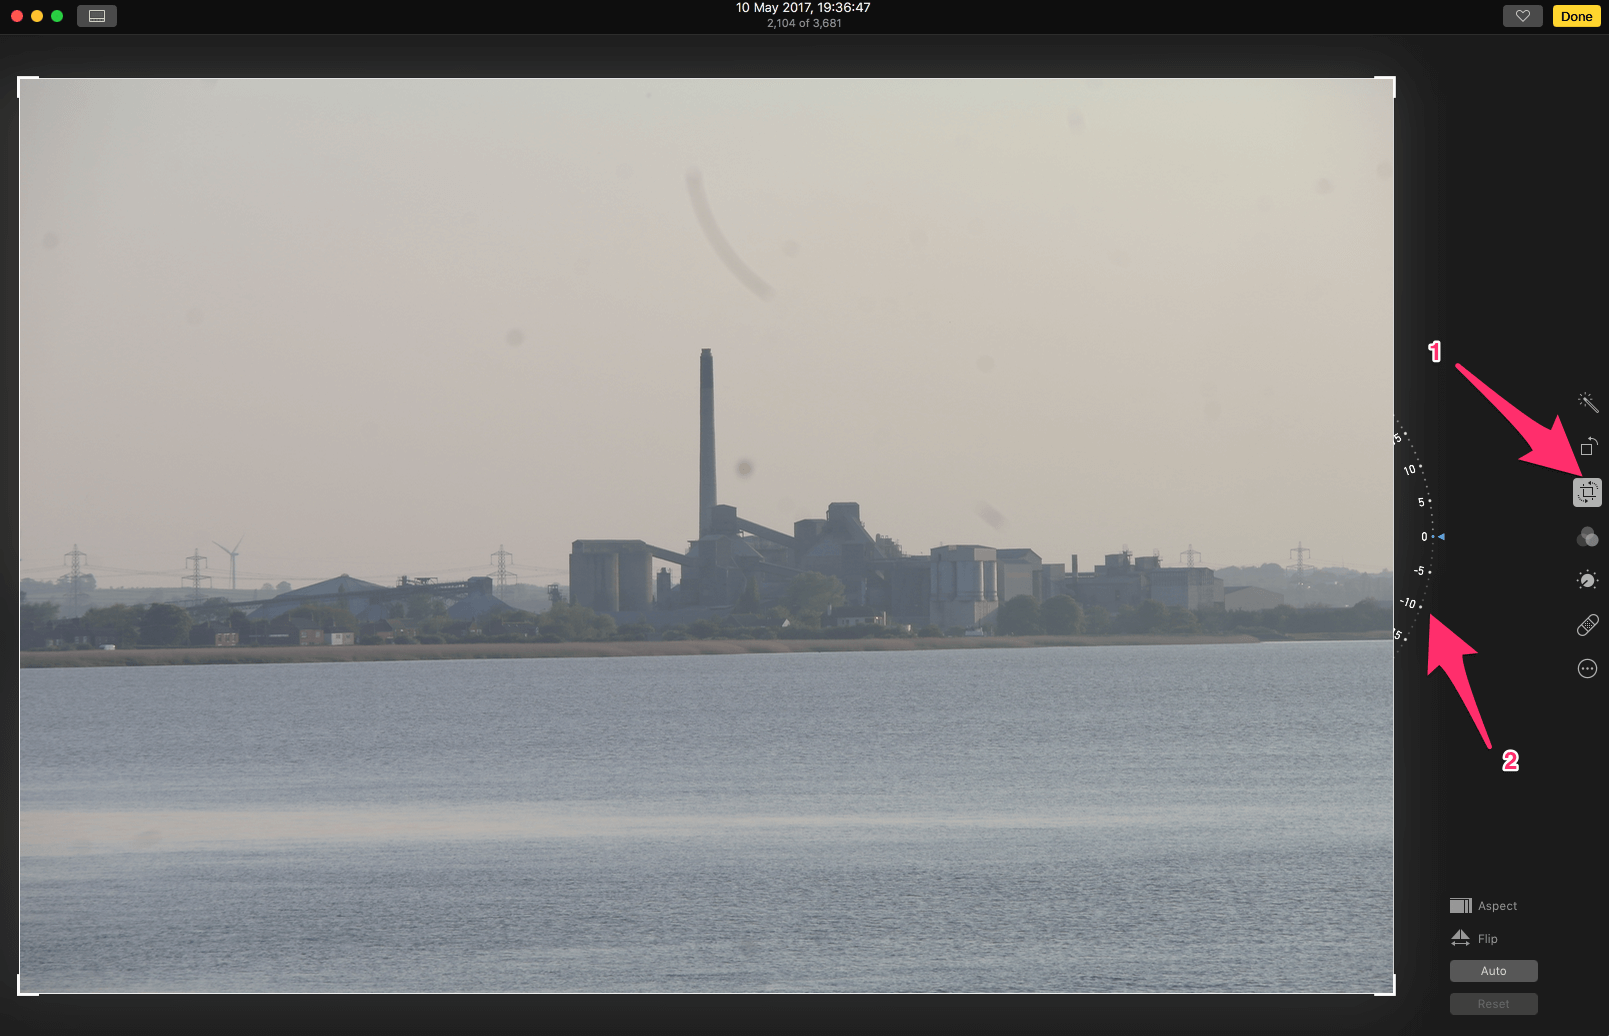
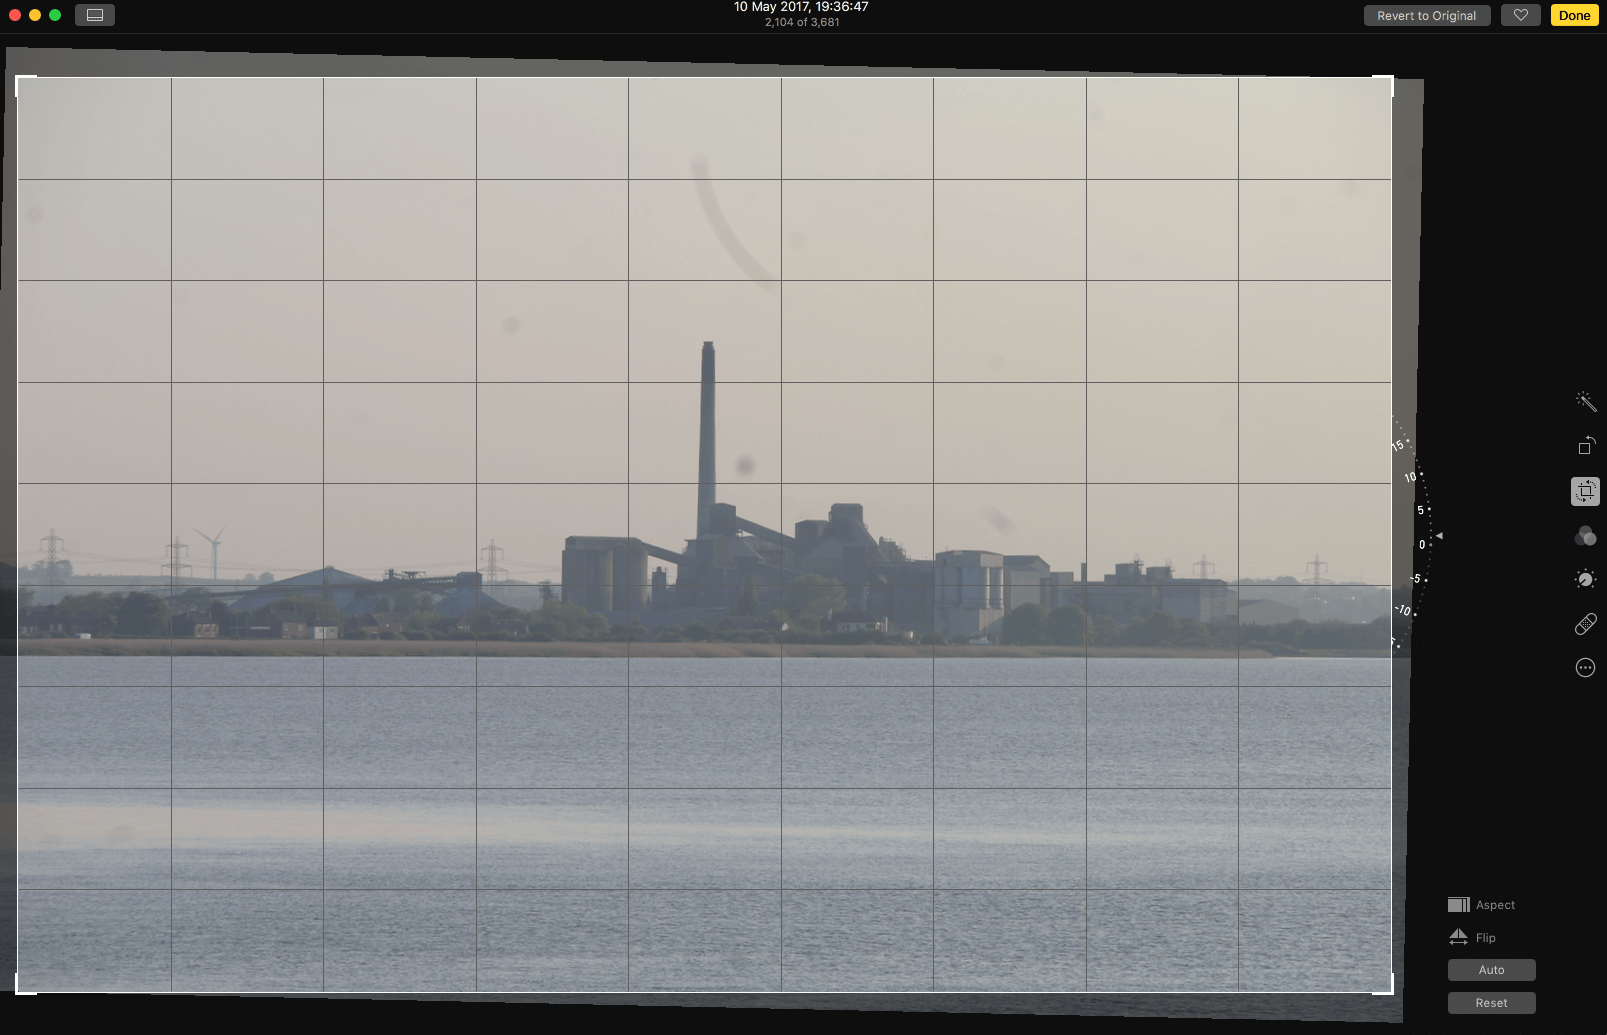
Horizontal and vertical lines appear as you rotate the image:
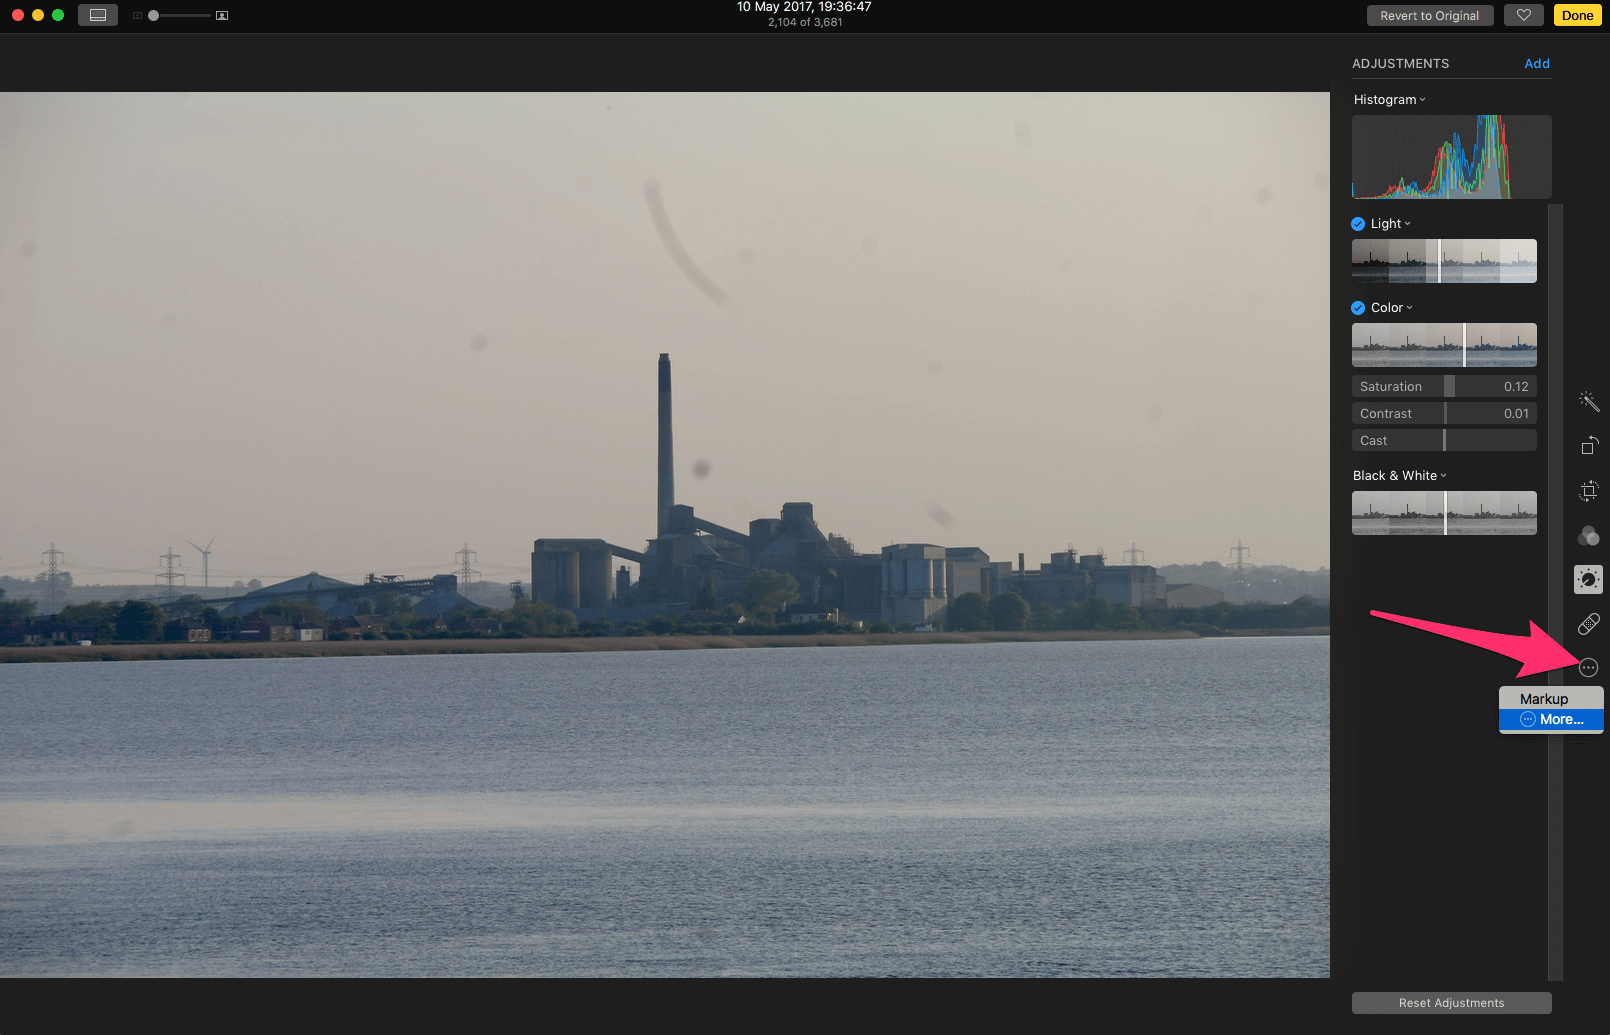
Add more tools:
As already mentioned in the adjustments panel click Add to add more tools to your work area:
You can also use the built in markup tools or even integrate with third party apps that support it such as Skitch (see: https://jonbrown.org/blog/copy-and-paste/)
Disaster recovery
If you’ve gone too far with your edits on an image Photos is a non-destructive editor and as such you can simply press the “revert to original” button.
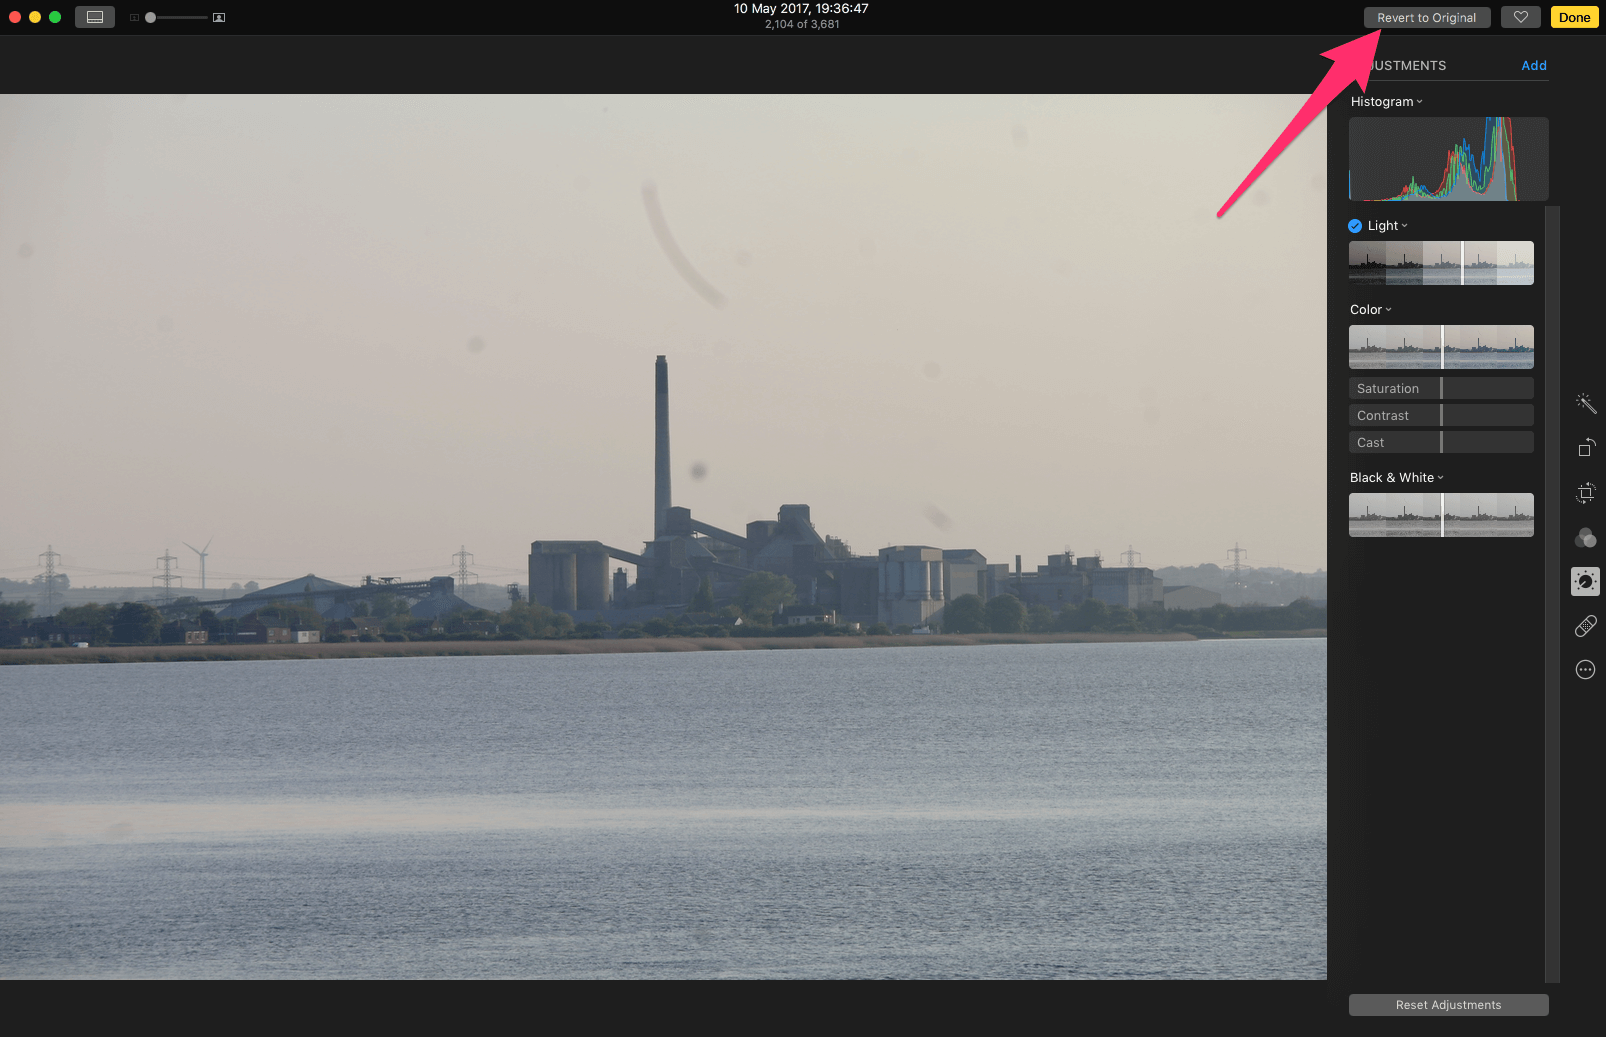
This can also be done with previously edited images, simply double click the image open the editor tools and either click the Revert to original button or from the Image Menu choose Revert to original.
As you are making your edits you can also go back one step by choosing Edit Menu > undo or pressing command Z.
AI Usage Transparency Report
Pre-AI Era · Written before widespread use of generative AI tools
AI Signal Composition
Score: 0.05 · Low AI Influence
Summary
Photos App on Mac provides advanced editing tools for sorting, filtering, and organizing photos and videos.
Related Posts
What is the Managed App Store & Why you need it
--- Many people discount the importance of running app level updates on your computers. Programs like Chrome, Firefox and Adobe Creative Suite all have built it update utilities that will look for and apply critical security and functional updates from their respective development teams. Part of the job of software vendors is providing quality assurance meaning they are testing their software to make sure that it is stable and usable for their users. However little is known about how each vendor actually tests their software. Many only test on newer...

Moment Helps You Gauge Your iPhone Use
Smartphone addiction is real. Do you check your iPhone before you get out of bed? During family dinners? Right before you go to sleep? Constantly during the day even when you’re on vacation? If you—or your family members—feel that you're disappearing into your phone too often or at inappropriate times, it may be time to do something about it. Consider how this behavior affects your relationships and daily routines – are you missing out on quality time with loved ones or neglecting responsibilities because of your phone use?

Block Telemarketing Calls Automatically on Your iPhone
Junk calls are one of the great annoyances of the modern world. You're minding your own business when your iPhone vibrates in your pocket. You pull it out, curious as to who's calling, but don't recognize the number. You may notice that it's in the same exchange as your phone number, suggesting that it's a neighbor. Often these calls are nothing more than automated messages or telemarketers trying to sell you something.

HomePod Preorders Begin, Smart Speaker Ships Feb 9
Apple has started preorders for its new HomePod as of yesterday. Priced at $349, the audio accessory focuses on delivering high-quality sound, offers integration with Siri's AI capabilities, and provides access to Apple Music's vast library of 45 million songs. The device is designed to work seamlessly within existing Apple ecosystems, allowing users to control it with their iPhone or iPad.

How to Use Apple Pay Cash on Your Apple Watch
After you install watchOS 4.2, you will see on your paired iPhone with iOS 11.2 installed, an Apple Pay Cash option within the Watch app's Wallet settings. To enable it, simply toggle the switch to "ON". You'll then be prompted to sign in with your Apple ID to complete the setup process.
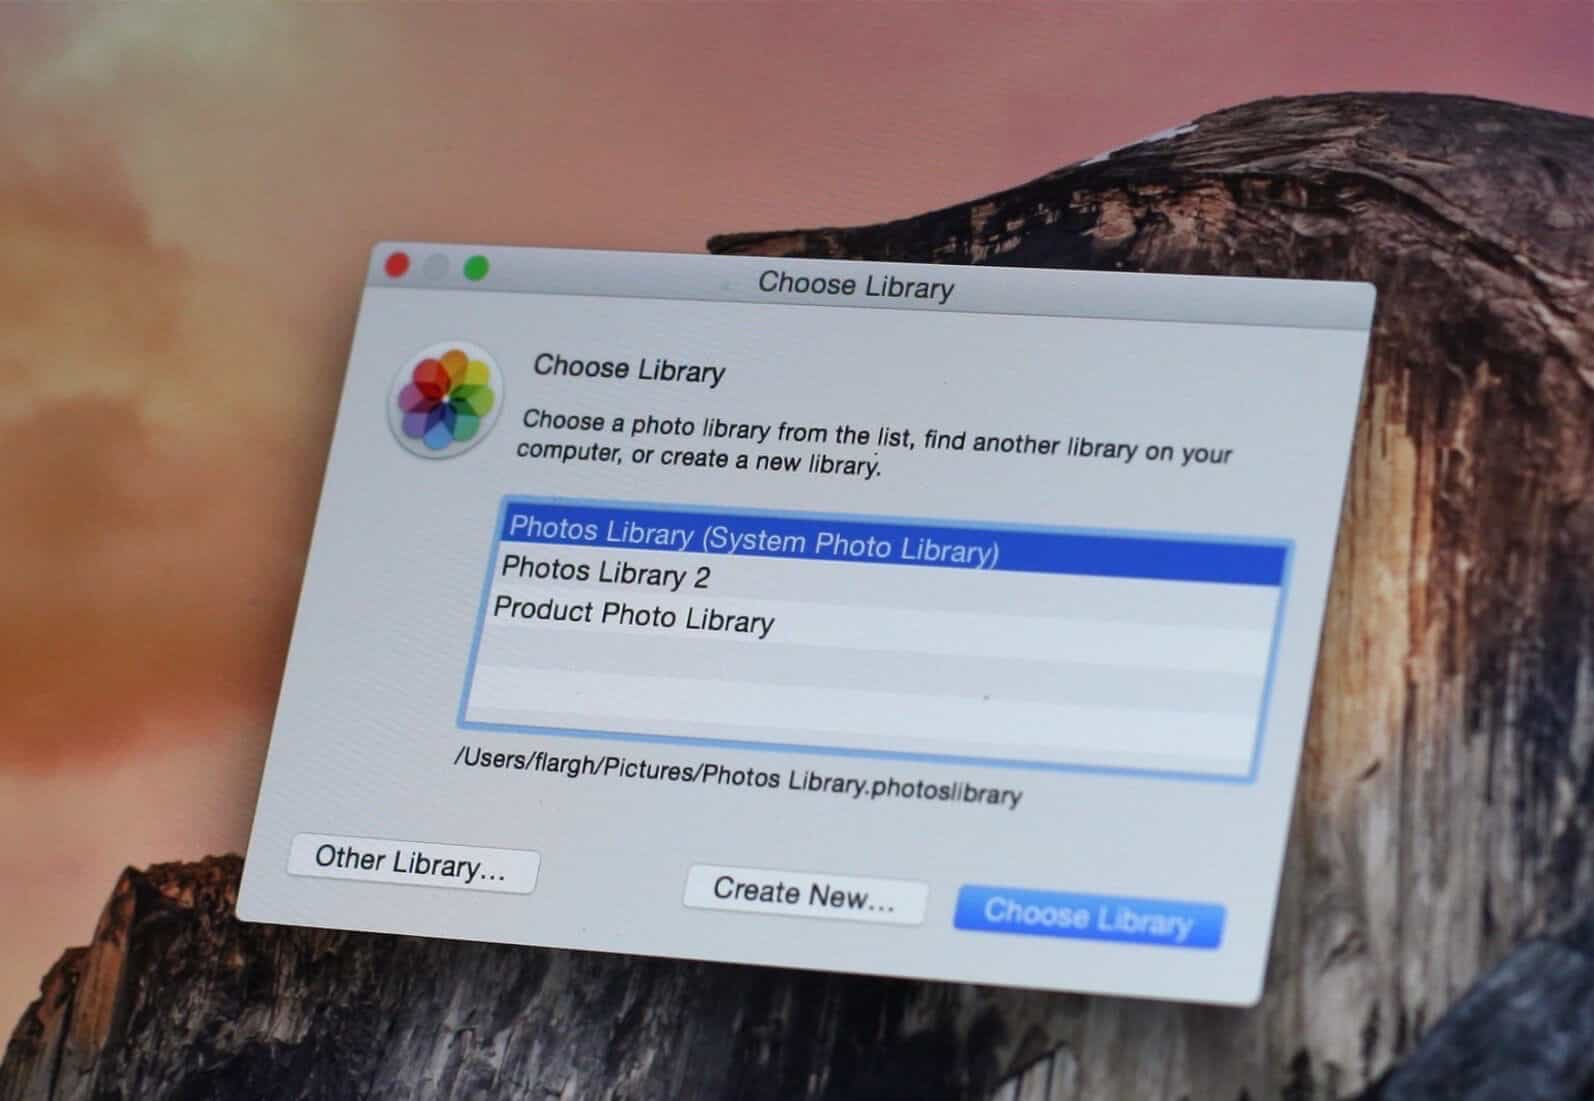
Move your Photos library to an External drive
Sometimes whether it is for backup purposes or for hosting, you will want to move your photos stored in your Apple Photos application library on your Mac to an external drive instead of the startup boot drive. This can help free up space and reduce clutter on your main drive. Making the change is simpler than you think, as long as you follow a few straightforward steps.

Does your iPhone battery need to be replaced?
Earlier this week we reported that Apple had acknowledged some iPhones are being throttled to prevent unexpected shutdowns. This admission came after a class-action lawsuit was filed against the company, alleging that it intentionally slowed down older devices to encourage users to upgrade to newer models. See our previous post for more information on this development.
Our Top 5 free macOS App picks for 2017
It is the season for giving, and we're happy to share some of our free apps with you. Here's a rundown of what's available to install on your Mac:
Don’t think you need Accessibility help with your iPhone?
Apple has made accessibility for differently abled people a cornerstone of iPhones and iDevices since 2007, and most of us never bother to explore these controls on our iPhone unless there is a specific need. These features are often hidden in plain sight, buried beneath layers of default settings and user interfaces that cater to the majority.

High Sierra using APFS breaks Boot Camp switching
If like me you use the Boot Camp Control panel in Windows to restart your Mac into High Sierra and you are using an SSD drive for High Sierra, you may or may not notice that you can no longer choose your Macintosh startup disk in the Boot Camp Control Panel in Windows. This change is likely due to a limitation in the integration between Boot Camp and High Sierra on an SSD, but I haven't been able to find any official documentation confirming this.
