
How to setup Rasberry Pi
The first step in setting up SNIPE-IT is to setup the platform that it will run on. Luckily the best platform and most economical is a Rasberry Pi. We are using a Rasberry Pi 3 in this case. Before we get too far we need to pick the operating system that the Rasberry Pi will use.
The drive or the card that we will use in the Rasberry Pi is a 64GB card, now we could use any size card we like, the smaller the card the leaner the OS needs to be so in this case I am going to pick a lean OS, DietPI is a great choice for this. If you chose a higher size card then maybe Rasberian or Ubuntu would be a good choice. The OS isn’t a huge factor in following along with the steps.
The concepts are still the same. At the core, we need to install the OS, install Docker, and then install Snipe-IT.
Ok so let’s continue on and set up DietPI on the SD Card.
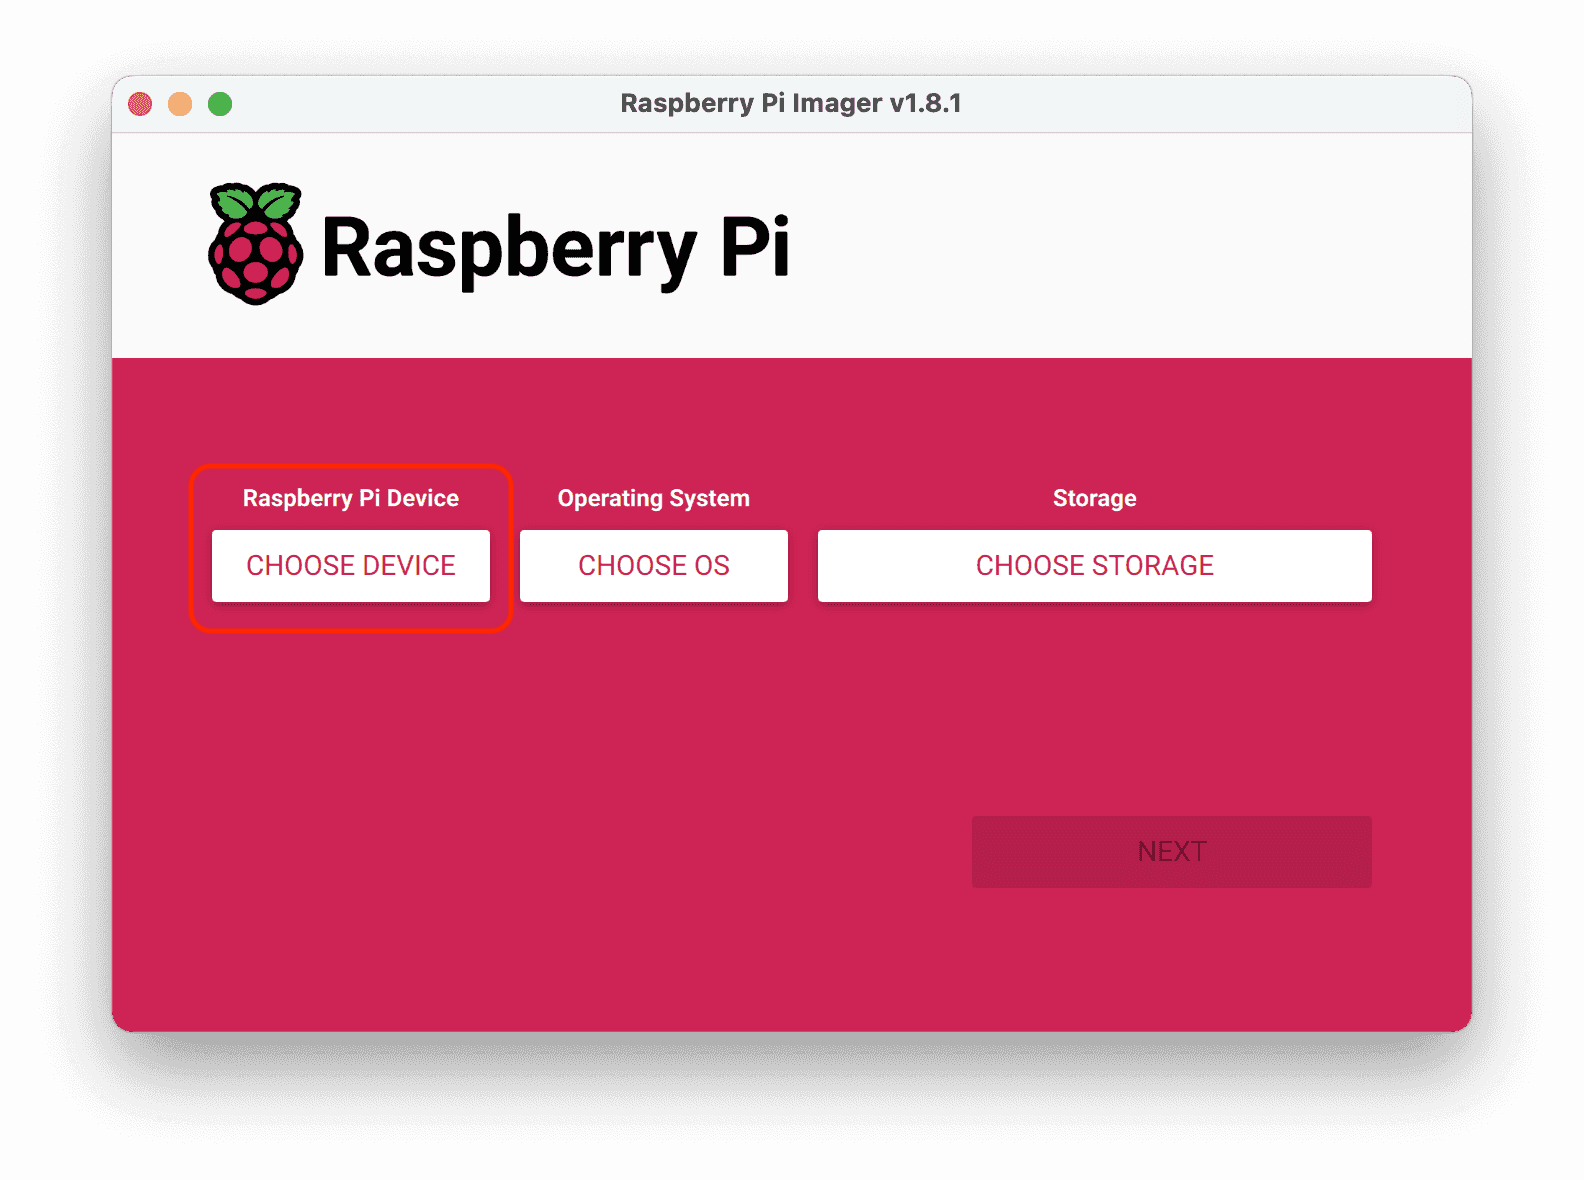
We are using a Mac and I have an SD Card Reader. Once the card is inserted, I used the software created by Rasberry Pi called the Raspberry Pi Imager. This tool allows you to image the SD card and it gives you the option to pick any number of great operating systems to flash the card with. Unfortunately, DIetPI is not one of them. Therefore we must go to the DietPi website and download the image and use the tool to upload the image and flash the card manually.
Ok so we have the Rasberry PI 3 so we need to go to the DietPi website and download the right image file. You can download it here. The website gives you the option to pick the Rasberry Pi model that you have and it gives you the right build that will work for your device.
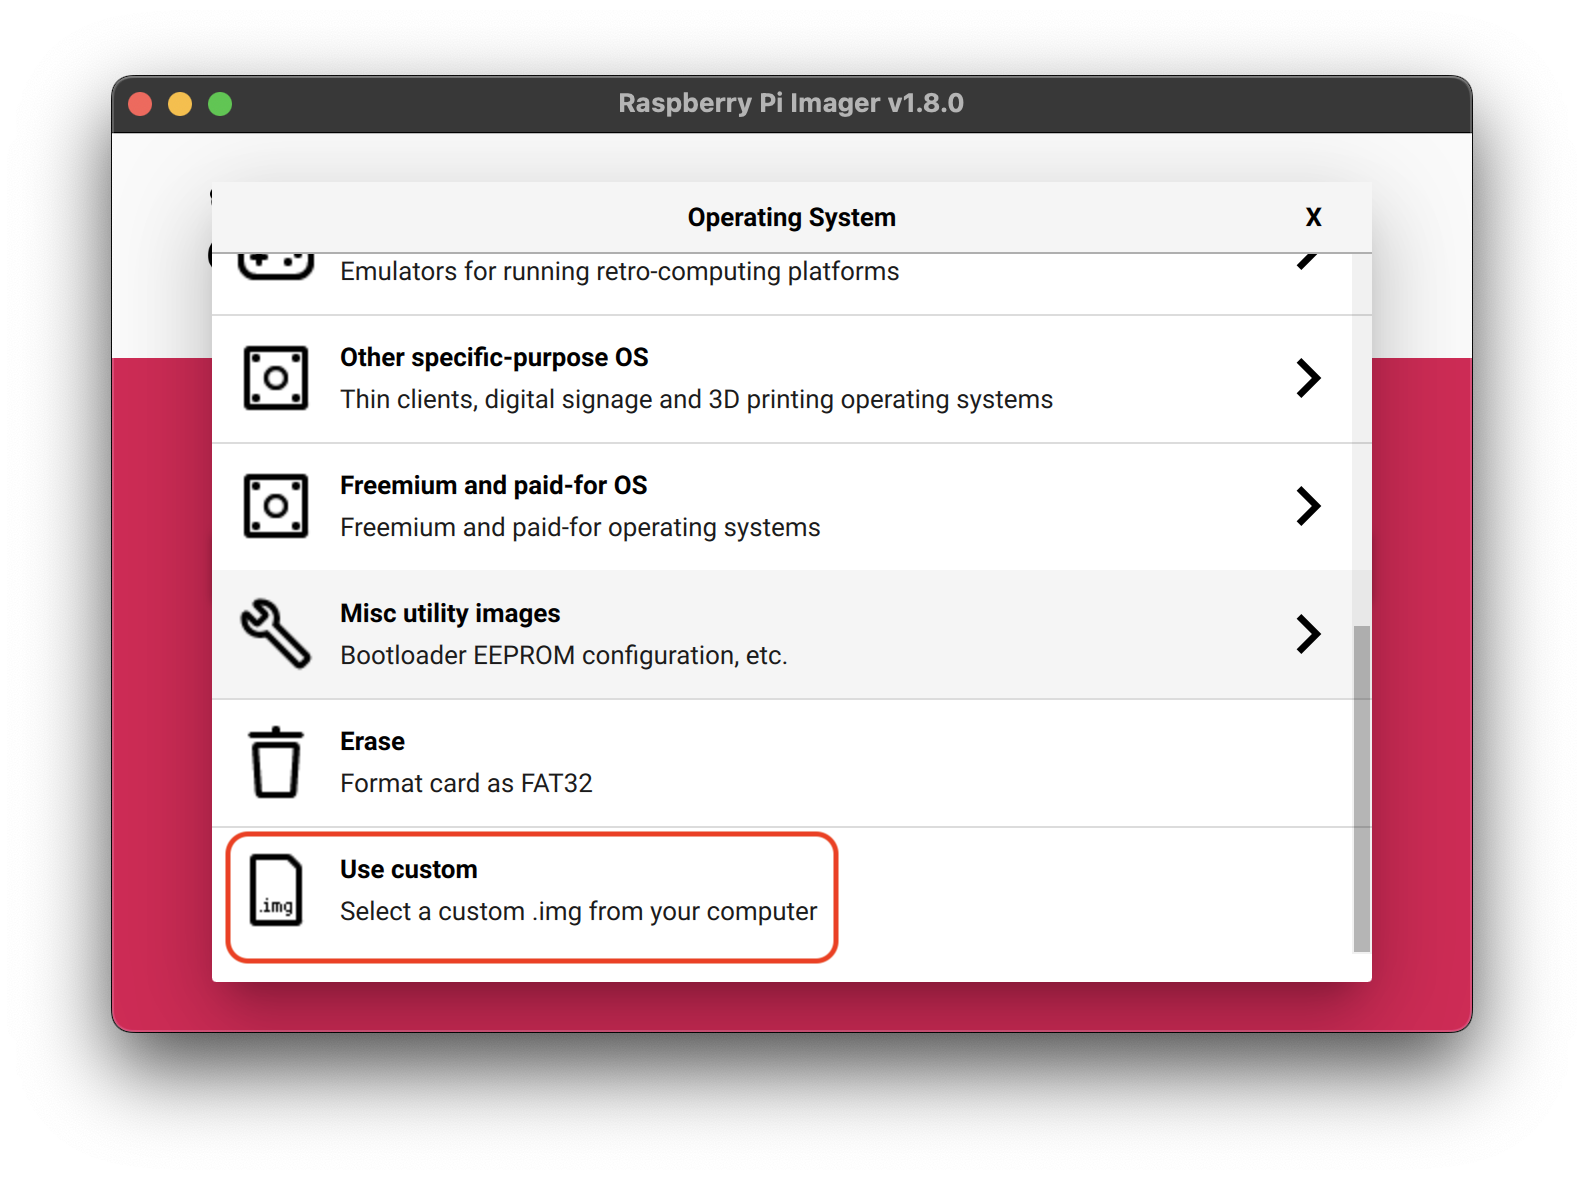
Once you have downloaded the right Image go back to the Raspberry Pi Imager and under operating systems click use custom.
Once done you can upload the .img file you downloaded from the previous step.
Then you will select the SD card and it will image the card with the DietPi image. It will happen very fast because DietPi is very small and compact thus the name.
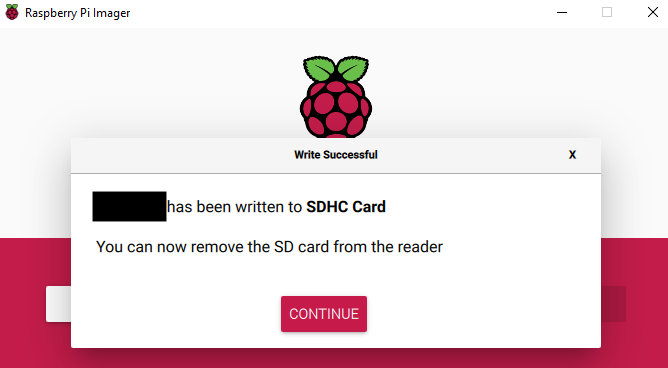
Now that DietPi is flashed you need to eject the SD Card and insert it into your Rasberry Pi.
Setting up WiFi & Initial Configuration
Note that your Pi is not going to have WiFi enabled so if you have a USB Wireless adapter like I do, you will need to first plug it into a network ethernet jack for it to connect to the network OR you will need to connect it to a monitor, keyboard and mouse so that you can interact with it. What did I do at this stage? I connected it to a keyboard, mouse and monitor.
When you first boot up the DietPi image on the SD card you will see the boot sequence and a launch screen with the default username and password shown.
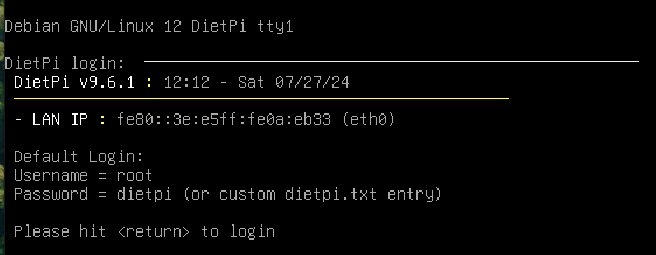
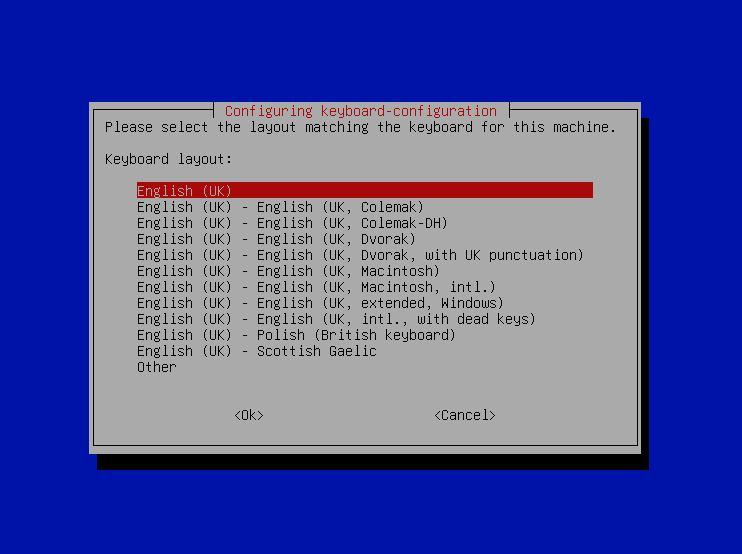
Use this default password to login to the Raspberry Pi. After you login it runs through a lot of updates and setup steps steps like setting up the language and keyboard localization.

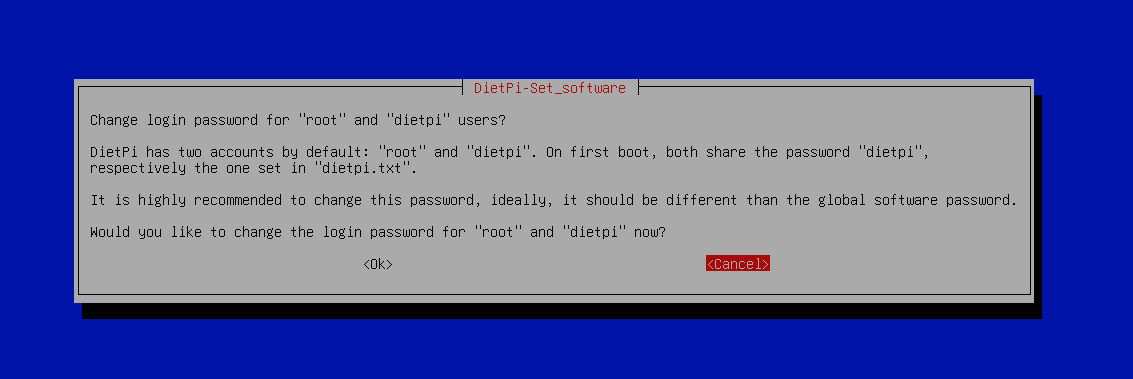
You will then be prompted to change the global password which we highly recommend doing for security.
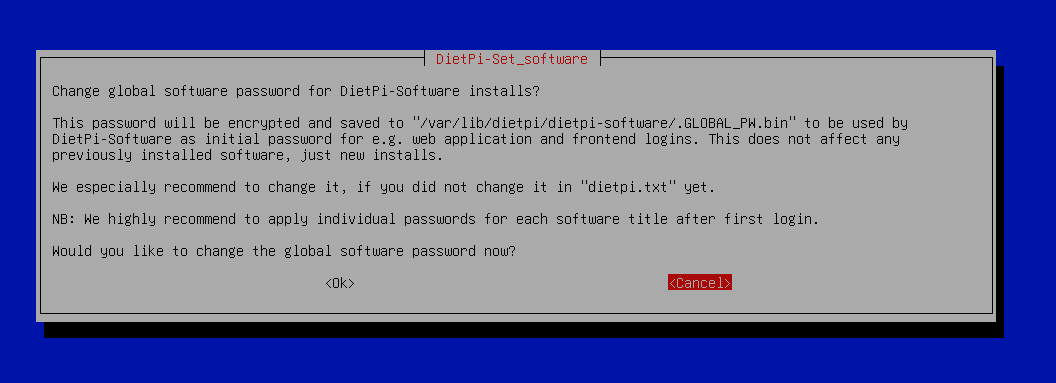
Also for added security it will prompt you to change the default root password again we highly recommend doing this.
Now your taken to the software update prompt, at this stage your being prompted to confirm and continue with the updates that are needed for DietPi.
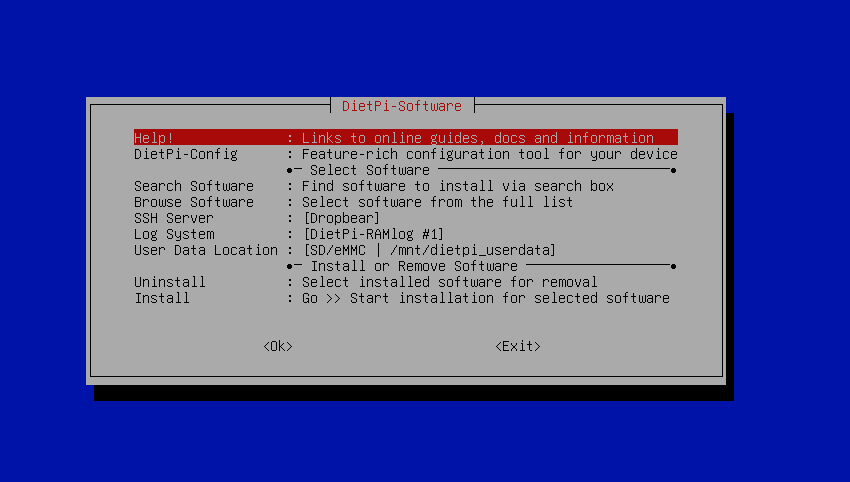
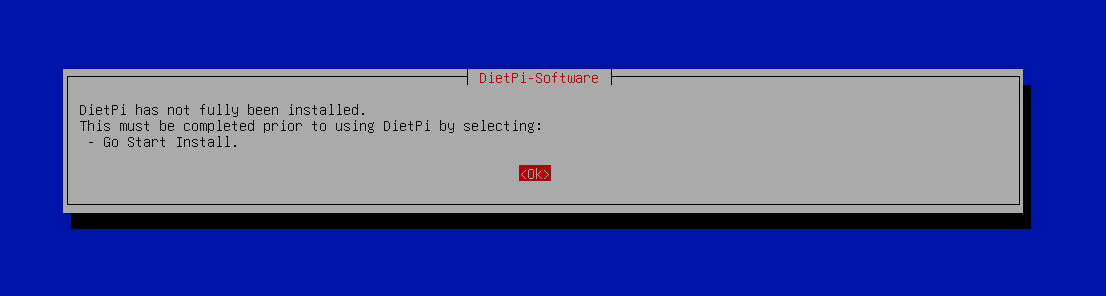
You must confirm the updates if you don’t you will get this error message
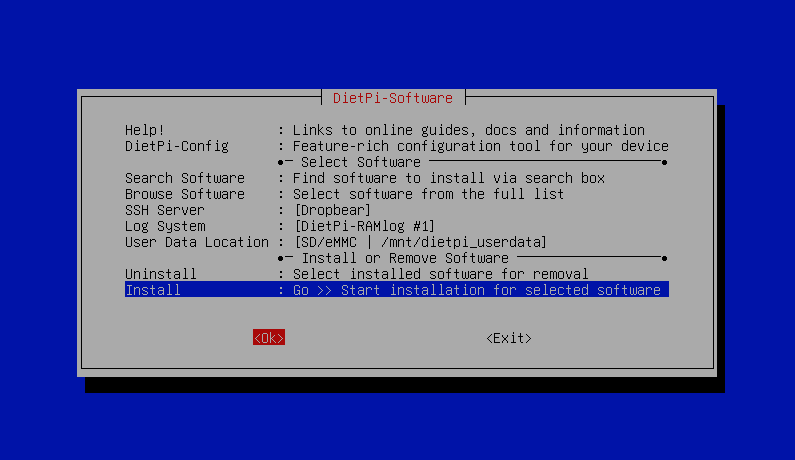
You confirm the updates by down arrowing to the bottom of the list and selecting “Install” and then selecting ok.
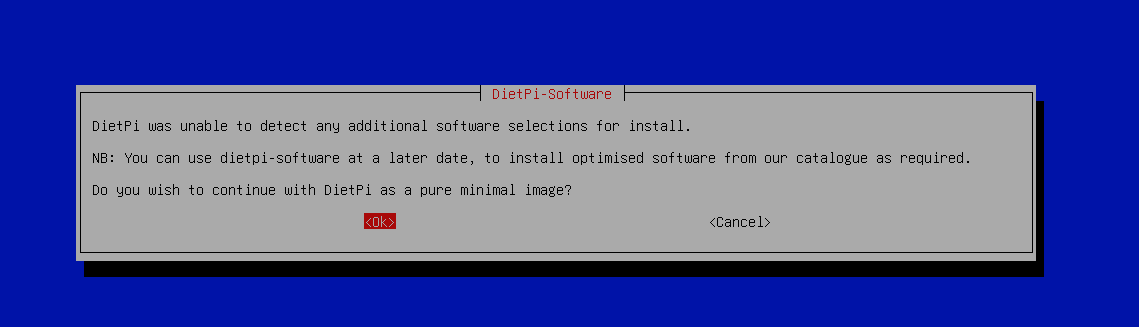
Since we just downloaded this image there are very minimal updates so we get the message that there are not many updates and were asked if we want to stay with the minimal Image which we do.
Once the updates are done the Pi should return you to a plain command prompt. Now that your at the command prompt you need to run the following command to get to the configuration screen
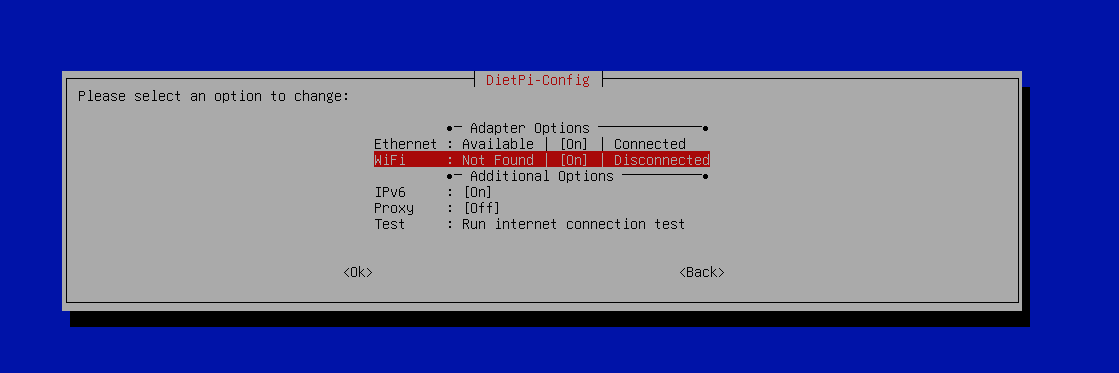
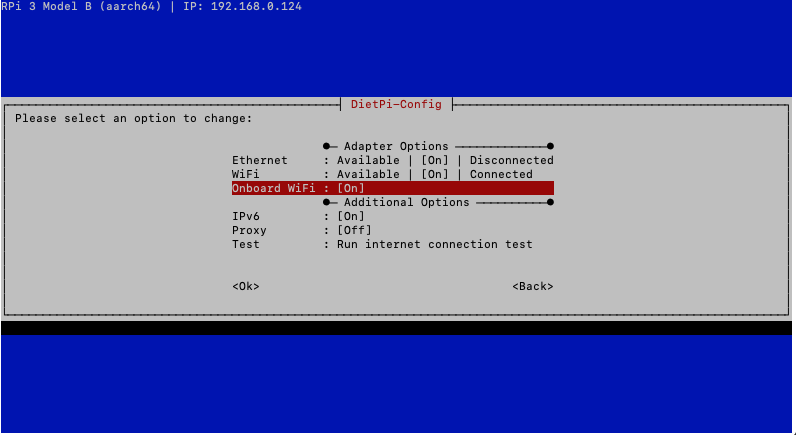
sudo dietpi-configAt this point I used the arrow keys to scroll through the various options. I selected “Network Options: Adapters” and hit the enter key and at this point, I was presented with a screen listing all the various network adapter options. These include:
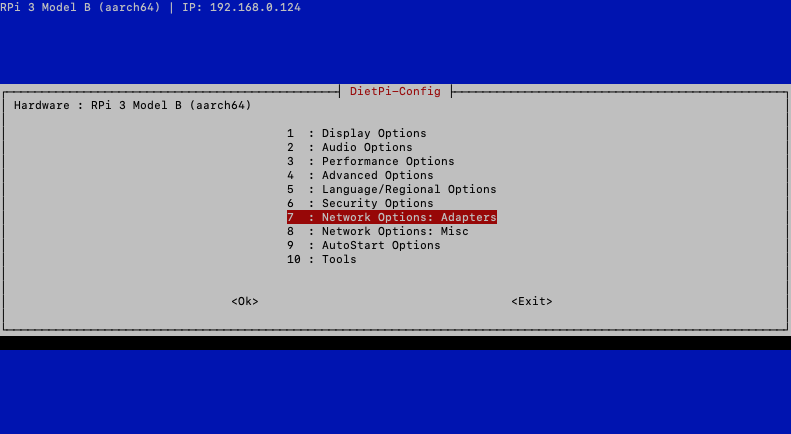
- Ethernet
- WIFI
- On-board WIFI
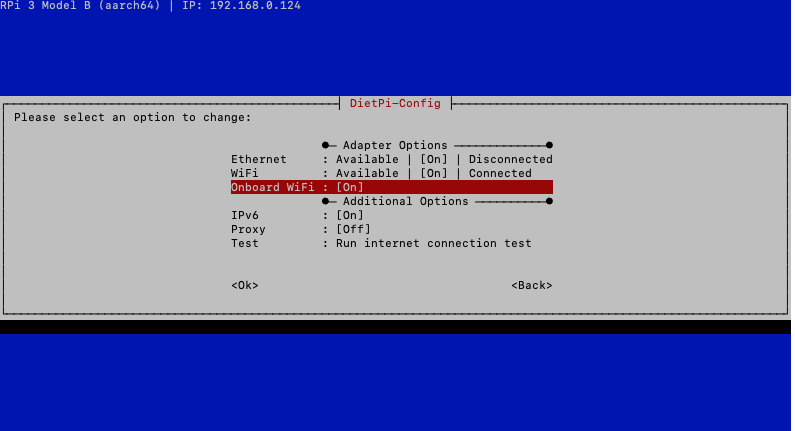
Of course I selected WIFI because I wanted to put the Rasberry Pi in a place where I did not have an ethernet port available on my modem. Now on the screen, you will see that WiFi is currently set to “OFF” and “disconnected”.

Now when you hit enter you should see the prompt, “Would you like to enable WIFI now?” When you hit the arrow keys to select “OK” I hit enter to enable WiFi.
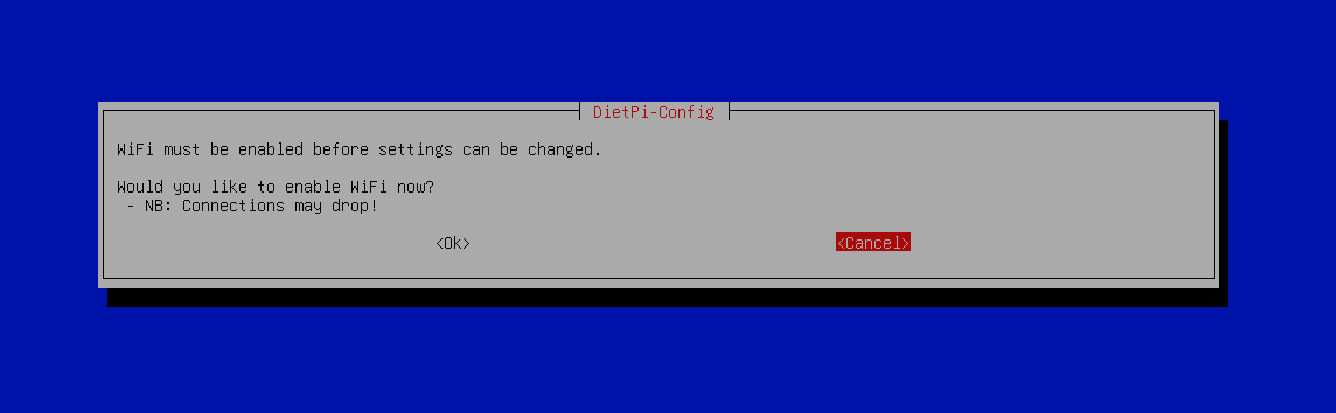
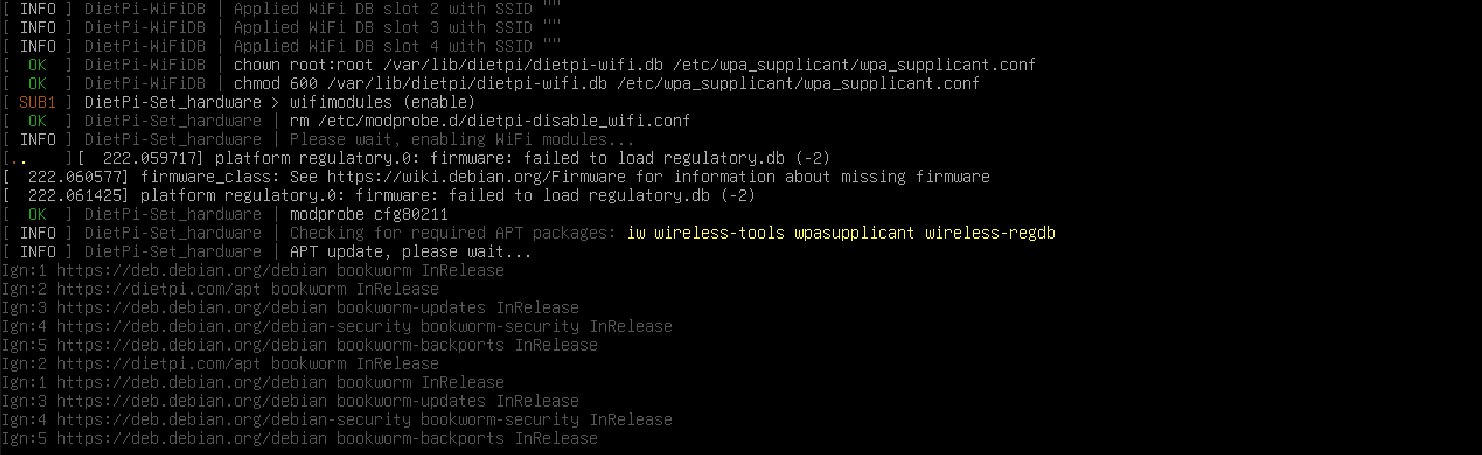
You will see various configurations happening on your Terminal. If you don’t get any error message, WIFI was successfully enabled on your system.
You will now see that WiFi is set to On.
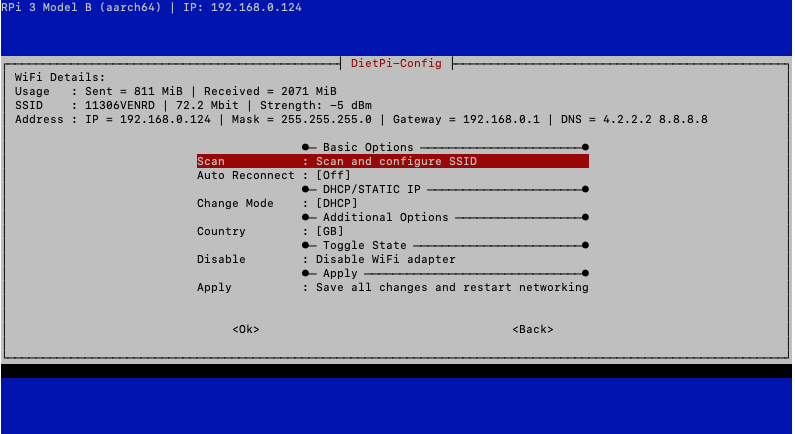
You will see a screen similar to the image below where you must choose the “Scan and Configure SSID” menu and hit Enter.
Next, you will see various slots you can use to configure a WIFI network.

On the next screen, you will see two options that you can use to connect to WiFi.
- Scan: Scan and Configure SSID
- Manual: Manually enter the SSID and other network details.
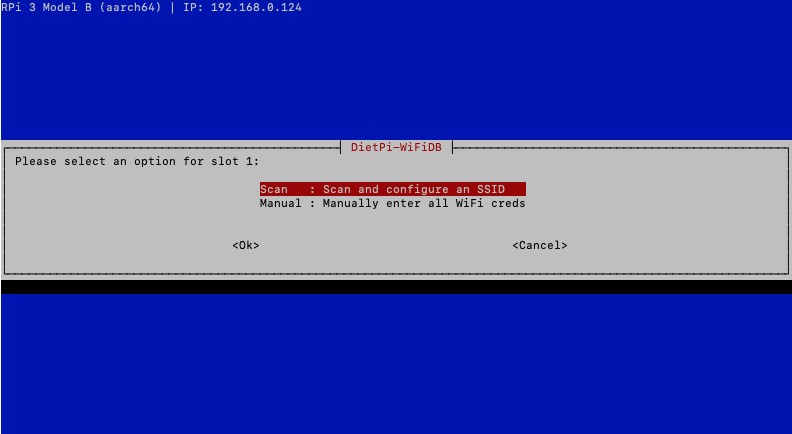
I chose the “Scan” option as it automatically scans the networks around you and displays the networks in a nice list that you can easily pick from.
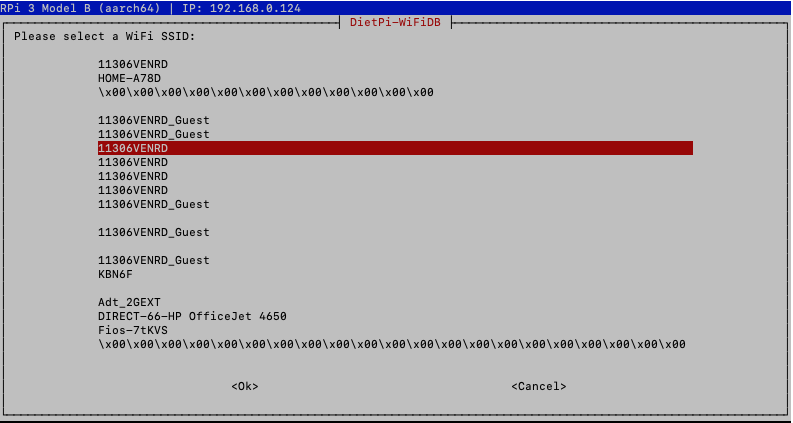
On the next screen, you will be required to select the encryption method used on the target WIFI network. They are;
- WPA-PSK: Default (recommended)
- WEP: Legacy (insecure)
- NONE: Open host that does not require a key (e.g., public WiFi)
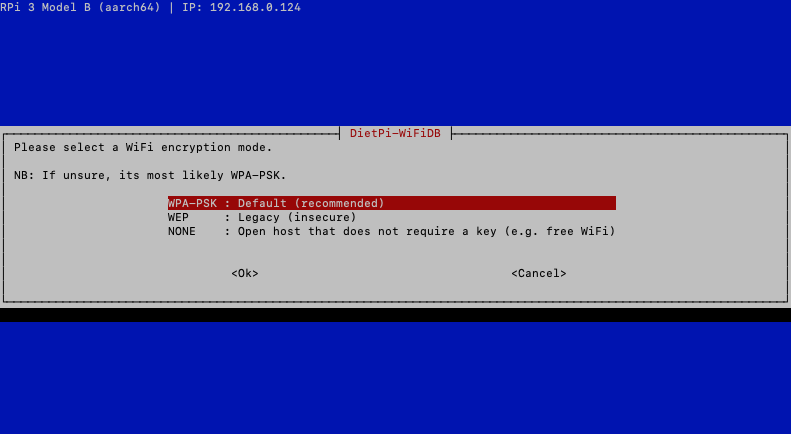
Click “OK” when done. Enter the password for the wireless network.
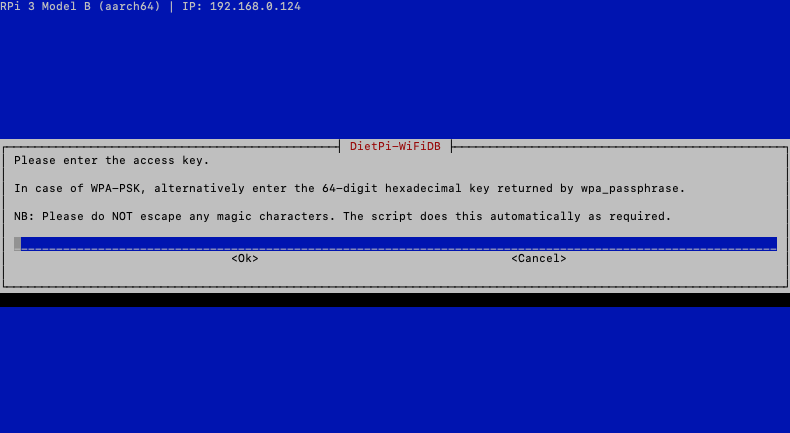
When your done press Apply.
If your connected successfully, you will see a detailed screen with the following information.
- SSID
- IP Address
- Gateway address

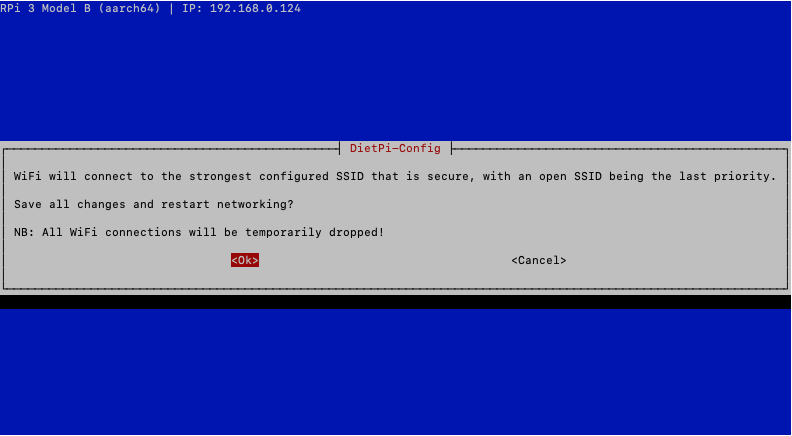
Once your done you must press apply, you will get a warning that this will restart the Raspberry Pi.
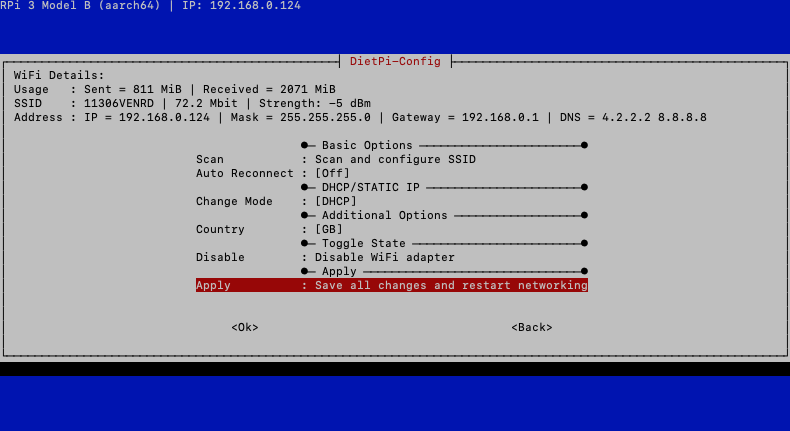
Warning: All WiFi connections will be dropped!
Once the system reboots re-enter into the configuration and you will see that WiFi is now connected, however at this point we’re getting a DHCP non static IP which isn’t great.
Static IP Address
Now we need to setup the Rasberry Pi with a static IP address because its going to be used as a server. Because of that we need to follow these steps.
We are still in the terminal so you run the command
sudo nano /etc/network/interfacesAnd press Enter. This puts you in the text edit mode for the interfaces file.
Scroll down and edit the wlan0 section using the down arrow button on the keyboard.
auto wlan0
iface wlan0 inet static
address 192.168.1.59 #REPLACE THIS ADDRESS
Replace the IP address 192.168.1.59 with the desired static IP address
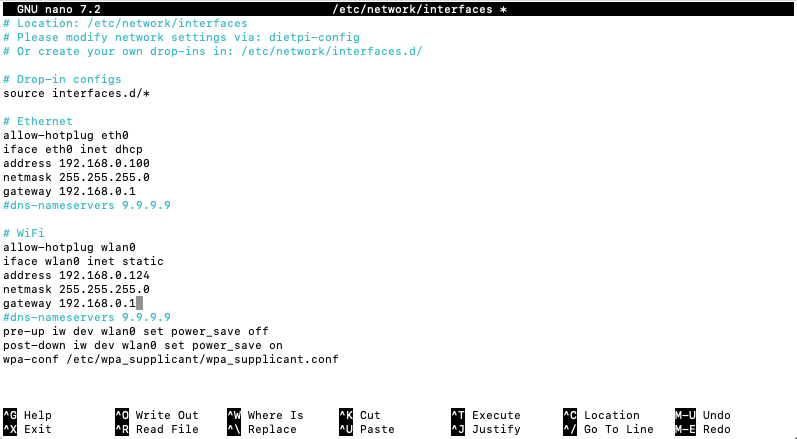
Press Ctrl+X, Y, and Enter to save the changes and exit nano.
Finally run this command to restart the network and apply the settings.
sudo service networking restartUpdate Strategies
Ok so we now have DietPi setup on Rasberry Pi with WiFi configured with a Static IP address. Thats the end of Step 1 now that we have this baseline we need to update DietPi we can do that by running some updates. Now before we go into that lets talk a little bit about DietPi updates. A good strategy here for DietPi updates could be summed up as follows.
monthly:
apt update && apt upgrade -yquarterly:
dietpi-updatedietpi-update is for updating the components of diet-pi customizations, scripts, and a few system level and apt are for the operating system updates and upgrades (kernels, packages, security patches, etc..).
For now I am going to run
apt update && apt upgrade -y 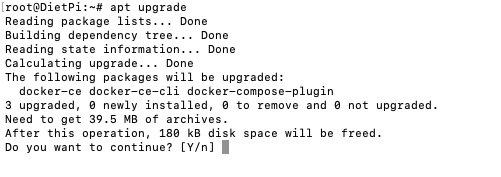
and let that run here. As you can see I already installed Docker, Docker CLI and Docker Compose but we will cover how I installed them and the pitfalls on a few of the methods of how they were installed in the next post.
In the next document series were going to install Docker and Portainer the GUI interface for interfacing with Docker. We will also run through how to secure Portainer leveraging free SSL certificates using Lets Encrypt.
AI Usage Transparency Report
AI Era · Written during widespread use of AI tools
AI Signal Composition
Score: 0.39 · Moderate AI Influence
Summary
This article provides a step-by-step guide on how to set up a Raspberry Pi with DietPI, including setting up WiFi and initial configuration.
Related Posts
Setting up Snipe-IT on Portainer with DietPi
Ok so now that we have Portainer up and running, it's running securely so now we are ready to set up SNIPE-IT. Here are the steps to add SNIPE via Portainer. The first step is logging into Portainer. Upon logging into Portainer you will click on "Local" under Environments. This is the default Environment. Next, navigate to the "Stacks" tab and select the option to create a new stack. In this case, we'll be creating a new stack for SNIPE-IT.

Securing Raspberry Pi with Reverse Proxy and or Cloudflare Proxy Tunnel
Here's the expanded paragraph: Ok so I've done a lot of research on reverse proxies and they are great at protecting your internal assets by hiding them from direct access, but there are some inherent security flaws that you have to live with if you want perfect security. Lets face it, there is no such thing as perfect security, but we can get pretty close. In fact, the more secure something is, the more complex and vulnerable it becomes in other ways.
Installing Docker & Portainer on DietPi for Snipe-IT
At this stage, we are assuming that you are still connected to the Raspberry Pi via a monitor. If you're already SSH'd into the machine, then you're one step ahead. In either case, please ensure that you have a stable connection and can access the terminal or command line interface without any issues.

Discovering Mole: A Command Line Utility for Mac Cleaning
Caches pile up, apps leave behind junk, and disk space slowly disappears. While there are plenty of GUI tools out there, most of them either lack transparency or feel overly bloated.

Introducing Pique - The Game-Changing Quick Look Plugin for Mac Admins
As a Mac admin, I'm always on the lookout for tools that make my life easier and more efficient. Recently, I stumbled upon Pique - a brilliant Quick Look plugin created by Henry Stamerjohann that allows you to view file contents in a syntax highlighted way.

ABM Warranty 0.4.1 Walkthrough: Wrap-Up and Beta
In this final ABM Warranty 0.4.1 walkthrough, I’m wrapping up the last features I had not covered directly in the earlier videos and then focusing on support, community, and the beta program. I also want to show where the support resources live inside the app so you know where to go if you need help, documentation, or a way to send useful feedback. Additionally, I'll be covering some of the key features that were updated since the previous version, including any bug fixes or improvements made to existing functionality.
ABM Warranty 0.4.1 Walkthrough: Managed Preferences
In this part of the ABM Warranty 0.4.1 walkthrough series, I'm focusing on managed preferences and the credential packaging workflow. In the last video, I covered multiple credentials inside the app itself. In this one, I'm showing how to package those credentials so they can be deployed securely through MDM. This process is a crucial step in ensuring that your credentials are properly configured and protected within your organization's mobile device management system.
Low Profile Walkthrough and Review
Today I’m walking through Low Profile, a utility from Nindi Gill that I use when I want to inspect profiles already installed on a Mac and figure out whether those profiles contain issues I need to clean up. The value is that Low Profile gives me a straightforward way to inspect profiles installed on any Mac. This simplicity makes it easy for me to identify and address potential problems, which is especially useful when working with multiple machines or troubleshooting complex profile configurations.
ABM Warranty 0.4.1 Walkthrough: Multiple Credentials
In this part of the ABM Warranty 0.4.1 walkthrough series, I’m focusing on multiple credentials. In the first video, I showed the basic setup and how to add a single credential. Now, I want to explore what happens when I remove a credential, what changes occur when I add more than one, and how the app behaves once there are multiple contexts in play. This will help clarify any potential issues or inconsistencies that may arise with multiple credentials.
