
Setting up SNIPE-IT with Portainer
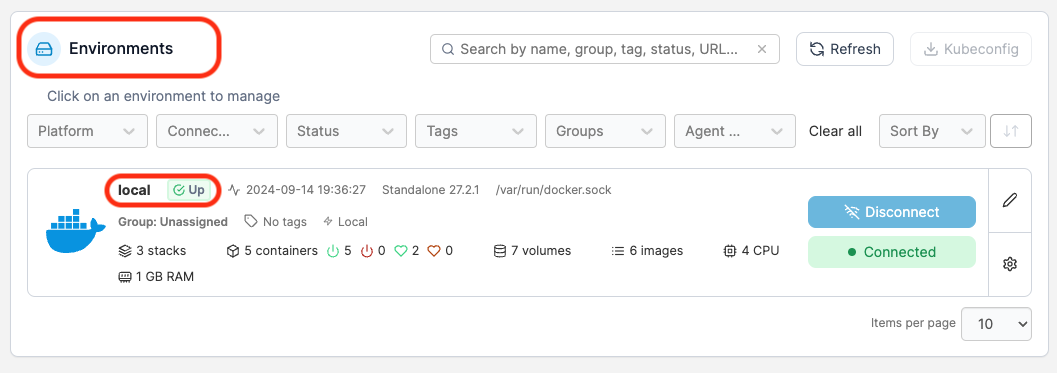
Ok so now that we have Portainer up and running, its running securely so now we are ready to setup SNIPE-IT. Here are the steps to add SNIPE via Portainer. The first step is logging into Portainer. Upon logging into Portainer you will click on “Local” under Environments. This is the default Environment.
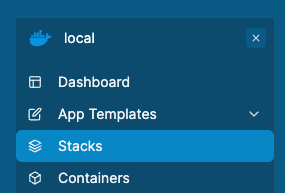
In the sidebar click on Stacks. This will take you into the stacks area of the default environment.
We have to next click on Add Stack to add the Snipe-IT stack.

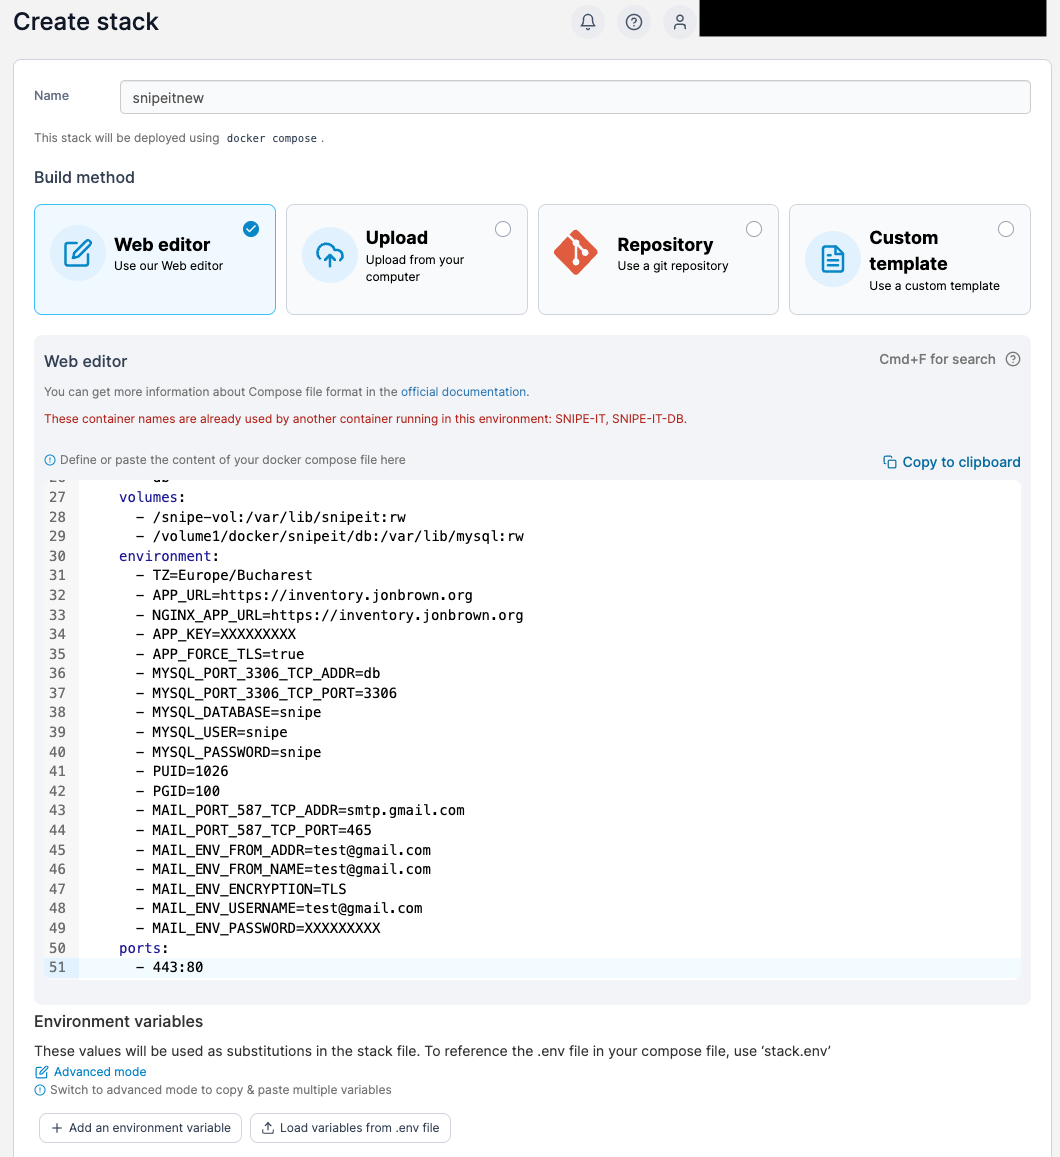
Once we click on “Add Stack” we need to give the stack a name. Note the name must not contain any spaces, numbers or uppercase letters.
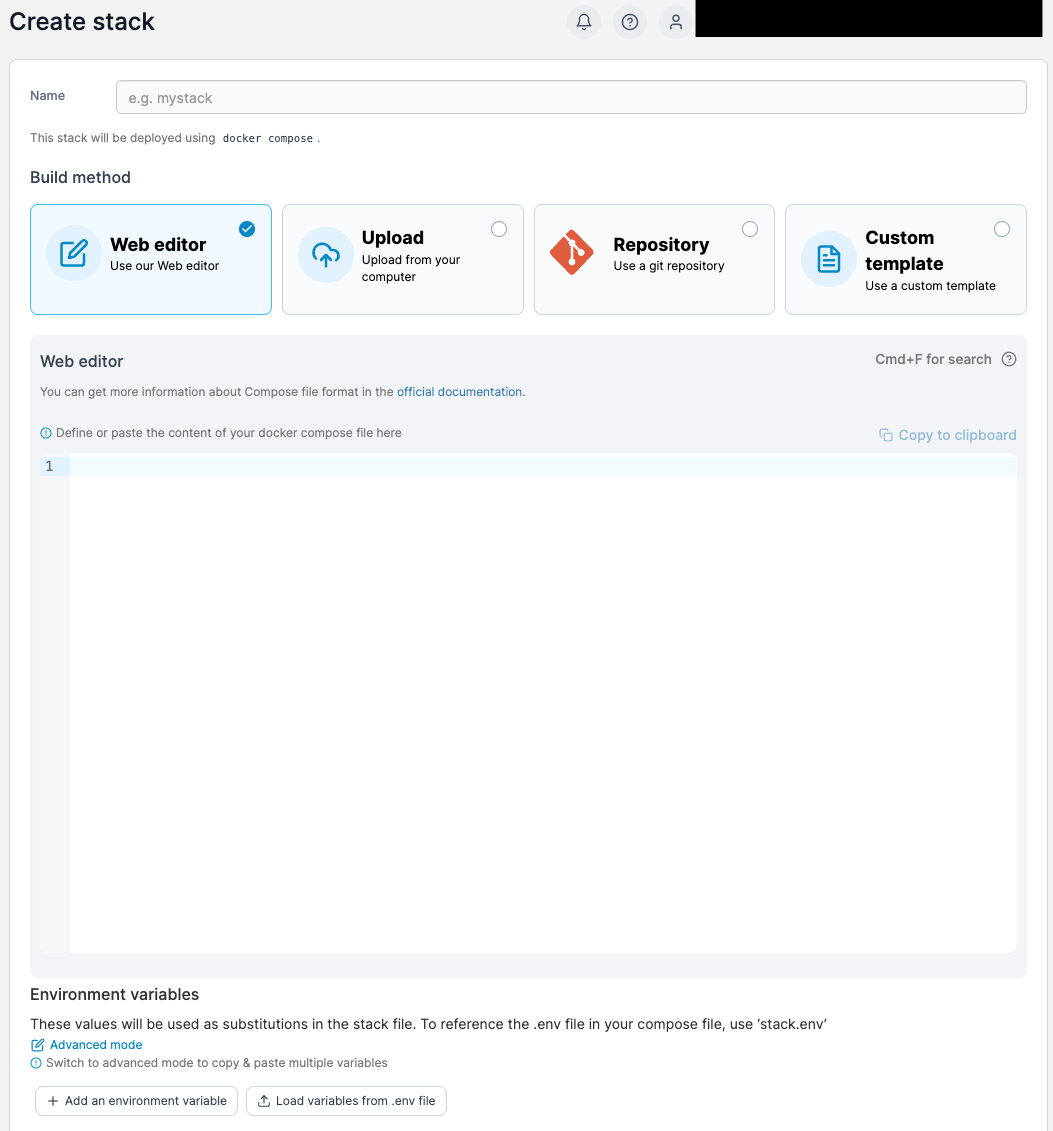
We will need to add the following items to the “Web Editor area”
version: "3.9"
services:
  db:
    image: mariadb:11.3-jammy
    container_name: SNIPE-IT-DB
    security_opt:
      - no-new-privileges:true
    hostname: db
    volumes:
      - /volume1/docker/snipeit/db:/var/lib/mysql:rw
    environment:
      - MYSQL_ROOT_PASSWORD=snipe
      - MYSQL_USER=snipe
      - MYSQL_PASSWORD=snipe
      - MYSQL_DATABASE=snipe
      - TZ=Europe/Bucharest
    restart: on-failure:5

  snipeit:
    image: lscr.io/linuxserver/snipe-it:latest
    container_name: SNIPE-IT
    restart: on-failure:5
    healthcheck:
      test: curl -f http://localhost:80/ || exit 1
    depends_on:
      - db
    volumes:
      - /snipe-vol:/var/lib/snipeit:rw
      - /volume1/docker/snipeit/db:/var/lib/mysql:rw
    environment:
      - TZ=Europe/Bucharest
      - APP_URL=https://inventory.jonbrown.org
      - NGINX_APP_URL=https://inventory.jonbrown.org
      - APP_KEY=XXXXXXXXX
      - APP_FORCE_TLS=true
      - MYSQL_PORT_3306_TCP_ADDR=db
      - MYSQL_PORT_3306_TCP_PORT=3306
      - MYSQL_DATABASE=snipe
      - MYSQL_USER=snipe
      - MYSQL_PASSWORD=snipe
      - PUID=1026
      - PGID=100
      - MAIL_PORT_587_TCP_ADDR=smtp.gmail.com
      - MAIL_PORT_587_TCP_PORT=465
      - MAIL_ENV_FROM_ADDR=test@gmail.com
      - MAIL_ENV_FROM_NAME=test@gmail.com
      - MAIL_ENV_ENCRYPTION=TLS
      - MAIL_ENV_USERNAME=test@gmail.com
      - MAIL_ENV_PASSWORD=XXXXXXXXX
    ports:
      - 443:80
Please note that you must change the following sections to suite your needs.
Email Customization
      - MAIL_PORT_587_TCP_ADDR=smtp.gmail.com
      - MAIL_PORT_587_TCP_PORT=465
      - MAIL_ENV_FROM_ADDR=test@gmail.com
      - MAIL_ENV_FROM_NAME=test@gmail.com
      - MAIL_ENV_ENCRYPTION=TLS
      - MAIL_ENV_USERNAME=test@gmail.com
      - MAIL_ENV_PASSWORD=XXXXXXXXX
    ports:
      - 443:80
Time Zone, URL, and App_Key Customization
    environment:
      - TZ=Europe/Bucharest
      - APP_URL=https://inventory.jonbrown.org
      - NGINX_APP_URL=https://inventory.jonbrown.org
      - APP_KEY=XXXXXXXXX
Note To get an App_Key you can use the default key as noted here.
Please re-run this container with an environment variable $APP_KEY
An example APP_KEY you could use is:
base64:D5oGA+zhFSVA3VwuoZoQ21RAcwBtJv/RGiqOcZ7BUvI=
MYSQL table and password customization
version: "3.9"
services:
  db:
    image: mariadb:11.3-jammy
    container_name: SNIPE-IT-DB
    security_opt:
      - no-new-privileges:true
    hostname: db
    volumes:
      - /volume1/docker/snipeit/db:/var/lib/mysql:rw
    environment:
      - MYSQL_ROOT_PASSWORD=snipe
      - MYSQL_USER=snipe
      - MYSQL_PASSWORD=snipe
      - MYSQL_DATABASE=snipe
      - TZ=Europe/Bucharest
    restart: on-failure:5
I highly recommend creating a custom name, and database password that differs from the default. Once you have customized that information paste it into the main “Web Editor” area.
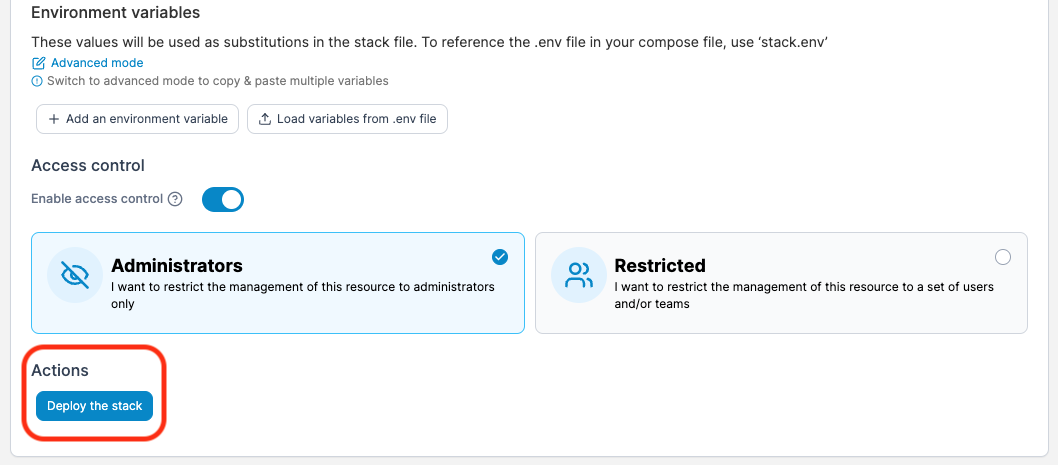
Once done click on “Deploy the stack”.
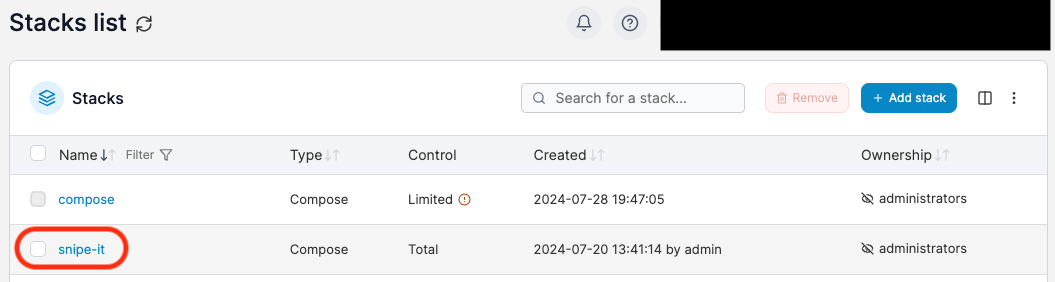
Once the stack deploys you will see a new stack with your name in the stack list.
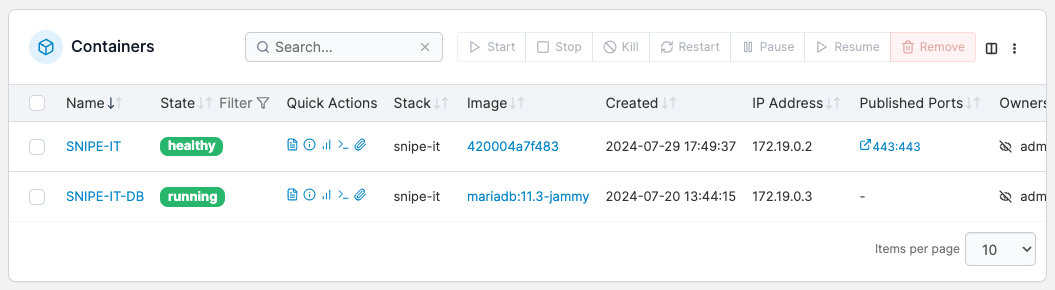
Click into the stack and you will see you have your database container and your actual SNIPE-IT container running.
Note If you do not see your containers running, click on the checkmark next to the not running container and click “Start” to start the container.
Configuring SNIPE-IT
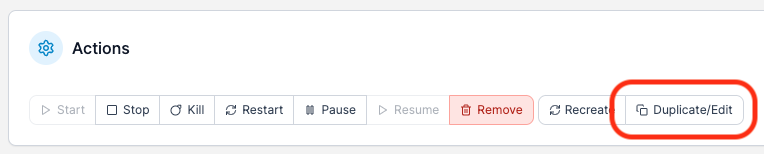
Now that you have SNIPE running you need to set some configurations to ensure that its running correctly. From the “Stacks” area click into your SNIPE-IT container. Here you will see the container status and health. Lets click on the “Duplicate/Edit” button in the top of the “Actions” area.
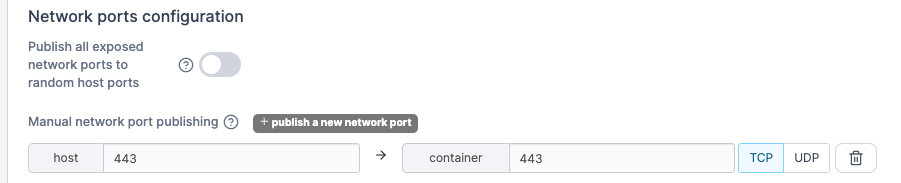
We need to be sure that we have our Network Ports setup as follows. We should have host 443 pointing to container port 443. These ports typically need to match. Mismatched ports here will not allow HTTPS traffic through to your SNIPE-IT environment.
Next in the Advanced Container Settings area, click on ENV.

We need to be sure that we have “APP_FORCE_TLS” set to ture and we need to have “ALLOW_DATA_PURGE” set to true as well. The first item forces connections over HTTPS. The second forces or allows deleted items in SNIPE to be purged.


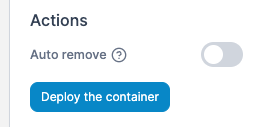
Once done press the “Deploy the Container” button. This will save your changes, deploy the container and restart it.
Ok so now you have SNIPE-IT running but you can’t yet login to SNIPE-IT because when you do, it will not load over SSL because you have not yet installed the SSL certificate. So how do you do that? Well you must do that over an SSH connection to your Diet-Pi. Lets make that connection now.
ssh root@<ip of dietpi server> -p<port of dietpi server>Remember we set the IP address and the port of the Diet-Pi server in a previous tutorial. Once you are logged into the Diet-Pi you will need to copy the SSL information into the running SNIPE-IT container. At this stage we must capture the SSL key and full chain information that we generated in the previous tutorial.
This is important because we need to paste this information into the default certificate files created when SNIPE-IT was instantiated.
Once you have your fullchain certificate contents and your certificate key file contents you can proceed. You can do this by running the following commands
cd /etc/letsencrypt/live/<your domain>nano fullchain.pemThen copy the contents to a file outside of your SSH connection. Then run
nano privkey.pemThen copy the contents to a file outside of your SSH connection. The fullchain.pem contnets will be pasted into the cert.crt file. The privkey.pem contents will be pasted into the cert.key file in the next steps.
Next, while SSH’d into the Diet-PI server, you must run.
docker exec -it SNIPE-IT /bin/bashMake sure to replace “SNIPE-IT” with whatever you ended up naming your container when you edited the values earlier.
snipeit:
    image: lscr.io/linuxserver/snipe-it:latest
    container_name: SNIPE-IT <------ HERE
This will connect you into the container. Now that you are connected into the container run these commands.
cd /config/keys/Now that you are in the Keys location you will see the 2 certificate files the cert.crt and cert.key you can see these by running
lsin the directory. This will list these 2 files. We need to recreate these files so first lets rename these files by running these commands.
mv cert.crt cert-old.crt
mv cert.key cert-old.key
These commands will rename the files. Next we need to copy the contents of the fullchain certificate file that we created in the previous tutorial. That file would typically be stored in
/etc/letsencrypt/live/<your domain>On the core server. If you have not copied the contents of the fullchain and key files from these locations you need to do that as we previously stated.
Now we will run
nano cert.crtWe will paste in the values of the fullchain.pem file and save. To save the document press the CNTRL+Z key on your keyboard and press enter.
Now we will run
nano cert.keyWe will paste in the values of the privkey.pem file and save. To save the document press the CNTRL+Z key on your keyboard and press enter. Now, what have we just done? We have now installed the SSL certificate needed in order to load the SNIPE-IT setup!
SNIPE-IT Setup
Now that we have SNIPE-IT running we need to go to the URL and go through the setup wizard. For me my APP_URL was set to https://inventory.jonbrown.org assuming we have our DNS forwarded or proxied correctly to our Diet-PI container we should be able to load this URL. This URL will redirect us to https://inventory.jonbrown.org/setup or whatever your domain is and you will hopefully see a SNIPE-IT Pre-Flight screen. If you have configured everything correctly it will be running over HTTPS, with your updated certificate and all items will be green.
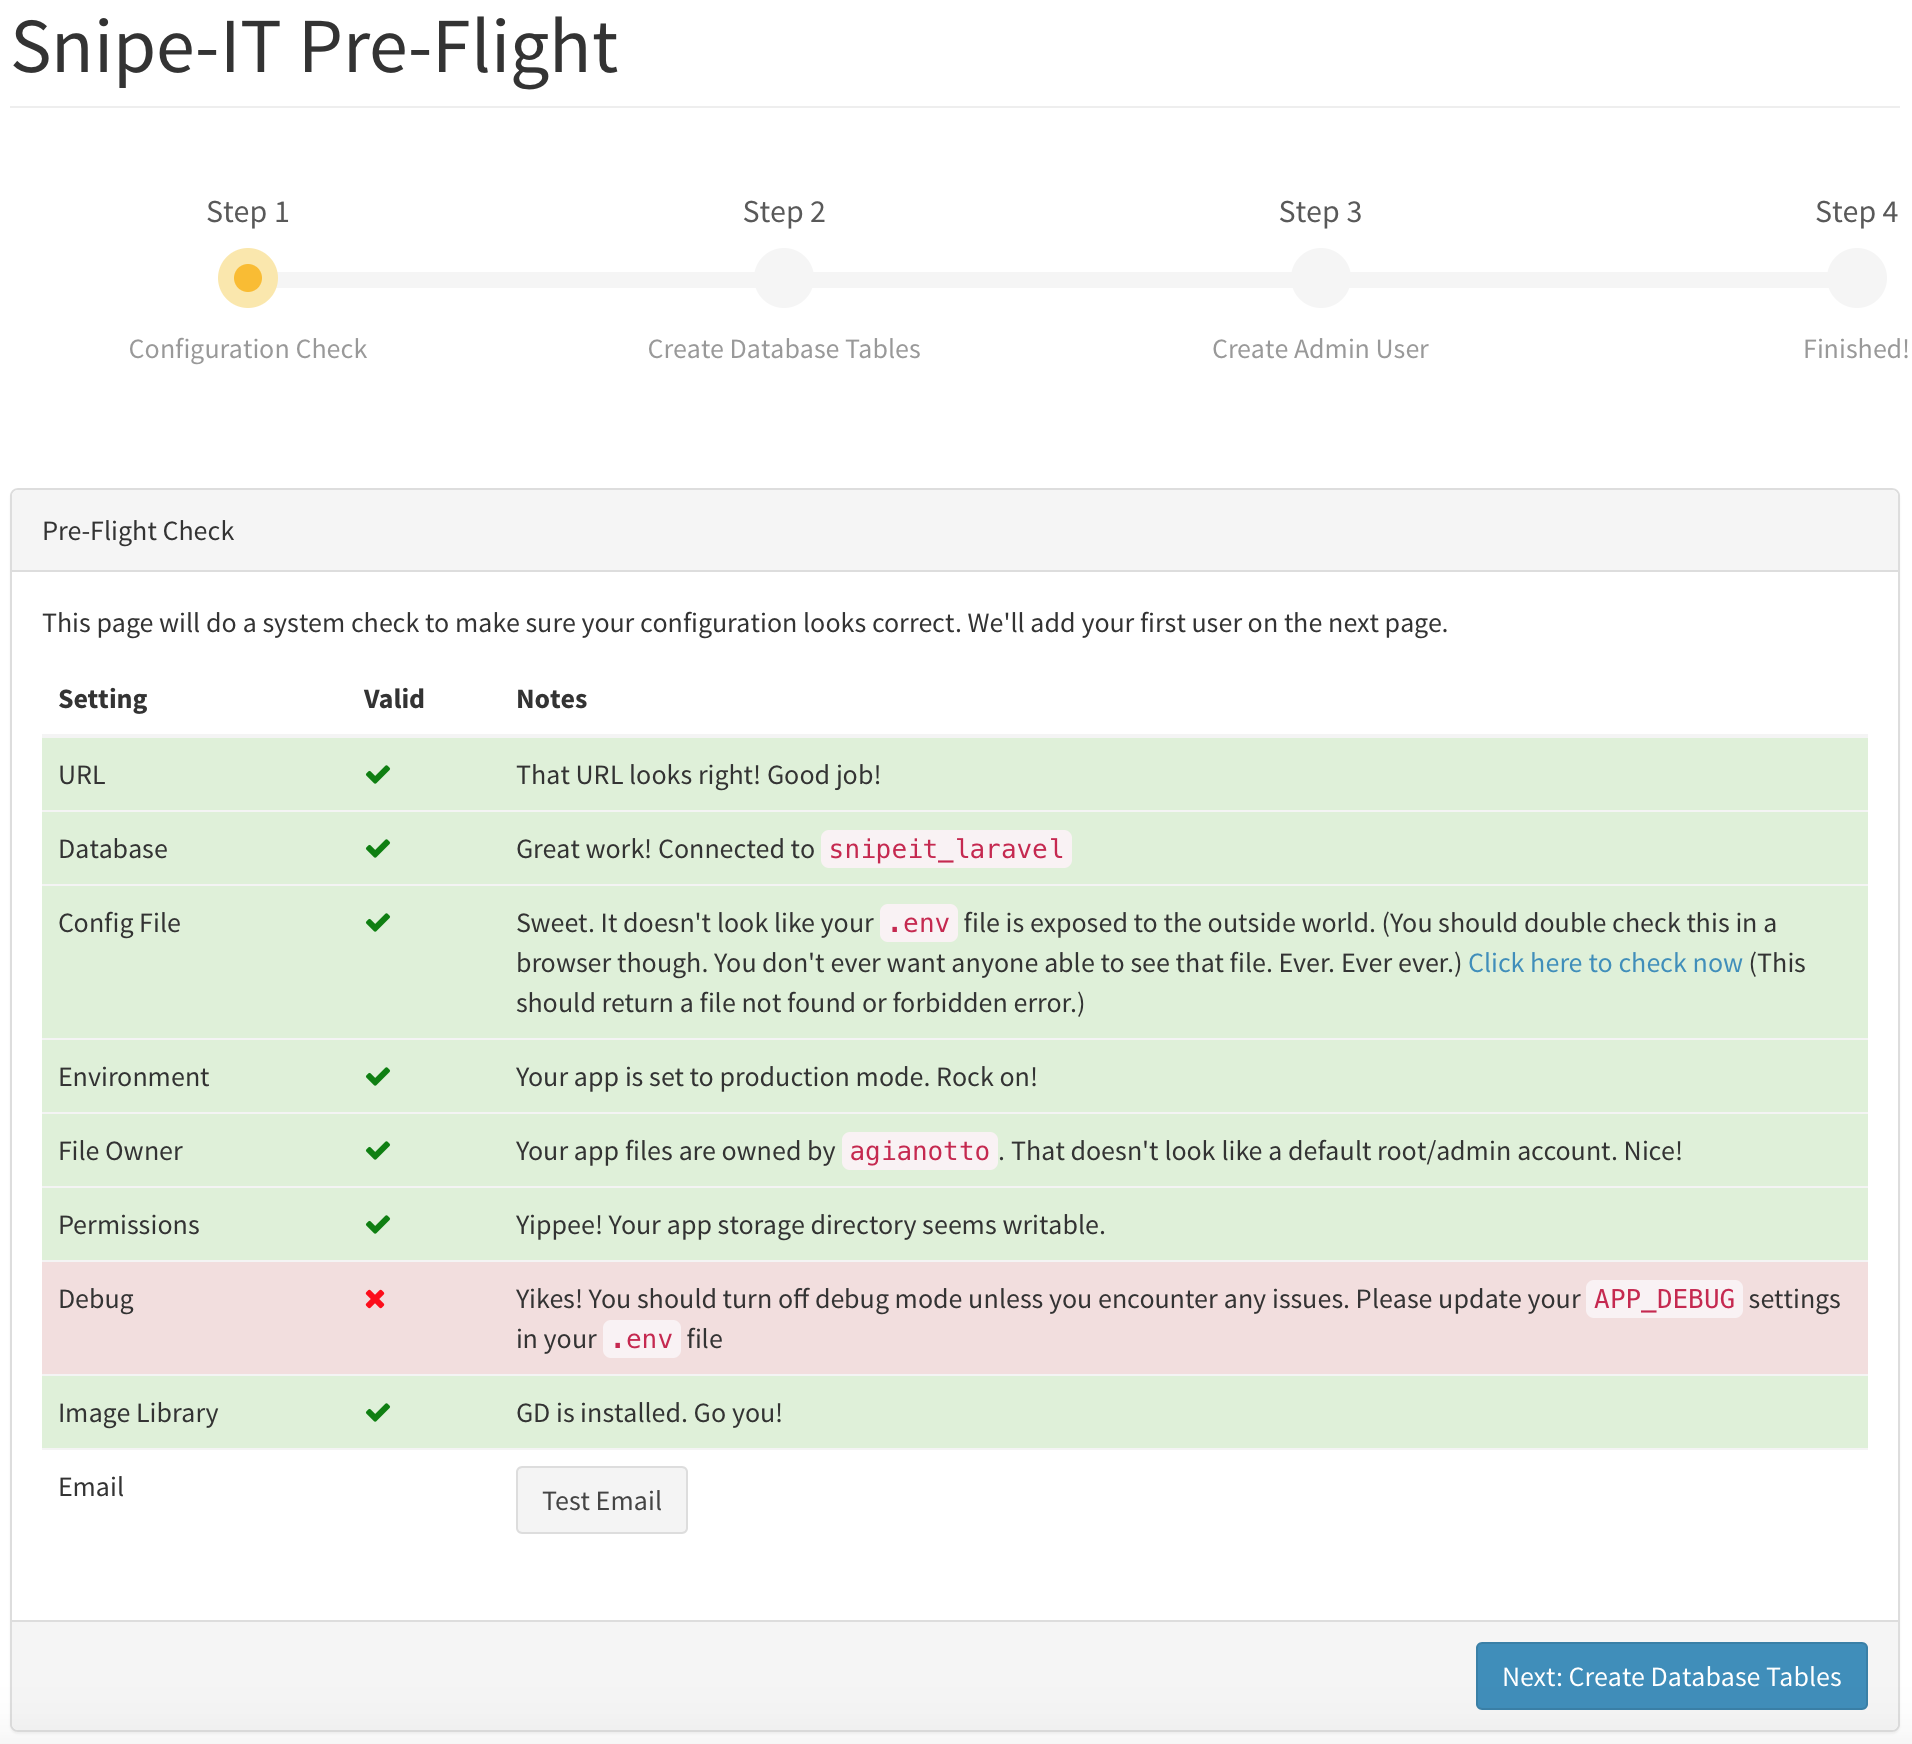
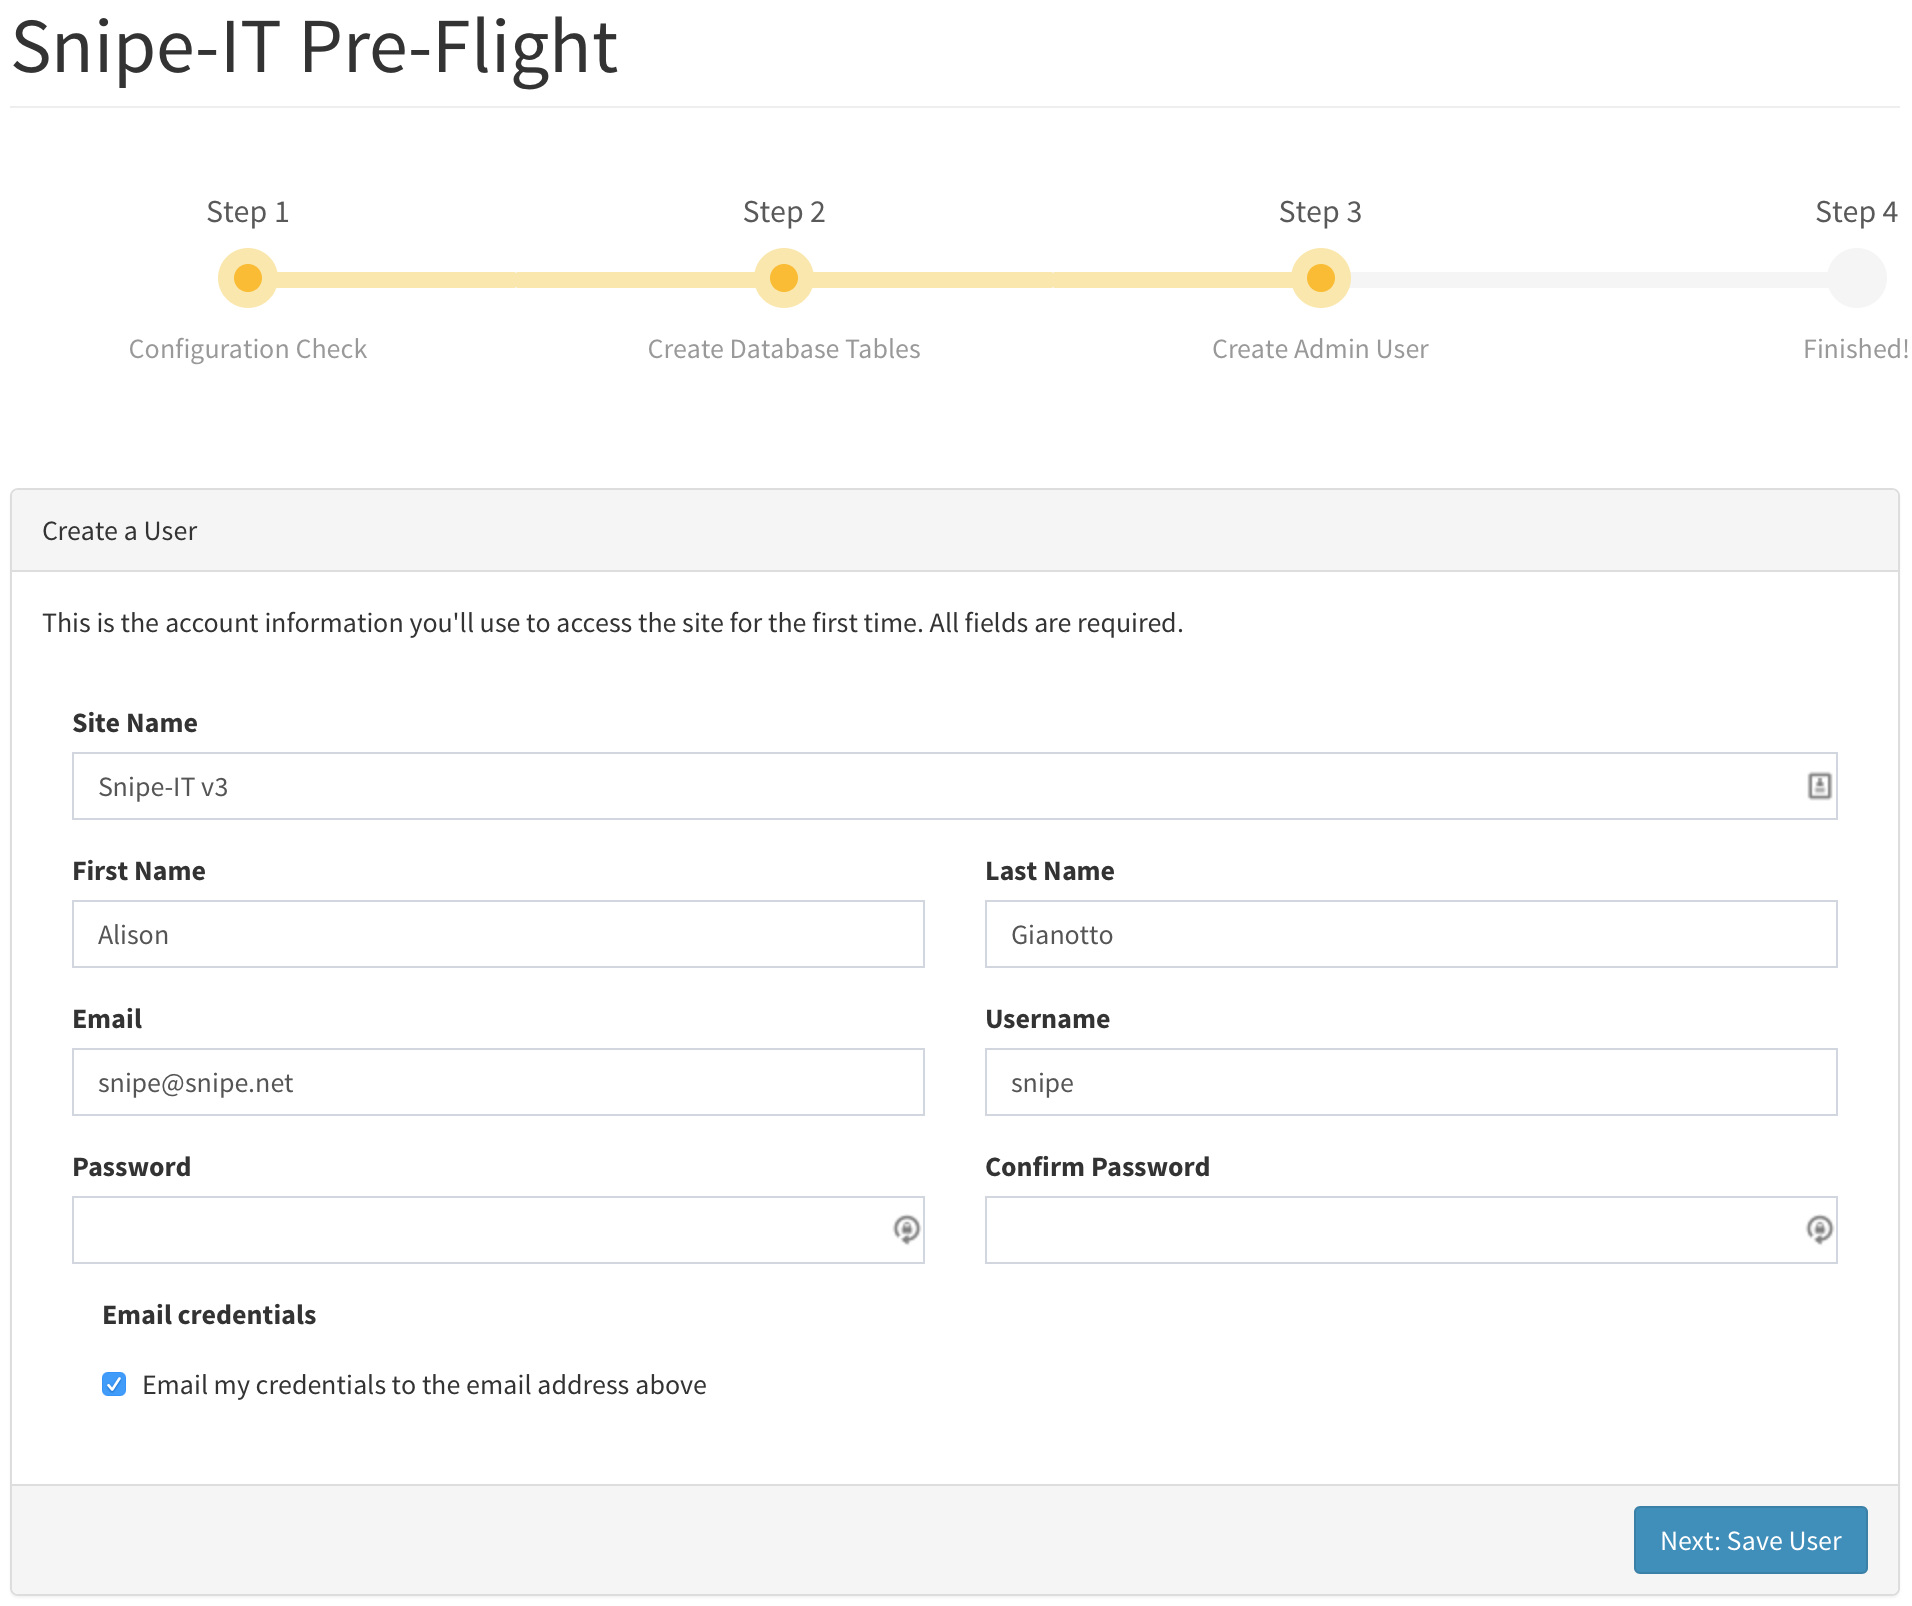
Press the “Next: Create Database Table” button to proceed. Simply follow the on-screen instructions. You’ll be prompted to create your first user, with an option to email yourself the credentials you used to create your user.
If you’ve entered all of the fields correctly, you’ll see a final message informing you that your Snipe-IT setup is complete and prompting you to login.
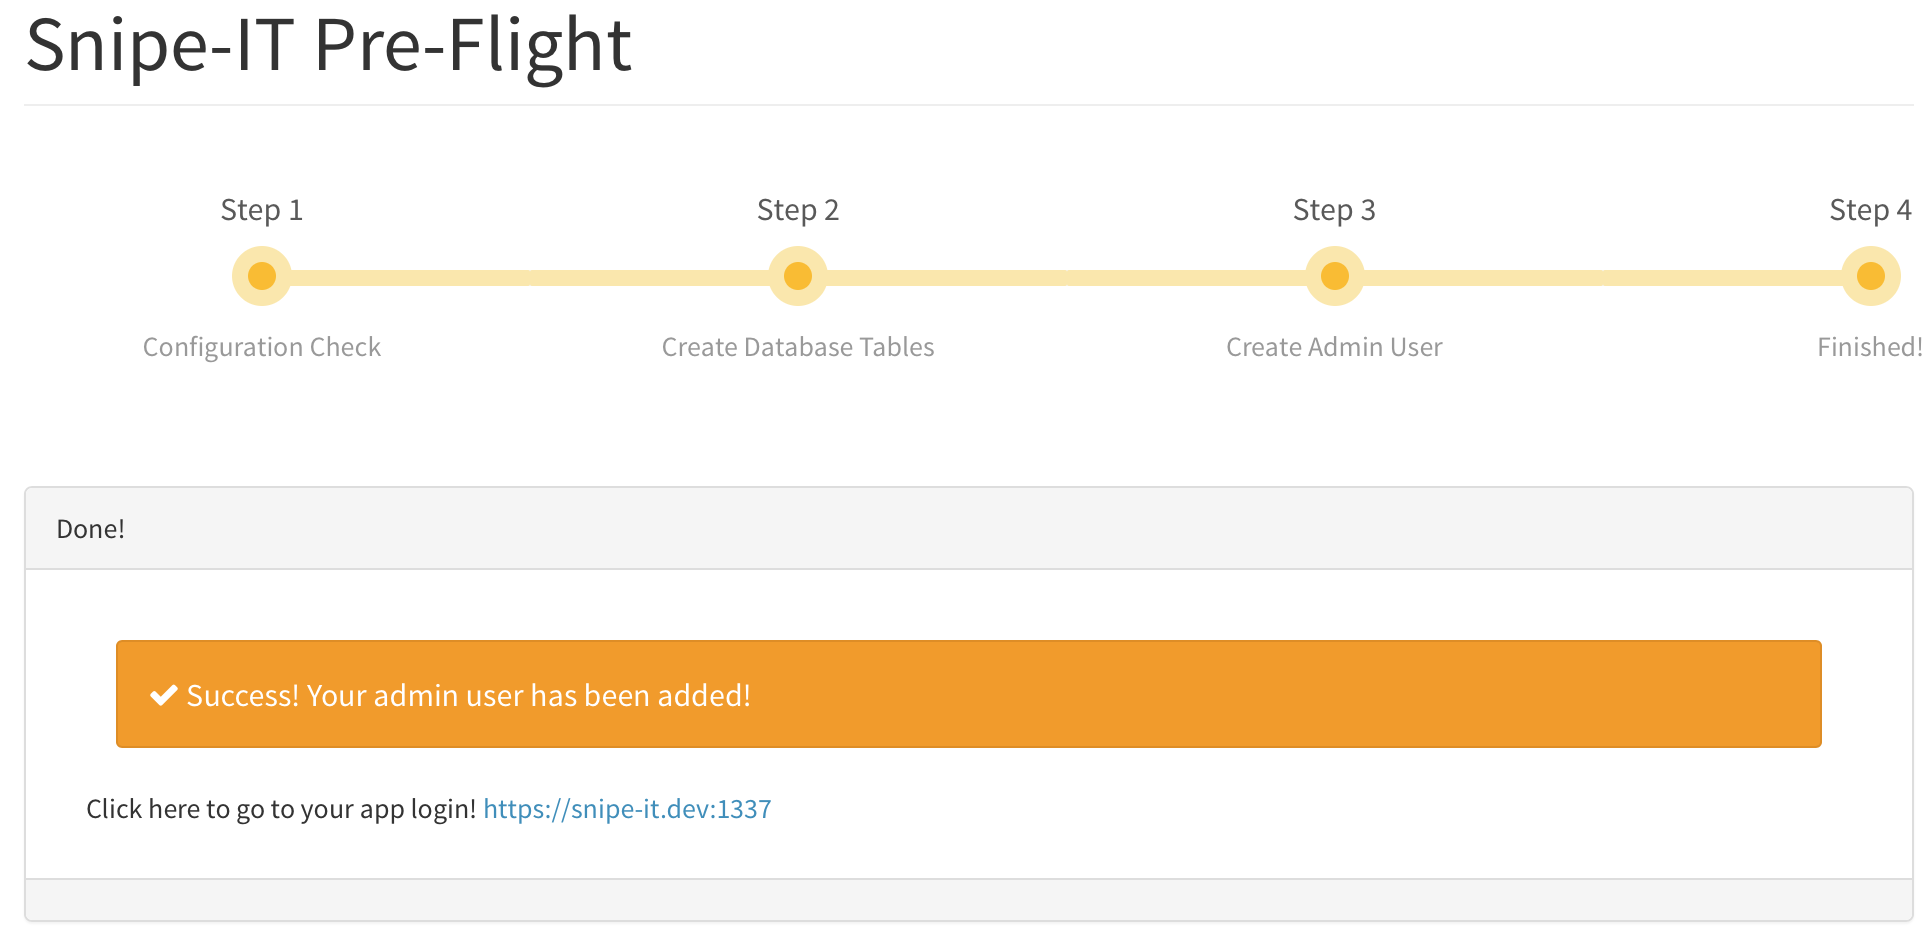
Once you have created the first user you will be directed to login to your environment. For me that was https://inventory.jonbrown.org/ and I was able to login with the user that I created!
Securing SNIPE-IT (With SSO) From Documentation
To ensure that your site does not become the target of bots and hackers, lets secure our SNIPE-IT Environment. For me since I use Azure AD for my directory, I am adding in a connection to Azure SSO. If you happen to use Okta or some other directory provider you can use the instructions outlined in the SNIPE-Docs for how to configure SAML for a variety of providers.
Add an “Azure AD SAML Toolkit” app to your Enterprise apps in Azure AD, and edit the “Single Sign On” page, choosing SAML as the method. Edit the first section with the values below, substituting your own domains.
| Key | Value |
|---|---|
Entity-ID | https://assets.example.com |
Assertion Consumer Service (ACS) URL | https://assets.example.com/saml/acs |
Single Logout Service (SLS) URL | https://assets.example.com/saml/sls |
Sign on URL | https://assets.example.com |
Azure will automatically configure a certificate for you to sign the SAML responses. This is included in the metadata file which you download from Azure and upload into the Snipe-IT SAML settings.
Download this metadata once you have filled in all of the above information, by clicking the “Federation Metadata XML” download link. Upload it into Snipe-IT.
Finally, add the users that are allowed to sign in via SAML to the Azure AD app under Users and Groups. If you miss this step, users will receive an error if they try and sign in via SAML.
Alternatively, if you would like to manage user assignment in Azure AD in a different way, refer to this documentation from Microsoft.
BUG #1: SSL Configuration
For anyone having this issue, if you are using local certificated you need to add your bundleCA to the php configuration, otherwise it will check only the CAs of the container os and not the ones installed on the host machine, I made aware of my custom CA by copying it to the /config/keys place.
BUG #2: Logo does not show up on PDF after Acceptance
I have confirmed that editing the /app/www/config/dompdf.php and adding these paths to the CHROOT line fixes the issue
FROM
",/var/lib/snipeit/data/uploads,/var/lib/snipeit/data/private_uploads",to
",/var/lib/snipeit/data/uploads,/var/lib/snipeit/data/private_uploads,/app/www/storage/private_uploads/,/config/uploads",This version of SNIPE-IT uses these 2 paths.
/app/www/storage/private_uploads/
/config/uploads
Which needs to be added to the dompdf.php file.
Sources
- https://snipe-it.readme.io/docs/pre-flight-setup
- https://snipe-it.readme.io/docs/saml
- https://docs.microsoft.com/en-us/azure/active-directory/manage-apps/ways-users-get-assigned-to-applications
- https://github.com/linuxserver/docker-snipe-it/issues/73
- https://github.com/linuxserver/docker-snipe-it/issues/75
AI Usage Transparency Report
AI Era · Written during widespread use of AI tools
AI Signal Composition
Score: 0.48 · Moderate AI Influence
Summary
This is a summary of the content.
Related Posts
Securing Raspberry Pi with Reverse Proxy and or Cloudflare Proxy Tunnel
Here's the expanded paragraph: Ok so I've done a lot of research on reverse proxies and they are great at protecting your internal assets by hiding them from direct access, but there are some inherent security flaws that you have to live with if you want perfect security. Lets face it, there is no such thing as perfect security, but we can get pretty close. In fact, the more secure something is, the more complex and vulnerable it becomes in other ways.
Installing Docker & Portainer on DietPi for Snipe-IT
At this stage, we are assuming that you are still connected to the Raspberry Pi via a monitor. If you're already SSH'd into the machine, then you're one step ahead. In either case, please ensure that you have a stable connection and can access the terminal or command line interface without any issues.
Setting up SNIPE-IT with DietPi on a Raspberry Pi
The first step in setting up SNIPE-IT is to set up the platform that it will run on. Luckily, the best platform and most economical option is a Raspberry Pi. We are using a Raspberry Pi 3 in this case. Before we get too far, we need to pick the operating system that the Raspberry Pi will use. This decision will determine how easily we can install and manage SNIPE-IT's dependencies and requirements.
Discovering Mole: A Command Line Utility for Mac Cleaning
Caches pile up, apps leave behind junk, and disk space slowly disappears. While there are plenty of GUI tools out there, most of them either lack transparency or feel overly bloated.
Introducing Pique - The Game-Changing Quick Look Plugin for Mac Admins
As a Mac admin, I'm always on the lookout for tools that make my life easier and more efficient. Recently, I stumbled upon Pique - a brilliant Quick Look plugin created by Henry Stamerjohann that allows you to view file contents in a syntax highlighted way.
ABM Warranty 0.4.1 Walkthrough: Wrap-Up and Beta
In this final ABM Warranty 0.4.1 walkthrough, I’m wrapping up the last features I had not covered directly in the earlier videos and then focusing on support, community, and the beta program. I also want to show where the support resources live inside the app so you know where to go if you need help, documentation, or a way to send useful feedback. Additionally, I'll be covering some of the key features that were updated since the previous version, including any bug fixes or improvements made to existing functionality.
ABM Warranty 0.4.1 Walkthrough: Managed Preferences
In this part of the ABM Warranty 0.4.1 walkthrough series, I'm focusing on managed preferences and the credential packaging workflow. In the last video, I covered multiple credentials inside the app itself. In this one, I'm showing how to package those credentials so they can be deployed securely through MDM. This process is a crucial step in ensuring that your credentials are properly configured and protected within your organization's mobile device management system.
Low Profile Walkthrough and Review
Today I’m walking through Low Profile, a utility from Nindi Gill that I use when I want to inspect profiles already installed on a Mac and figure out whether those profiles contain issues I need to clean up. The value is that Low Profile gives me a straightforward way to inspect profiles installed on any Mac. This simplicity makes it easy for me to identify and address potential problems, which is especially useful when working with multiple machines or troubleshooting complex profile configurations.
ABM Warranty 0.4.1 Walkthrough: Multiple Credentials
In this part of the ABM Warranty 0.4.1 walkthrough series, I’m focusing on multiple credentials. In the first video, I showed the basic setup and how to add a single credential. Now, I want to explore what happens when I remove a credential, what changes occur when I add more than one, and how the app behaves once there are multiple contexts in play. This will help clarify any potential issues or inconsistencies that may arise with multiple credentials.
