

Most of us treat Apple Configurator like a fire extinguisher: break glass, DFU, restore, move on. But it can do a lot more, and when you know the edges, you can turn a bricked morning into a ship-it afternoon. Below are ten things I regularly use (or wish I’d used sooner).
1) Retro-enroll Devices into Apple Business Manager (iOS/iPadOS)
If a Mac wasn’t purchased through your ABM-linked reseller, you can still claim it. Adding it via Configurator means you get Automated Device Enrollment (ADE) on next setup, assignment to your MDM, and a cleaner lifecycle. There is a provisional period for devices added this way, so treat it like a “claim, then immediately assign and restore” workflow.
Steps:
- On your admin Mac, install/launch Apple Configurator. Connect the target device with a USB-C cable.
- Put the target device into DFU mode, this article covers it nicely.
- In Configurator, select the DFU device: Right Click → Prepare → (CHECK the checkbox to) Add to Apple School/Business Manager.
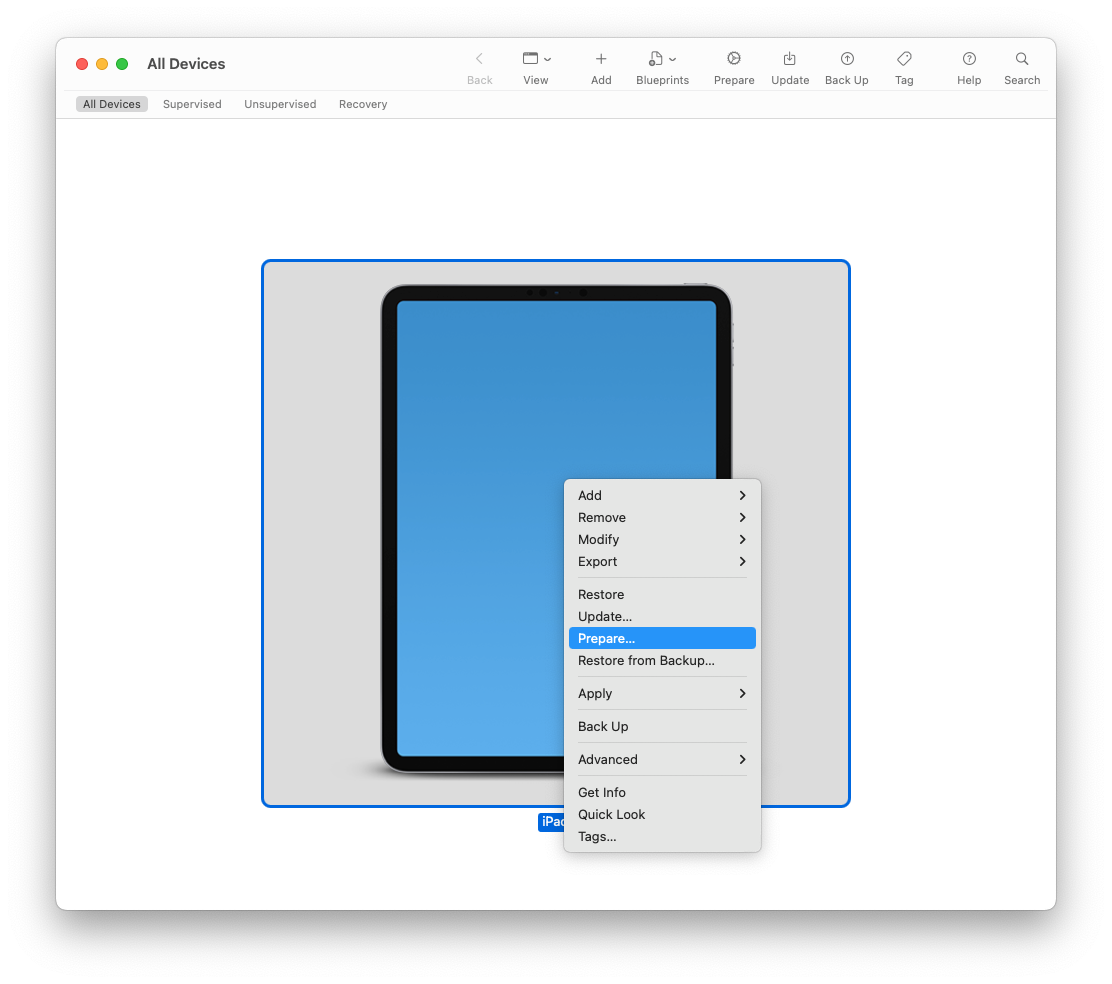

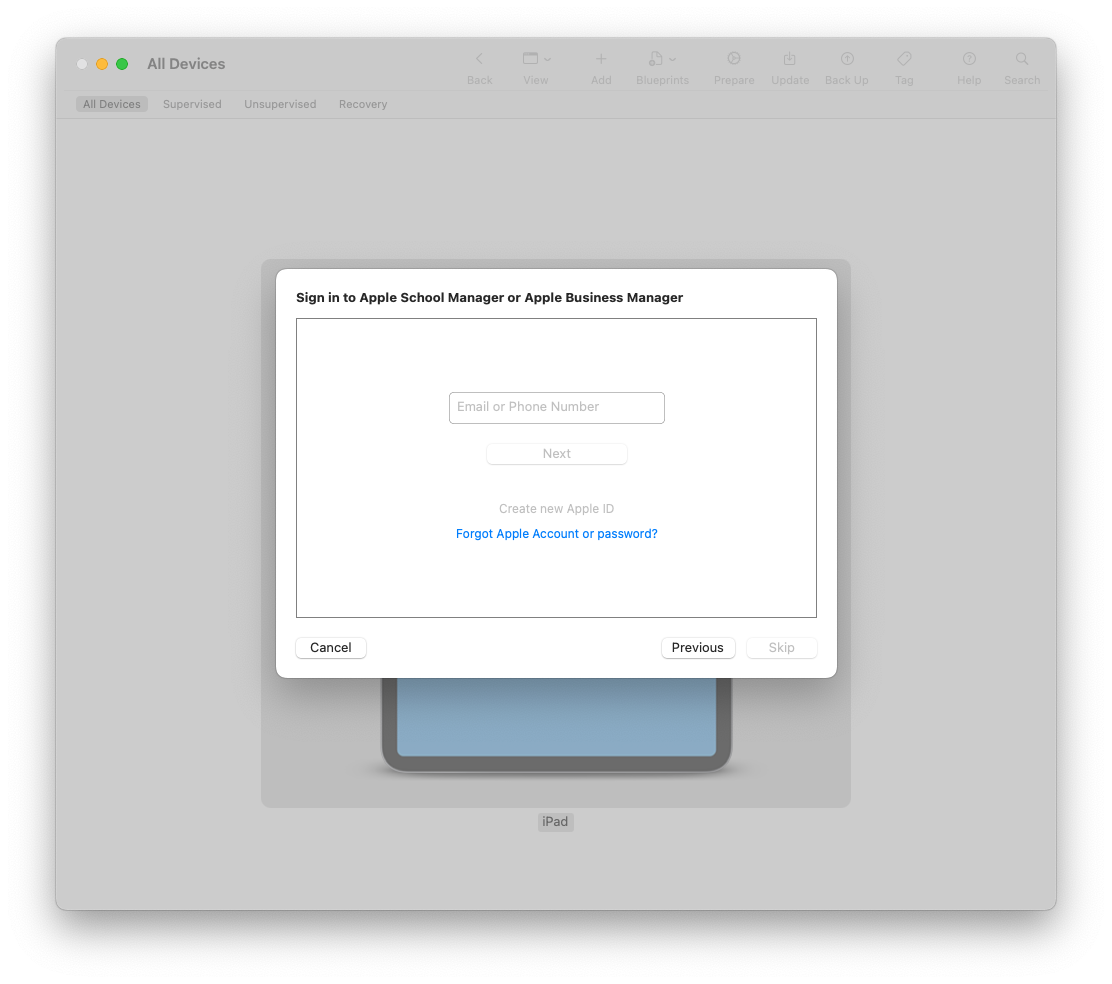
- Sign in with an ABM admin and confirm the add.
- In ABM → Devices, search the serial and assign it to your MDM server.
- Back in Configurator, Restore the device so the ADE screen appears on first boot.
- On first boot, verify Remote Management appears in Setup Assistant.
Pro tip: Assign a default enrollment profile in your MDM that skips the fluff screens and sets local admin to your standard.
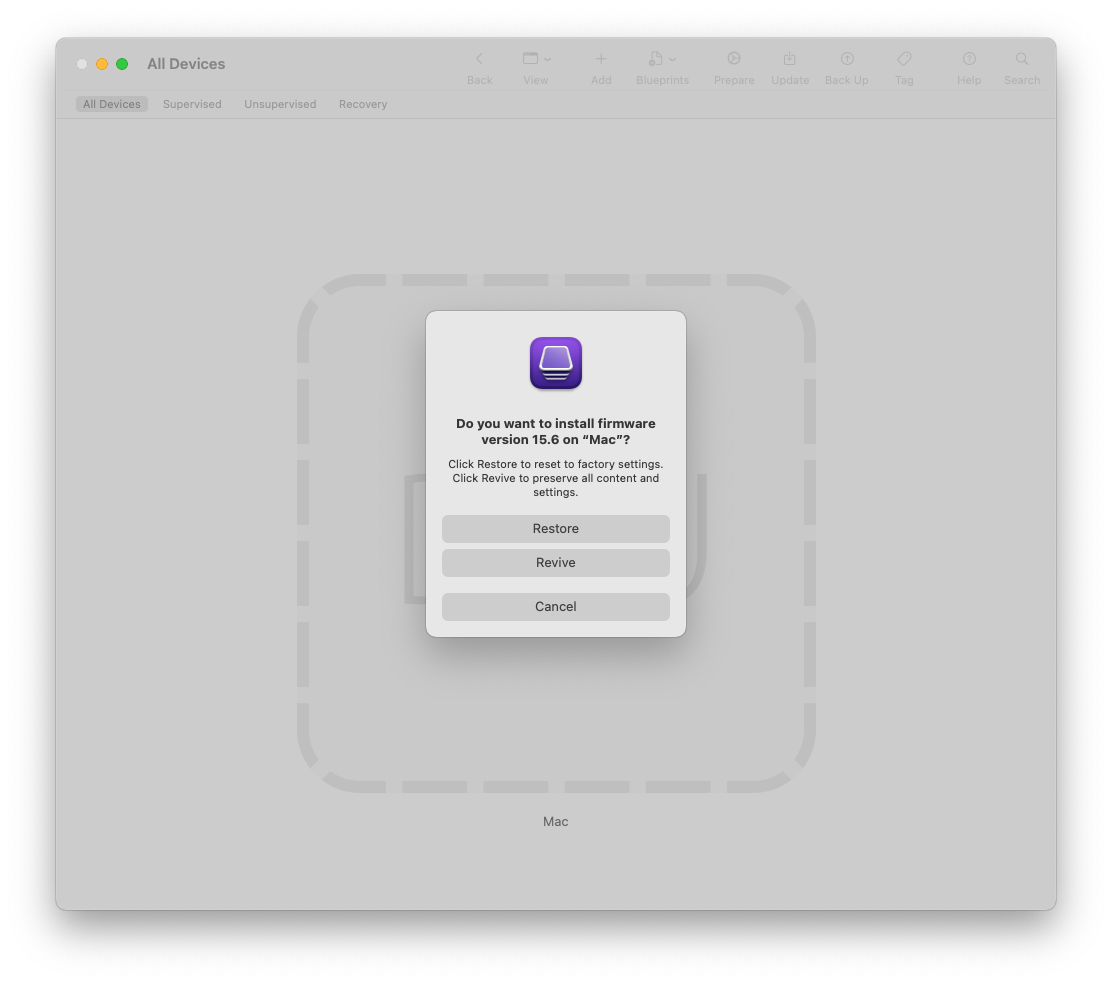
2) Revive vs. Restore: fix firmware/OS without nuking data
“Revive” reloads low-level firmware/bridgeOS and updates recovery, preserving user data. “Restore” wipes and lays down the full OS. When a machine refuses to boot after an update, always try Revive first—it’s often the fastest happy path.
Steps:
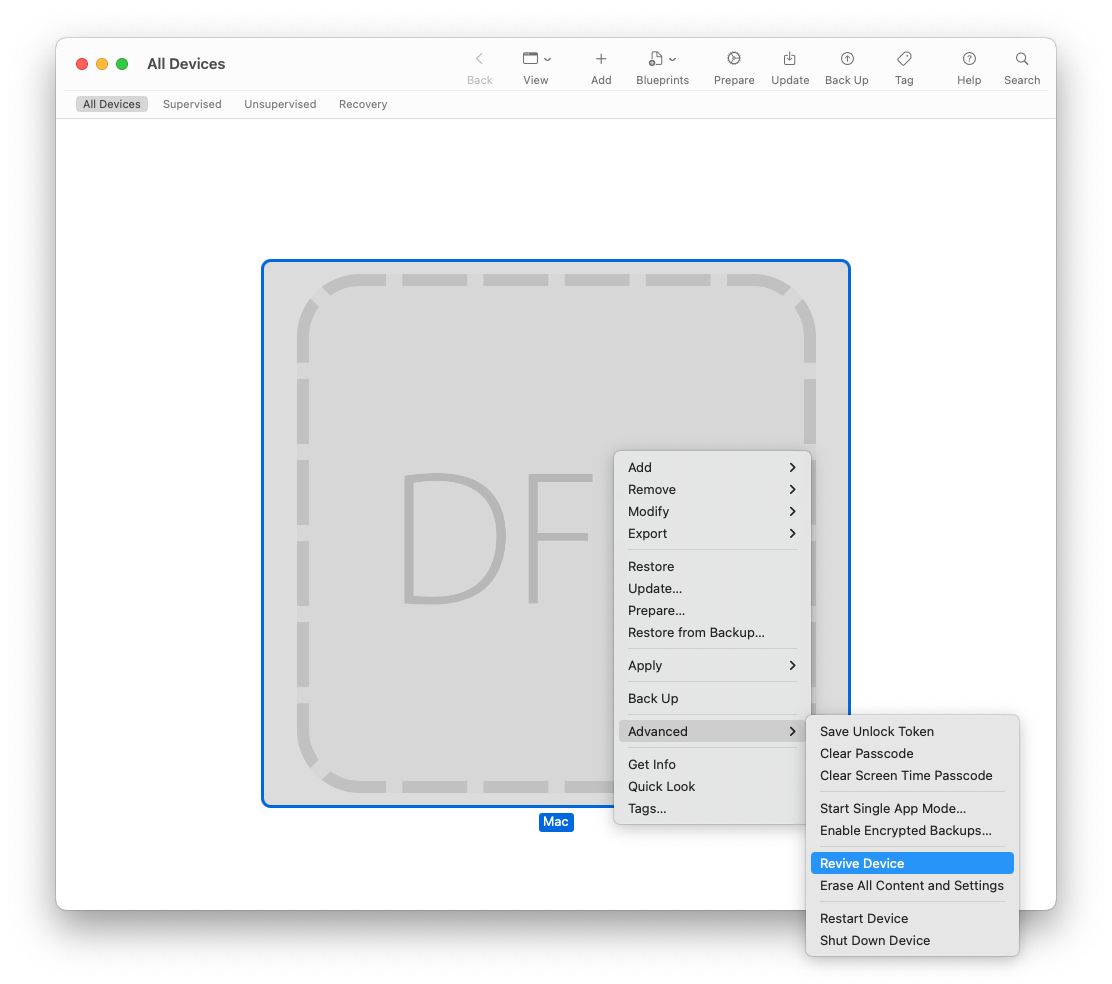
- Put the Mac into DFU and select it in Configurator.


- Right-click → Advanced → Revive. Let it complete; the device may reboot more than once.
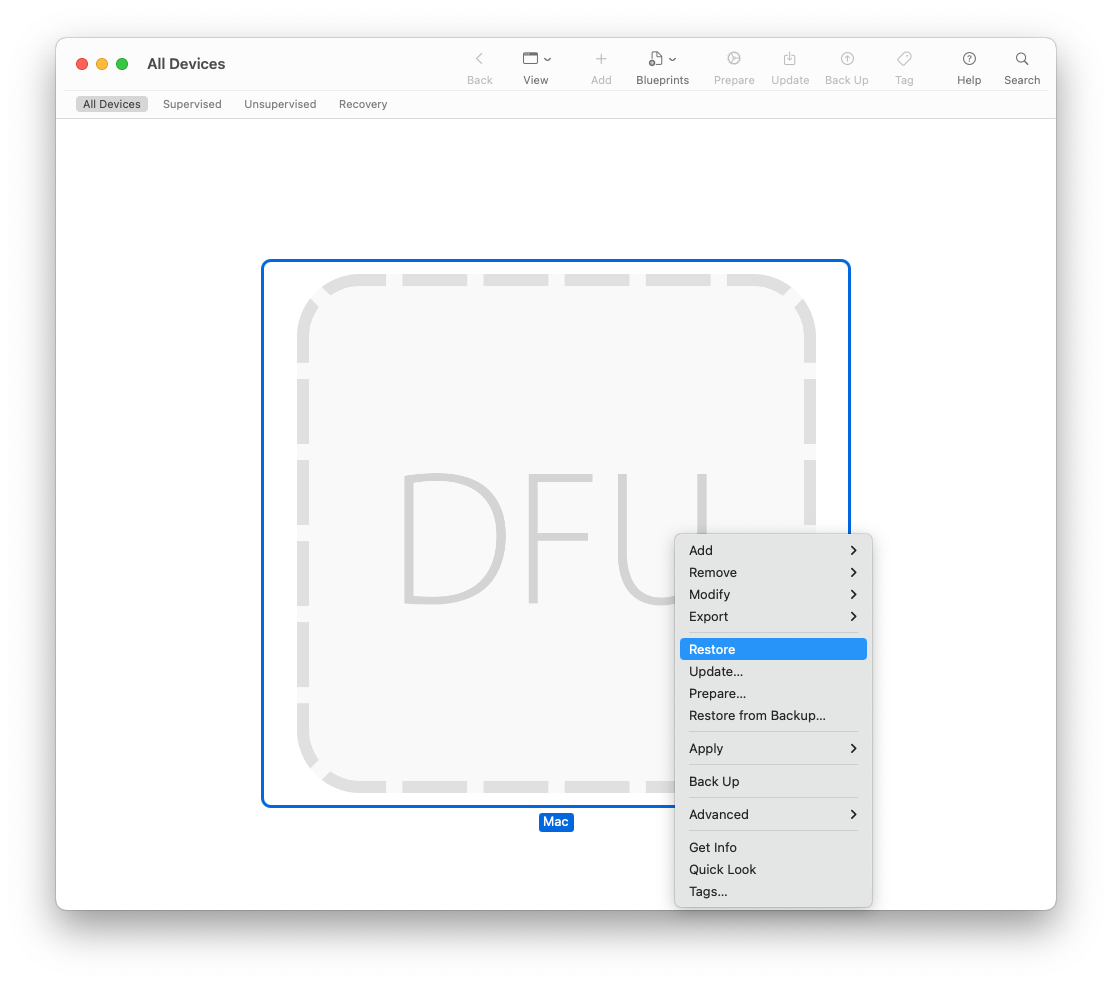
- If Revive fails, fall back to Right-click → Restore (yes, that’s a wipe).
Gotcha: Power and cable quality matter. Use a known-good USB-C cable (preferably Apple’s) directly connected—no hubs.
3) Pick the exact macOS build by dragging an IPSW
Sometimes “latest” isn’t good enough. As Mac Admins, we’ve all had moments where a vendor app isn’t yet certified for the newest macOS point release, or a fleet of machines needs to stay on a specific build for compatibility reasons. Apple Configurator gives you a quiet superpower here: the ability to restore a Mac to a specific IPSW build of macOS, not just whatever the recovery servers hand out. This is particularly useful when you need to test upgrades in a controlled way, pin lab machines to a known-good release, or roll back after a bad update.
Steps:
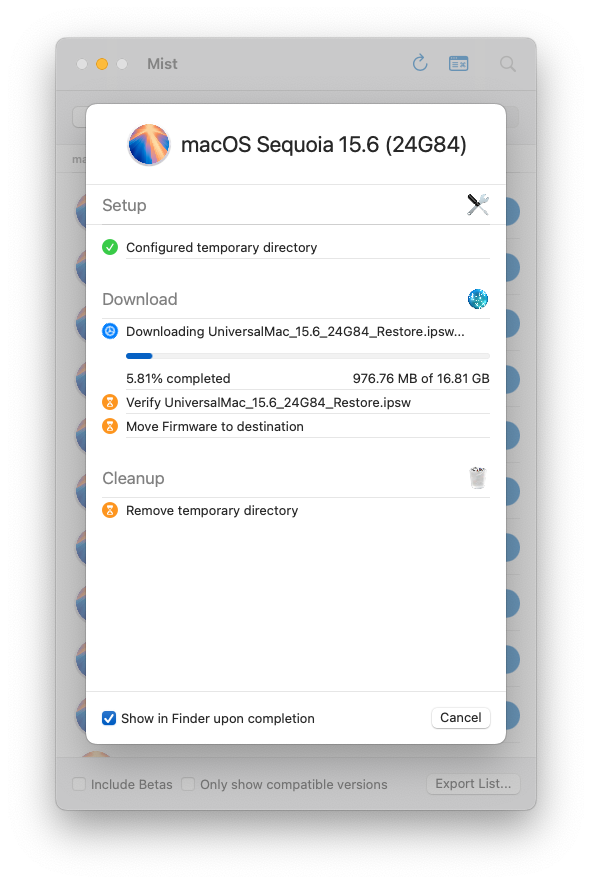
- Download the signed macOS IPSW for your model (Apple silicon/T2). I like to do this with the MIST - macOS Installer Super Tool.
- Once you download the MIST app add it to your Applications folder and launch it to download the correct firmware in IPSW format.
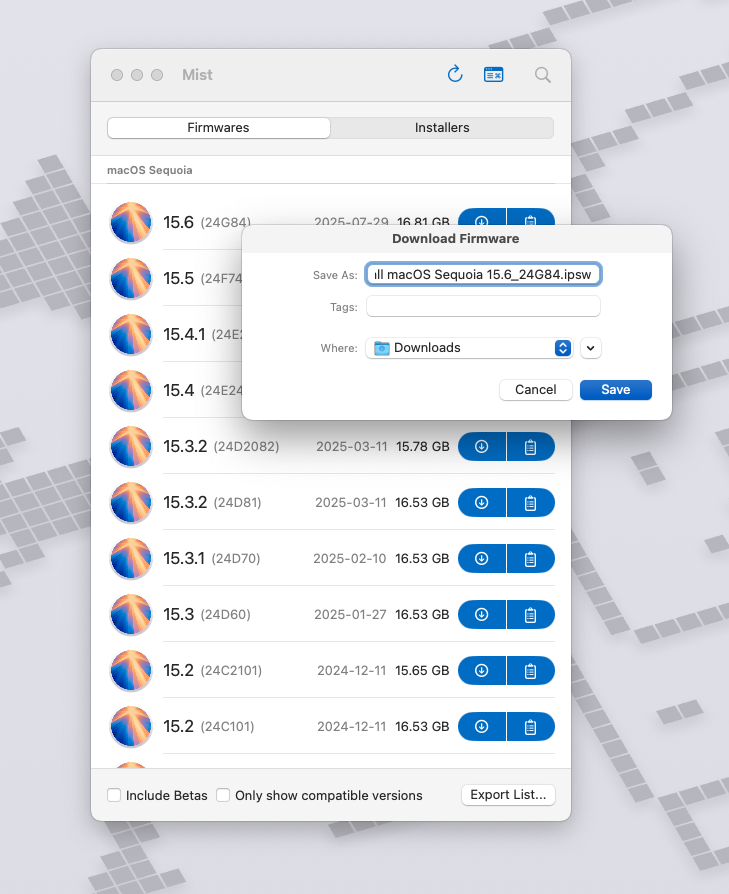
- Put the target Mac into DFU and open Configurator.
- Drag the IPSW from Finder onto the DFU device in Configurator.
- Confirm the restore to that build and wait.
Note: You can keep a small library of IPSWs per model. Pair this with Content Caching (next tip) and restores get fast.
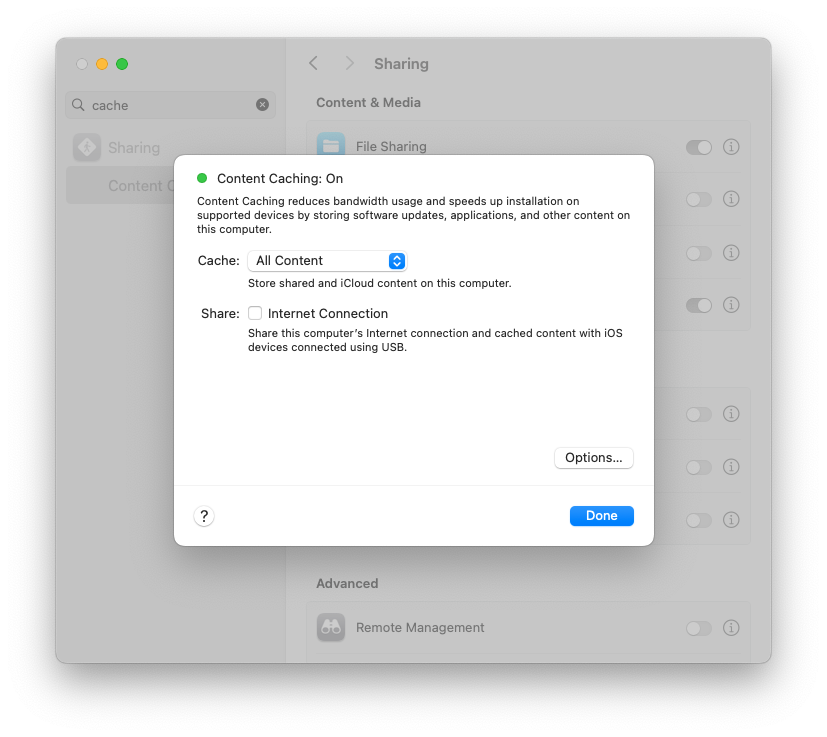
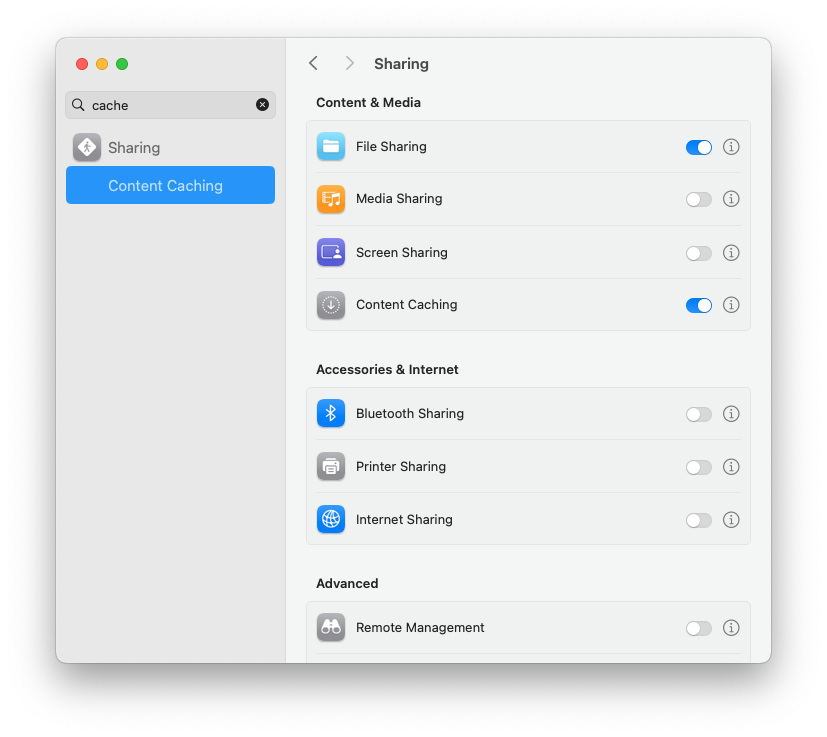
4) Turbo-charge restores with Content Caching + offline IPSW
If you’ve ever had to bring a lab or a fleet of machines back online, you know the pain: restores crawl when every Mac is independently trying to pull down multi-gigabyte IPSW or macOS images from Apple’s servers. Multiply that by a few dozen stations and suddenly your entire network grinds to a halt. This is where Content Caching earns its keep. With just a few clicks, you can turn any spare Mac into a local CDN for Apple software, apps, and updates. The best part? Apple Configurator plays along automatically. If a cached IPSW or system update exists locally, Configurator will fetch from the cache instead of hauling data across the internet.
Steps:
- On a Mac on the same subnet: System Settings → General → Sharing → Content Caching → On.
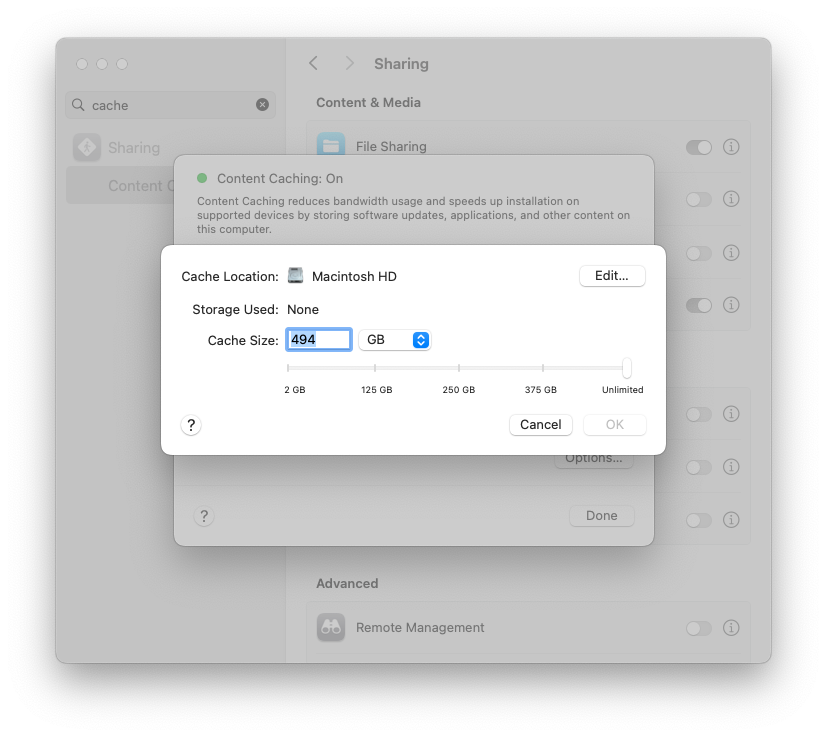
- Kick off one restore to prime the cache (or just pre-download an IPSW from Apple).
- Subsequent restores on the subnet will pull from cache.
Field note: Put the cache box on wired ethernet. It makes a dramatic difference rolling carts of machines.
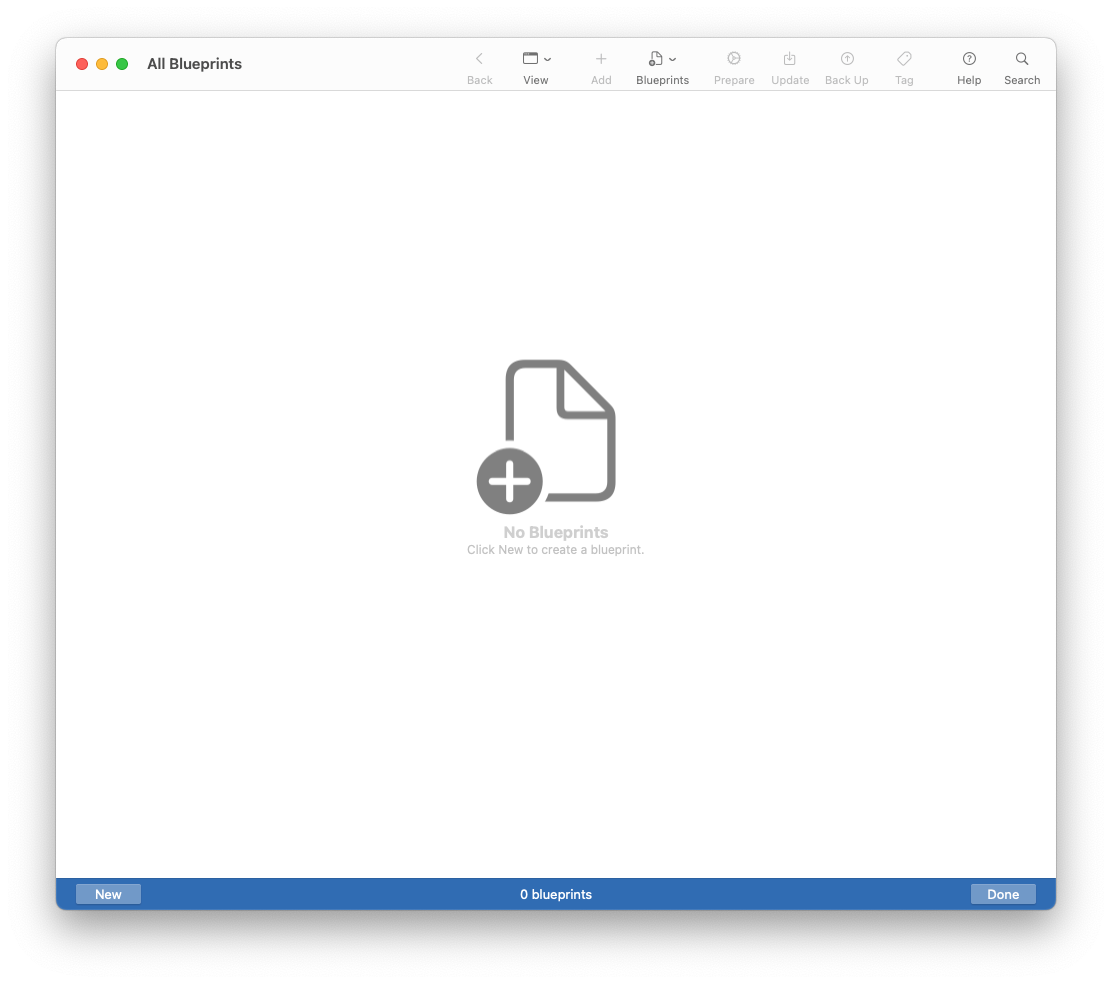
5) Blueprints: one-click prep for carts (iPad & Apple TV)
Even if your day job is Macs, you probably get dragged into iPad/Apple TV season. Blueprints let you bundle Wi-Fi, certificates, restrictions, and apps so you can apply a known-good stack with one move. It’s perfect for staging where MDM enrollment happens later.
Steps:
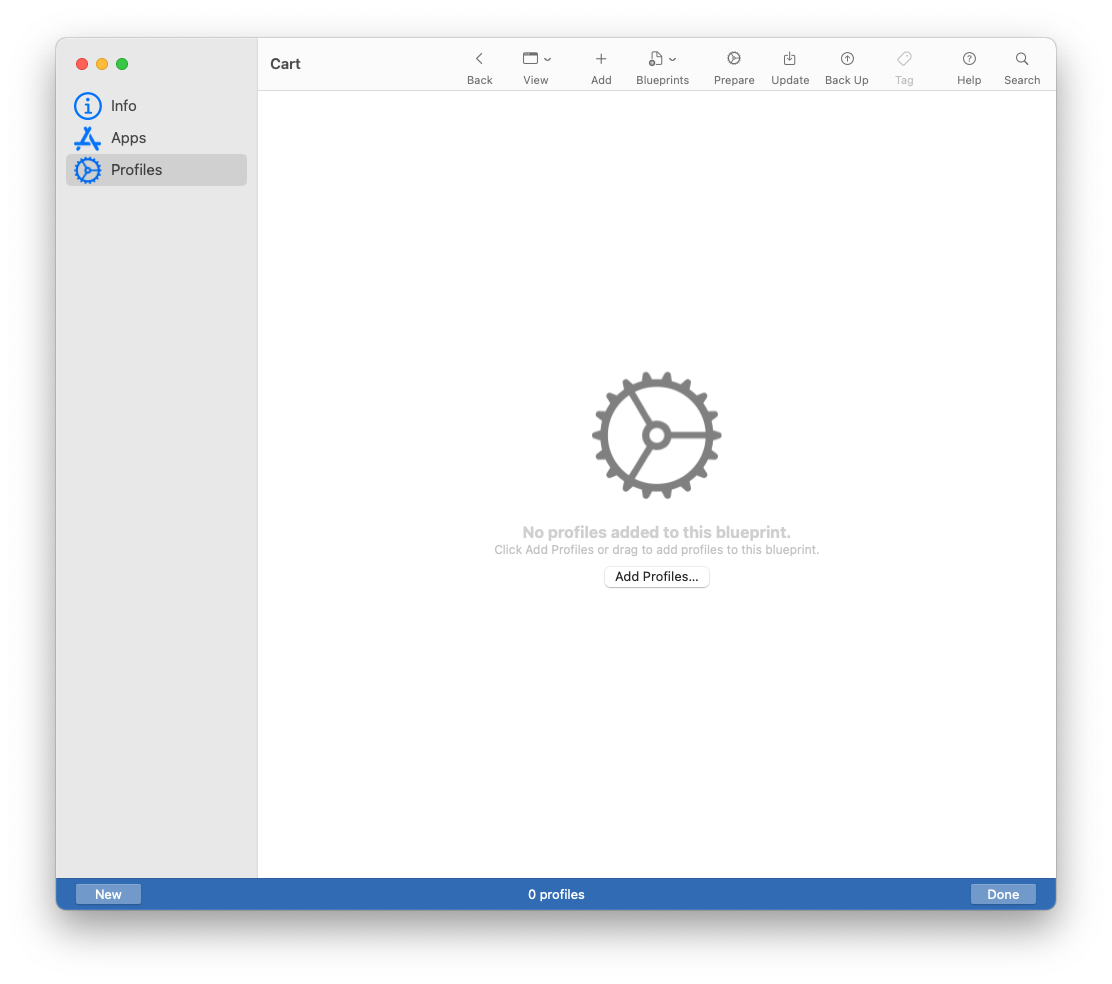
- File → New Blueprint. Name it for the cart or location.
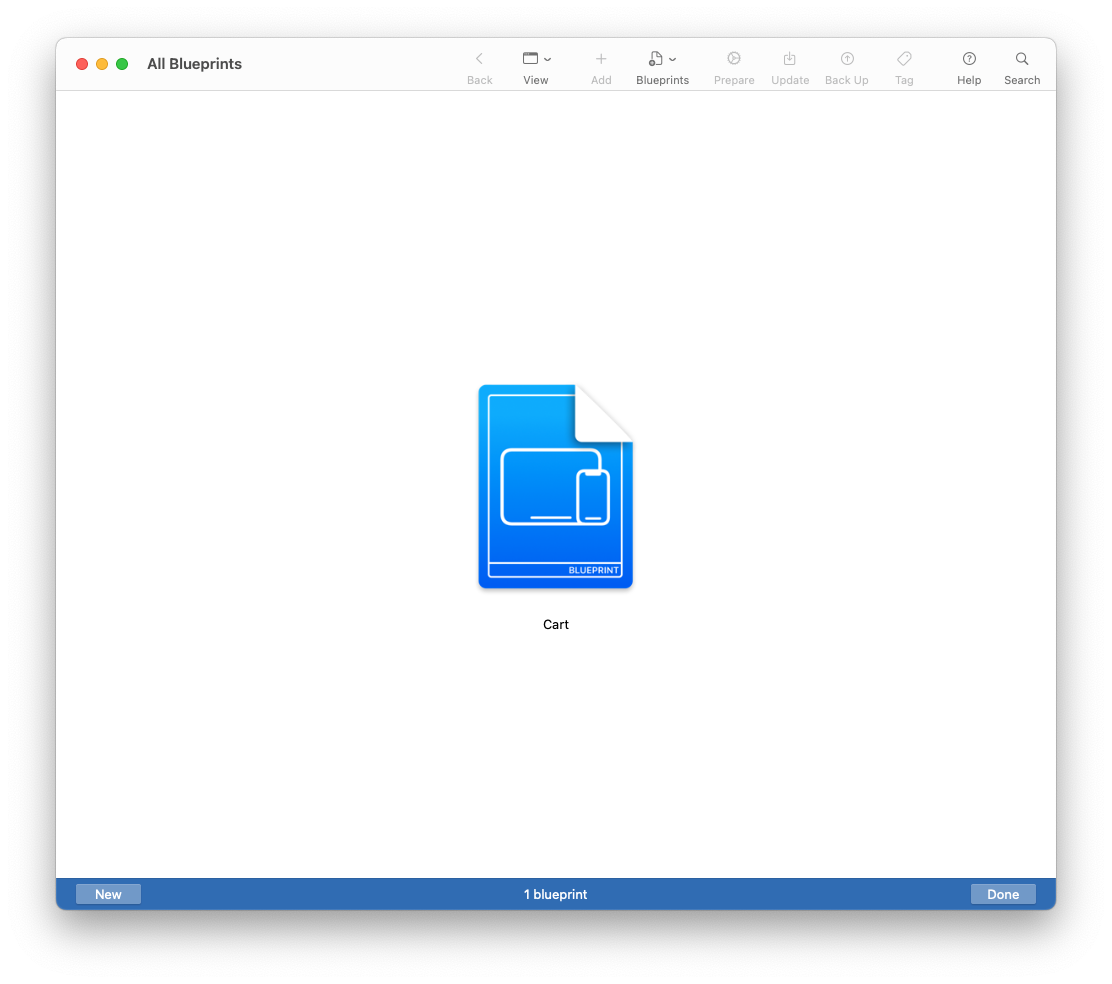
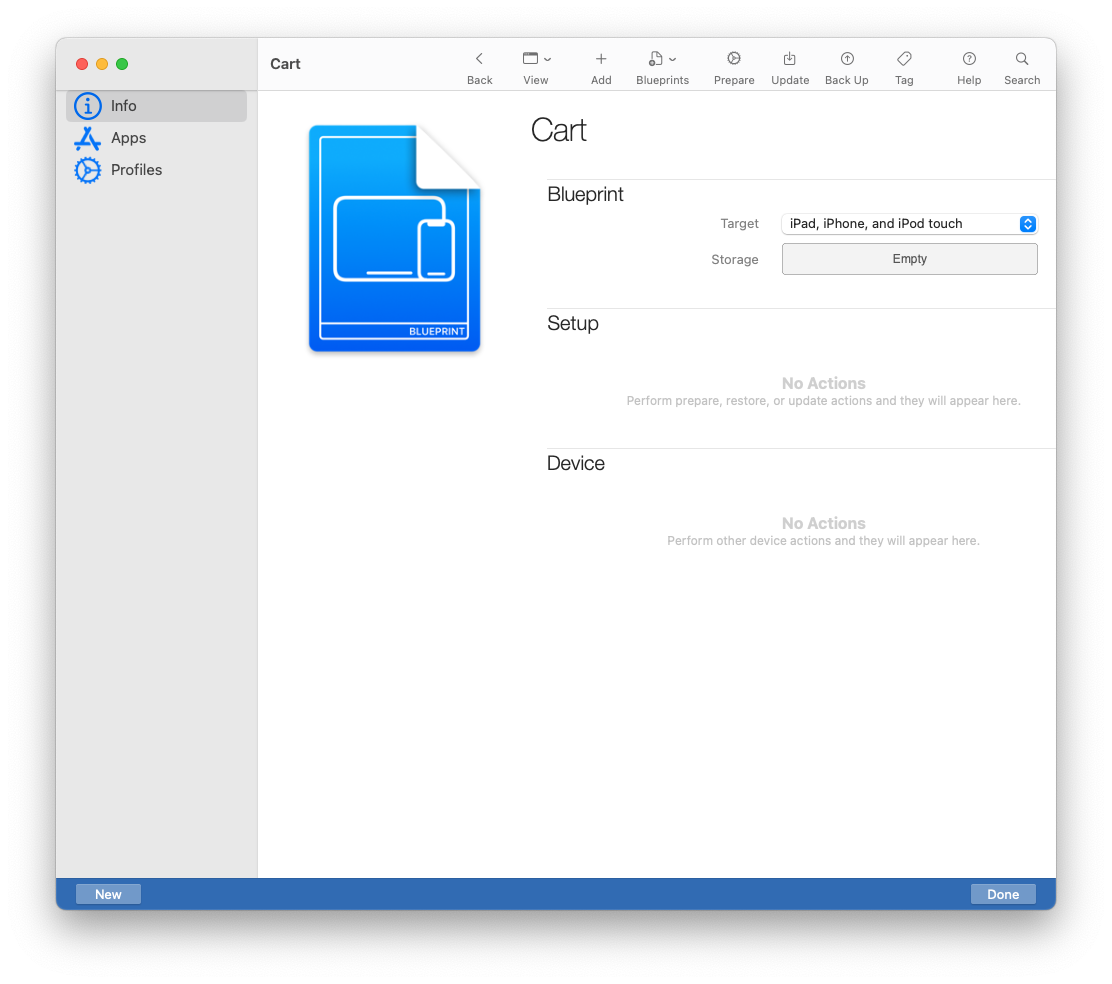
- Edit the blueprint: Add → Profiles (Wi-Fi, certs, restrictions), Add → Apps (enterprise .ipa).
- Connect a pile of devices, select all, and Apply the blueprint.
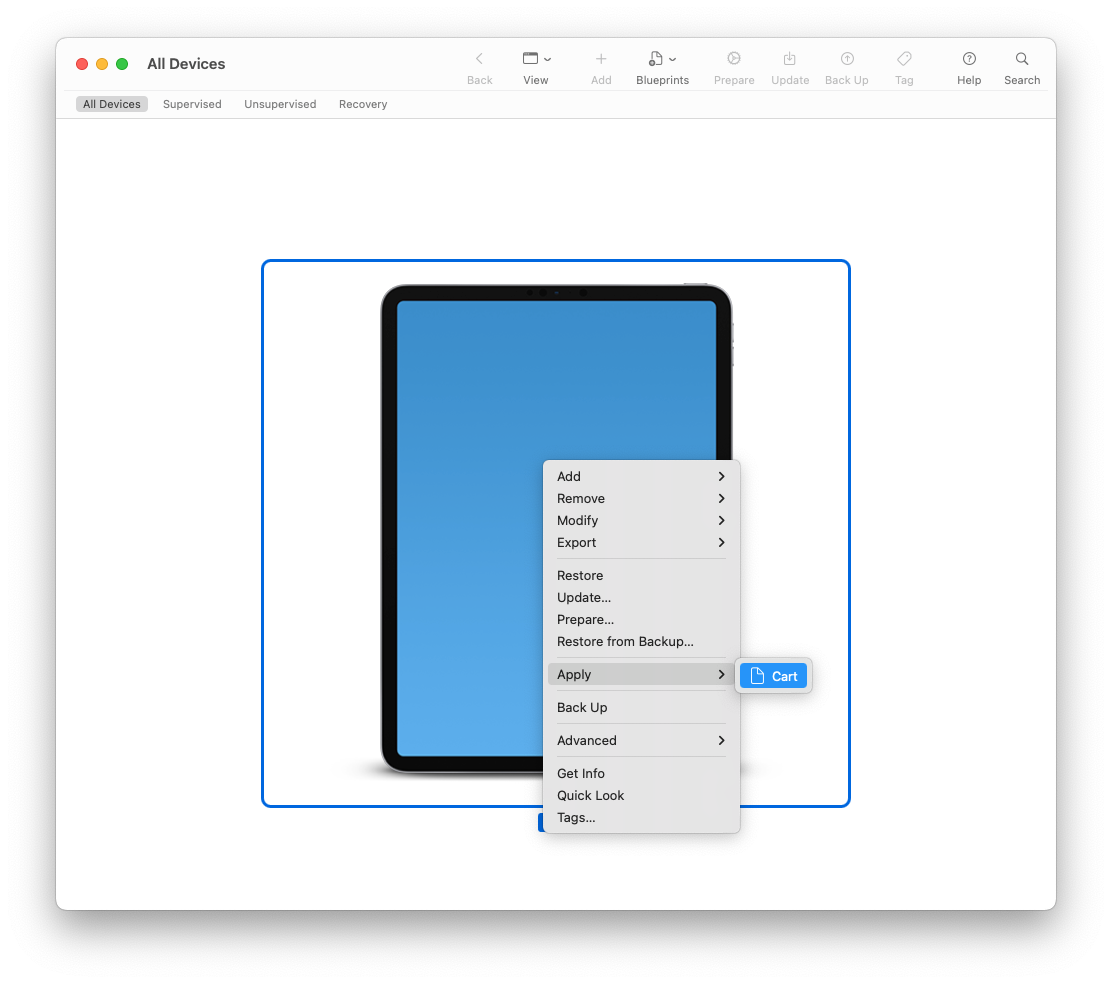
- Spot-check a device: Wi-Fi connects; profiles appear; app(s) install.
Tip: Keep a “Base” blueprint and clone for variations (testing vs. production, conference vs. classroom).
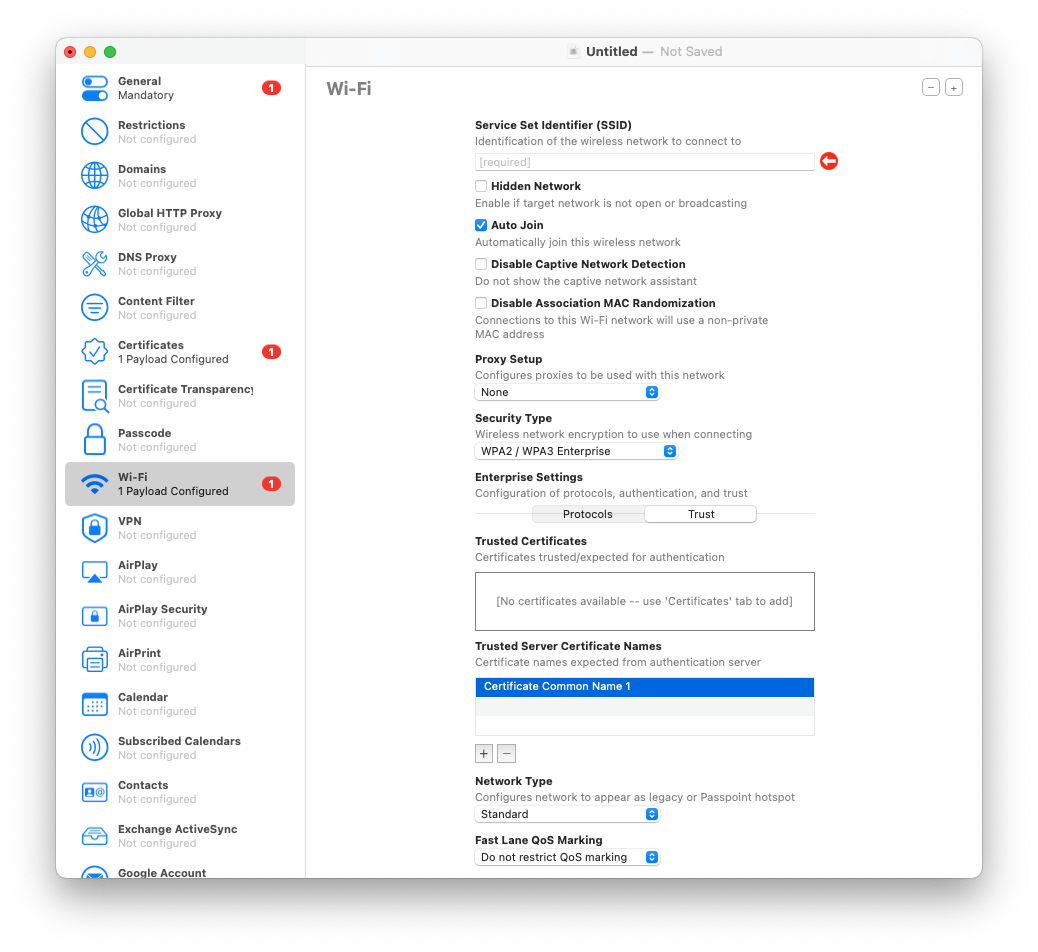
6) Create rock-solid Wi-Fi payloads for staging/offline rooms (iOS/iPadOS)
Configurator’s profile editor is still the fastest way to craft Wi-Fi payloads that just work—especially when you need to stage devices offline or in a Faraday-ish training room where MDM can’t reach yet.
Steps:
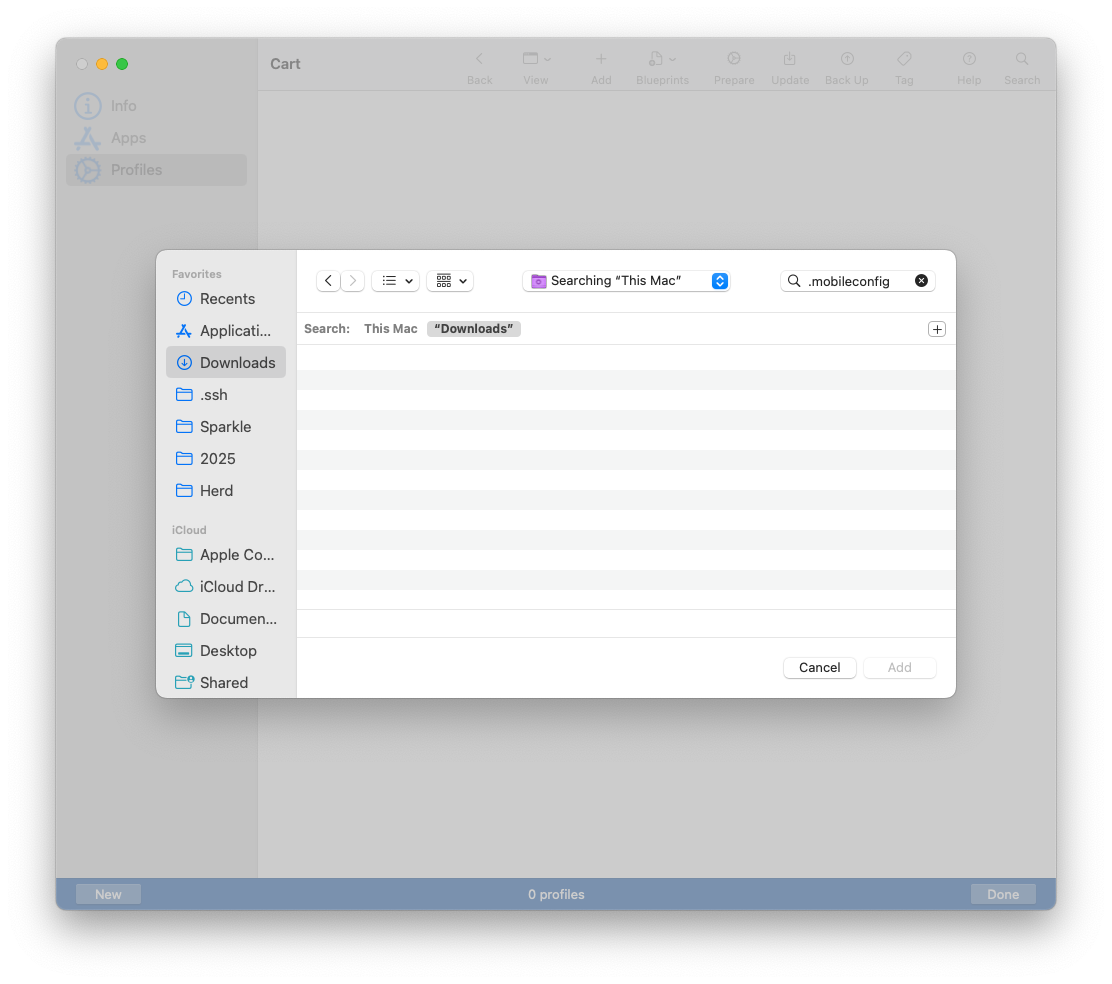
- File → New Profile → add Wi-Fi payload.
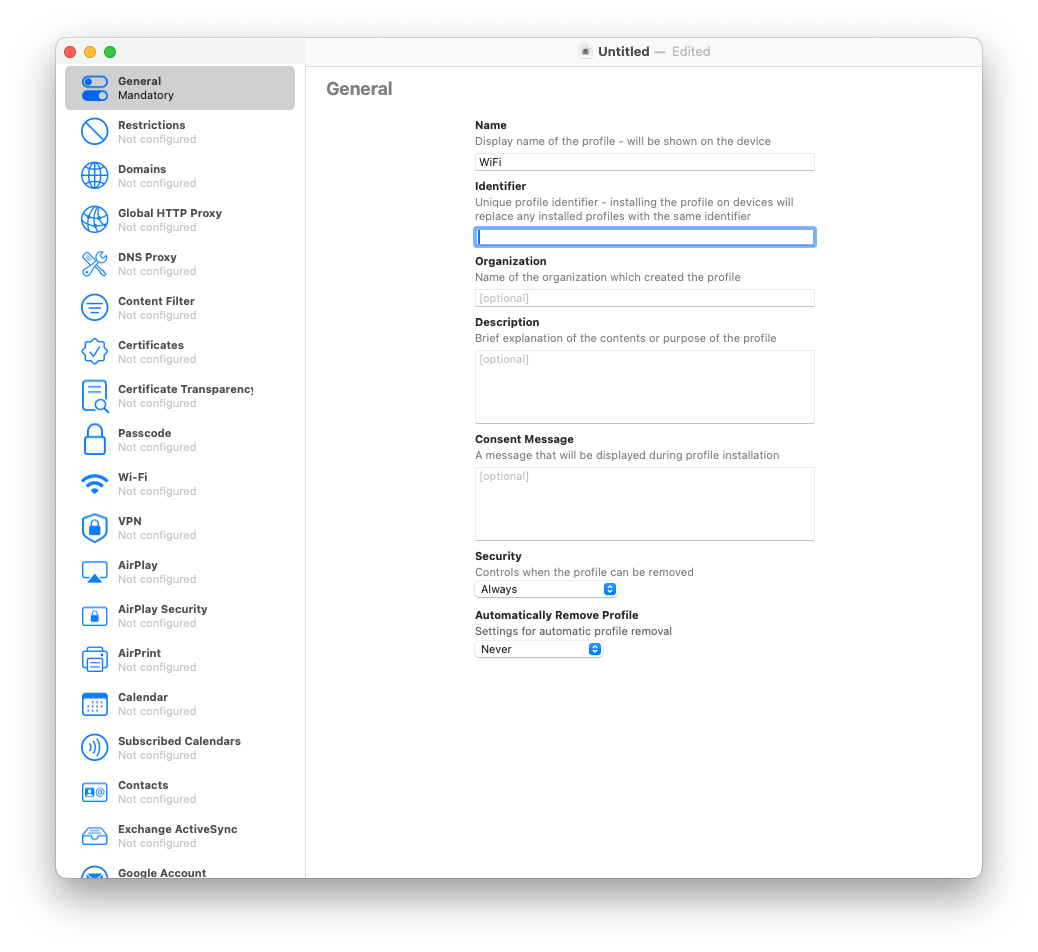
- Set SSID, security type, and “Auto-Join”. Add Proxy if required.
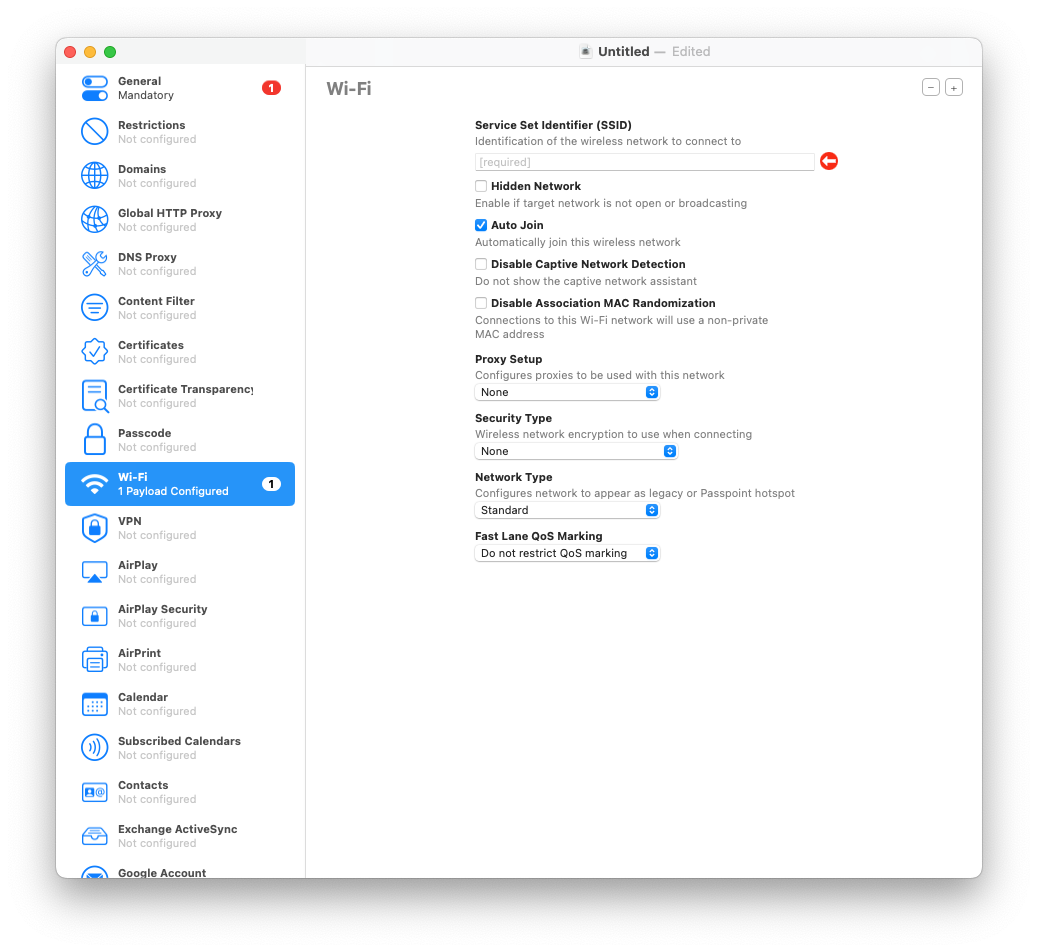
- Save the
.mobileconfigand drag it onto connected devices (or into a Blueprint).
Gotcha: If the network requires certificate-based auth (EAP-TLS), pair this with the next tip.
7) EAP-TLS the right way: install full certificate chains & identities (iOS/iPadOS)
802.1X can be fussy when the intermediate CA is missing or the client identity isn’t in the right container. Do it once, do it right: install Root, Intermediate(s), and the identity (.p12) in one profile so the Wi-Fi payload has everything it needs.
Steps:
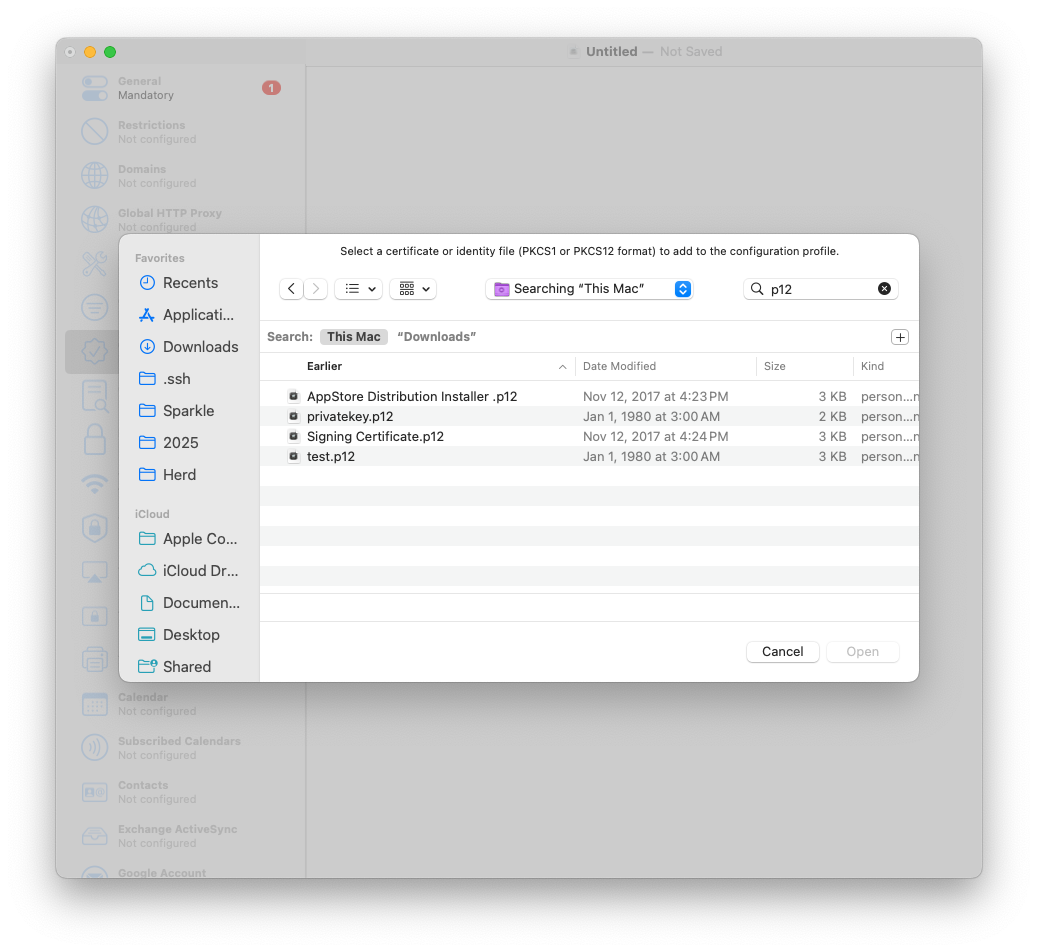
- File → New Profile → add Certificates payload.
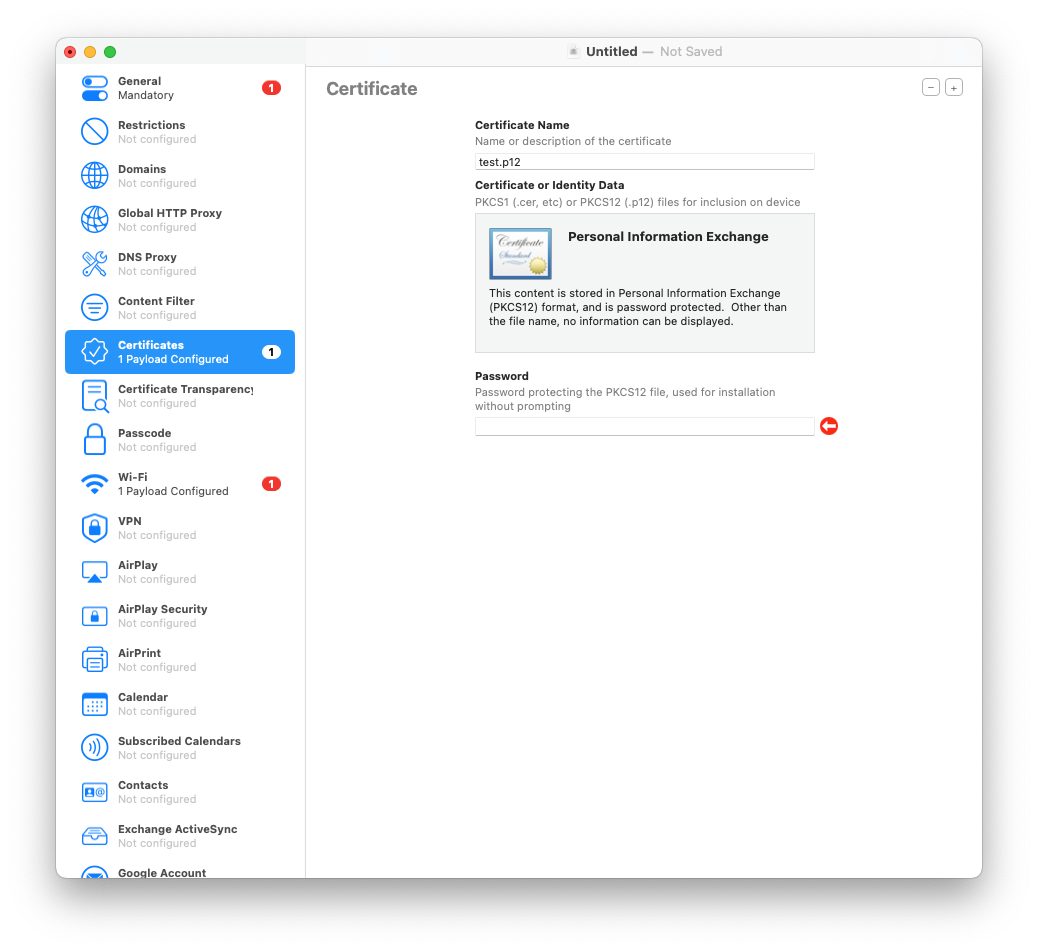
- Import Root and Intermediate CAs first, then the client identity .p12 (with password).
- Add Wi-Fi payload set to EAP-TLS, select the identity you added.
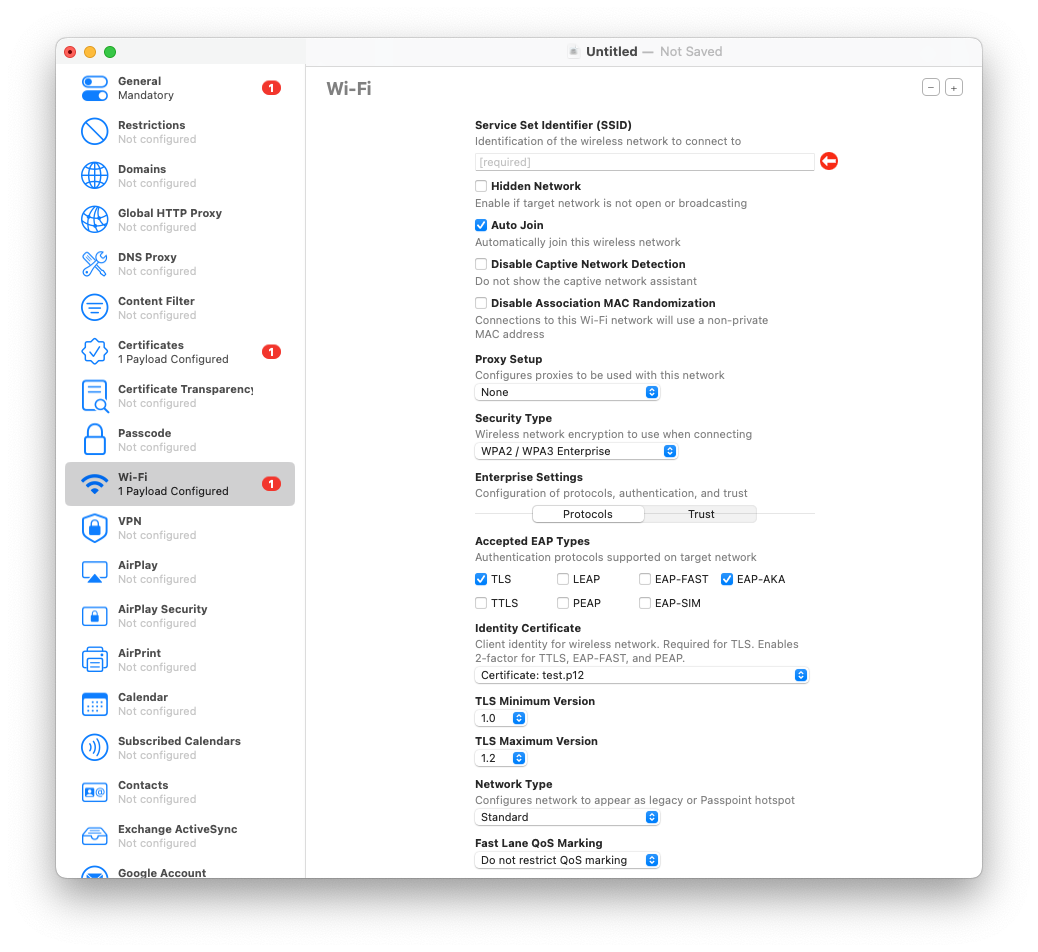
- Save and apply to tethered devices (or drop into a Blueprint).
Tip: If you rotate intermediates, version your profile filename (Corp-WiFi-2025Q3.mobileconfig) so you know what’s deployed.
8) Cable-enroll iPads into your MDM (no ADE required)
When procurement and ABM paperwork lag, but you still need control today, use Configurator to supervise and enroll an iPad directly into your MDM. Later, when the device shows up in ABM, you can transition to ADE at next wipe.
Steps:
- In Configurator Preferences → Servers, add your MDM enrollment URL (and trust the cert).
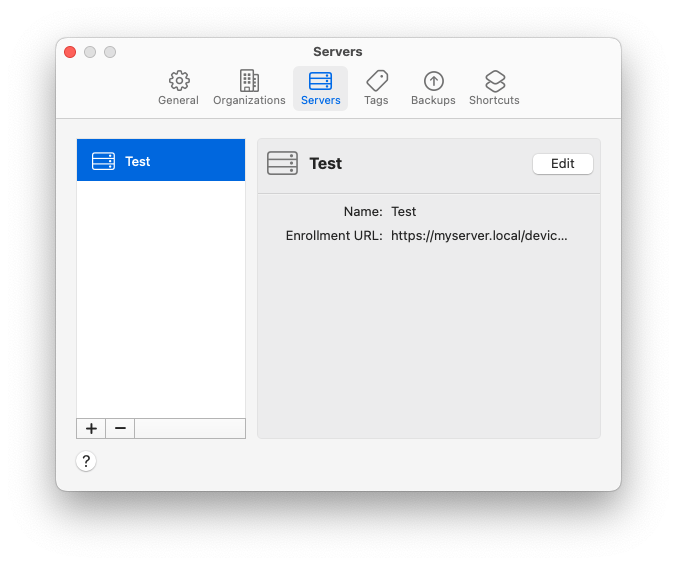
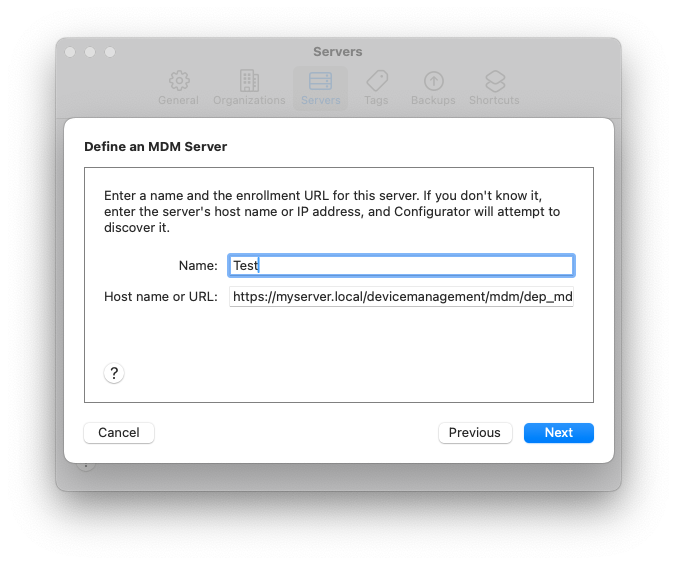
- Connect the iPad, select it, then Prepare. Choose Manual Configuration, check Supervise and Enroll in MDM Server (pick the server you added).
- Optionally choose Setup Assistant screens to skip (language, Apple ID, Siri, etc.).
- Finish prepare, let the device reboot, confirm it’s Supervised and enrolled.
Heads-up: User-Approved MDM is an issue for macOS, but for iOS/iPadOS supervised via Configurator, you get the stronger management model right away.
9) Export (and guard) your Supervision Identity (.p12)
Supervision is one of those invisible gears in Apple device management that you don’t think about until it breaks. When you prepare a Mac with Apple Configurator, it ties that device to a Supervision Identity—basically a cryptographic handshake that tells the machine, “you belong to this admin.” Lose that identity, and any future restores or re-preps won’t line up with your previously supervised devices. That’s when workflows start to fracture: new devices refuse to take old profiles, and swapping laptops during a busy week turns into a small disaster.
The good news is Apple gives you the ability to export and safeguard your Supervision Identity. Treat it like a crown jewel: vault it, version it, and make sure it’s backed up outside of your daily working Mac. When the day inevitably comes that you need to match a new install to an existing supervised fleet, you’ll be glad you took the extra five minutes to save it.
Steps:
- Apple Configurator → Settings/Preferences → Organizations.
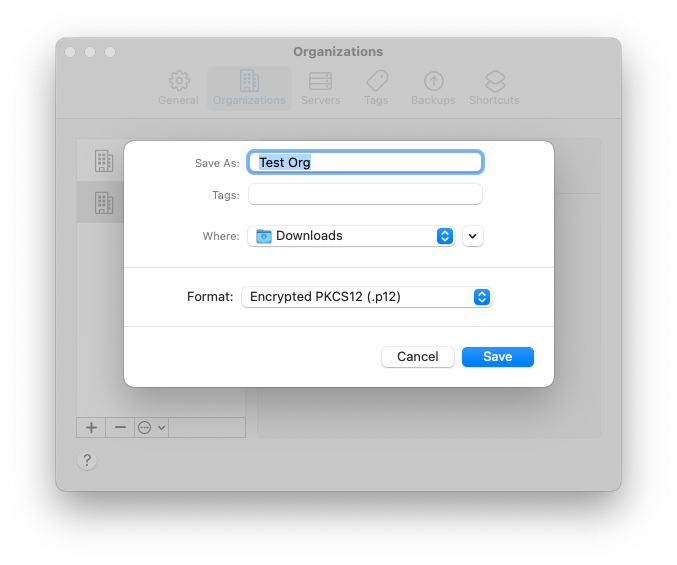
- Select your org → Export Supervision Identity → set a strong password.
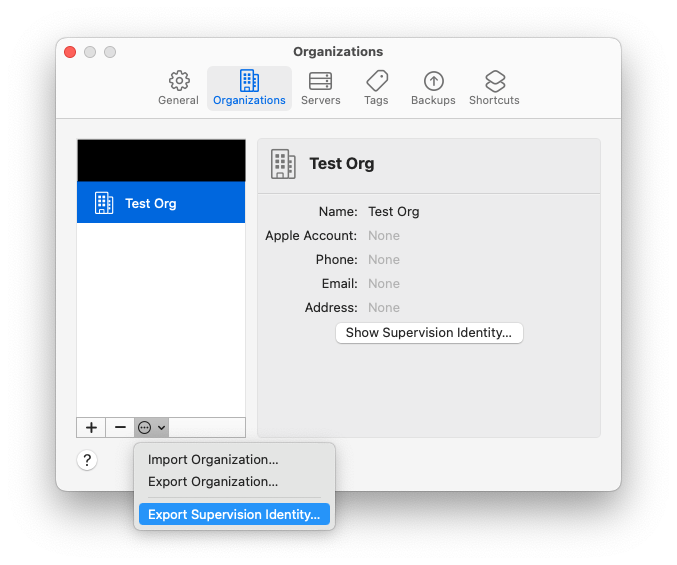
- Store the
.p12in your password manager or secrets vault.
Tip: When teammates build blueprints on their Macs, import the same identity so results are consistent.
10) Script the boring stuff with cfgutil (UDIDs, reports, logs)
cfgutil, which comes bundled with Configurator, offers a powerful and straightforward command-line interface that makes repetitive tasks much easier to manage. You can quickly grab UDIDs and serial numbers and export them to CSV for tracking or inventory purposes, deploy configuration profiles to multiple devices at once, wipe test devices clean for fresh setups, and even stream logs in real time during enrollment to monitor progress and troubleshoot issues. For anyone managing large numbers of Apple devices, cfgutil turns what would normally be a tedious, manual process into a repeatable, efficient workflow.
Steps:
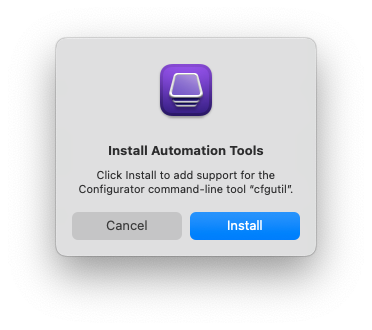
- To install
cfgutilopen Apple Configurator - From the Apple Configurator menu, choose “Install Automation Tools”.
- Open Terminal on the admin Mac. Verify
cfgutil:cfgutil help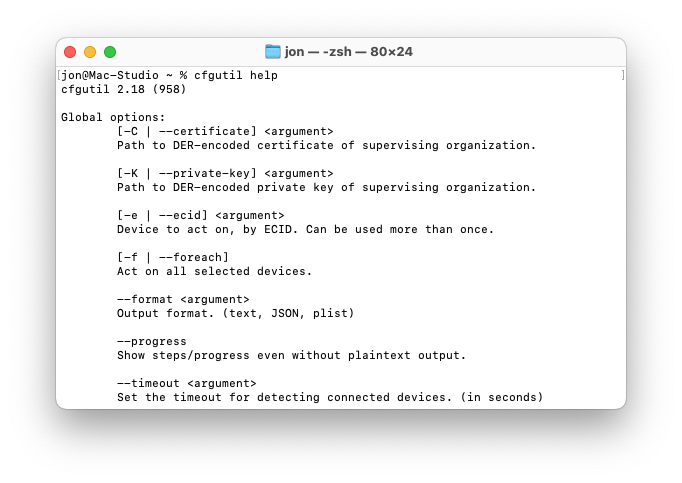
- Get a quick inventory (serial, udid, device name) for connected devices:
cfgutil --format JSON get serialNumber udid deviceName > devices.json - Convert to CSV for the ticket or intake log (use
jqif you like, or import JSON directly to your tool). - Install a profile at scale:
cfgutil install-profile /path/to/Corp-WiFi-2025Q3.mobileconfig - Watch live logs during an iOS/iPadOS enrollment:
cfgutil syslogBonus: Wrap these in a tiny shell script and you’ve got a reliable cart-prep workflow that doesn’t require babysitting the GUI.
Wrap-up
Apple Configurator won’t replace your MDM, but it’s the fastest way to bootstrap, recover, and standardize when the fancy stuff isn’t available (or isn’t cooperating). The more you lean on Blueprints, profiles, cfgutil, and ABM adds, the less time you spend clicking through surprises.
If you’ve got a Configurator trick you love—or a horror story we can all learn from—send it my way and I’ll add it here.
Sources
Ready to take your Apple IT skills and consulting career to the next level?
I’m opening up free mentorship slots to help you navigate certifications, real-world challenges, and starting your own independent consulting business.
Let’s connect and grow together — Sign up here
AI Usage Transparency Report
AI Era · Written during widespread use of AI tools
AI Signal Composition
Score: 0.54 · High AI Influence
Summary
Apple Configurator: 5 Hidden Gems for Mac Admins
Related Posts

Discovering Mole: A Command Line Utility for Mac Cleaning
Caches pile up, apps leave behind junk, and disk space slowly disappears. While there are plenty of GUI tools out there, most of them either lack transparency or feel overly bloated.

Scoring AI Influence in Jekyll Posts with Local LLMs
There’s a moment that kind of sneaks up on you when you’ve been writing for a while, especially if you’ve started using AI tools regularly. You stop asking whether AI was used at all, and instead start wondering how much it actually shaped what you’re reading. That shift is subtle, but once you notice it, you can’t really unsee it.

Automating JAMF Pro Email Notifications with SendGrid (Smart Group Driven Workflows)
Modern device management isn't just about enforcing policies—it's about communicating effectively with users at the right time. In JAMF Pro, Smart Groups give you powerful visibility into device state, but they don't natively solve the problem of proactive, automated user communication. Whether you're trying to prompt users to restart their machines, complete updates, or take action on compliance issues, bridging that gap requires a flexible and scalable notification system.

Cleaning House in Jamf Pro: A Friendly Auditor Script for Real-World Hygiene
There’s a tipping point in every Jamf Pro environment where the policy list begins to feel like a junk drawer. Everyone means well. Nobody deletes anything. And then, months later, you’re trying to answer simple questions like: *Which policies are actually scoped? What’s no longer referenced? Why are there five versions of the same script?* This post covers a small, practical script I wrote to help you **see** what’s stale, **explain** why it’s stale, and (optionally) **park** it safely out of the way—without deleting a thing.

Turn Jamf Compliance Output into Real Audit Evidence
Most teams use Apple’s macOS Security Compliance Project (mSCP) baselines because they scale and they’re repeatable. Jamf’s tooling makes deployment straightforward and the Extension Attribute (EA) output is a convenient place to capture drift. What you don’t automatically get is the artifact an auditor will accept on a specific date—an actual document you can file that shows which endpoints are failing which items, plus a concise roll-up of failure counts you can act on. Smart Groups answer scope; they don’t produce evidence.

The Power of Scripting App Updates Without Deploying Packages
Keeping macOS environments up-to-date in a seamless, efficient, and low-maintenance way has always been a challenge for IT admins. Traditional package deployment workflows can be time-consuming, prone to versioning issues, and require extensive testing and repackaging. This can lead to frustration and wasted resources as IT teams struggle to keep pace with the latest updates and patches. But there's another way—a more elegant, nimble approach: scripting.

Detecting Invalid Characters and Long Paths in OneDrive on macOS
Microsoft OneDrive is widely used for syncing documents across devices, but on macOS, it can silently fail to sync certain files if they violate Windows filesystem rules — like overly long paths or invalid characters. This creates frustrating experiences for end users who don’t know why files aren’t syncing.

Using a script to Enable FileVault via JAMF: A Word of Caution
Enabling FileVault is a critical step in securing macOS devices, particularly in managed environments like schools, enterprises, and remote teams. For administrators using **Jamf Pro**, automating this process can simplify device onboarding and ensure compliance with disk encryption policies. This automation also helps reduce the administrative burden associated with manually configuring each device, allowing IT staff to focus on other tasks while maintaining a secure environment.

Automating Script Versioning, Releases, and ChatGPT Integration with GitHub Actions
Managing and maintaining a growing collection of scripts in a GitHub repository can quickly become cumbersome without automation. Whether you're writing bash scripts for JAMF deployments, maintenance tasks, or DevOps workflows, it's critical to keep things well-documented, consistently versioned, and easy to track over time. This includes ensuring that changes are properly recorded, dependencies are up-to-date, and the overall structure remains organized.

Leaving Flickr: Migrating 20,000+ Photos to Synology and Taking Back Control
There’s a certain kind of friction you start to notice when you’ve been using a service for a long time. Not enough to make you leave immediately, but enough to make you pause. Flickr had been that kind of service for me. It quietly held years of photos, uploads from old phones, albums I hadn’t looked at in ages, and a massive "Auto Upload" collection that had grown into something I didn’t fully understand anymore.
