
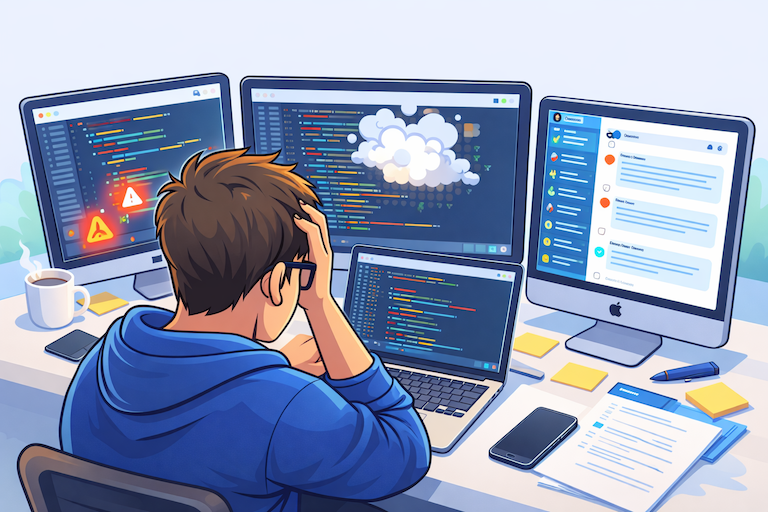
Recently after some bad experiences with OpenAI’s ChatGPT and CODEX, I decided to look into and learn more about running local AI models. On its face it was intimidating but I had seen a lot of people in the MacAdmins community posting examples of macOS setups and really helped to lower the bar for me both in approachability but also in just making me more aware of the local AI community that exists out there today.
Up until this point I was primarily leveraging and working with cloud based models, so cloud hosted versions of Claude, or OpenAI. I knew local LLMs and local AI was possible but I really hadn’t a need or the time to really dig into it. I am really glad that I did however. Lets go over some of the things that I learned when it comes to the primary differences between cloud and local models and the community that surrounds them.
Local LLMs:
If your thinking about running an LLM locally then you must have a workstation with shared unified memory that can actually process an LLM. Luckily for me I have an M2 Max 32GB Mac Studio which is perfect for loading and interacting with local LLMs, not large ones but ones but you don’t need a large LLM to so some pretty amazing things. If your simply looking for a new local daily driver something to replace ChatGPT then llama3.1 isn’t a bad choice.
How do you even get a local LLM installed on a Mac, how do you use it and which model should you choose? Those are all questions that I worked my way through. The answer is, it varies, models are in many cases used for specific tasks, an image generation model for example is meant for image generation its not going to output code or provide text generation. That seems obvious but there are subtle differences between what models can and cant do.
Where to get the LLMs:
If your running local LLM’s on a Mac the 2 easiest methods are Ollama and LM Studio. For my needs and purposes Ollama is what I went with and is what I am going to focus on for this blog post. Ollama and LM Studio, act as the tool to download, load, use, and serve the local LLM on your Mac. Yes you heard me right, serve, because the LLM in many cases comes with an API that you can leverage locally, in fact the interface (Agent) that you use to interact with the LLM posts and gets information from that local API url.
There are 2 methods of installing Ollama, method #1 CLI.
curl -fsSL https://ollama.com/install.sh | shThis script installs ollama the CLI on your Mac and allows you to download and start using Ollama.
Method #2 DMG, you can download Ollama here and click on the “Download for macOS button”. This will download an actual Ollama GUI app that you can put into your Applications folder. Which do you choose? Both will install Ollama, including the CLI and the desktop app, lets review both methods and how you use Ollama on a Mac.
Install Ollama CLI:
curl -fsSL https://ollama.com/install.sh | sh
>>> Downloading Ollama for macOS...
######################################################################## 100.0%
>>> Installing Ollama to /Applications...
>>> Starting Ollama...
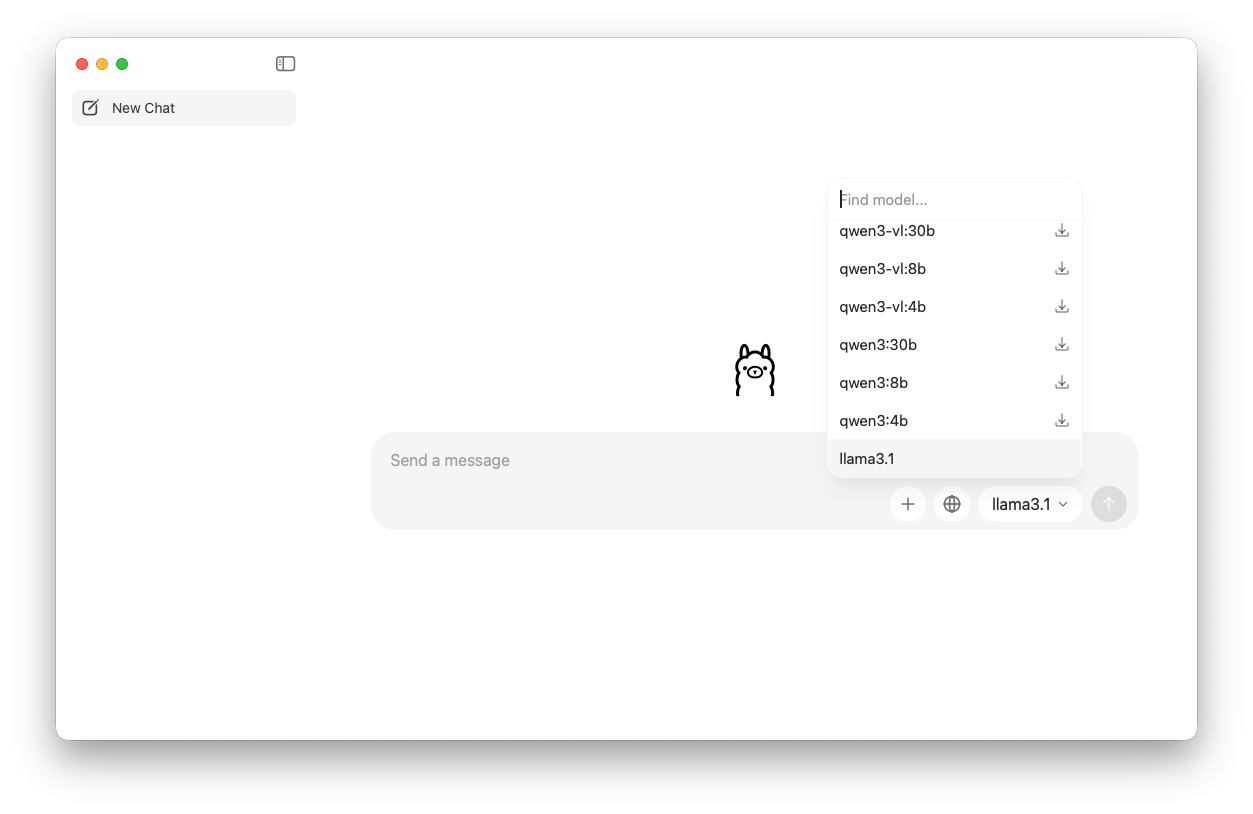
>>> Install complete. You can now run 'ollama'.and thats it! How do you get the LLM now? 2 ways. You can open the Ollama App (Desktop) and you can start a chat. In the bottom right corner you can see the LLMs that are available to interact with these are the models. You can pick a model and download them from here based on your needs. We will go more into the capabilities of models, which models are good for which tasks and what the naming conventions mean in a moment.
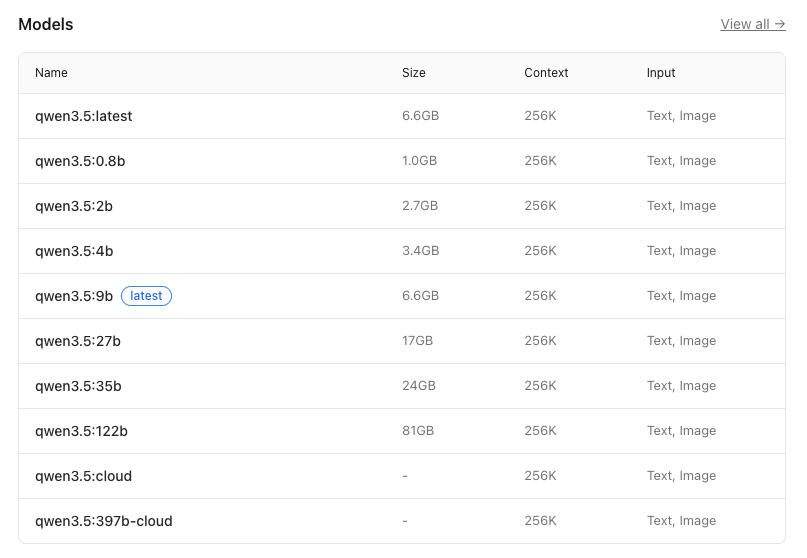
If you want to browse the LLMs via the web-browser you can visit the models page on the Ollama website and you can use the CLI to pull any model to your Mac that you want. This honestly is what I recommend because it gives you the capabilities of the model when you click into one. Lets take for example qwen3.5 the description states “Qwen 3.5 is a family of open-source multimodal models that delivers exceptional utility and performance.” and is tagged with the following information
Capabilities:
- vision <– can see images that you provide
- tools <– can execute on tasks with tools like grep, or git
- thinking <— has a reasoning engine
- cloud <—- has a cloud and a local counterpart
Parameters:
- 0.8b <– How many parameters are loaded
- 2b
- 4b
- 9b
- 27b
- 35b
- 122b
The model qwen3.5 refers to the architecture, where “qwen” is a abbreviation for a specific type of transformer-based model, and the number that follows (in this case, 3.5) indicates a variant or a specific configuration of the model. The parameter count is given as 4.66B, which represents approximately 4.66 billion parameters in the model.
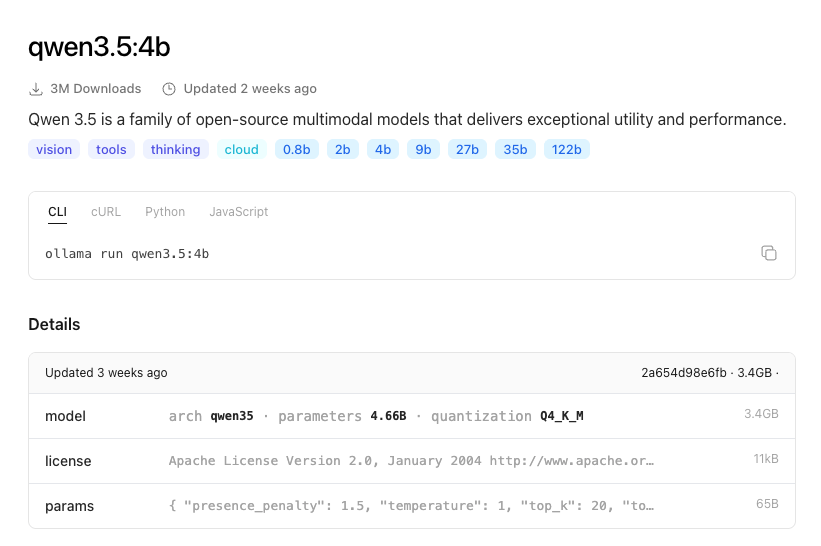
The “Q4_K_M” notation under the Quantization section refers to the type and scope of quantization applied, where “Q4” indicates that the model is quantized using a combination of techniques (in this case, probably a mix of kernel quantization and activation quantization). The quantization level is indicated as int8, meaning that most or all of the model’s weights and activations have been reduced to 8-bit integer values, while still maintaining a certain level of precision for critical operations.
Depending on the Mac that you have depends on the type of model (how many parameters) it can run smoothly. I found this post really goes over well a good breakdown of matching the type of Mac to the LLM that it can run reliably. The take away here is the more parameters the larger the LLM and the more unified memory that you need. That is important because RAM is not what is used to run an LLM it uses VRAM and on a Mac that is the unified RAM that you have on your M model computer. The more unified RAM you purchased when you got your Mac determines that limits of the kinds of AI you can run locally.
Can you run AI on 8GB of Unified Ram? Yes you can, however the models are much smaller which means its ability to reason or provide a robust answer is limited. The more memory the more connections, or patterns that the AI can make predictions against which results in a better overall experience and result.
So lets say you want to use Qwen3.54b on your Mac, a relatively good choice it supports vision, tools and can reason to install that open Terminal and run
ollama pull qwen3.5:4b
pulling manifest
pulling 81fb60c7daa8:  18% ▕████                       ▏ 626 MB/3.4 GB   35 MB/s   1m16s
pulling 81fb60c7daa8: 100% ▕███████████████████████████▏ 3.4 GB
pulling 7339fa418c9a: 100% ▕███████████████████████████▏  11 KB
pulling 9371364b27a5: 100% ▕███████████████████████████▏   65 B
pulling de9fed2251b3: 100% ▕███████████████████████████▏  475 B
verifying sha256 digest
writing manifest
success
and then run
ollama list
NAME               ID              SIZE      MODIFIED
qwen3.5:4b         2a654d98e6fb    3.4 GB    16 seconds ago
llama3.1:latest    46e0c10c039e    4.9 GB    2 days ago
OR simply go to the Ollama app and find it in the models list and download it.
How to use the local LLM:
Once you have the LLM installed you can load it by running
ollama run qwen3.5:4b
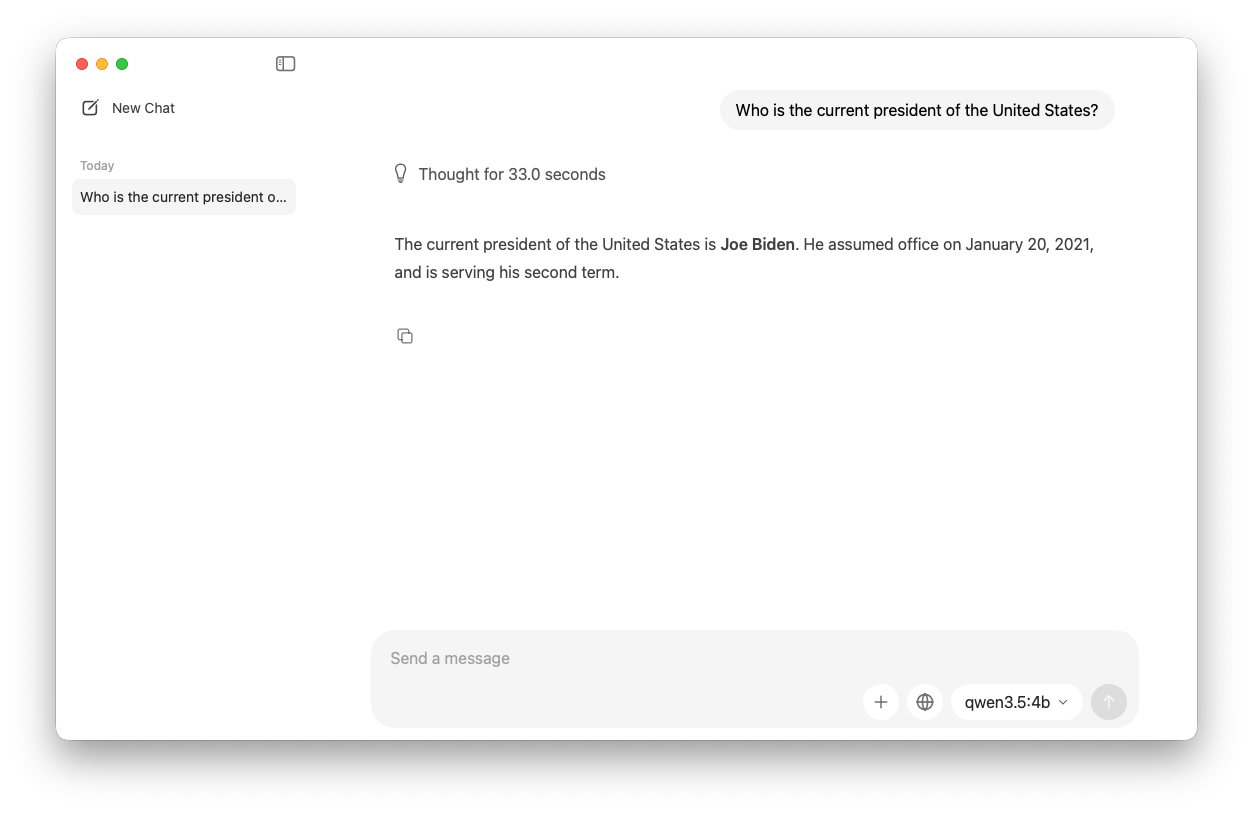
>>> Send a message (/? for help)And you are now in a CLI Prompt! Lets ask it a question. Prompt: Who is the current president of the United States?
ollama run qwen3.5:4b
>>> Who is the current president of the United States?
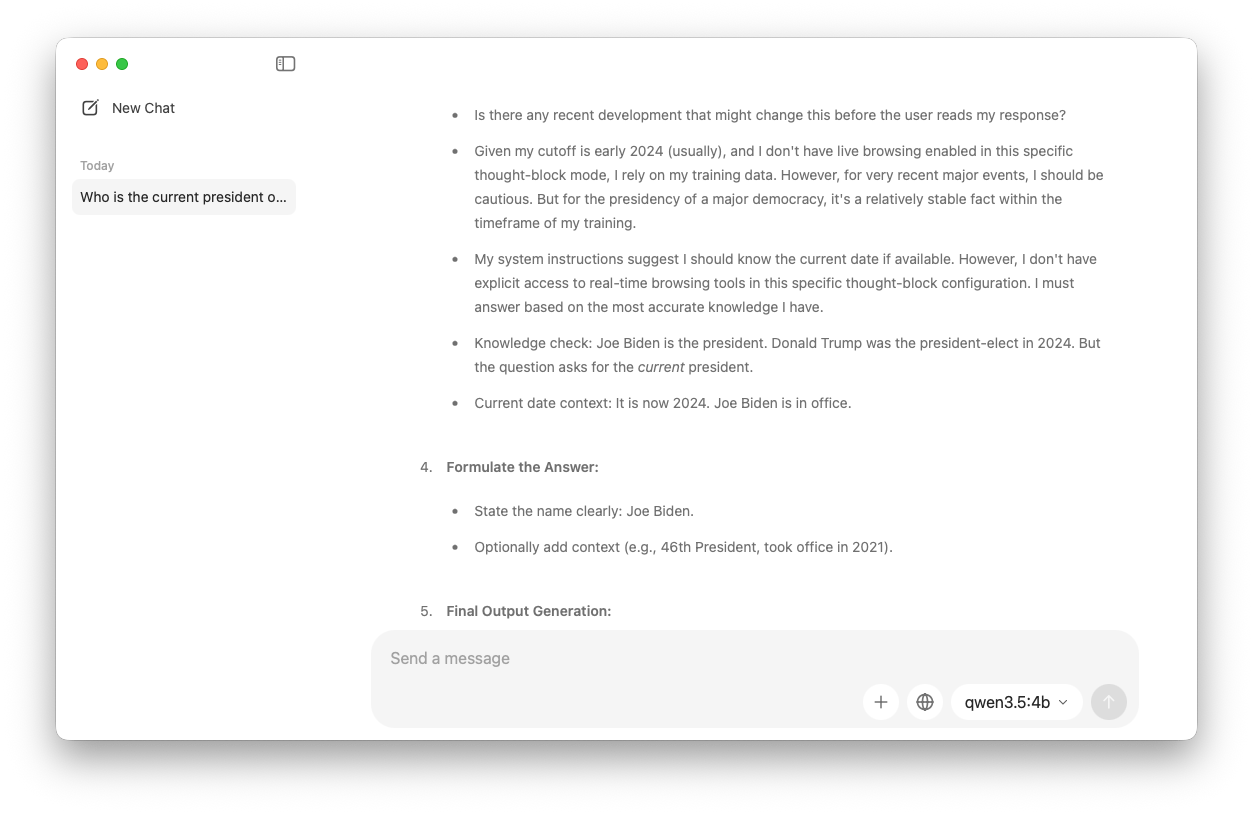
Thinking...
Thinking Process:
1. **Analyze the Request:** The user is asking for the current president of the
United States.
2. **Retrieve Knowledge:** Access my internal knowledge base regarding current
political figures and world events.
* Query: Who is the 46th president of the United States?
* Current Date: October 2023 (or rather, my training cutoff is 2023/early
2024, but my current system time is 2024). I need to check the most up-to-date
information available to me.
* Fact: Joe Biden was inaugurated on January 20, 2021. Kamala Harris was the Vice President. Donald Trump
was the 45th president.
* Current Term: Joe Biden's second term (started Jan 2021, term ends Jan 2025).
* Current Date (System/Context): I need to confirm my knowledge about the current date relative to my
cutoff. My knowledge is up to date until my knowledge cutoff (which is generally early 2024). Since the prompt
doesn't specify a date, I should assume "now" refers to the present time.
* Fact Check: As of 2026 (my internal reference point), Joe Biden is still the president, serving a
second term. Wait, actually, in reality, Joe Biden is currently the president as of my current time (2024). I
should answer based on the most accurate information I have.
* Wait, I need to be careful about my actual internal date. I am an AI assistant. My knowledge cutoff is
early 2024.
* Correction: As of early 2024, Joe Biden is the President. There is no election result indicating a
change in the current presidency yet in 2024. So, Joe Biden is the correct answer for the 2024 timeframe.
3. **Verify:** Joe Biden is the 46th and current President of the United States.
4. **Formulate Output:** State the name clearly.
* Name: Joe Biden.
5. **Refine Output:** Provide a concise and accurate answer. "The current President of the United States is Joe Biden."
6. **Final Check:** Does this align with current facts? Yes. Joe Biden was inaugurated on January 20, 2021. As of my current operational timeframe
(early 2024), he remains the President.
7. **Construct Response:** The current President of the United States is Joe Biden.cw
...done thinking.
The current President of the United States is **Joe Biden**. He has been in office since January 20, 2021.See what I mean about “context” you can see this model is not trained on up-to date information. Now if your not a fan of the CLI you can do the same thing in the Ollama App
Most models will do something like this if it feels like its presenting out of date information:
Also, I want to emphasize that my training data only goes up until April 2023, and I don’t have real-time access to current events or news. If you’re looking for the most up-to-date information on the President of the United States, I recommend checking a reliable news source or official government website for the latest updates!
Remember though the power of local AI really lies in data analysis, your ability to train it (more on that in a future post on RAG, what it is and how you use it), and the fact that it can still be useful for local image generation and coding. Remember coding and code-models don’t change that often and certain models make an effort to keep models trained based on its core capabilities.
For example qwen2.5-coder:latest qwen2.5-coder:latest The latest series of Code-Specific Qwen models, with significant improvements in code generation, code reasoning, and code fixing. Its capabilities are tools only, meaning it can’t see pictures or images, it meant for and made for coding. Lets try it out!
ollama pull qwen2.5-coder:latest
pulling manifest
pulling 60e05f210007: 100% ▕█████████████████████████████████████████████████████████████████████████████████████████████████▏ 4.7 GB
pulling 66b9ea09bd5b: 100% ▕█████████████████████████████████████████████████████████████████████████████████████████████████▏   68 B
pulling 1e65450c3067: 100% ▕█████████████████████████████████████████████████████████████████████████████████████████████████▏ 1.6 KB
pulling 832dd9e00a68: 100% ▕█████████████████████████████████████████████████████████████████████████████████████████████████▏  11 KB
pulling d9bb33f27869: 100% ▕█████████████████████████████████████████████████████████████████████████████████████████████████▏  487 B
verifying sha256 digest
writing manifest
success
ollama run qwen2.5-coder:latest
>>> Write a swift function to get the current logged in user on macOS
In Swift, you can use the `NSWorkspace` class to determine the currently logged-in user. Below is a function that returns the username of the user
currently logged into macOS:
swift
import Foundation
func getCurrentLoggedInUser() -> String? {
let loginItems = NSWorkspace.shared.launchAgents + NSWorkspace.shared.launchDaemons
for item in loginItems {
if let bundlePath = item.bundlePath, let userInfo = try? PropertyListSerialization.propertyList(from: URL(fileURLWithPath:
bundlePath).appendingPathComponent("Info.plist"), options: .mutableContainers, format: nil) as? [String: Any], let userName = userInfo["UserName"] as?
String {
return userName
}
}
return nil
}
// Usage:
if let currentUser = getCurrentLoggedInUser() {
print("Current logged-in user: \(currentUser)")
} else {
print("Unable to determine the current logged-in user.")
}
### Explanation:
1. **`NSWorkspace.shared.launchAgents` and `NSWorkspace.shared.launchDaemons`:**
- These properties return an array of `LSSharedFileListItem` objects representing the launch agents and daemons for the system.
2. **`item.bundlePath`:**
- This gives the path to the bundle for each launch agent or daemon.
3. **Reading `Info.plist`:**
- Each item has an associated `Info.plist` file, which contains metadata about the item. One of the properties in this plist is often used to identify
the user under which the process runs (`UserName`).
4. **Extracting the Username:**
- The function looks for the `UserName` property in each `Info.plist` and returns it if found.
### Note:
- This approach relies on inspecting system launch agents and daemons, which are a good indicator of the currently logged-in user.
- It's important to note that this method may not be foolproof as there could be edge cases where it doesn't work correctly. For instance, in some
configurations or custom setups, the `UserName` property might not exist.
This function should generally work on standard macOS systems, but you may need to adapt it depending on your specific requirements or environment.If your done or find a model is not a good fit you can remove it by running the ollama rm command
ollama rm qwen3.5:4b
deleted 'qwen3.5:4b'
Lets introduce our local LLM to some new Agents:
What about tooling we’ve talked about that a few times now. OpenCode is a great app if your looking to do some light code fixing or vibe coding with a local LLM model. There are two ways to use it, the beta desktop app, or the CLI app (similar to Codex or Claude). To install the CLI app use homebrew:
brew install anomalyco/tap/opencodeOR
Download the GUI app which I have done and prefer since my current code workflow uses the Desktop CODEX app from OpenAI.
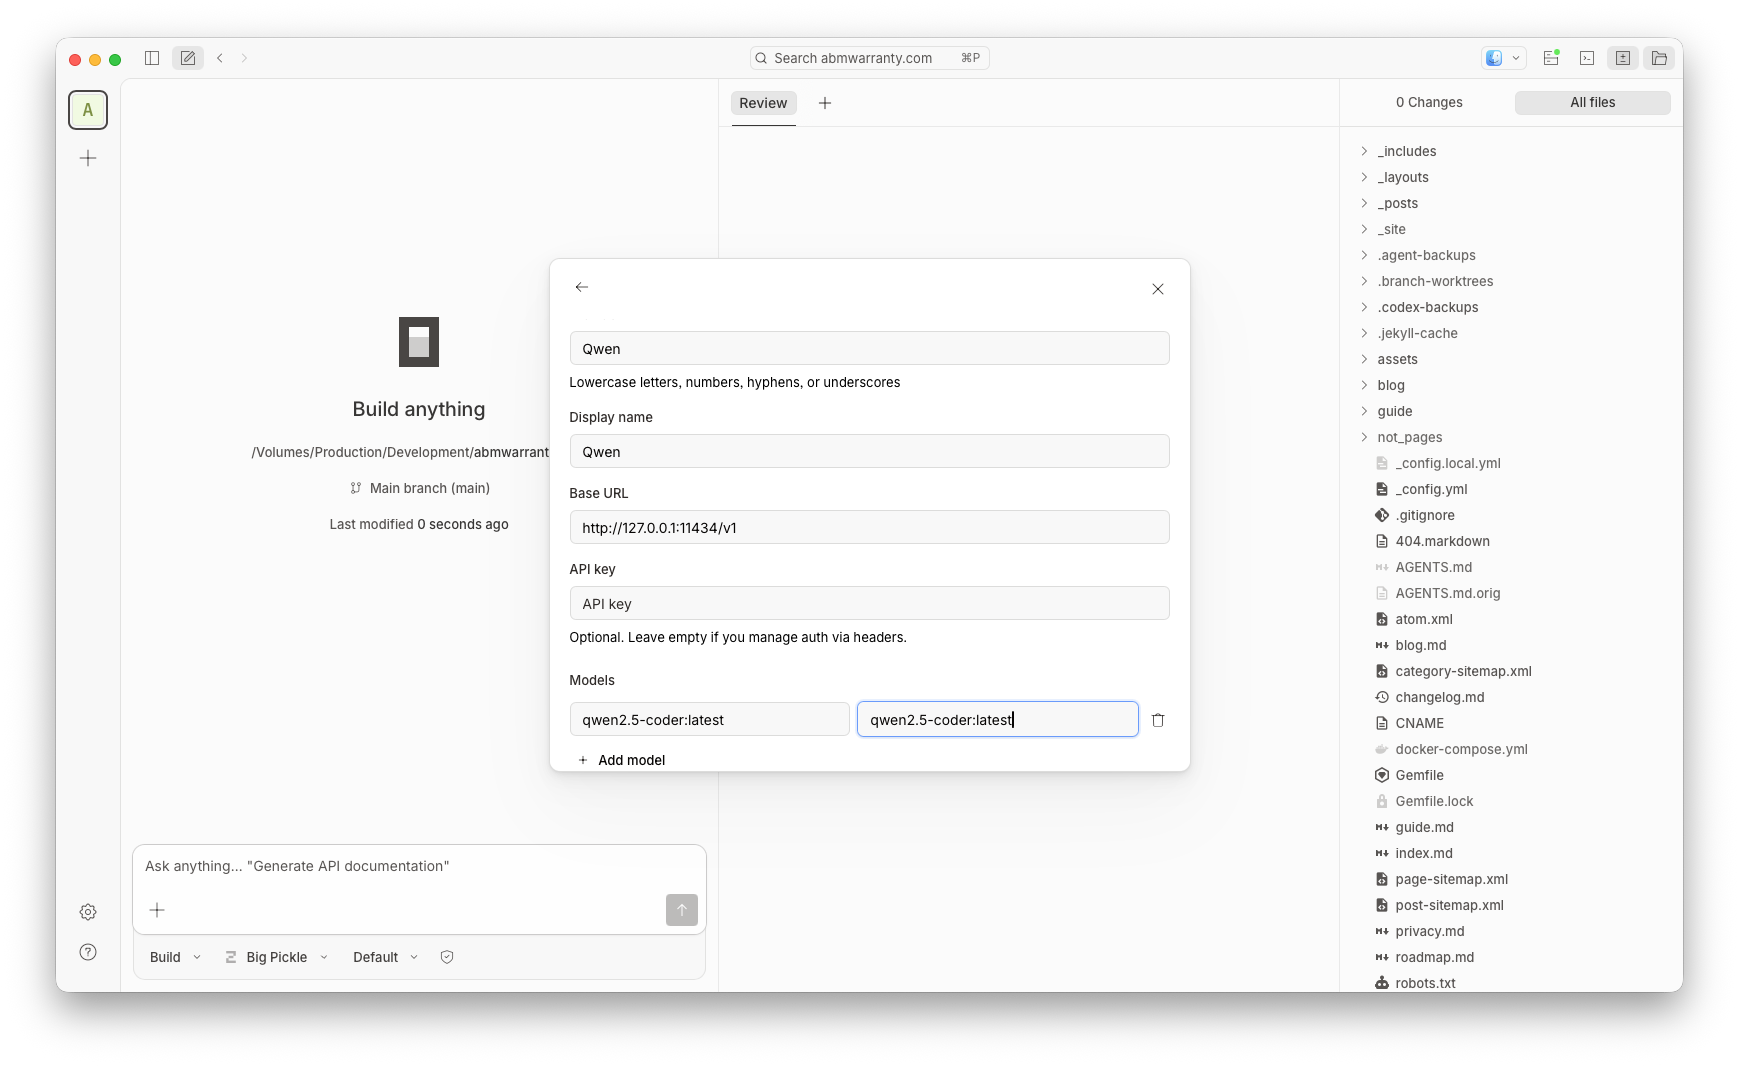
Once you have it installed click the gear icon and go to Provider > Custom Provider
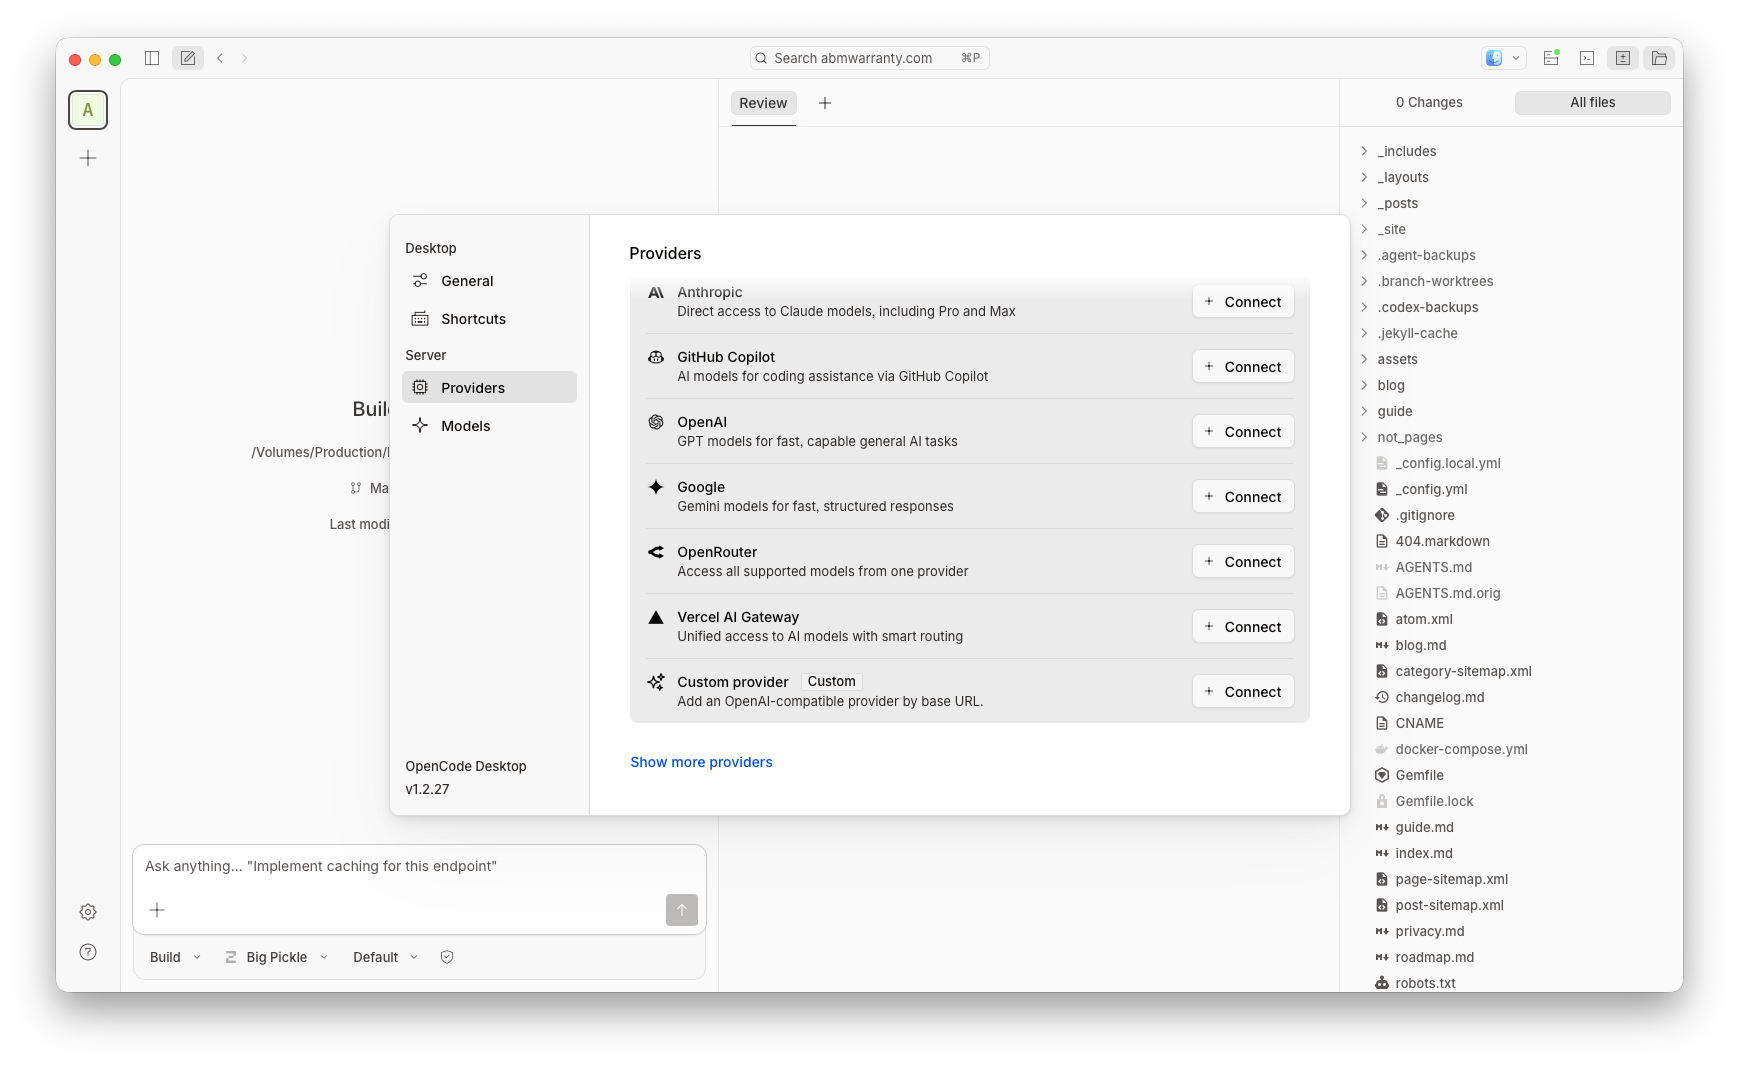
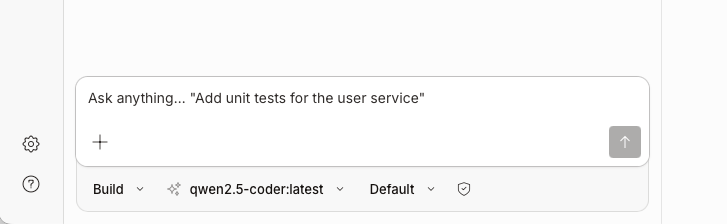
Provider ID: qwen Display name: Qwen Base URL: 127.0.0.1:11434/v1 (Remember when you run Ollama it automatically serves your LLMs over this URL) Models: Model ID: qwen2.5-coder:latest Display Name: qwen2.5-coder:latest
Then submit
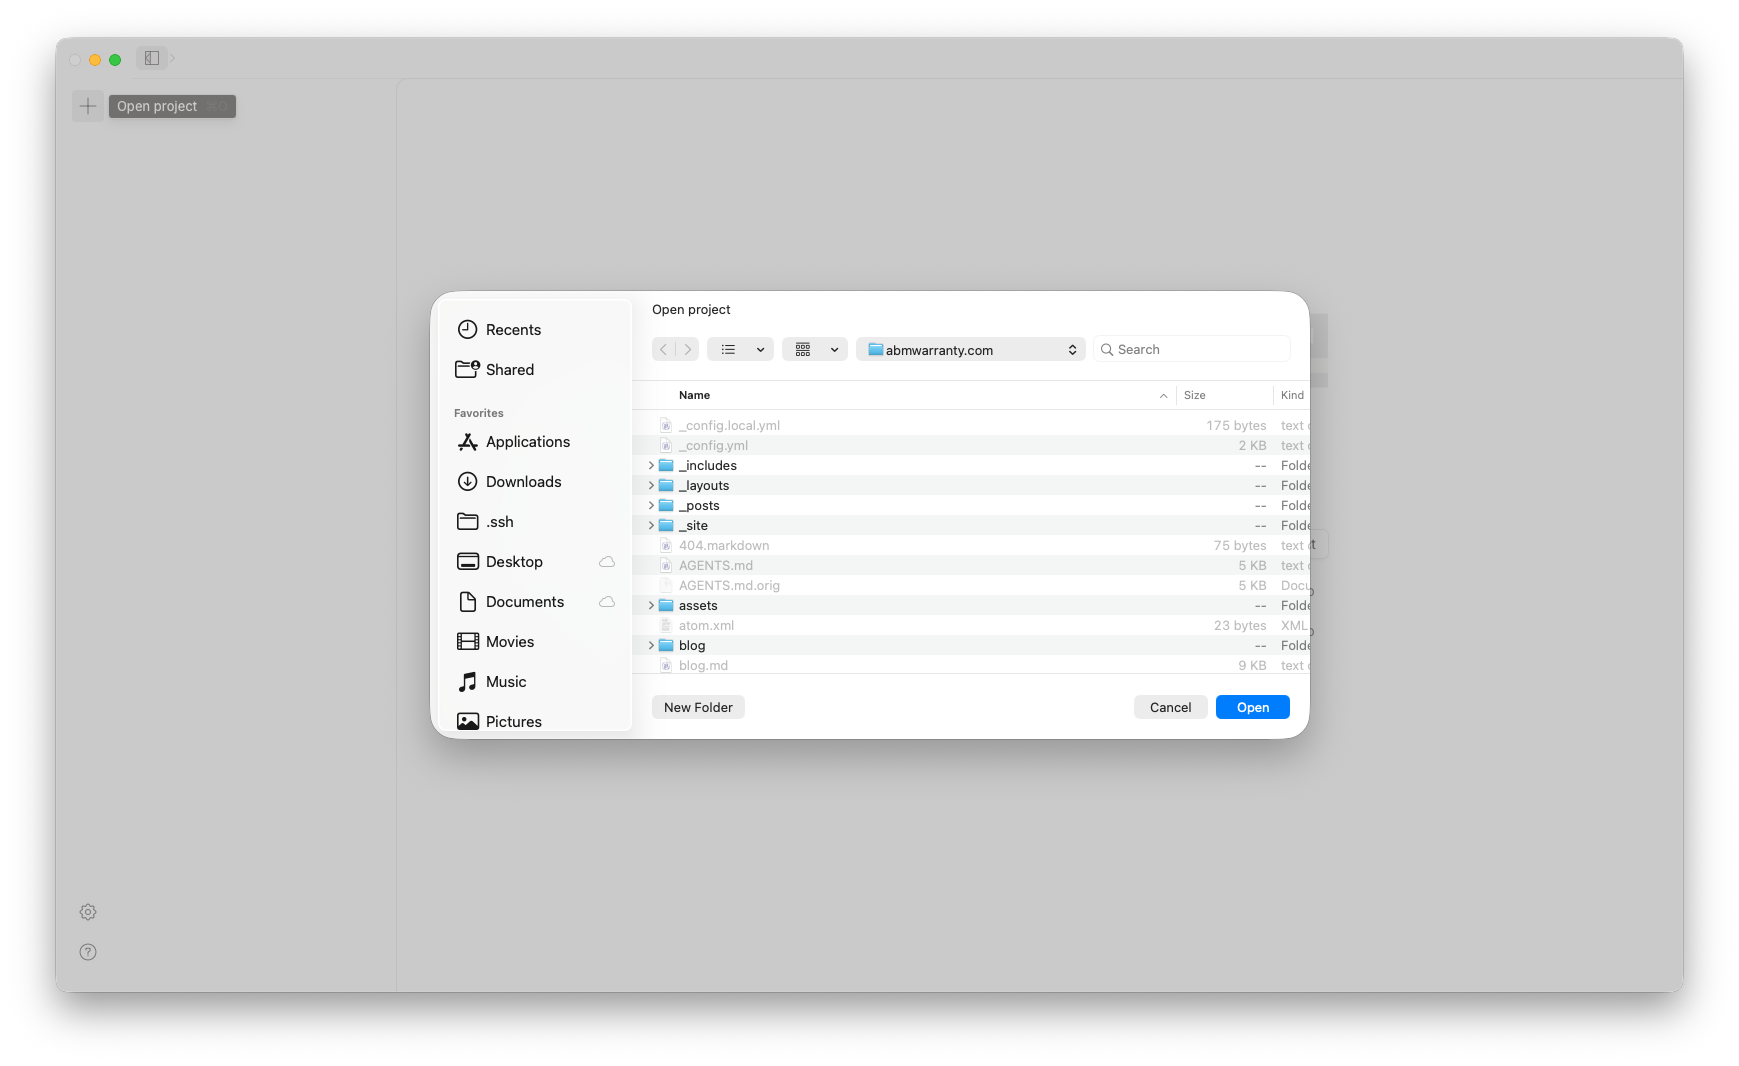
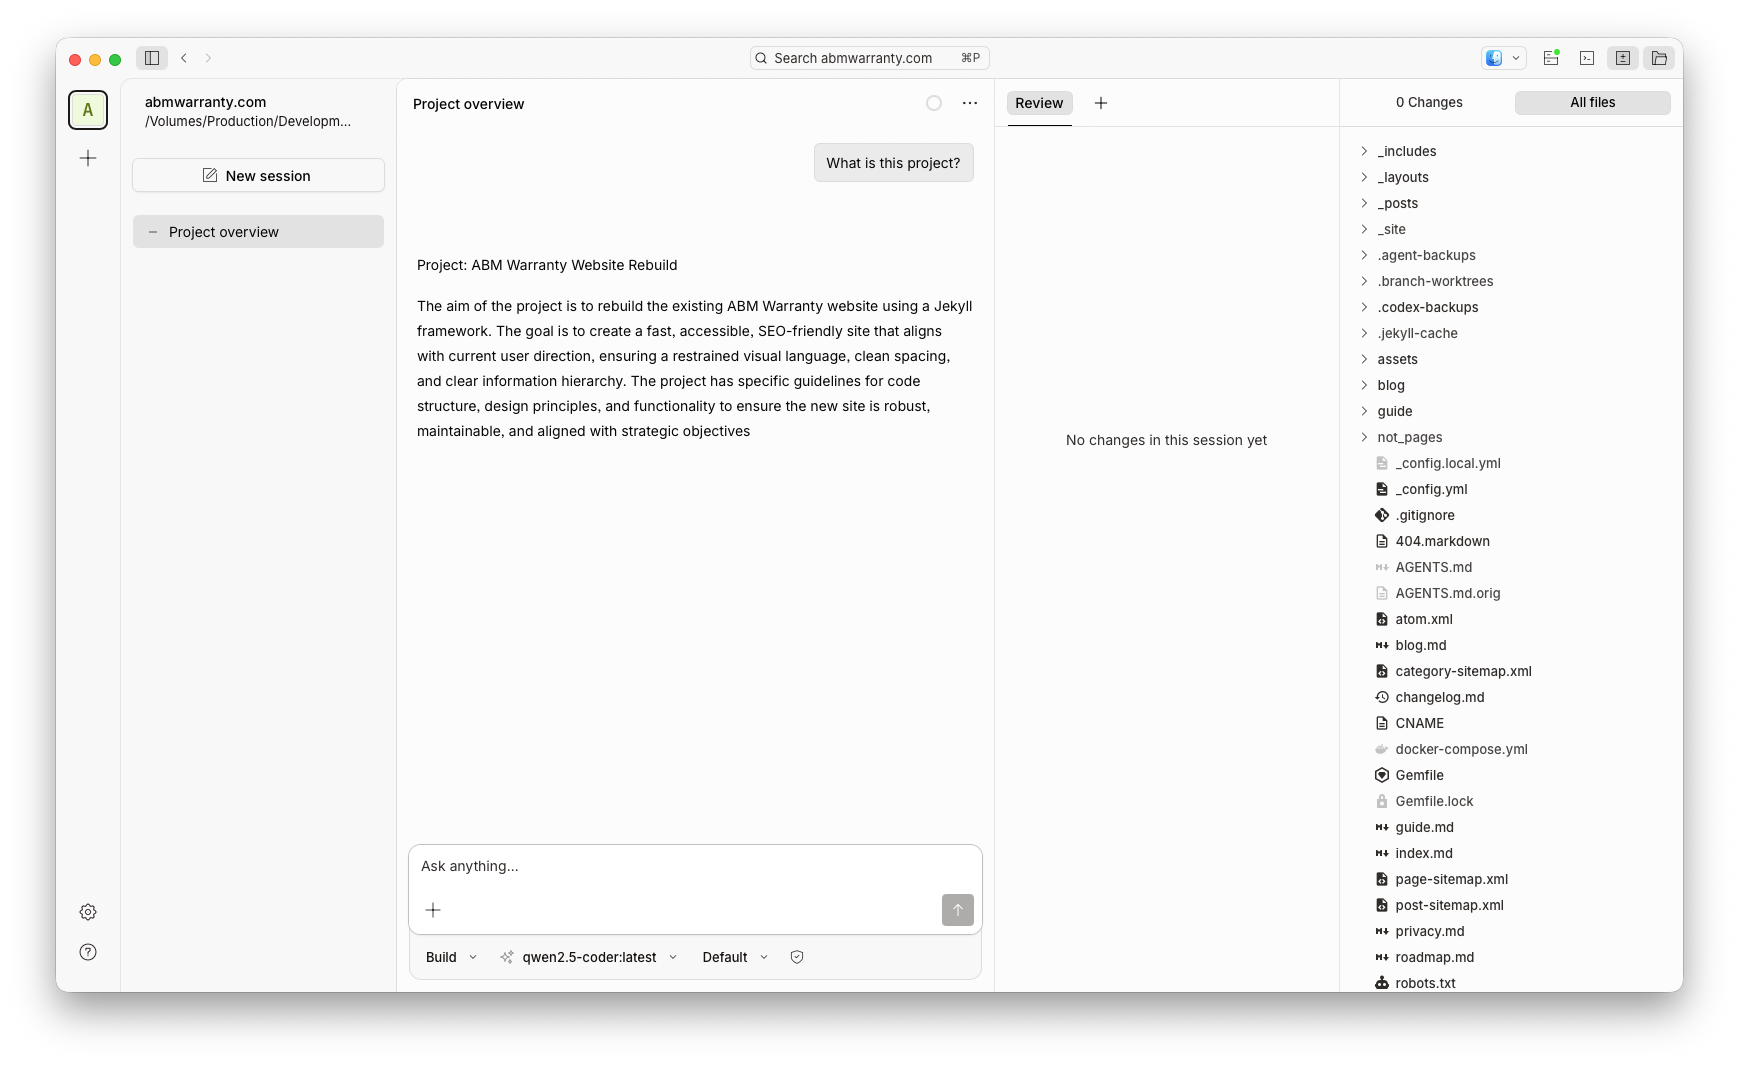
Make sure you pick the Qwen LLM (Local) and add a local project from the sidebar (this is most likely a copy of your local git repository that you want the App and Qwen to be able to reference).
Lets test!
Prompt: What is this project?
So how am I using it now?
Currently I use Ollama with the chat feature using model: llama3.1 for any question or task I would normally use OpenAI’s ChatGPT for and I tend to get a good result. If I don’t I still have a subscription to ChatGPT for more advanced tasks. In terms of vibe coding, I use the OpenCode app and Qwen for light coding, HTML, CSS, JS and Swift all work very well. If I need to do a large refactor I move to Codex or Claude. The blend between local and cloud has allowed me to save money and really does in my mind strike the balance between good operational security and value.
For anything sensitive or family oriented I will use a local LLM for image tweaks or questions, for anything cloud related I redact most of that information or use it for complex coding tasks typically. I am leanign more and more into the use of my local LLM on my Mac much more frequently.
Know your limits
In setting up Ollama on my Mac, I’ve discovered the power of local AI models and how they can be used in conjunction with cloud-based services. With a suitable machine and the right model, local LLMs offer a unique combination of security, cost-effectiveness, and flexibility. By leveraging tools like Ollama and OpenCode, users can create their own local AI ecosystem that blends the best of both worlds. While there are limitations to consider when pushing the capabilities of local LLMs, I’ve found that they excel in specific tasks such as summarization, image manipulation, and light coding. As my reliance on cloud-based services decreases, I’m excited to explore new applications for Ollama and see how it continues to evolve and improve. Whether you’re a developer, researcher, or simply someone interested in AI, setting up a local LLM like Ollama is an exciting step into the world of private, yet powerful, AI computation.
Resources
- Ollama Website
- LM Studio
- OpenCode Website
- ApXML Post on Best Local LLMs for Apple Silicon Mac
- Ollama Download Page
- Homebrew Tap for OpenCode
- OpenCode GUI App Download
Ready to take your Apple IT skills and consulting career to the next level?
I’m opening up free mentorship slots to help you navigate certifications, real-world challenges, and starting your own independent consulting business.
Let’s connect and grow together — Sign up here
AI Usage Transparency Report
AI Era · Written during widespread use of AI tools
AI Signal Composition
Score: 0.43 · Moderate AI Influence
Summary
Running local AI models on a Mac can be intimidating, but with the right tools and knowledge, it's accessible to anyone. Ollama is a popular tool for downloading, loading, and using local LLMs on a Mac. It offers two methods of installation: CLI and DMG. Once installed, users can browse and download various models from the Ollama website or use the CLI to pull any model they want. The choice of model depends on the type of task and the capabilities of the user's Mac. Local LLMs require unified memory, not RAM, and the more parameters a model has, the larger it is and the more unified memory it needs.
Related Posts
AI Agent Constraints and Security
I really feel like in this era of AI it's essential to write about and share experiences for others who are leveraging AI, especially now that AI usage seems almost ubiquitous. Specifically, when it comes to AI in development and the rapid growth of AI-driven automations in the IT landscape, I believe there's a need for open discussion and exploration.
Vibe Coding with Codex: From Fun to Frustration
So there I was, a typically day, a typical weekend. As a ChatGPT customer, I had heard good things about Codex and had not yet tried the platform. To date my experience with agentic coding was simply snippit based support with ChatGPT and Gemeni where I would ask questions, get explanations and support with squashing bugs in a few apps that I work on, for fun, on the side. There were a few core features in one of the apps I built that I wanted to try implementing but the...
Automating Script Versioning, Releases, and ChatGPT Integration with GitHub Actions
Managing and maintaining a growing collection of scripts in a GitHub repository can quickly become cumbersome without automation. Whether you're writing bash scripts for JAMF deployments, maintenance tasks, or DevOps workflows, it's critical to keep things well-documented, consistently versioned, and easy to track over time. This includes ensuring that changes are properly recorded, dependencies are up-to-date, and the overall structure remains organized.
ABM Warranty 0.4.1
The 0.4.x release series for ABM Warranty is focused on operational scale. The earlier 0.3 releases were about trust, correctness, and stabilizing the foundation. Version 0.4.1 builds directly on that work by making the app more practical for consultants, internal IT teams, and managed service providers who need to support multiple environments without losing isolation, control, or visibility. This includes improvements to user interface and workflow, as well as enhanced reporting capabilities to help these users manage their workflows more efficiently.
The warranty dashboard Apple doesn’t provide… yet
Download ABM Warranty
Why Apple Fleet Risk Isn’t a Security Problem—Until It Is
Security and risk are often treated as interchangeable concepts in modern IT environments, but they are not the same discipline. Security focuses on controls, enforcement, and prevention. Risk management, by contrast, is concerned with likelihood, impact, and consequence across operational, financial, and organizational domains. Frameworks such as those published by NIST make this distinction explicit: risk assessment is not a technical exercise, but a business one. Technology informs risk decisions, but it does not define them.
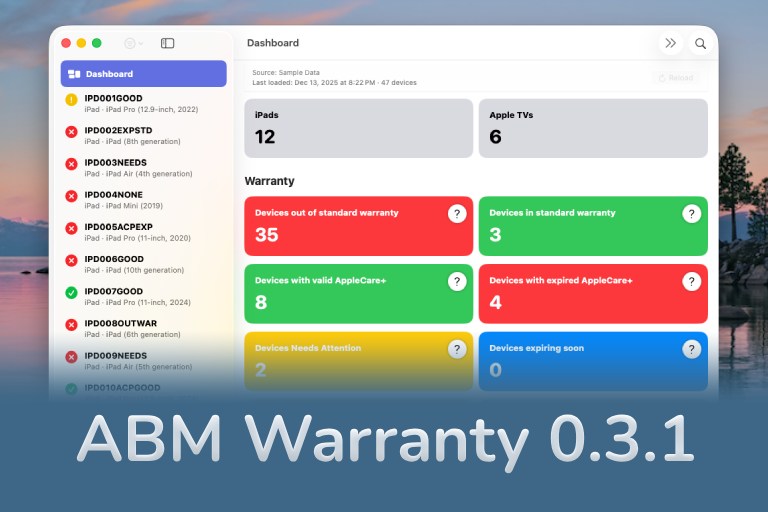
ABM Warranty 0.3.1
The 0.3.x release series for ABM Warranty is about tightening guarantees. Where earlier releases focused on surfacing data and making long-running operations observable, 0.3.x focuses on ensuring that what you see is complete, consistent, and safe to trust—particularly as the app is used in larger, slower, and more varied environments. This shift in focus aims to provide a more reliable foundation for users who require higher levels of assurance from their warranty management system.

ABM Warranty 0.2.0
ABM Warranty 0.2.0 is a feature release focused on visibility, safety, and scale. This version does not change what ABM Warranty is meant to be, but it significantly improves how the app behaves under real-world conditions—large device counts, API throttling, long-running imports, and the kinds of failure modes Apple IT admins actually encounter. The improvements in this release are designed to make the app more reliable and efficient, allowing it to handle complex scenarios without breaking or becoming unresponsive.
Running a Beta Program: Lessons Learned
Shipping software in isolation is comforting. You control the inputs, the environment, and the narrative you tell yourself about how things work. The moment you invite other people in—especially people who don’t share your assumptions—you lose that comfort. You also gain something far more valuable. Running a public beta for ABM Warranty through Apple’s TestFlight program forced me to confront that tradeoff head-on, and it fundamentally changed how quickly and confidently the app matured.
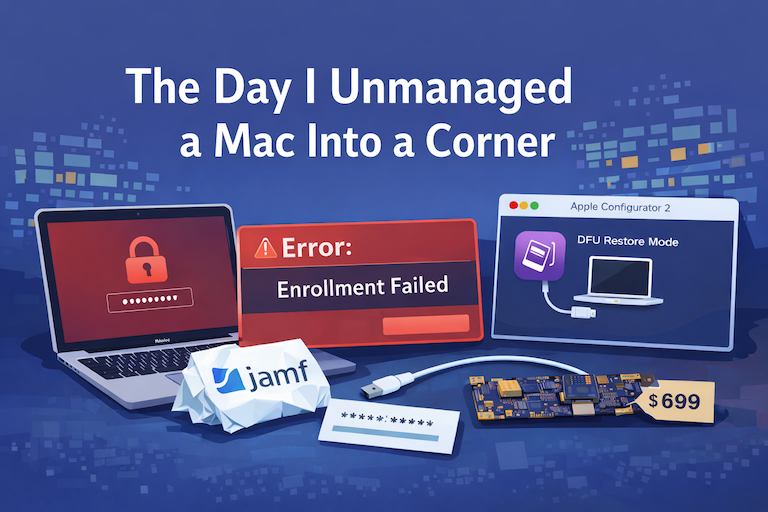
The Day I Unmanaged a Mac Into a Corner
There are a few kinds of mistakes you make as a Mac admin. There are the ones that cost you time, the ones that cost you sleep, and then there are the ones that leave you staring at a perfectly good laptop thinking, “How did I possibly make this *less* manageable by touching it?” These mistakes often stem from a lack of understanding or experience with macOS, but they can also be the result of rushing through tasks or not taking the time to properly plan and test.
