
If you’re trying to streamline macOS deployments in JAMF, there’s always that moment where you realize: the built-in experience gets you close, but not all the way there.
That’s where JAMF Setup Manager comes in. This is one of those tools that feels immediately familiar if you’ve used something like DEPNotify, but it takes a slightly different approach. Instead of building everything from scratch, you’re working with a structured, JAMF-native workflow that lets you deploy a polished enrollment experience using just a package and a configuration profile.
Let me walk you through how I set this up and why it’s been such a solid addition to my workflow.
What JAMF Setup Manager Actually Solves
At its core, JAMF Setup Manager is about creating a controlled, user-friendly zero-touch enrollment flow.
You’re defining what happens during provisioning, how it looks, and what actions run—without having to stitch together a bunch of scripts and UI components yourself.
The biggest takeaway is how simple the deployment model is:
- One package
- One configuration profile
That’s it.
Once those are in place, everything else becomes about how you scope and structure the workflow. We will be referencing the quickstart for this setup.
Getting the Package into JAMF
The first step is getting the Setup Manager package into your JAMF environment so it can be deployed during enrollment.
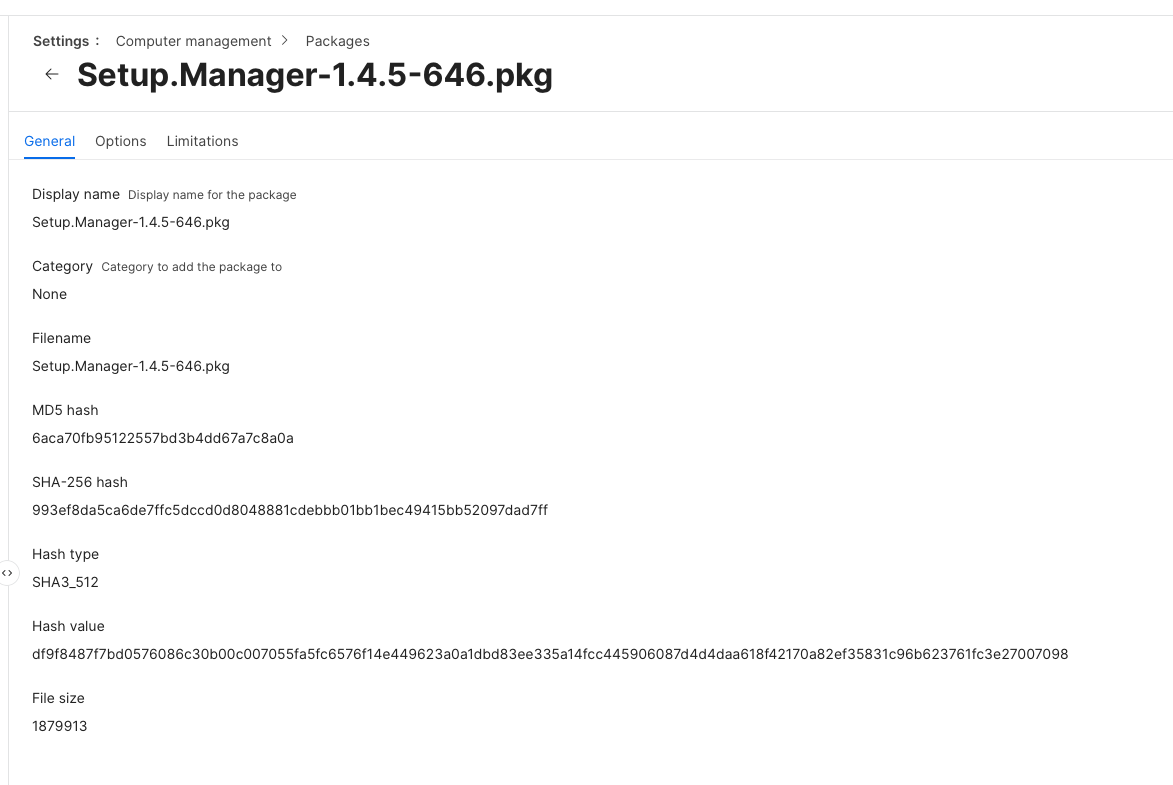
Start by downloading the latest release of the Setup Manager package from the project’s GitHub releases page. This will typically be a .pkg file.
Once downloaded, upload the package into JAMF Pro:
- Log into JAMF Pro
- Navigate to Settings → Computer Management → Packages
- Click New
- Upload the
.pkgfile you downloaded - Save the package
At this point, the package is now available inside JAMF and can be used in policies or PreStage enrollment.
From a workflow perspective, this package is one half of the deployment model. It provides the actual Setup Manager application that will run on the device during enrollment.
The next step is associating this package with your PreStage enrollment so it installs automatically when a device is provisioned.
Scoping - An important step
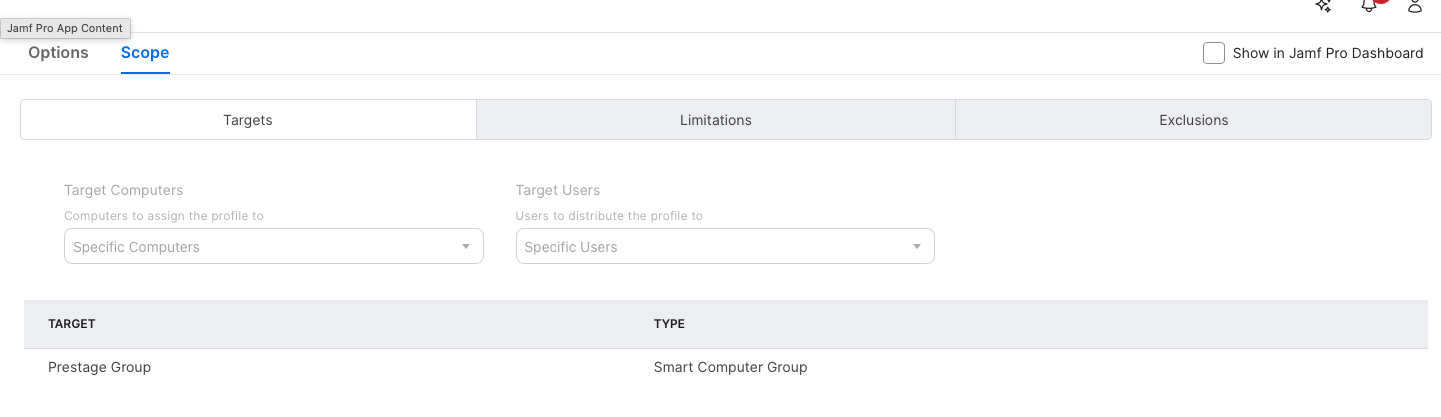
This is where most of the complexity lives, and honestly, it’s the part you want to get right the first time. I always like to start scoping by creating the groups and criteria first so that when I create the profile its easy to add the scope and the exclusion.
You need two key groups:
-
A PreStage group that targets devices during enrollment

-
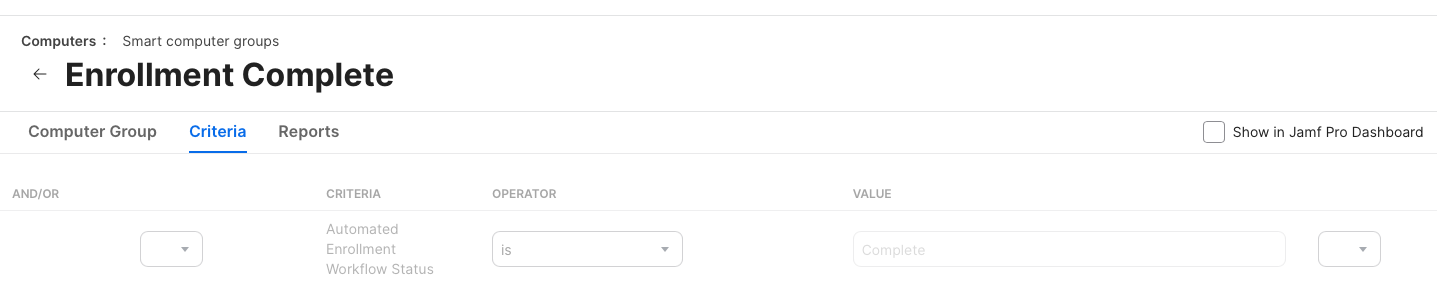
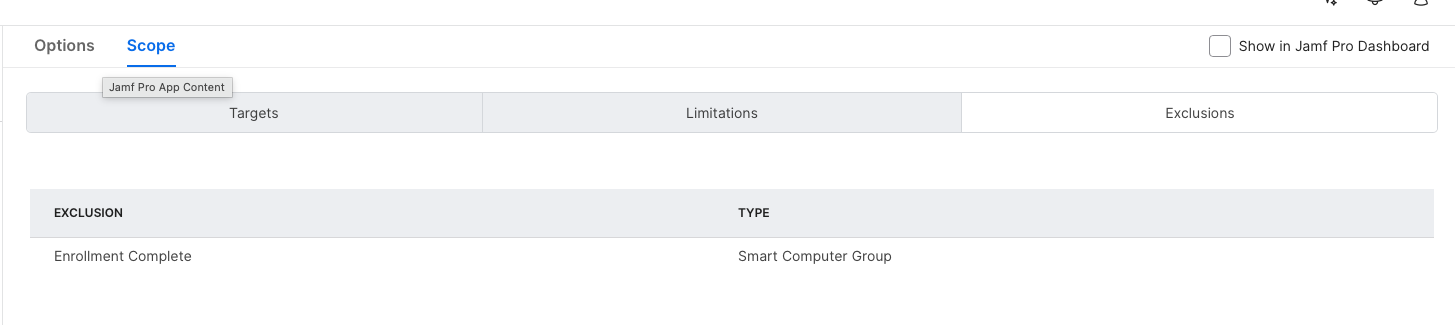
An Enrollment Complete group that removes the profile when you’re done
The PreStage group is typically based on the enrollment method. If a device is enrolled via PreStage, it gets the profile. Simple.
The tricky part is making sure the profile doesn’t disappear too early.
If it vanishes before your workflow finishes, you’ll end up with a broken or incomplete setup experience. So you need a clean way to remove it only after everything is done.
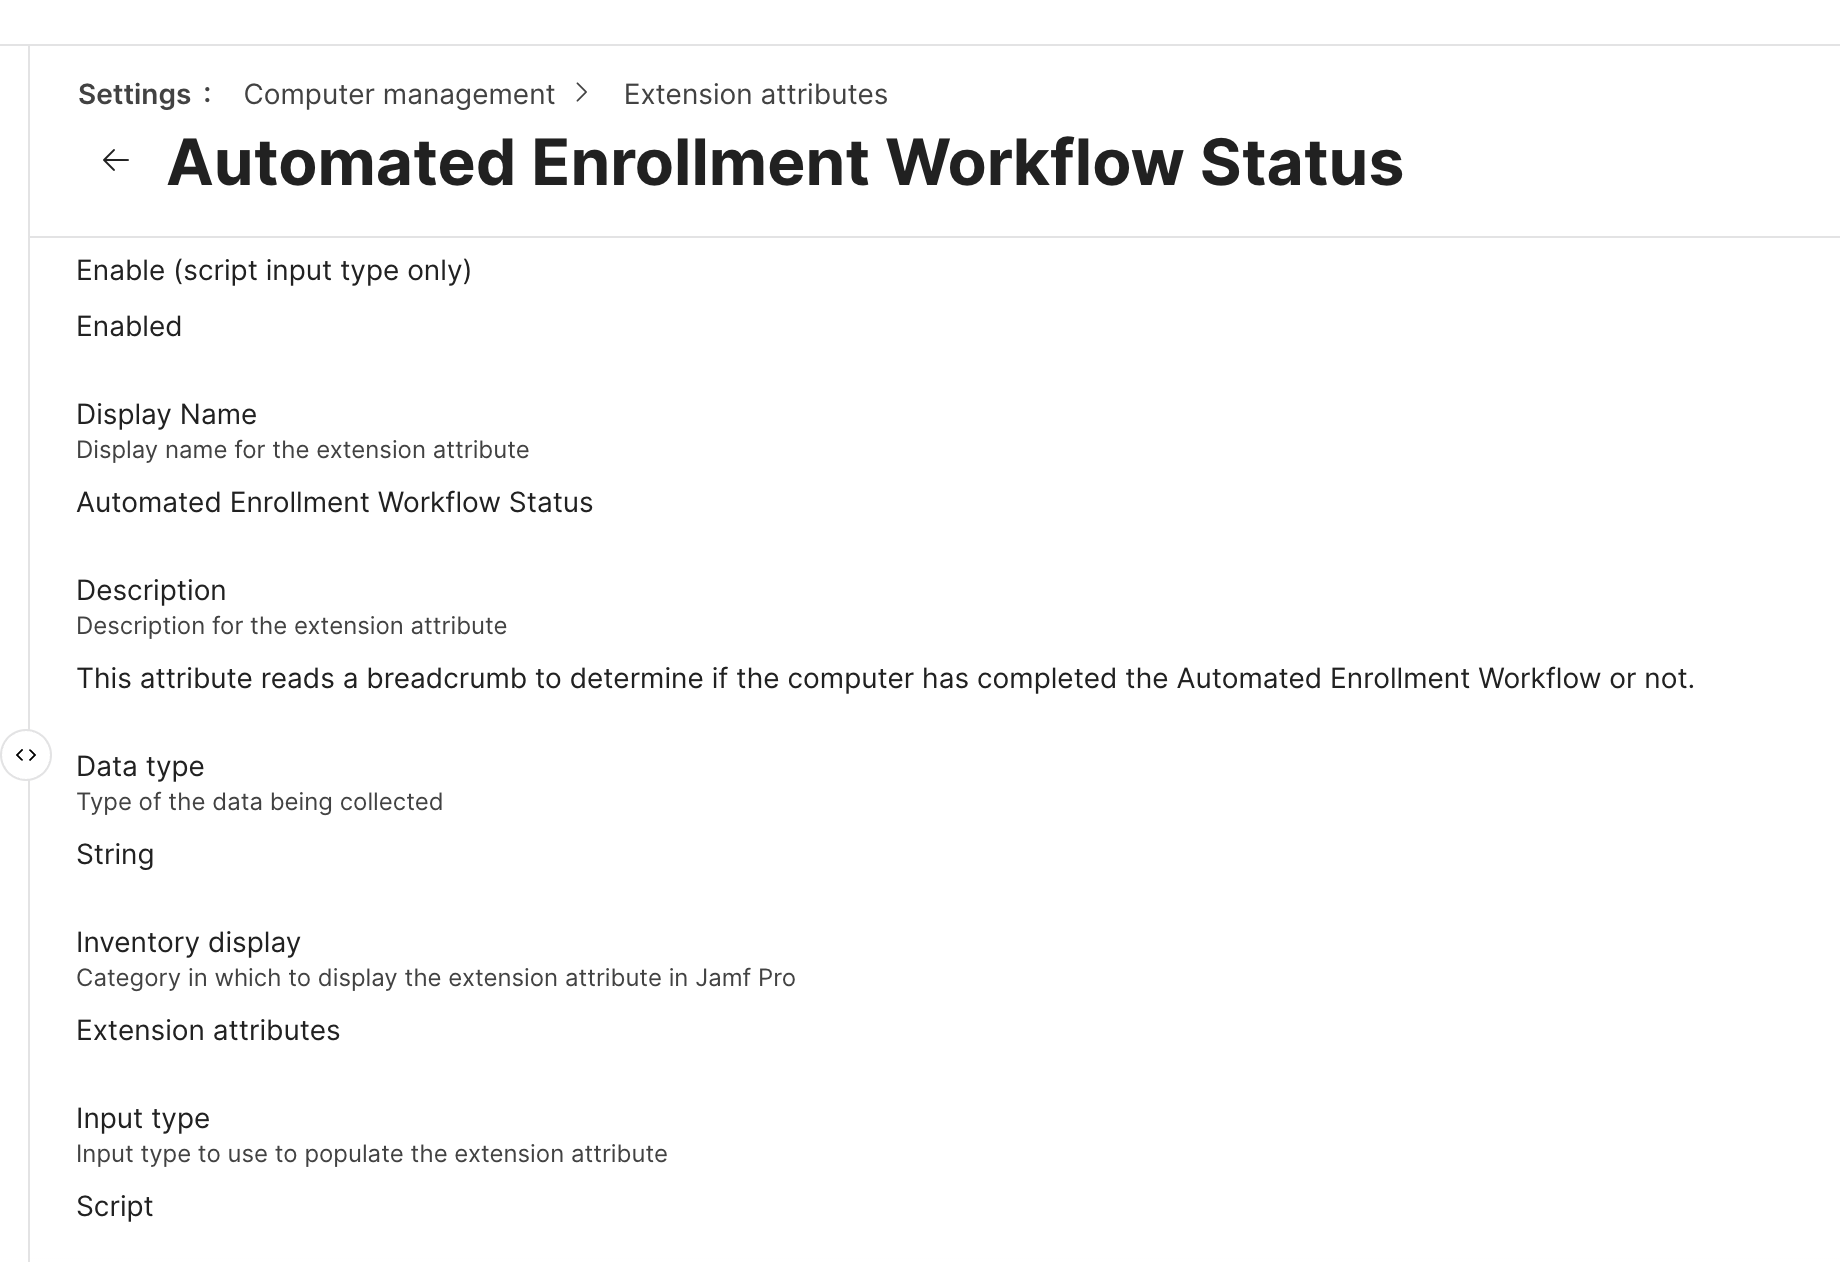
What I do is use a custom attribute that checks for a file-based signal indicating completion using a computer extension attribute written by Alectrona. Once that condition is met, the device falls into the “Enrollment Complete” group and the profile is removed.
#!/bin/bash
# Automated Enrollment Workflow Status
# This attribute reads a breadcrumb to determine if the computer has completed the Automated Enrollment Workflow or not.
# Created by Alectrona for use with https://github.com/alectrona/automated-deployment
completionBreadcrumb="/Library/Application Support/Alectrona/com.alectrona.AutomatedEnrollment.plist"
result=$(/usr/bin/defaults read "$completionBreadcrumb" Complete 2> /dev/null)
# If the breadcrumb reads false then return incomplete, and true means complete
if [[ "$result" == "0" ]]; then
echo "<result>Incomplete</result>"
elif [[ "$result" == "1" ]]; then
echo "<result>Complete</result>"
fi
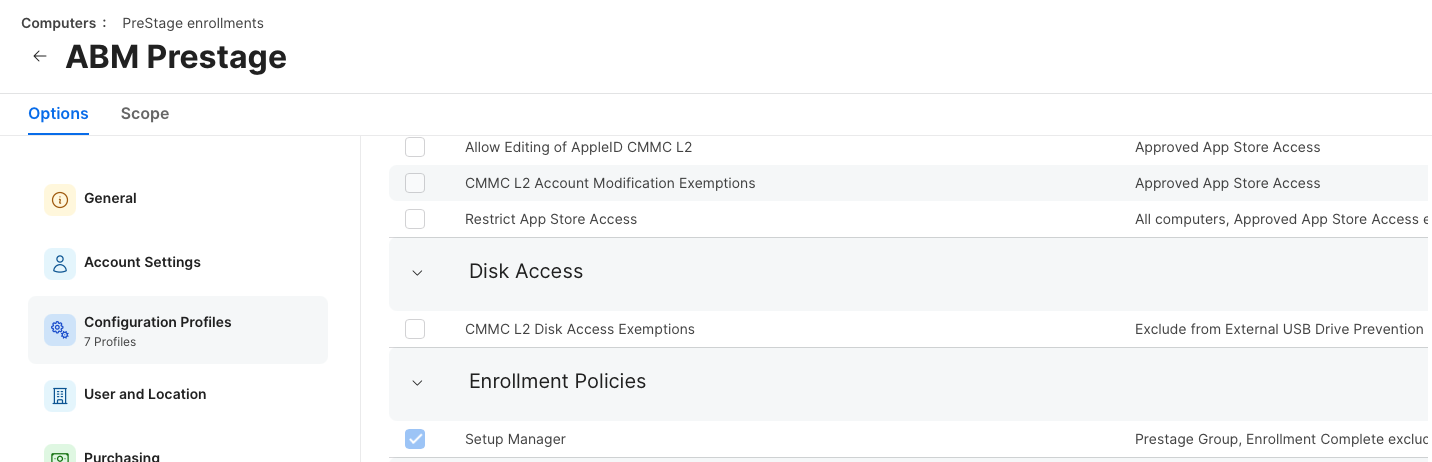
exit 0That separation—between “should have the profile” and “should no longer have the profile”—is critical.
Once you have these groups I scope the configuration profile we build in the next step to make sure that its scoped to the Prestage Group, and excludes the Enrollment Complete group so when enrollment is done, the computer will exclude itself and the profile will be pulled from the workstation.
Building the Configuration Profile
This is where Setup Manager really shines.
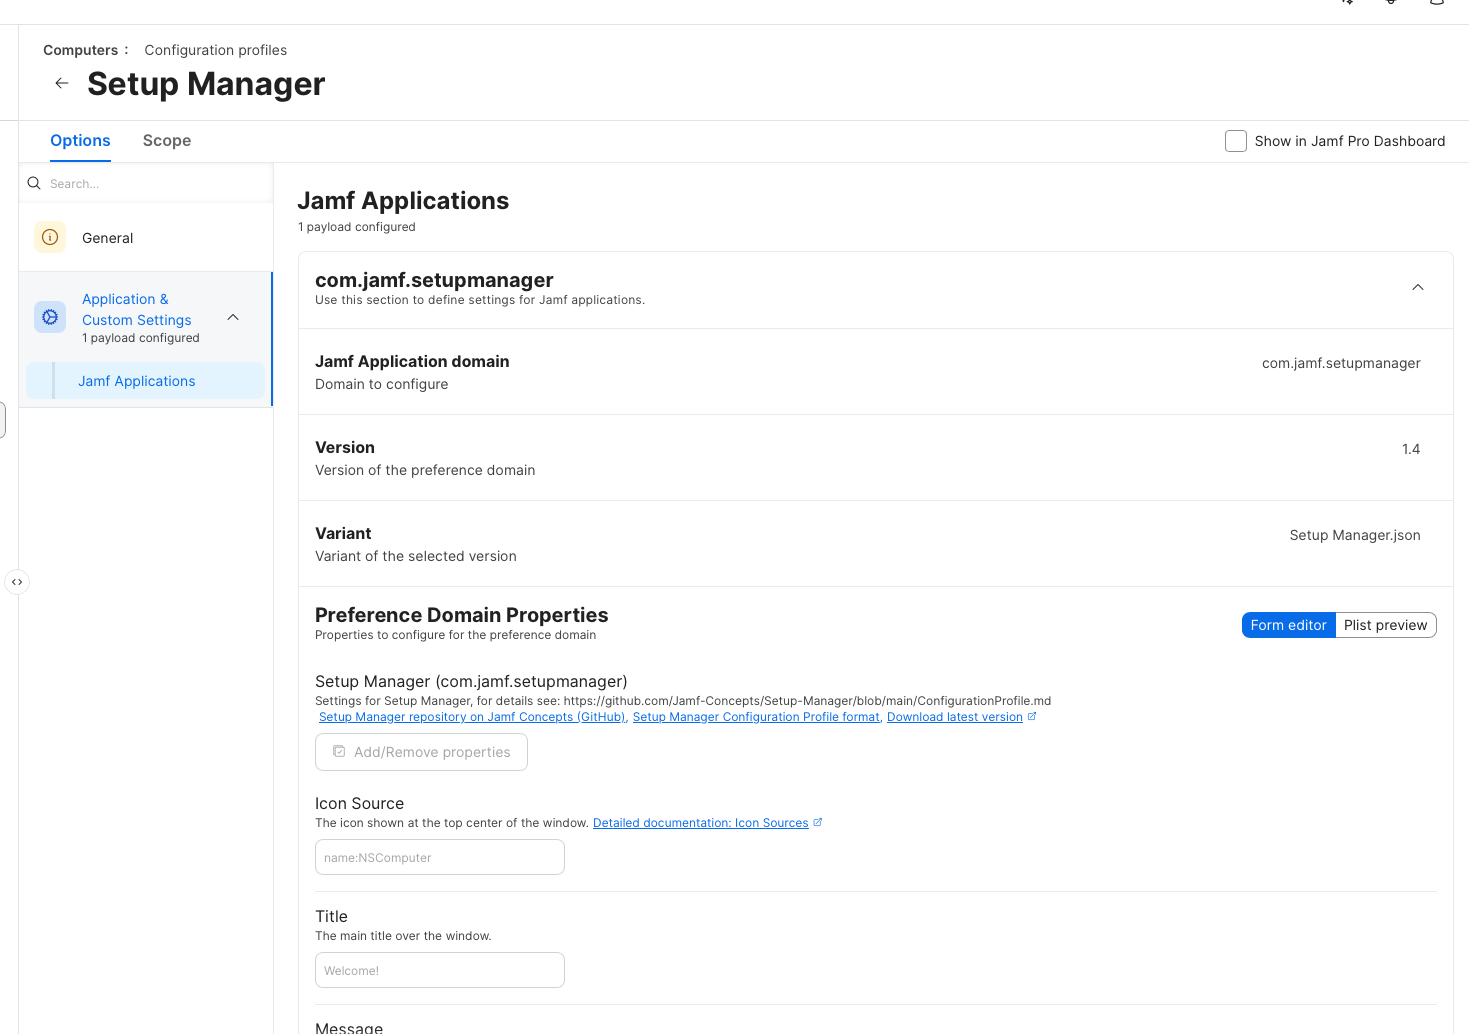
Inside JAMF, you configure it under application and custom settings. Once you select Setup Manager, you get access to a structured set of properties that define the entire experience.
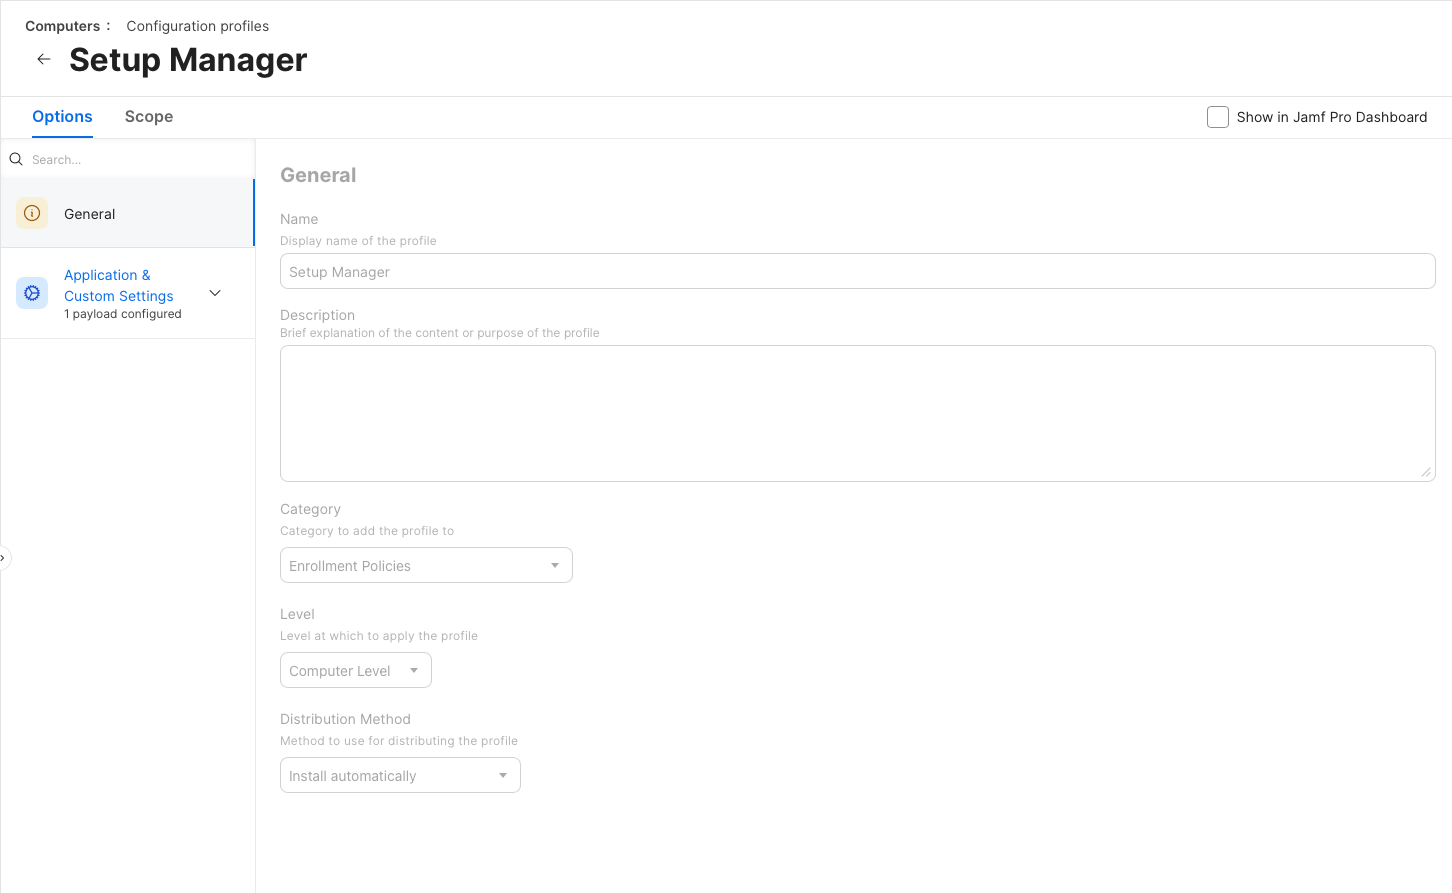
Out of the gate, you can define things like:
- The icon at the top of the screen
- The title and messaging
- The sequence of actions that run during setup
What’s nice is that you’re not starting from scratch. The JSON-based configuration exposes the most common properties immediately, so you can focus on building your workflow instead of figuring out syntax.
From there, it becomes about defining actions.
Designing the Workflow
Everything in Setup Manager runs in sequence. Each step executes in order, and you can rearrange them as needed.
Most of my workflow is built around simple policy triggers, but you have a lot of flexibility:
- Run shell commands
- Install packages
- Trigger inventory updates
- Watch for files or conditions
- Prompt the user for input
That last one—user input—is more powerful than it sounds.
You can prompt a user to select something like a department, then use that input to drive downstream actions. For example, you can install department-specific applications automatically after they make a selection. If your interested in learning more about this option check out more here.
It turns Setup Manager from a static deployment tool into something that can adapt dynamically during enrollment.
Icons, UI, and Presentation
This is one of those areas that seems minor at first, but it has a huge impact on how polished your deployment feels.
Setup Manager gives you a surprising amount of control over how icons are sourced and rendered throughout the workflow—not just the main icon, but also backgrounds and per-action icons. Once you understand how flexible this is, you can move beyond generic visuals and build something that actually feels intentional.
At a high level, you can define icon sources in several ways:
- Remote images (downloaded at runtime)
- Local files installed on the system
- Existing macOS application icons
- Named system icons
- SF Symbols
- Even colors used as backgrounds or visual elements
Each of these behaves a little differently, and choosing the right one depends on how you’re designing your enrollment experience.
Using Icons from the Web
If your icon source starts with http or https, Setup Manager will download the image at runtime and display it.
This is useful if you want to centralize branding or update visuals without rebuilding packages. While the image is being fetched, Setup Manager shows a loading indicator, so the user isn’t left wondering what’s happening.
<key>icon</key>
<string>https://example.com/path/to/icon.png</string>
This approach works well for dynamic environments, but it does introduce a dependency on network availability during enrollment.
Using Local Files (Recommended for Branding)
If you point to an absolute file path, Setup Manager will load the image directly from disk.
This is the most reliable way to deliver custom branding, especially in zero-touch workflows where network conditions may vary.
<key>icon</key>
<string>/Library/Organization/image.png</string>
The key detail here is timing. The image must already exist on the system before Setup Manager runs. In JAMF, the easiest way to handle this is to include a separate branding package in your PreStage.
Because PreStage installs packages in alphabetical order, you can control execution order by naming your branding package so it installs before Setup Manager. That guarantees your assets are in place when the workflow starts.
Pulling Icons from Applications
You can also point directly to an .app bundle, and Setup Manager will extract and display that app’s icon.
This is an easy win for consistency. If you’re installing apps as part of your workflow, you can visually reinforce that by showing their actual icons during each step. It makes the process feel more connected and less abstract.
<key>icon</key>
<string>/System/Applications/App Store.app</string>
Using Named System Icons
There are also built-in named icons you can reference.
For example:
AppIconuses the Setup Manager app iconNSComputerrepresents the current hardware
<key>icon</key>
<string>name:AppIcon</string>
These are useful when you want something clean and native without introducing external assets.
SF Symbols for a Native Look
If your icon source starts with symbol:, Setup Manager will render an SF Symbol.
This is one of the best options for maintaining a consistent macOS aesthetic. SF Symbols scale cleanly, adapt well to different UI contexts, and feel native to the platform.
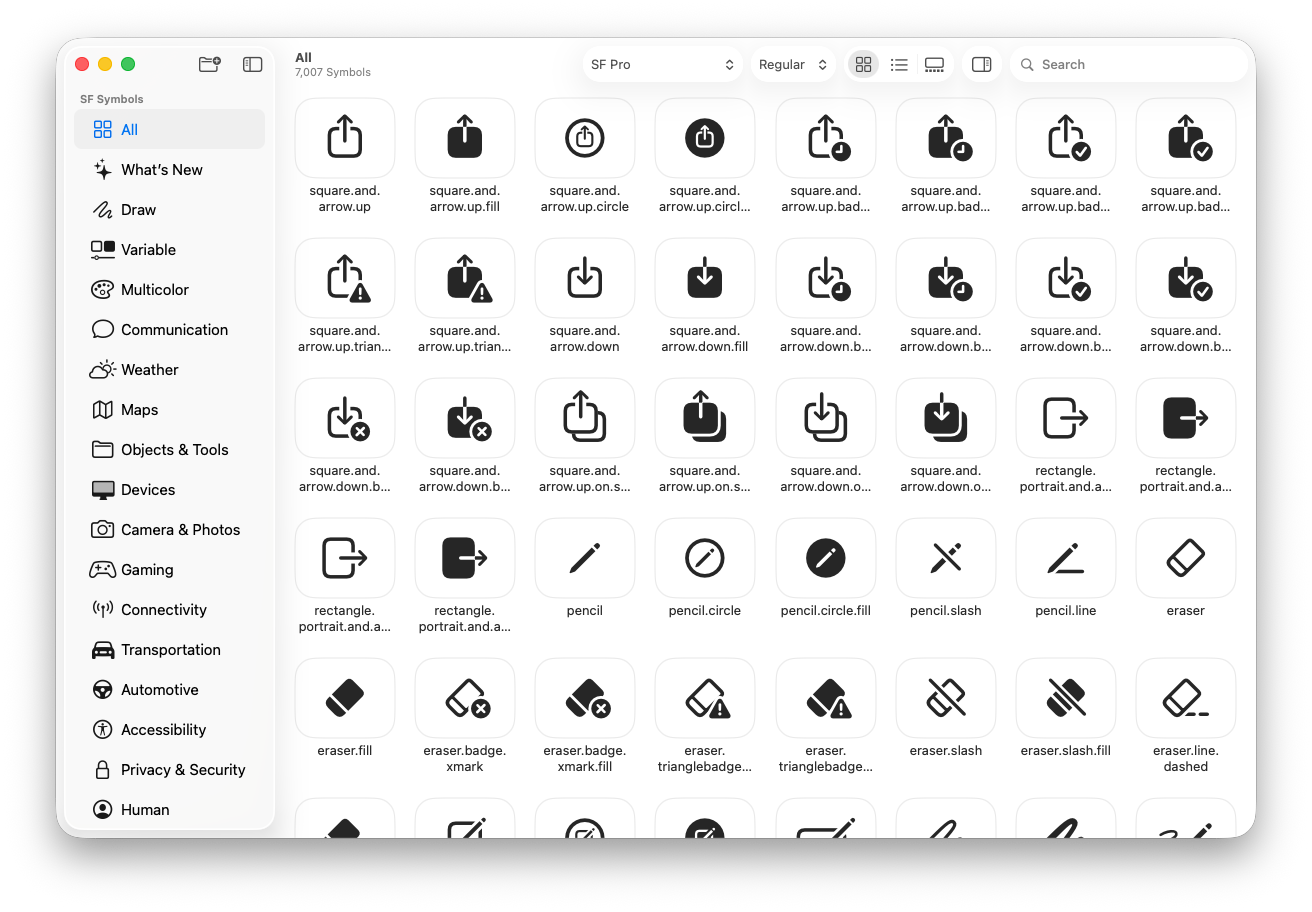
Just keep in mind that symbol availability can vary depending on macOS version and localization, so it’s worth testing across your supported environments.
<key>icon</key>
<string>symbol:clock</string>
Using Colors as Visual Elements
Setup Manager also allows you to define colors directly using hex values or system color names.
This is especially useful for backgrounds or accent elements. Instead of relying on images, you can create a clean, minimal look using color alone.
You can use:
- Standard hex values (e.g.
#f900a2) - Short hex values (e.g.
#aaa) - System colors (e.g.
##primary,##yellow)
This gives you another layer of control without adding complexity to your deployment.
<key>background</key>
<string>##white</string>
Supporting Light and Dark Mode
If you need to support both light and dark appearances, you can define icons as a dictionary with separate values for each mode.
This works for icons, backgrounds, and accent colors. It’s a simple way to ensure your visuals remain readable and consistent regardless of the system appearance.
<key>icon</key>
<dict>
  <key>dark</key>
  <string>name:Jamf_white</string>
  <key>light</key>
  <string>name:Jamf_blue</string>
</dict>
One important detail: Setup Manager doesn’t dynamically respond to appearance changes while it’s running. It evaluates the mode at launch and sticks with it, so design accordingly.
Advanced Options You Shouldn’t Ignore
There are a handful of optional settings that are easy to overlook but worth considering:
- Background images
- Accent colors
- Debug mode
- Countdown timers
- Run context (enrollment vs login window)
For my setup, I run everything at enrollment. That ensures the workflow kicks off immediately after the device is recognized by JAMF.
Debug mode is also incredibly useful while you’re building this out. It gives you visibility into what’s actually happening when something doesn’t behave the way you expect.
Connecting It to PreStage Enrollment
Once your profile is built and scoped correctly, you tie everything into PreStage enrollment.
This is where you:
-
Enable Setup Manager as part of the enrollment flow
-
Ensure the package installs during PreStage
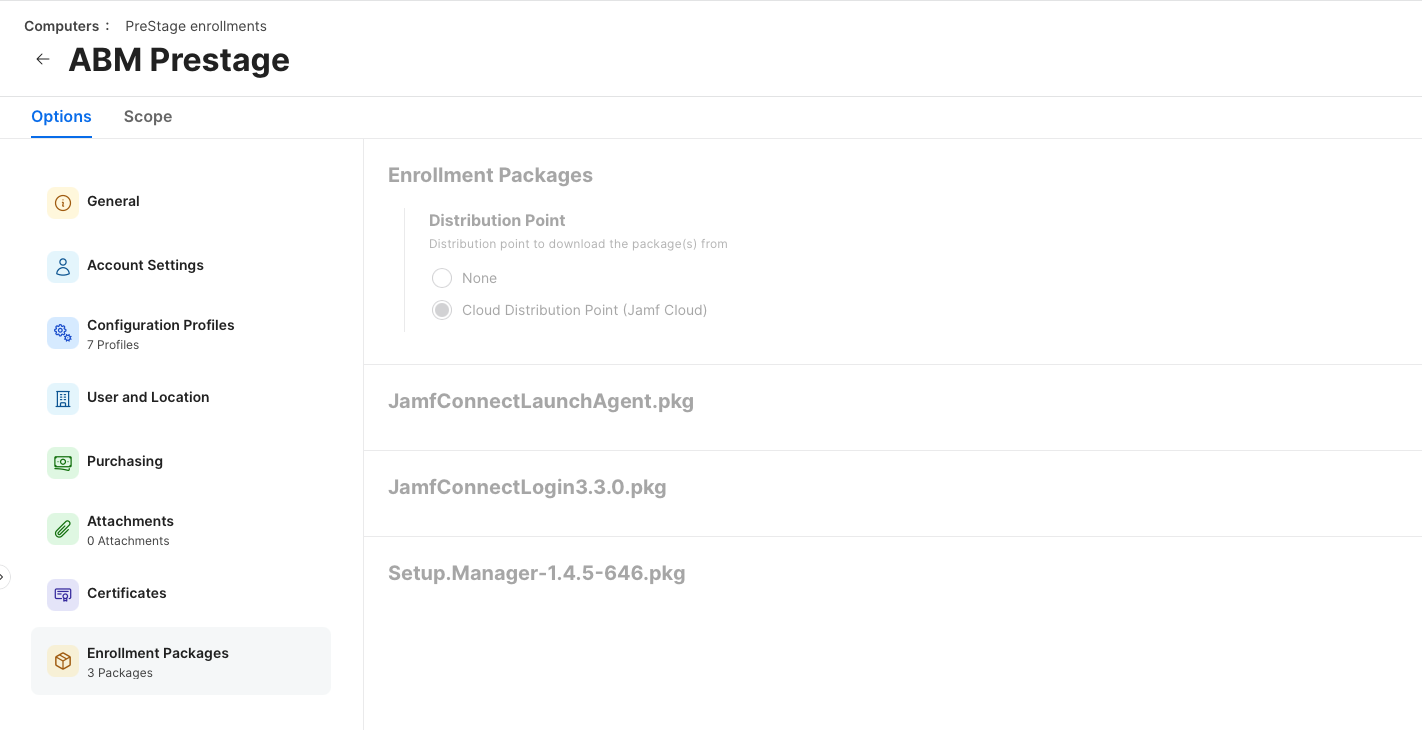
At that point, the entire experience becomes automatic.
The device enrolls, the profile lands, and Setup Manager takes over.
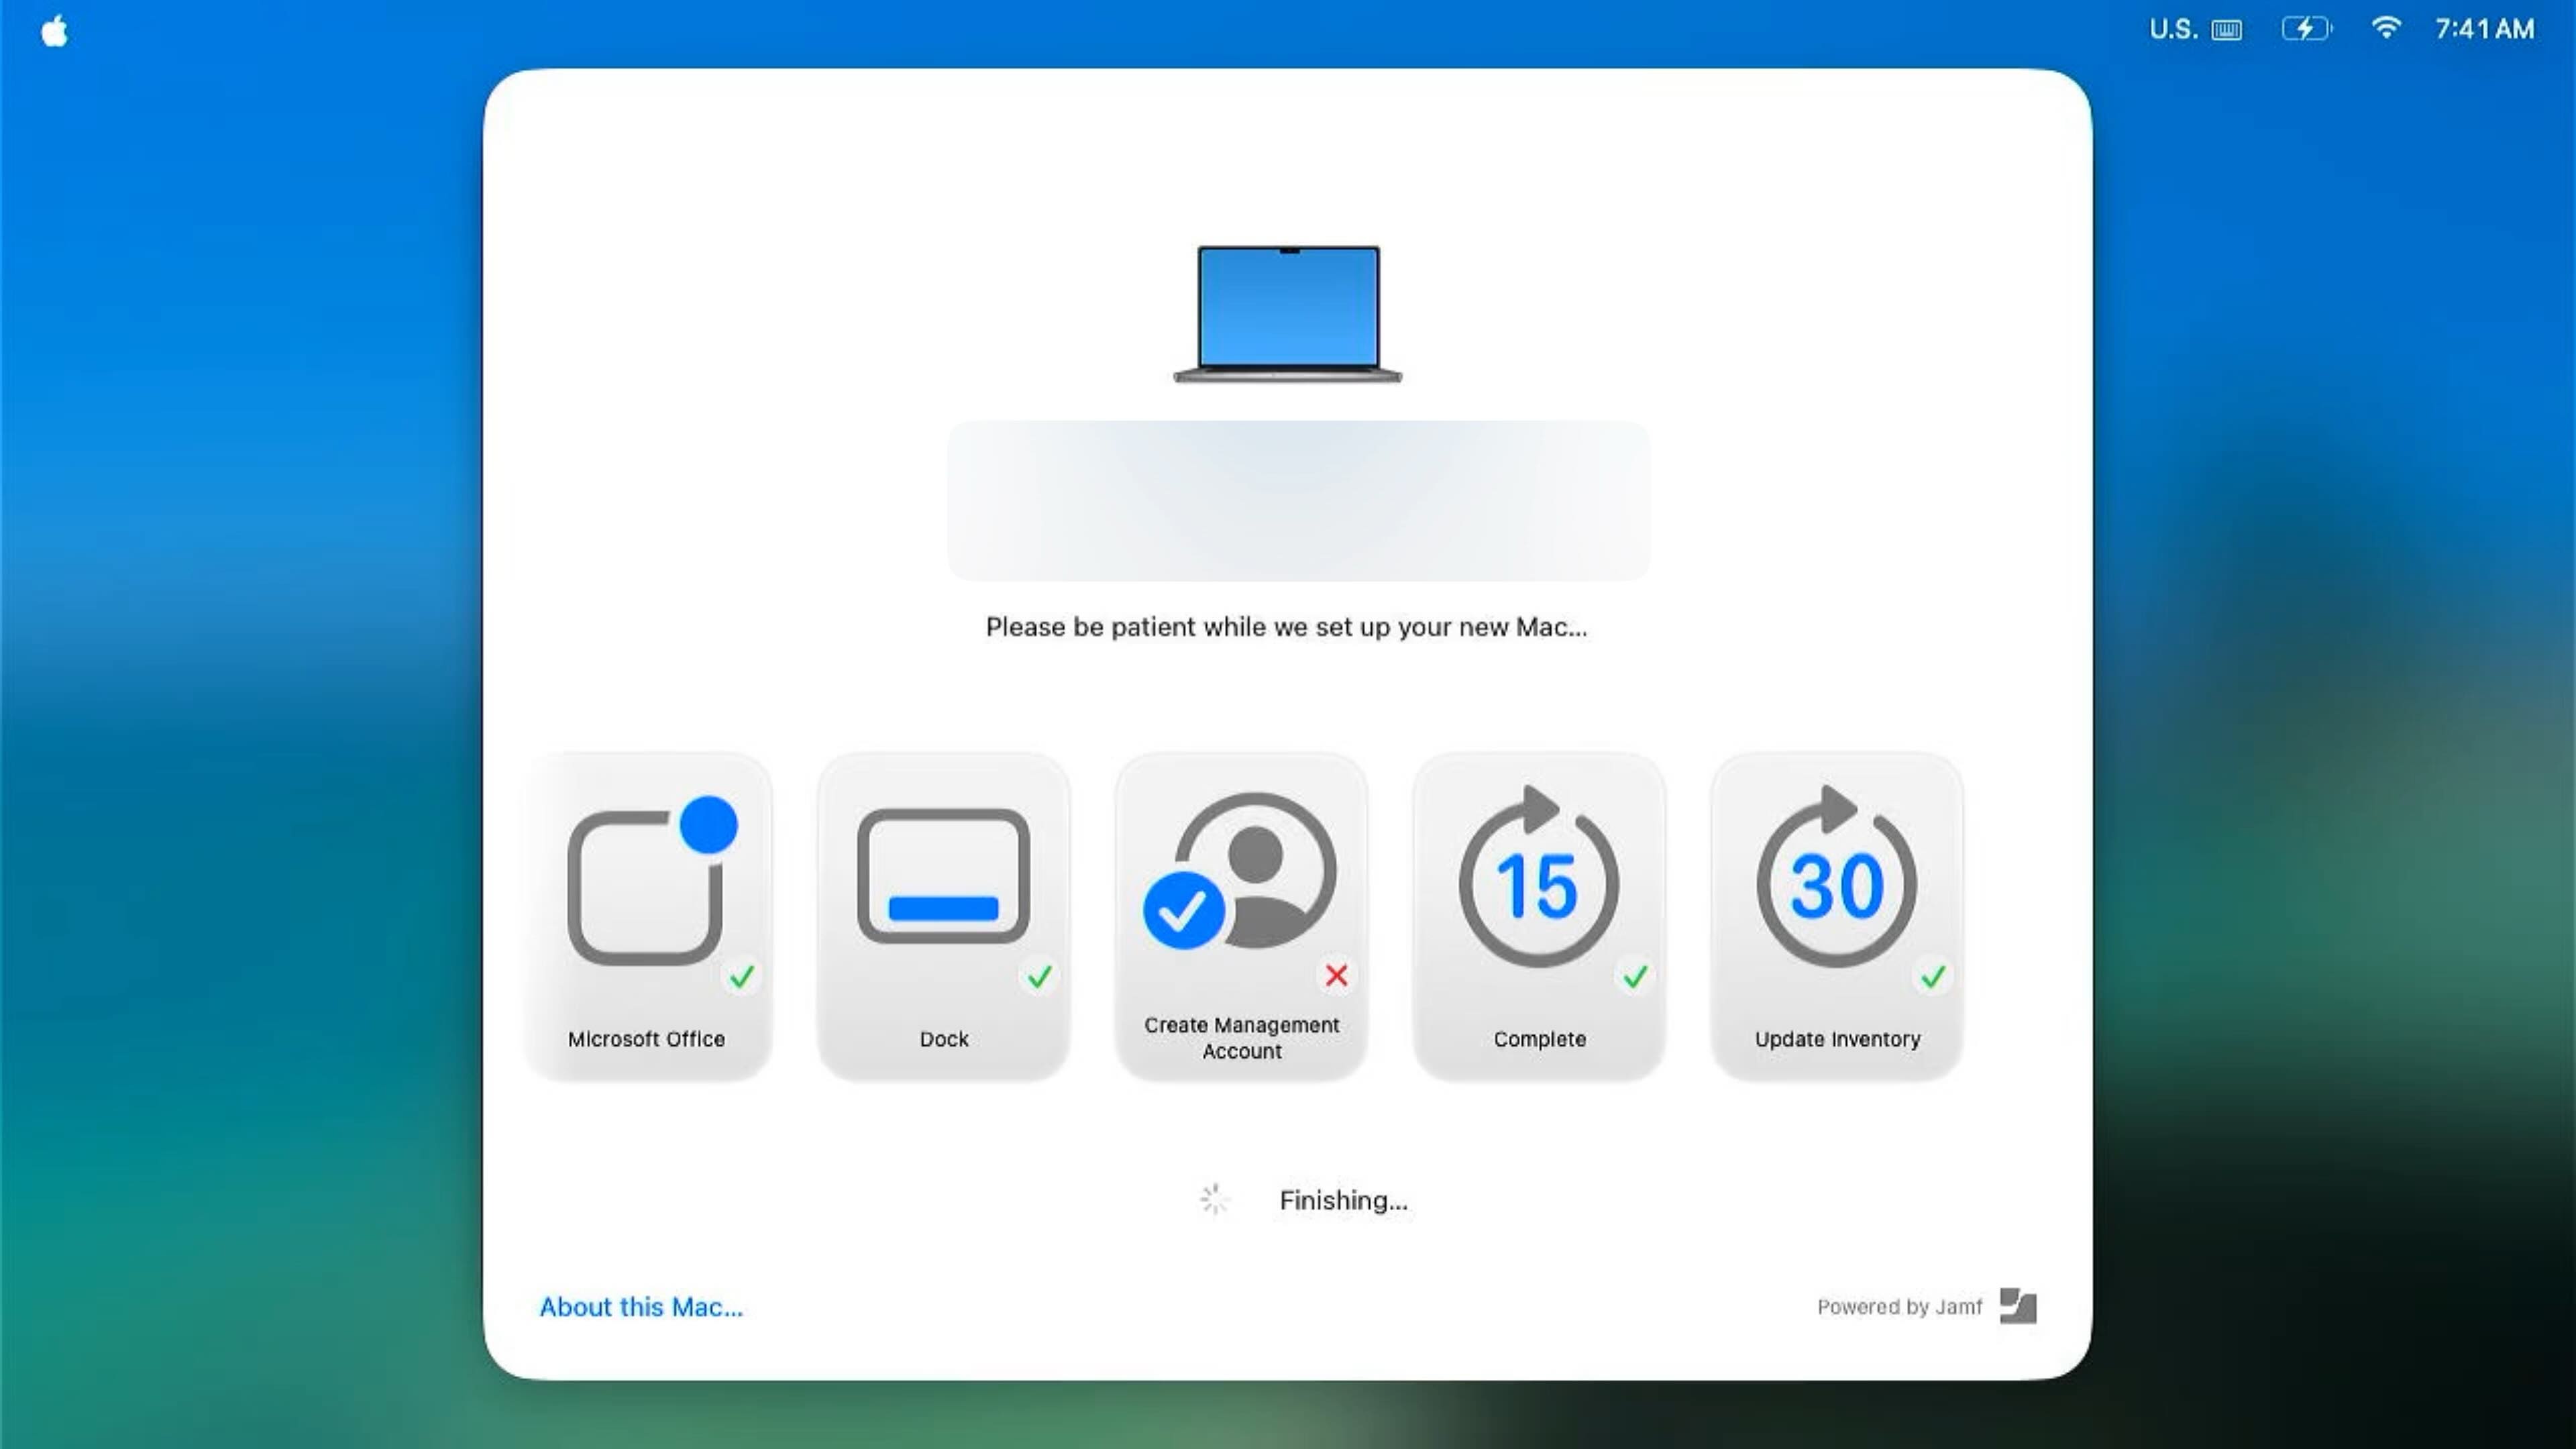
What It Looks Like in Practice
When the device hits enrollment, Setup Manager launches and begins executing the workflow.

You’ll see:
- A structured UI with your branding
- Progress through each step
- Success and failure indicators
- A final message guiding the user
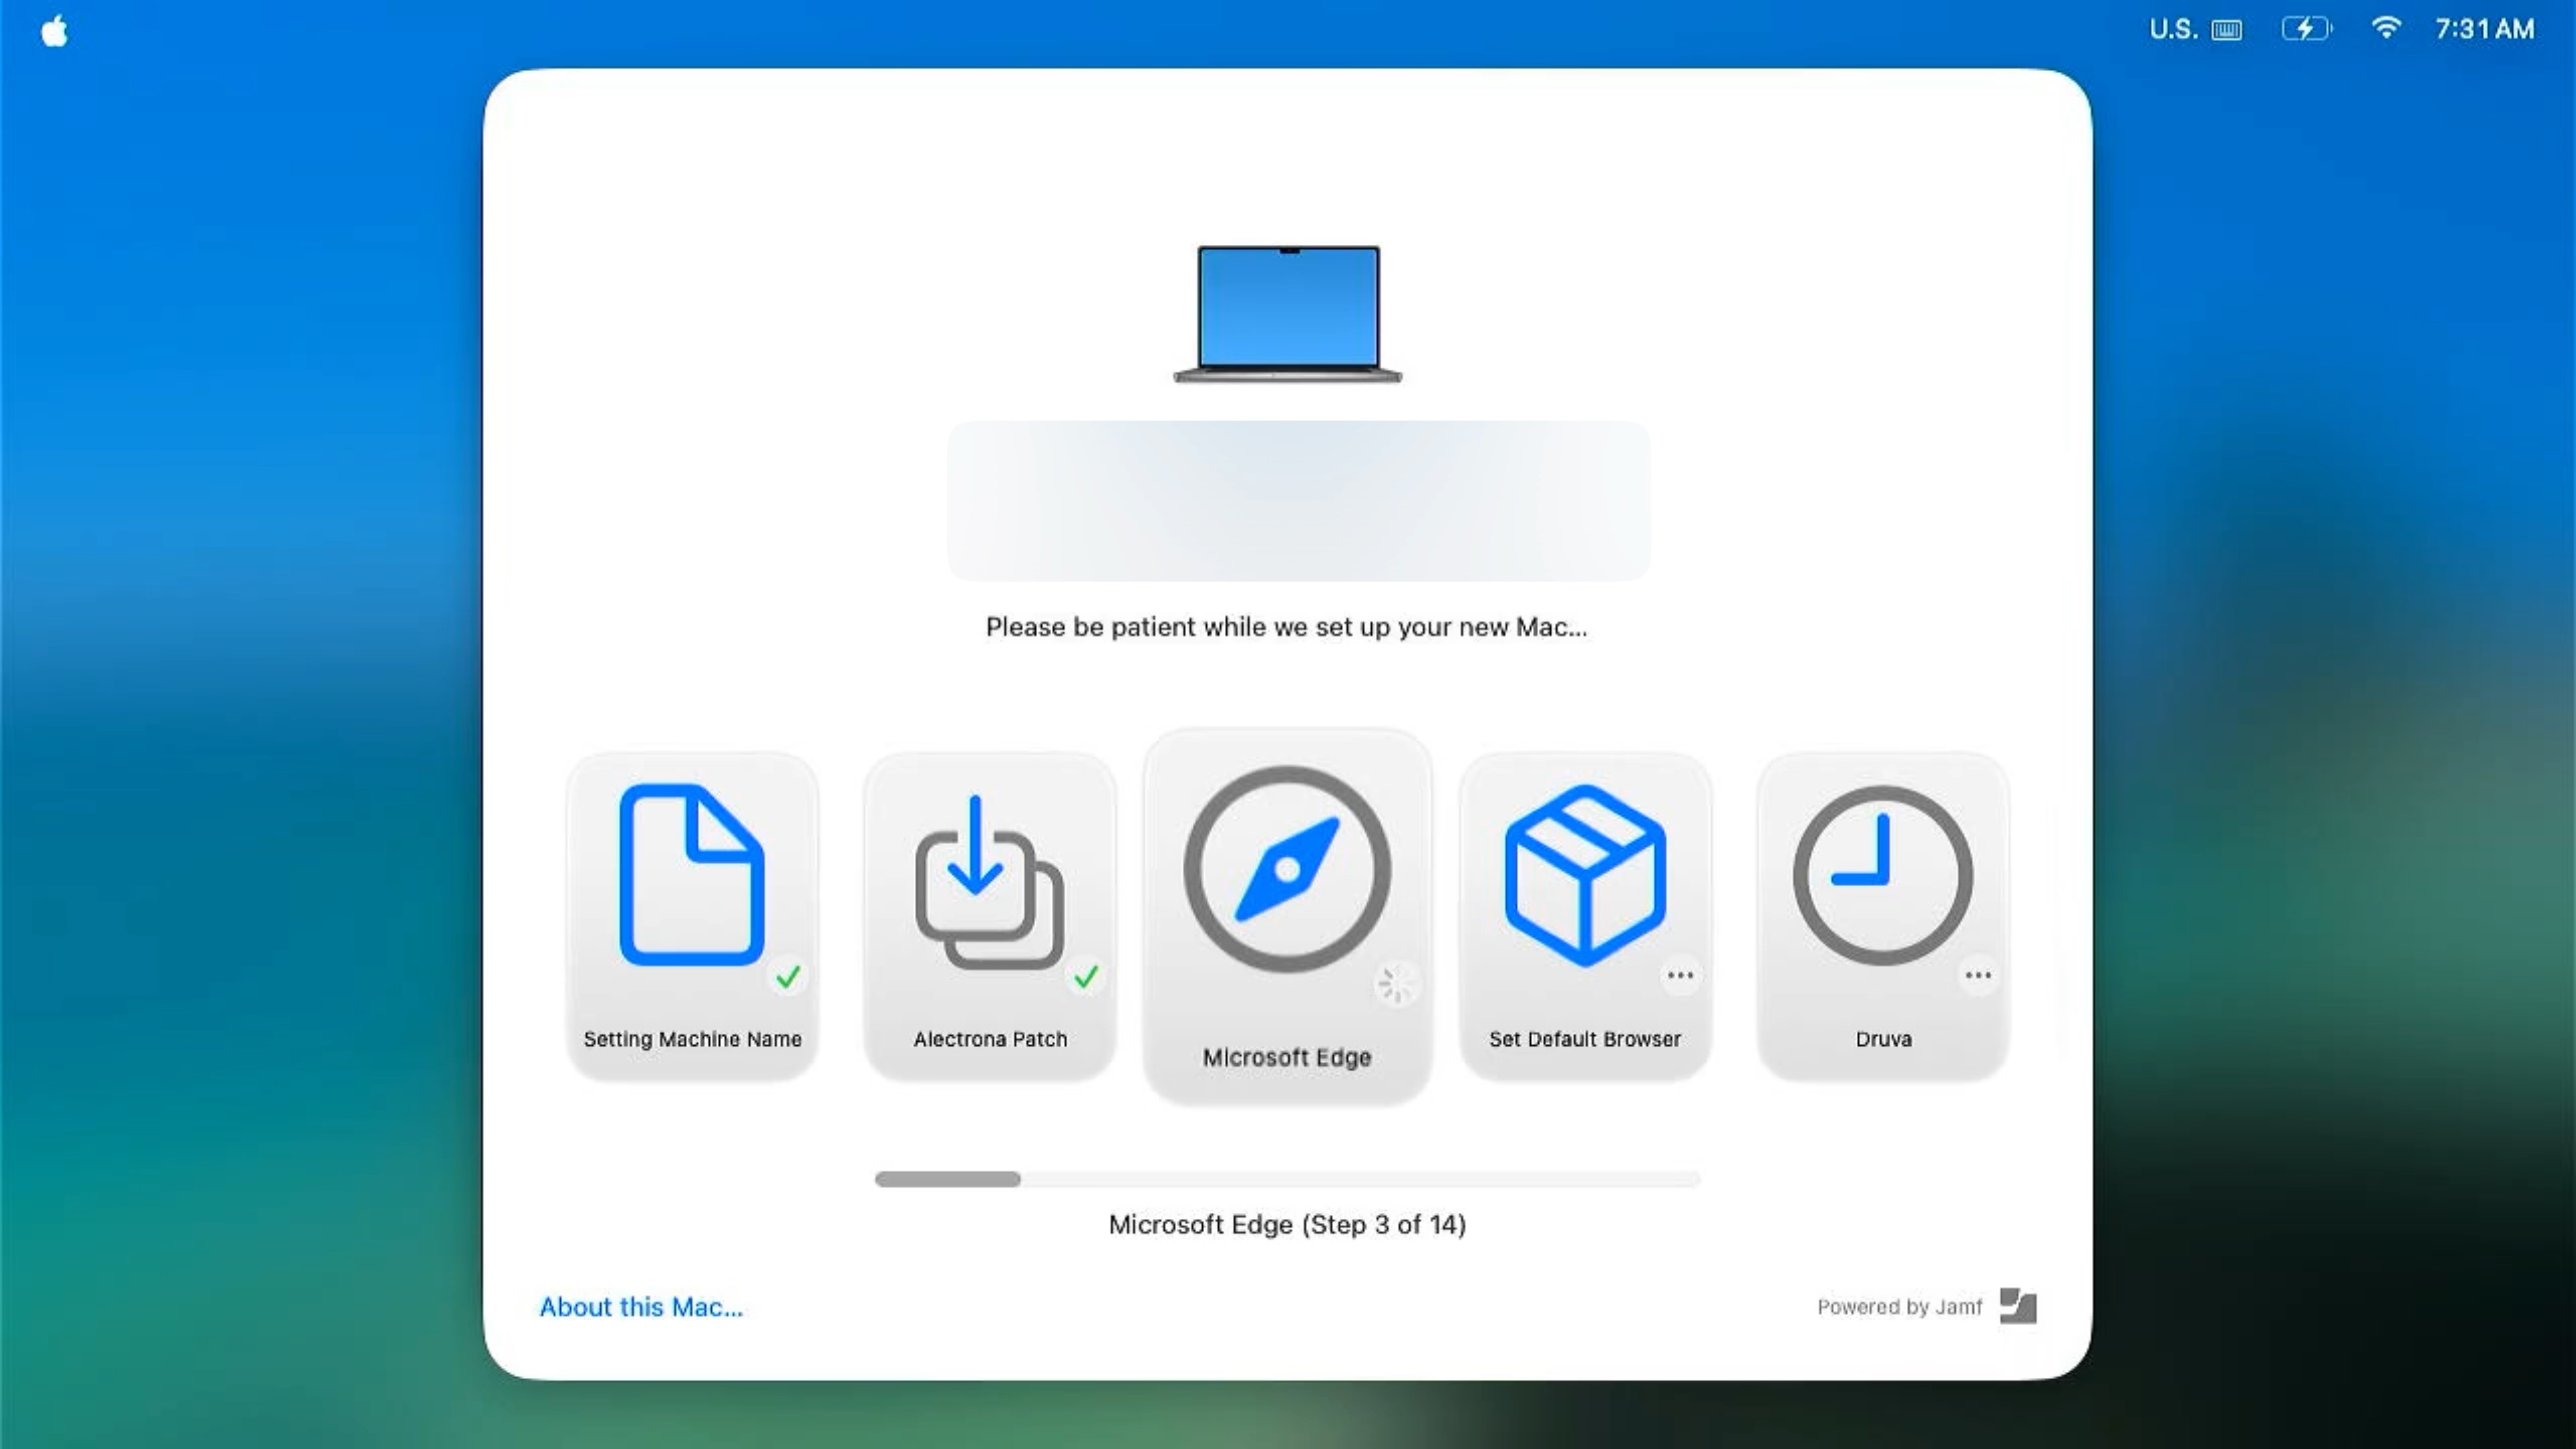
In my case, I include a message at the end that tells the user to log in and continue setup with IT.
From there, the next phase begins—things like:
- Platform SSO configuration
- Office sign-in
- Browser sync (bookmarks, profiles, etc.)
Setup Manager doesn’t eliminate every step in the onboarding process, but it gets the machine into a ready state where the user can immediately start working.
Final Thoughts
What I like most about JAMF Setup Manager is that it strikes a balance.
It’s not overly complicated, but it’s flexible enough to handle real-world deployment scenarios. The package + profile model keeps things clean, and the sequencing system makes it easy to reason about what’s happening during enrollment.
The hardest part isn’t the tool itself—it’s designing your workflow and getting your scoping right.
Once you solve for that, everything else falls into place. Here is my full config for reference.
	<?xml version="1.0" encoding="UTF-8"?>
	<!DOCTYPE plist PUBLIC "-//Apple//DTD PLIST 1.0//EN" "http://www.apple.com/DTDs/PropertyList-1.0.dtd">
	<plist version="1.0">
	  <dict>
		<key>icon</key>
		<string>name:NSComputer</string>
		<key>title</key>
		<string>Welcome!</string>
		<key>message</key>
		<string>Please be patient while we set up your new Mac…</string>
		<key>enrollmentActions</key>
		<array>
		  <dict>
			<key>label</key>
			<string>Setting Machine Name</string>
			<key>icon</key>
			<string>symbol:doc</string>
			<key>policy</key>
			<string>rename-mac</string>
		  </dict>
		  <dict>
			<key>label</key>
			<string>Alectrona Patch</string>
			<key>icon</key>
			<string>symbol:square.and.arrow.down.on.square</string>
			<key>policy</key>
			<string>alectrona-patch</string>
		  </dict>
		  <dict>
			<key>label</key>
			<string>Microsoft Edge</string>
			<key>icon</key>
			<string>symbol:safari</string>
			<key>policy</key>
			<string>microsoft-edge</string>
		  </dict>
		  <dict>
			<key>label</key>
			<string>Druva</string>
			<key>icon</key>
			<string>symbol:clock</string>
			<key>policy</key>
			<string>druva</string>
		  </dict>
		  <dict>
			<key>label</key>
			<string>Arctic Wolf</string>
			<key>icon</key>
			<string>symbol:helm</string>
			<key>policy</key>
			<string>arctic-wolf</string>
		  </dict>
		  <dict>
			<key>label</key>
			<string>Slack</string>
			<key>icon</key>
			<string>symbol:message</string>
			<key>policy</key>
			<string>slack</string>
		  </dict>
		  <dict>
			<key>label</key>
			<string>Ricoh IM C2510 Copier</string>
			<key>icon</key>
			<string>symbol:printer</string>
			<key>policy</key>
			<string>ricoh-copier</string>
		  </dict>
		  <dict>
			<key>label</key>
			<string>Dock Util</string>
			<key>icon</key>
			<string>symbol:rectangle.dock</string>
			<key>policy</key>
			<string>dockutil</string>
		  </dict>
		  <dict>
			<key>label</key>
			<string>Microsoft Office</string>
			<key>icon</key>
			<string>symbol:app.badge</string>
			<key>policy</key>
			<string>microsoft-office</string>
		  </dict>
		  <dict>
			<key>label</key>
			<string>Dock</string>
			<key>icon</key>
			<string>symbol:rectangle.dock</string>
			<key>policy</key>
			<string>configure-dock</string>
		  </dict>
		  <dict>
			<key>label</key>
			<string>Complete</string>
			<key>icon</key>
			<string>symbol:goforward.15</string>
			<key>policy</key>
			<string>breadcrumb</string>
		  </dict>
		  <dict>
			<key>label</key>
			<string>Update Inventory</string>
			<key>icon</key>
			<string>symbol:goforward.30</string>
			<key>policy</key>
			<string>recon</string>
		  </dict>
		</array>
		<key>runAt</key>
		<string>enrollment</string>
		<key>finishedMessage</key>
		<string>Please Login and work with IT to configure your apps!</string>
	  </dict>
	</plist>
Resources
- JAMF Setup Manager
- Alectrona Github
- JAMF Setup Manager: Two Phase
- JAMF Setup Manager: Quickstart
- SF Symbols App
Ready to take your Apple IT skills and consulting career to the next level?
I’m opening up free mentorship slots to help you navigate certifications, real-world challenges, and starting your own independent consulting business.
Let’s connect and grow together — Sign up here
If you’re already using JAMF and you want a more controlled, polished enrollment experience, this is absolutely worth implementing.
AI Usage Transparency Report
AI Era · Written during widespread use of AI tools
AI Signal Composition
Score: 0.33 · Moderate AI Influence
Summary
JAMF Setup Manager streamlines macOS deployments by providing a structured, JAMF-native workflow for deploying a polished enrollment experience using just a package and configuration profile.
Related Posts

Automating JAMF Pro Email Notifications with SendGrid (Smart Group Driven Workflows)
Modern device management isn't just about enforcing policies—it's about communicating effectively with users at the right time. In JAMF Pro, Smart Groups give you powerful visibility into device state, but they don't natively solve the problem of proactive, automated user communication. Whether you're trying to prompt users to restart their machines, complete updates, or take action on compliance issues, bridging that gap requires a flexible and scalable notification system.

The Day I Unmanaged a Mac Into a Corner
There are a few kinds of mistakes you make as a Mac admin. There are the ones that cost you time, the ones that cost you sleep, and then there are the ones that leave you staring at a perfectly good laptop thinking, “How did I possibly make this *less* manageable by touching it?” These mistakes often stem from a lack of understanding or experience with macOS, but they can also be the result of rushing through tasks or not taking the time to properly plan and test.

Updating Safari on macOS with Jamf Pro: Three Practical Strategies
Keeping Safari updated is one of the simplest ways to harden a macOS fleet. Apple ships security fixes for Safari frequently, and those patches often land before a full macOS point release. This means that by keeping Safari up-to-date, you can ensure your users have access to the latest security protections without having to wait for a major operating system update. If Safari is lagging behind, your users are browsing the web with a larger attack surface than necessary.

Hunting Down Jamf Profile Payloads with Python
If you've spent enough time living inside Jamf Pro, you eventually run into the same problem: someone set a configuration somewhere, sometime, and nobody remembers where. It might be something obscure – a certificate payload, a conditional SSO predicate, or that one security preference quietly misbehaving on three machines in accounting. And when you have dozens of configuration profiles, each with multiple payloads, nested keys, and XML-wrapped values, finding that setting can feel like forensic archaeology.

Keeping Jamf Security Cloud Current for Microsoft 365: Updated Routing Policies
When I first wrote about troubleshooting Standard Routing Policies in Jamf Security Cloud, the goal was simple: help admins keep Microsoft Teams and Microsoft 365 traffic flowing smoothly through Jamf Trust + App-Based VPN. This straightforward objective remains unchanged, as the complexities of network configurations can often lead to frustrating issues that hinder productivity.

Cleaning House in Jamf Pro: A Friendly Auditor Script for Real-World Hygiene
There’s a tipping point in every Jamf Pro environment where the policy list begins to feel like a junk drawer. Everyone means well. Nobody deletes anything. And then, months later, you’re trying to answer simple questions like: *Which policies are actually scoped? What’s no longer referenced? Why are there five versions of the same script?* This post covers a small, practical script I wrote to help you **see** what’s stale, **explain** why it’s stale, and (optionally) **park** it safely out of the way—without deleting a thing.

Turn Jamf Compliance Output into Real Audit Evidence
Most teams use Apple’s macOS Security Compliance Project (mSCP) baselines because they scale and they’re repeatable. Jamf’s tooling makes deployment straightforward and the Extension Attribute (EA) output is a convenient place to capture drift. What you don’t automatically get is the artifact an auditor will accept on a specific date—an actual document you can file that shows which endpoints are failing which items, plus a concise roll-up of failure counts you can act on. Smart Groups answer scope; they don’t produce evidence.
The Power of Scripting App Updates Without Deploying Packages
Keeping macOS environments up-to-date in a seamless, efficient, and low-maintenance way has always been a challenge for IT admins. Traditional package deployment workflows can be time-consuming, prone to versioning issues, and require extensive testing and repackaging. This can lead to frustration and wasted resources as IT teams struggle to keep pace with the latest updates and patches. But there's another way—a more elegant, nimble approach: scripting.

Detecting Invalid Characters and Long Paths in OneDrive on macOS
Microsoft OneDrive is widely used for syncing documents across devices, but on macOS, it can silently fail to sync certain files if they violate Windows filesystem rules — like overly long paths or invalid characters. This creates frustrating experiences for end users who don’t know why files aren’t syncing.

Using a script to Enable FileVault via JAMF: A Word of Caution
Enabling FileVault is a critical step in securing macOS devices, particularly in managed environments like schools, enterprises, and remote teams. For administrators using **Jamf Pro**, automating this process can simplify device onboarding and ensure compliance with disk encryption policies. This automation also helps reduce the administrative burden associated with manually configuring each device, allowing IT staff to focus on other tasks while maintaining a secure environment.
