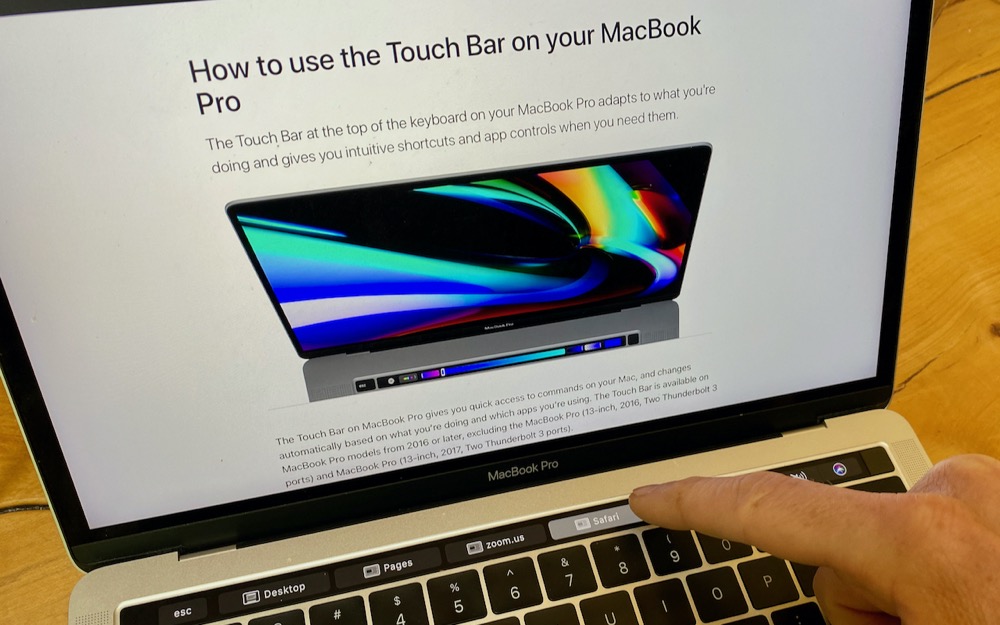

In 2016, Apple introduced the Touch Bar with the MacBook Pro. It’s a long, thin display above the number keys on the keyboard that shows a variety of buttons and controls. By default, it changes depending on which app you’re in, and it also displays the Control Strip, a collection of controls that roughly mimics the functions accessible from the F-keys that traditionally live in that position. Finally, it includes the Touch ID sensor that brings fingerprint authentication to the Mac.
Since its launch, however, the Touch Bar hasn’t migrated to any other Macs or keyboards, although the MacBook Air picked up a Touch ID sensor without the rest of the Touch Bar. As a result, developers haven’t been as enthusiastic about supporting the Touch Bar as they might have been. Nevertheless, it provides useful shortcuts in many apps, and you can customize it more to your liking. (Plus, although we’re not going into those details here, Apple is making the Touch Bar even more useful and customizable in macOS 11 Big Sur.)
Choose What the Touch Bar Shows
You may never have noticed the Touch Bar’s settings because Apple has hidden them in the Keyboard pane of System Preferences. Logical, but perhaps not where you might have looked first if you were thinking of the Touch Bar as an extension of the trackpad.
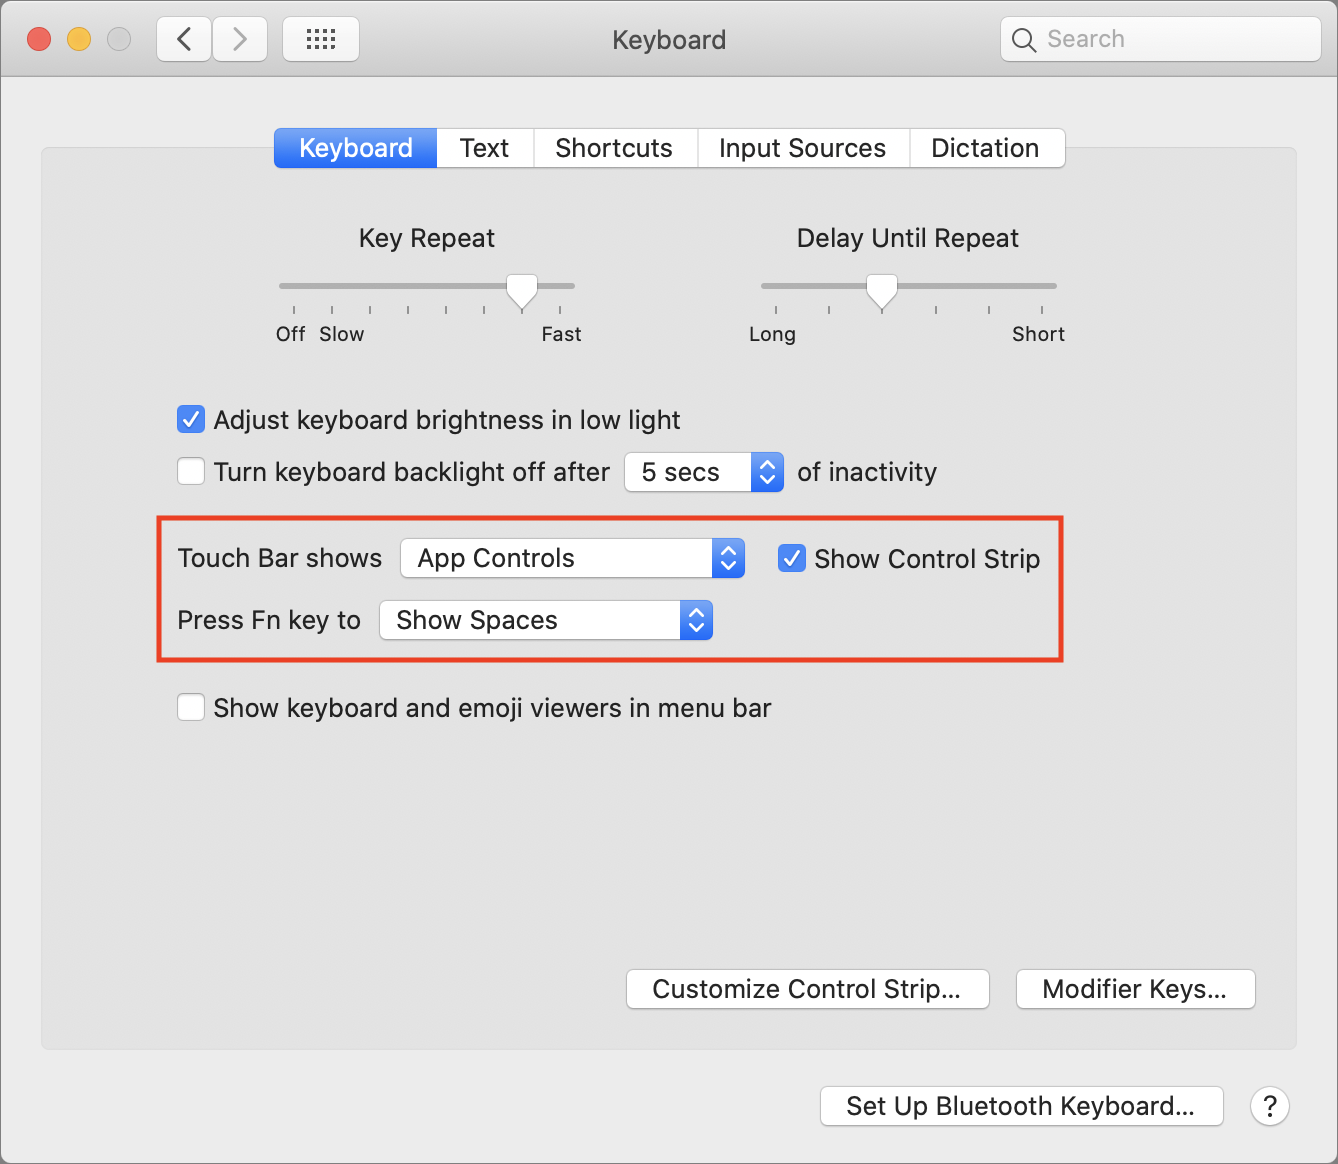
You have two choices here, what appears in the Touch Bar normally, and how it changes if you press the Fn key in the lower-left corner of the keyboard. Your options include:
- App Controls: The controls that appear when you choose this option vary by app. This option is the most generally useful, though how much so depends on whether the apps you use support the Touch Bar in helpful ways.
- Expanded Control Strip: The Control Strip, which appears by default on the right side of the Touch Bar, lets you adjust common settings like brightness and volume. The Expanded Control Strip option fills the rest of the Touch Bar with more buttons.
- F1, F2, etc. Keys: Aimed at keyboard traditionalists, this option mimics the F-keys that occupy the Touch Bar’s position on every other keyboard in the universe. People often use these keys as hot keys with macro programs like Keyboard Maestro.
- Quick Actions: Want to create your own custom buttons for the Touch Bar? In Apple’s Automator app, you can create workflows as Quick Actions, which then appear on the Touch Bar when you choose this option.
- Spaces: Those who are big users of Spaces in Mission Control might appreciate this option, which lets you switch between different full-screen apps and Split View spaces.
In the Touch Bar Shows pop-up menu, you should choose the set of Touch Bar buttons that you’ll find the most useful most of the time. That’s probably either App Controls or F-keys for most people, unless you do a lot of your own automation (choose Quick Actions) or regularly use full-screen apps (choose Spaces).
The Press Fn Key To menu basically gives you a second choice—press that key, and you can display whatever set of buttons you’d find next most useful.
Finally, notice that there’s a checkbox for Show Control Strip. If you want to take over its space on the right side of the Touch Bar for other buttons, deselect the checkbox. One useful approach is to disable the Control Strip in general use, but show the expanded Control Strip when you press Fn.
Customize App Controls
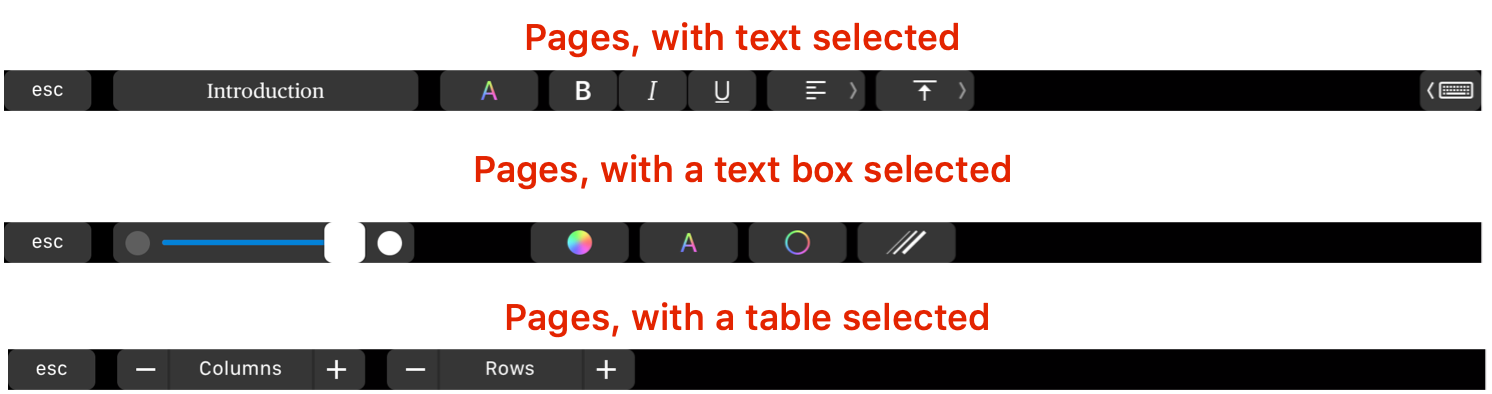
App controls are in many ways the most interesting because they change not just when you switch between apps, but also based on what you’re doing in an app. Take Pages, for instance. If you’re working with text, Pages configures the Touch Bar to show buttons that let you switch between paragraph styles, apply character formatting, and tweak horizontal and vertical justification. That button on the far right displays auto-complete options for the word you’re typing. But if you have a text box selected, Pages instead provides buttons for opacity, various colors, and line strokes. Select a table, and Pages immediately offers options for adding and removing columns and rows.
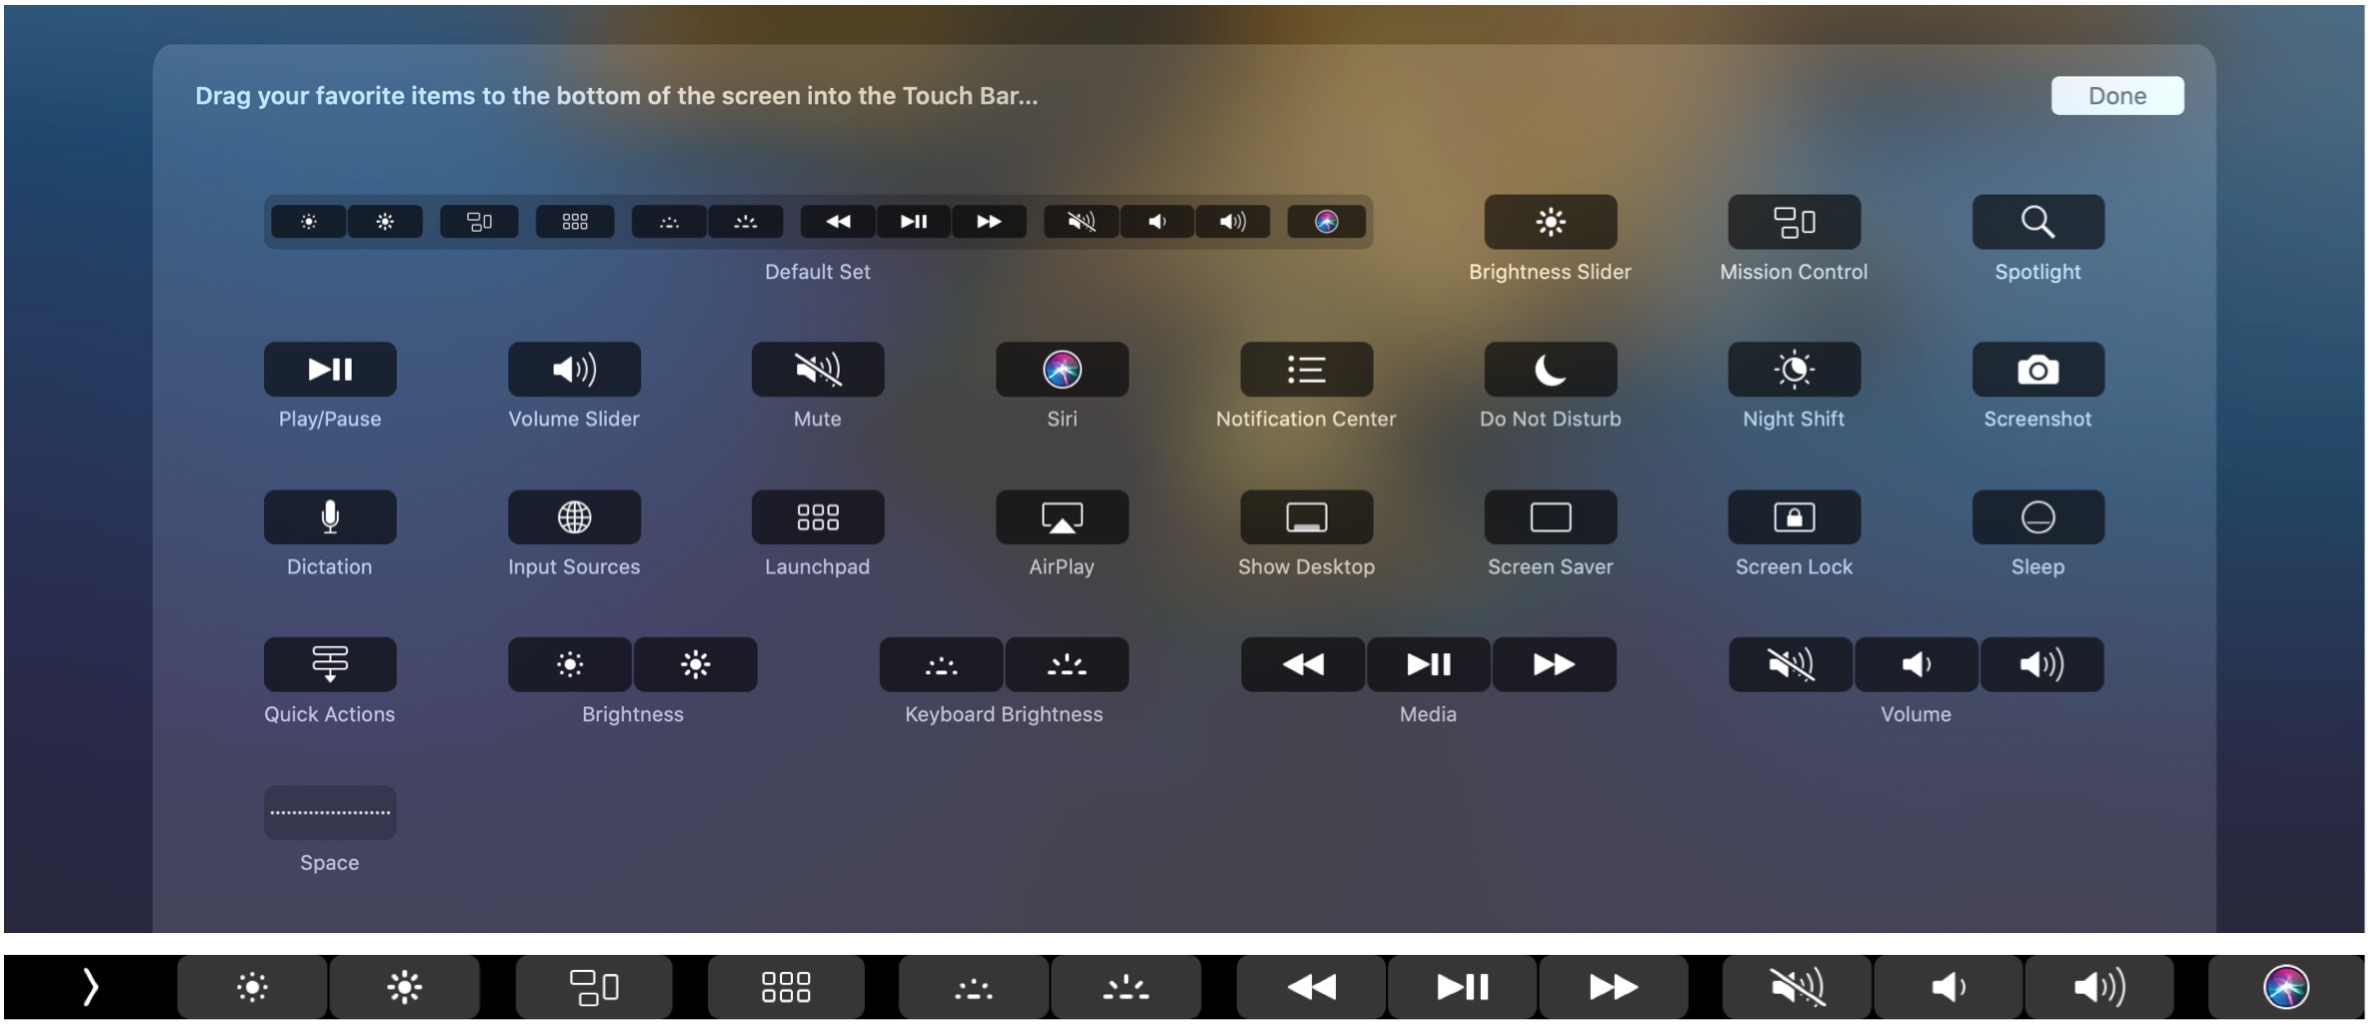
Even better, some apps, like Safari, let you pick which buttons appear in the Touch Bar, just as you can pick the controls that appear in window toolbars. In apps that allow this, choose View > Customize Touch Bar. A selection of available buttons appears at the bottom of the screen. Drag one of the buttons off the bottom of the screen and—really!—onto the Touch Bar, where you can drag it into different spots. When you’re done, click the Done button.
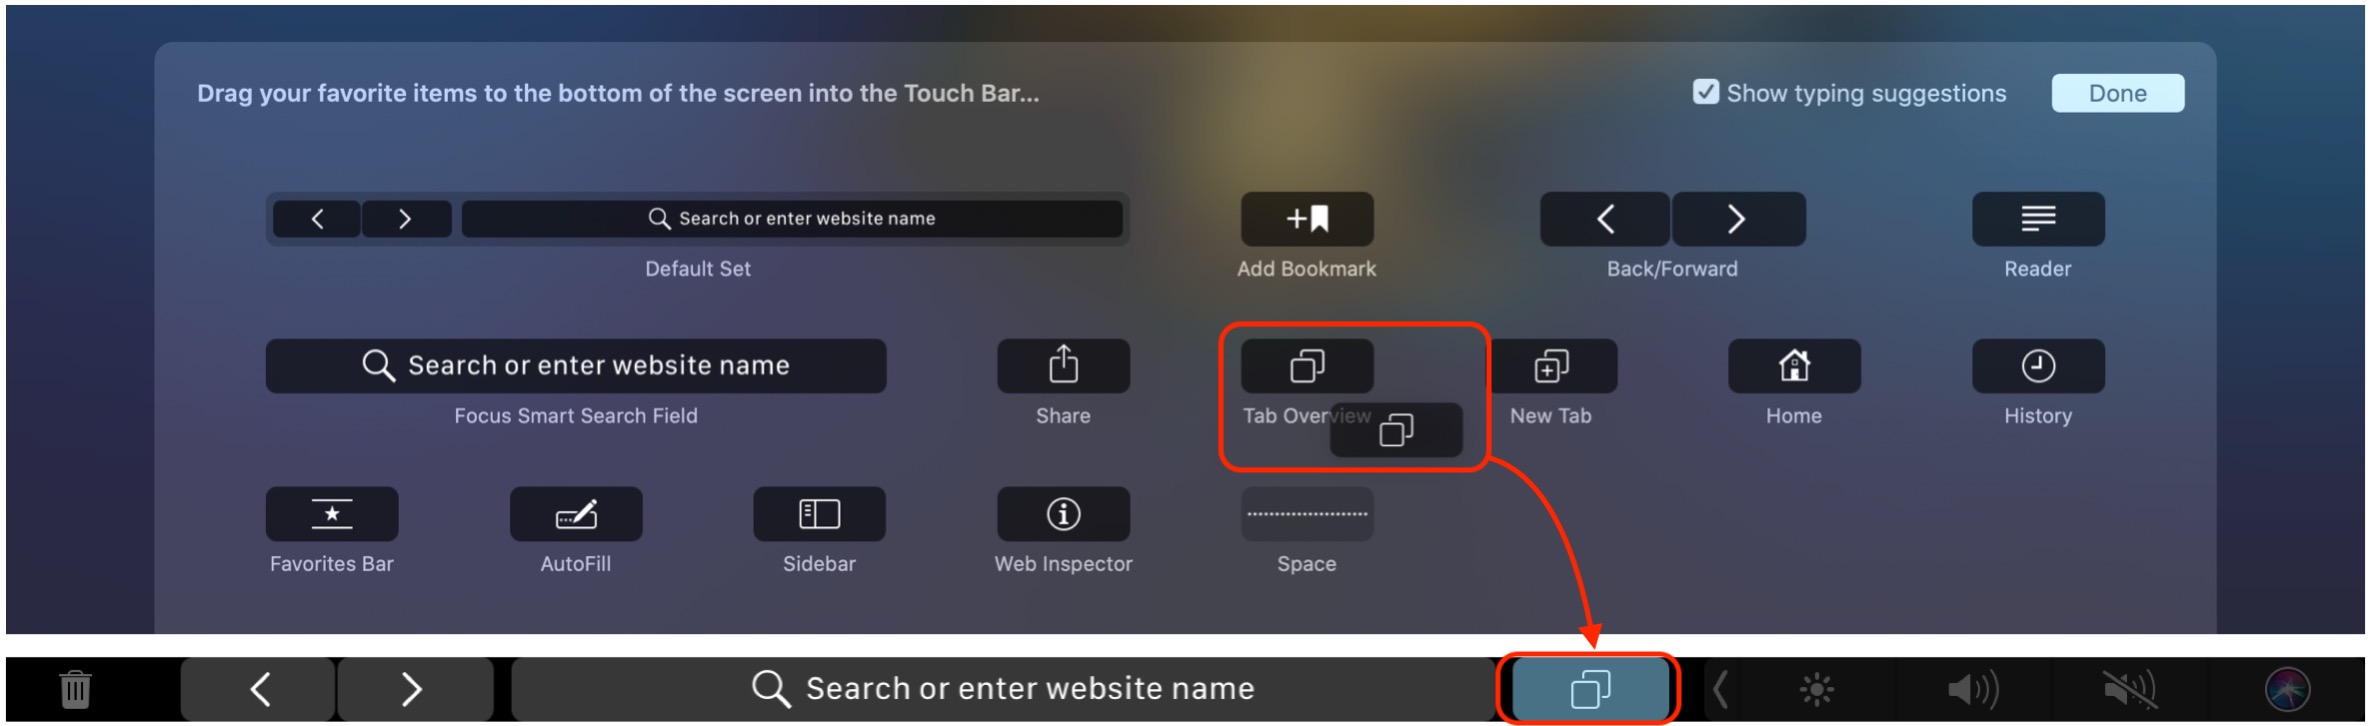
While you’re customizing the Touch Bar for an app, you can also rearrange buttons by dragging them left or right (with either the pointer or your finger) and remove buttons by dragging them (with the pointer) from the Touch Bar to the MacBook Pro’s screen.
Note that the Touch Bar is only so big, and the Mac won’t let you populate it with more buttons than it has room for. If you try, the new button will replace one of the current buttons.
Customize the Control Strip
You’re not limited to choosing which app controls you’d like to see in the Touch Bar. In System Preferences > Keyboard > Keyboard, click Customize Control Strip to bring up a similar collection of controls that you can add to the Control Strip. Plus, you can rearrange and remove buttons from the Touch Bar’s Control Strip just as with the app controls.
Try Third-Party Utilities
As you might expect, clever Mac programmers have extended the ways you can use the Touch Bar beyond what Apple provides. Here are a few of our favorites:
- BetterTouchTool: For $8.50, this general-purpose customization utility gives you control over various input devices on your Mac, including the Touch Bar. It lets you completely customize the Touch Bar, add and customize the appearance of buttons for all sorts of built-in actions, create dynamic widgets using AppleScript and other languages, and download ready-to-use presets.
- Pock: Want to recover the screen real-estate occupied by the Dock? The free Pock puts your Dock items in the Touch Bar for fast app switching. Plus, it provides useful widgets, including a handy Now Playing widget that can show the title of the current song.
- Haptic Touch Bar: Although Apple built the Touch Bar so it could provide haptic feedback—making it feel like you’ve pressed a key down when all you’ve done is touched a flat glass surface—most controls don’t provide it. The $4.99 Haptic Touch Bar utility makes all Touch Bar buttons pretend to be physical buttons, with haptic and audio feedback.
If you’ve been ignoring the Touch Bar because it didn’t work the way you wanted, or if you’ve liked using it but wished it could do more, give these customization options a try!
AI Usage Transparency Report
Pre-AI Era · Written before widespread use of generative AI tools
AI Signal Composition
Score: 0.05 · Low AI Influence
Summary
The Touch Bar is a long, thin display above the number keys on the keyboard that shows a variety of buttons and controls.
Related Posts
When Chromium Mistakes Your VPN for a Local Network
Turning off Jamf Trust fixed the webinar, which normally would have sent me straight to its routing policies. This time the route was fine: Chromium was treating Jamf's ZTNA broker addresses as a local network, and an Edge and Chrome preference corrected it.
Clamshell iBook G3 Restoration, Part 1: From Broken Screen to Board-Level Repair
Part one of a Clamshell iBook G3 restoration: a broken screen, a charger detour, a blinking system folder, a full teardown, and the backlight connector mistake that paused the project.
Bromure Gives Codex a Room of Its Own
I installed Bromure Agentic Coding, watched it build the Linux VM, authenticated Codex, and followed a real Codex task through the workspace.
Claude Code Auto Mode Changes Approval Flow, Not the Safety Boundary
Claude Code Auto mode changes how approval decisions are handled. It does not expand the boundary of what the coding agent should be allowed to do.

Amnesia Stealer Shows the Next Stage of ClickFix on macOS
Amnesia Stealer shows how ClickFix-style social engineering is adapting on macOS, while a public malware sample gives defenders an opportunity to study the behavior behind the campaign.
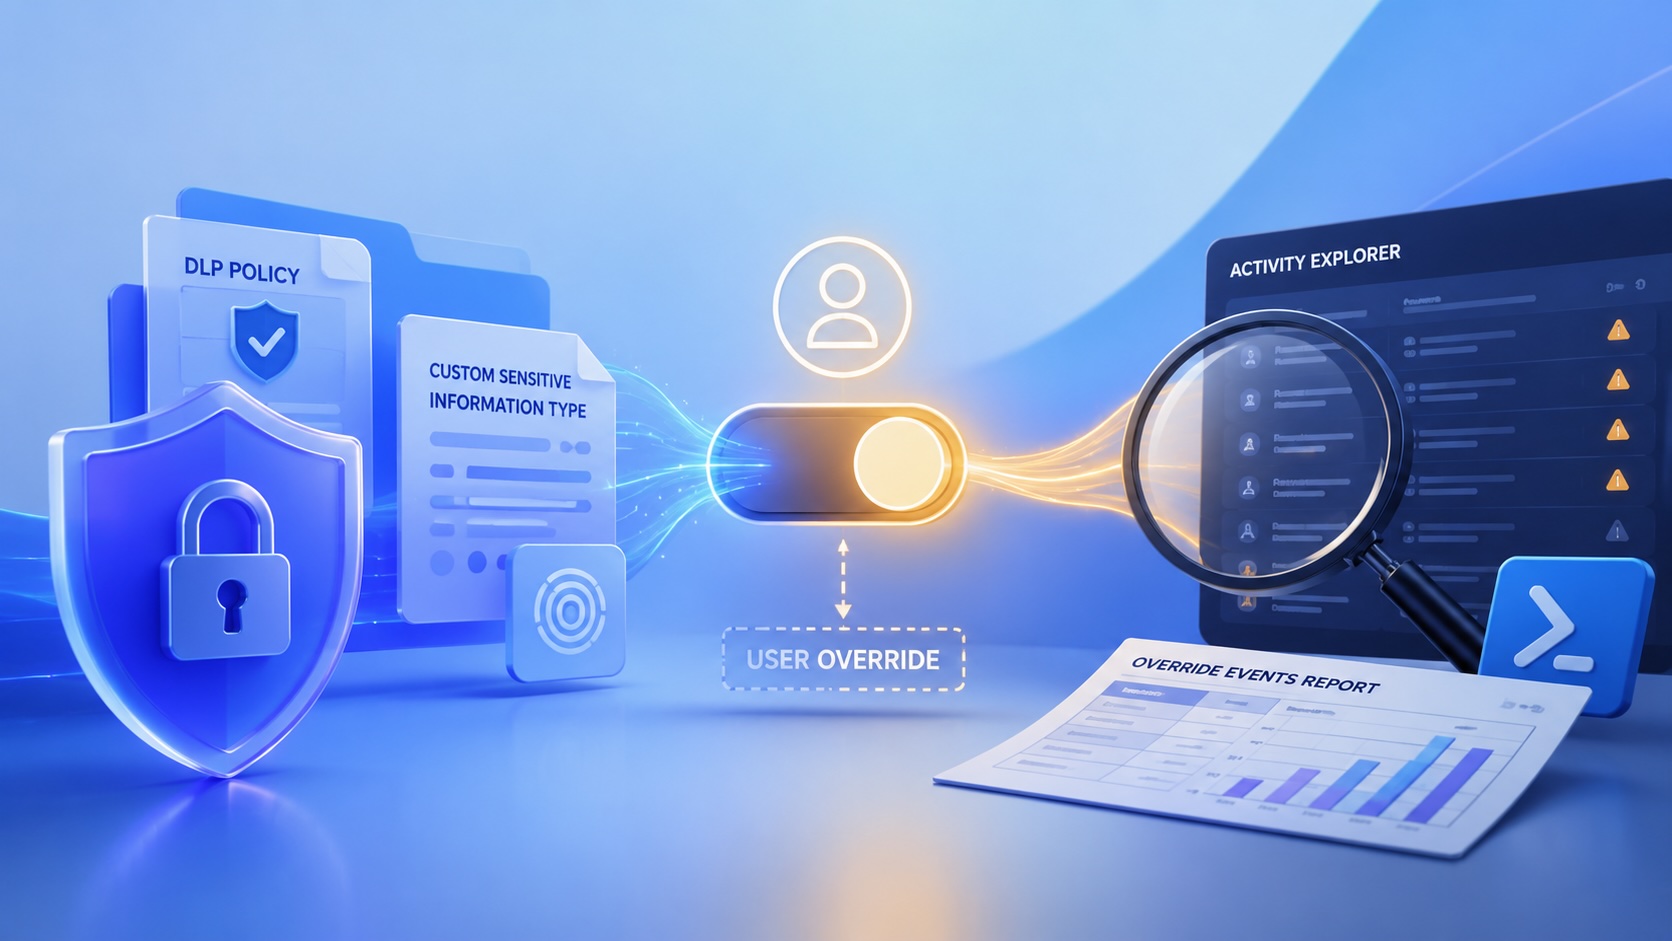
Reporting on Microsoft 365 DLP Overrides with PowerShell
DLP overrides are not automatically bad. They are a business process that needs visibility. This walkthrough covers a Microsoft Purview DLP policy, a custom sensitive information type, user override behavior, and a PowerShell report that exports override events from Activity Explorer.

PowerBook 140 BlueSCSI Install: Cable Fixed, Battery-Bay Power, and Wi-Fi Setup
The PowerBook 140 project moved from preparing a BlueSCSI card in Basilisk II to installing the repaired internal SCSI cable, powering the BlueSCSI Pico externally from the battery bay, booting System 7.1, and fighting through DaynaPORT Wi-Fi setup.

Move Entra Users Off SMS and Voice Before Microsoft Retires Them
Microsoft is retiring Microsoft-provided SMS and voice authentication in Entra ID. The migration is not passkeys for everyone; it is removing weak telecom MFA and choosing supported replacement methods such as Microsoft Authenticator, FIDO2 keys, certificate-based authentication, OATH hardware tokens, or customer-managed telecom.
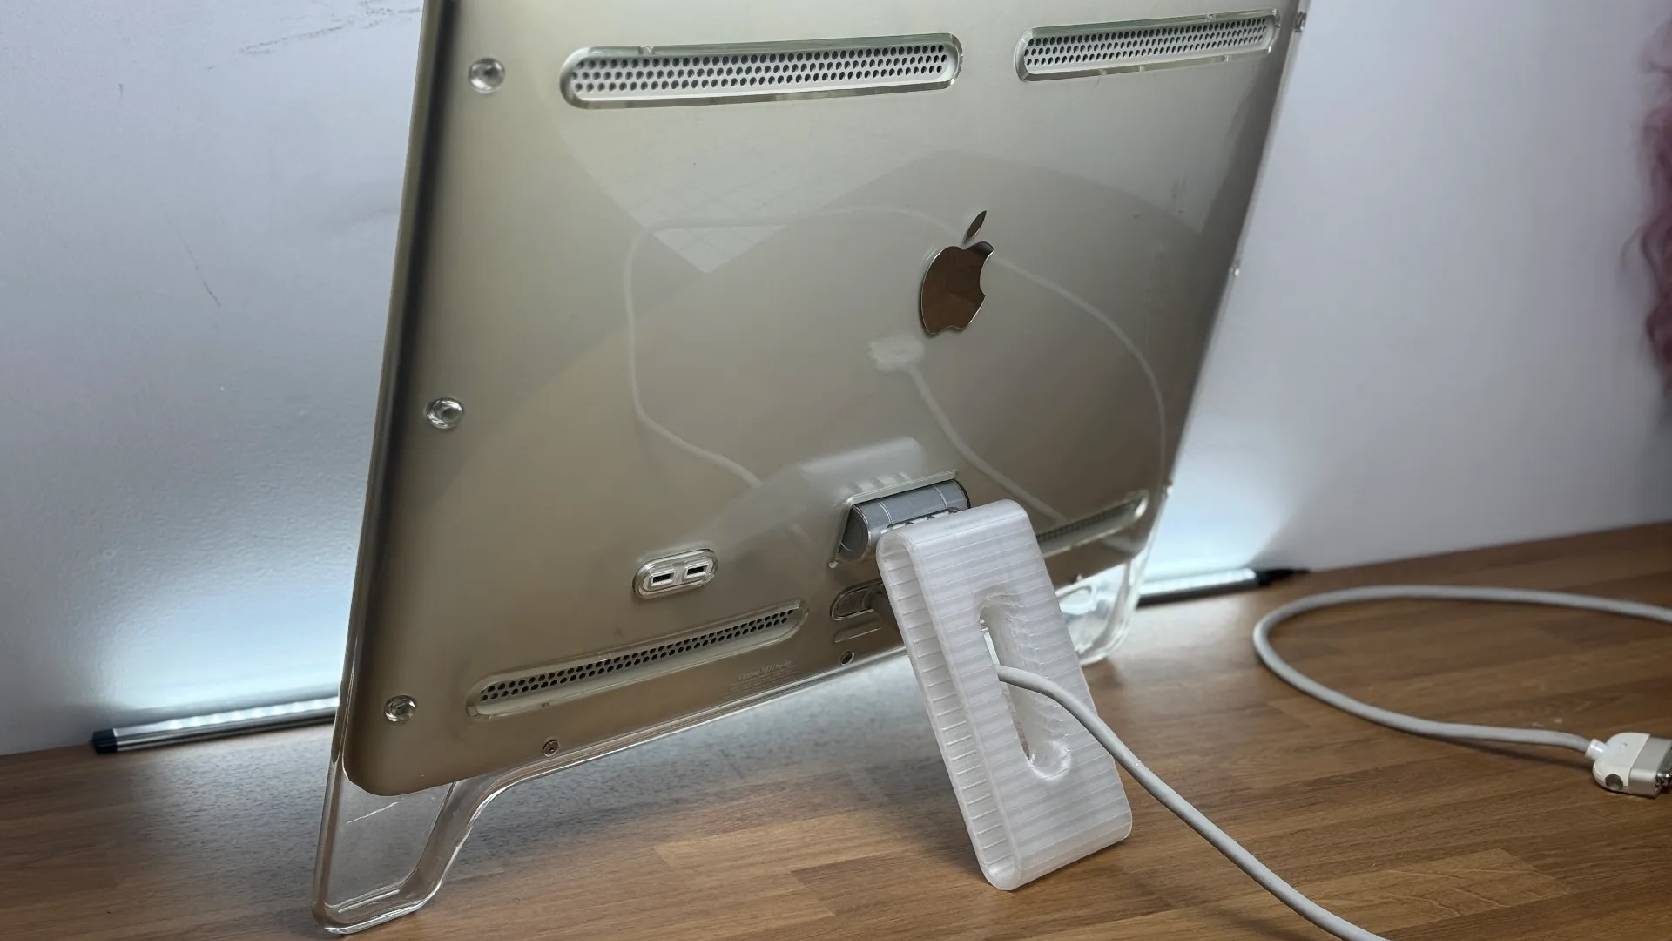
Fixing a Broken Apple Cinema Display Stand with a 3D Printed Leg
A 22-inch Apple Cinema Display arrived with a broken acrylic easel stand, so I used a 3D printed replacement leg instead of sending the monitor back.
macOS Tahoe 26.6.1 Fixes a High-Severity Screen Sharing Authentication Bypass
macOS Tahoe 26.6.1 fixes CVE-2026-65400, a high-severity Screen Sharing authentication issue where an attacker on the network may be able to authenticate without valid credentials.