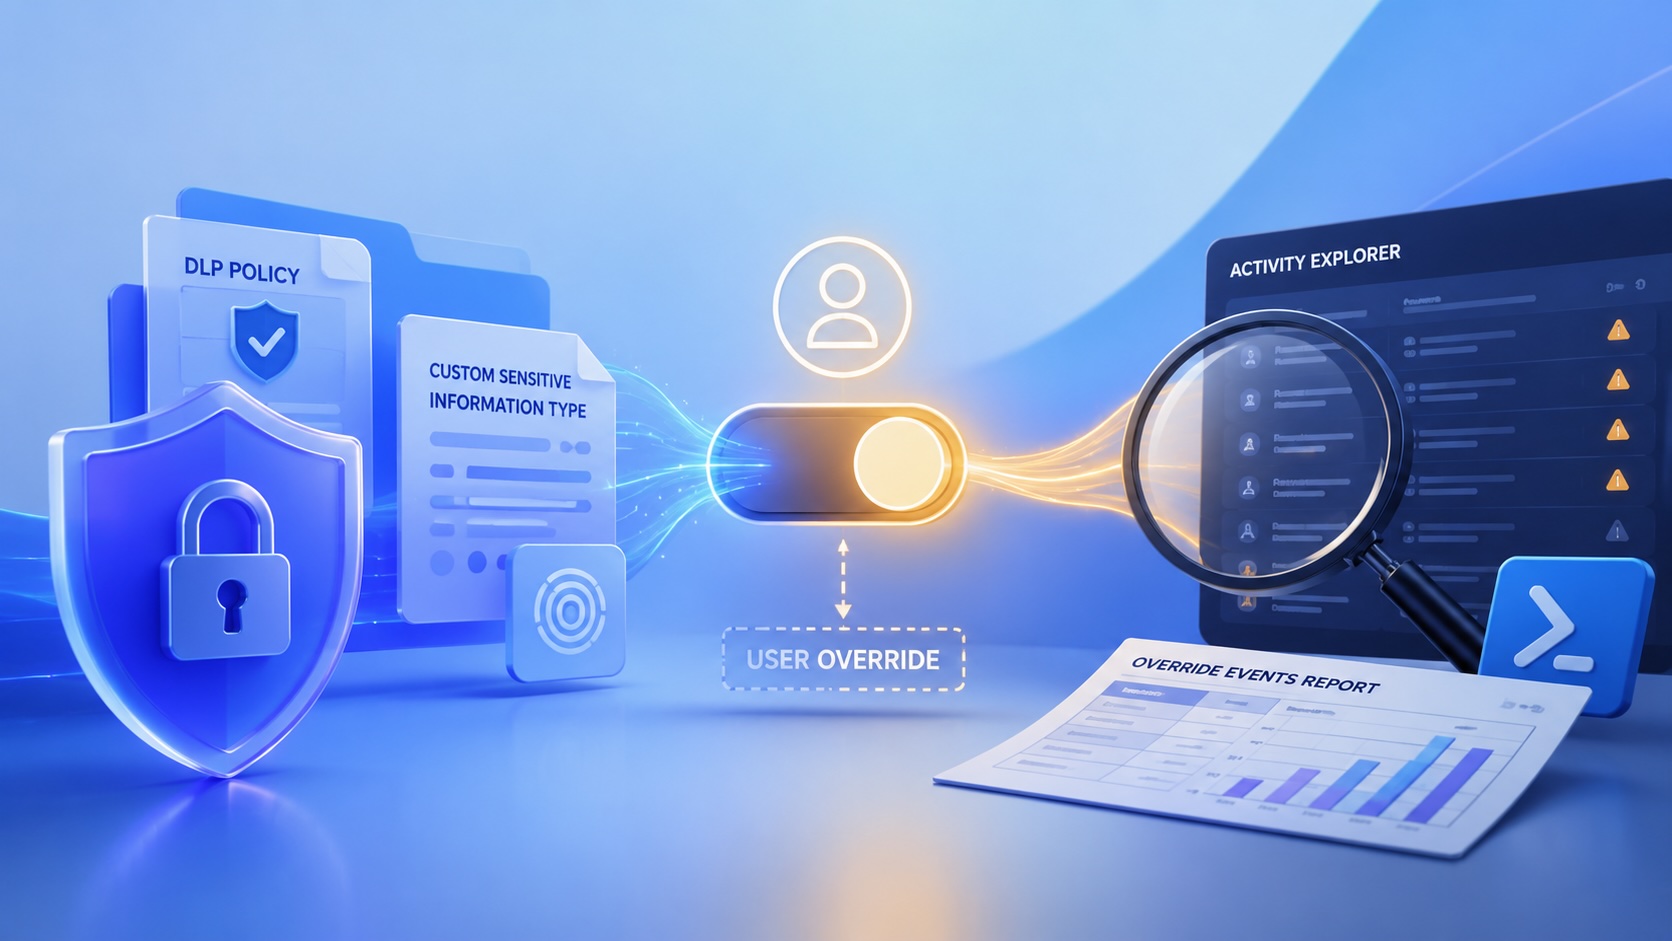

Data Loss Prevention, or DLP, is the part of Microsoft Purview that watches for sensitive information leaving places like Exchange, SharePoint, OneDrive, Teams, and endpoint devices. It is not only a hard block button. A good DLP policy can detect sensitive content, warn the user before the data leaves, block the action when the risk is too high, or allow the user to continue when the business process actually requires it.
Overrides are part of that design. If a policy is configured to warn and allow override, the user can provide a business justification and send the message anyway. In some workflows, that is exactly what the organization intended. A contract may need to go out, a support case may need a controlled attachment, or a user may know something about the business context that the policy cannot understand from pattern matching alone.
The review problem is where this gets messy. These justifications are not sitting in Azure like a simple approval queue. They live in Microsoft Purview activity data, mixed in with the rest of the DLP rule-match activity. Microsoft gives administrators a way to see and export that activity through Activity Explorer and PowerShell, but the portal is built more like an investigation surface than a clean weekly override report.
I wrote a script that streamlines this because I do not want to click through the Purview portal every week, change filters, open individual events, and hope I did not miss the user-entered reason. I want to ask for a date range, pull the Exchange DLP events, filter down to records with override signals, and export the fields that matter: sender, recipients, subject, policy, rule, false-positive flag, and justification.
Reading those justifications is the whole point of allowing overrides in the first place. If users keep entering solid business reasons, the policy may be doing its job. If the reasons are vague, repetitive, or obviously wrong, the organization has a training problem, a workflow problem, or a policy that is allowing too much. Without review, an override feature becomes a bypass with nicer wording.
Build the DLP policy in Purview
The DLP policy is the container for the decision. It defines where Purview should watch, which rule should fire, what the user sees, and whether the user is allowed to override the warning with a business justification. The sensitive information type is different. That is the detection object the policy uses to decide whether the content matches something the organization cares about.
Those two pieces have to be linked. A policy without the right sensitive information type has no useful signal. A sensitive information type that is never used in a policy is just a classifier sitting in Purview.
The path starts in the Microsoft Purview portal under Data Loss Prevention.
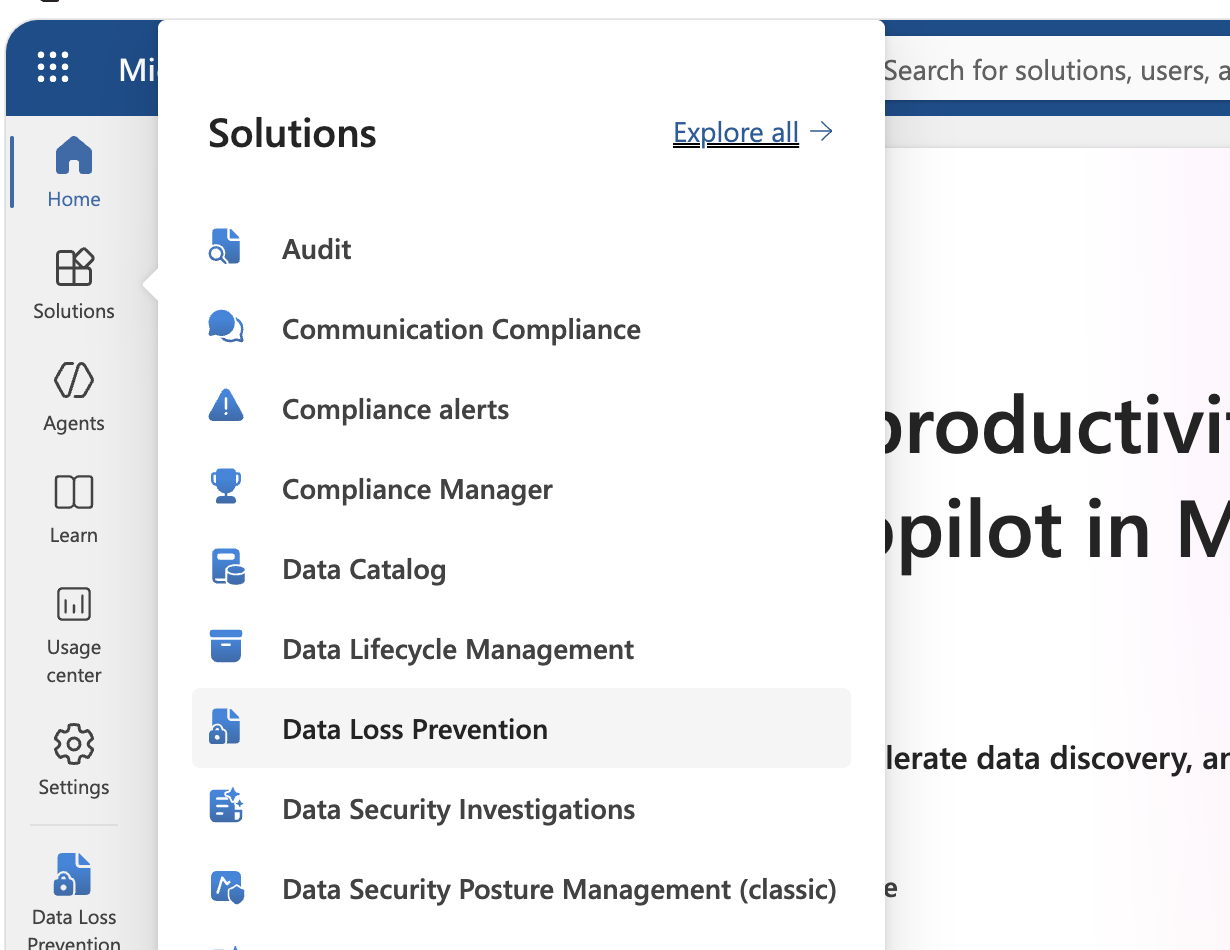
From there, the policy workflow starts under DLP policies. This is where I create the policy that will eventually use the custom CUI banner type.
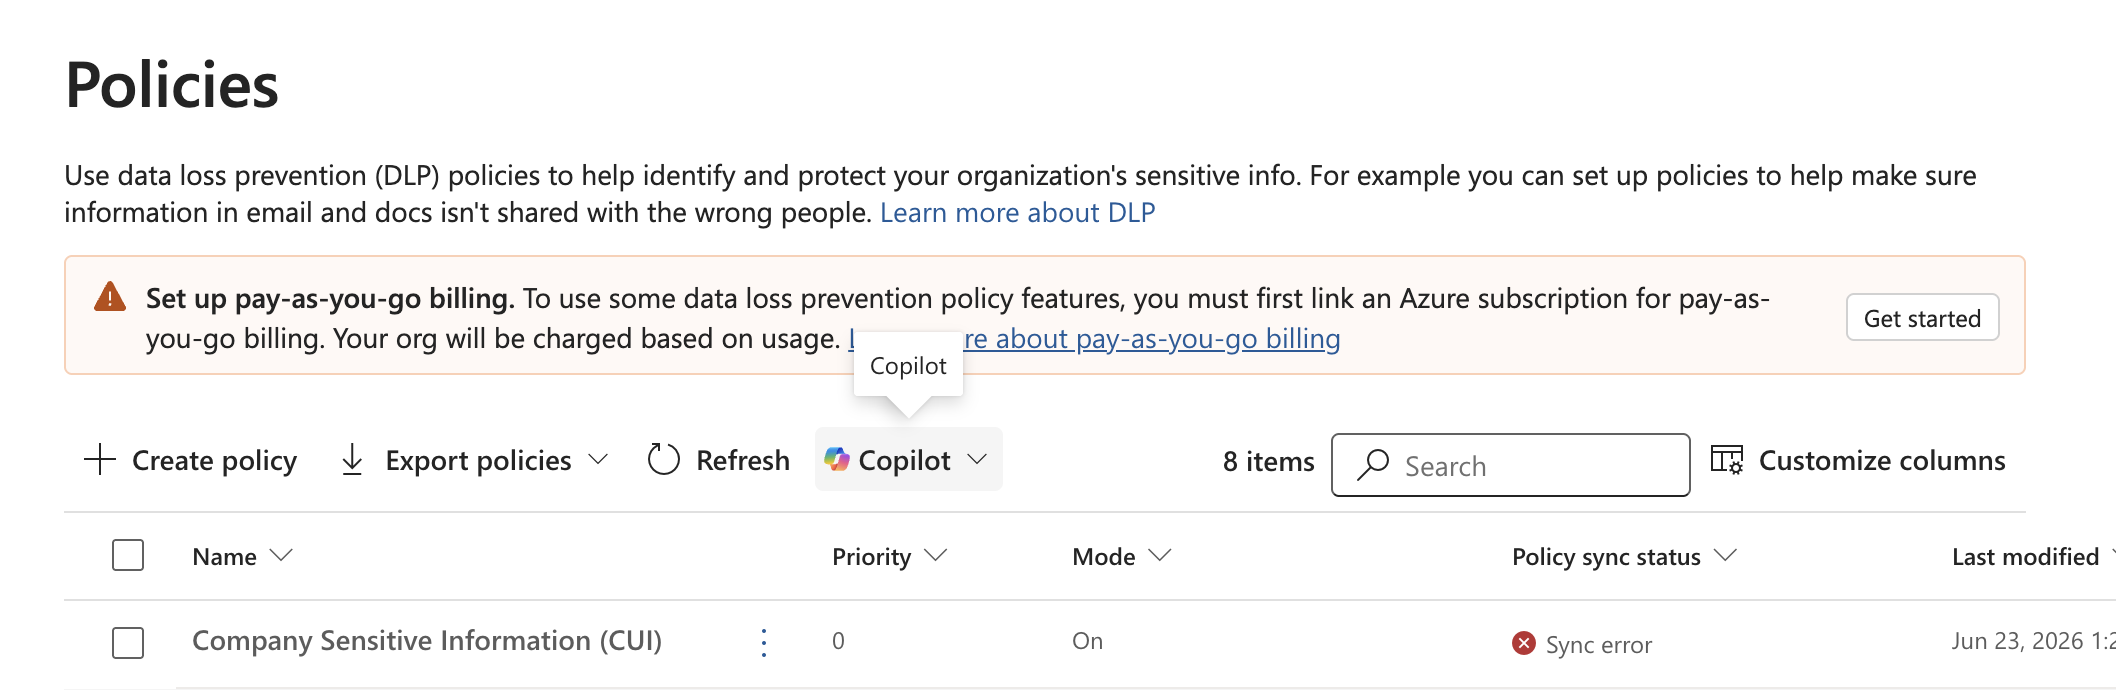
The policy name needs to be plain enough that it still makes sense when it shows up later in Activity Explorer and the exported CSV. A vague name makes the report harder to review because the reviewer has to go back into Purview to understand what fired.
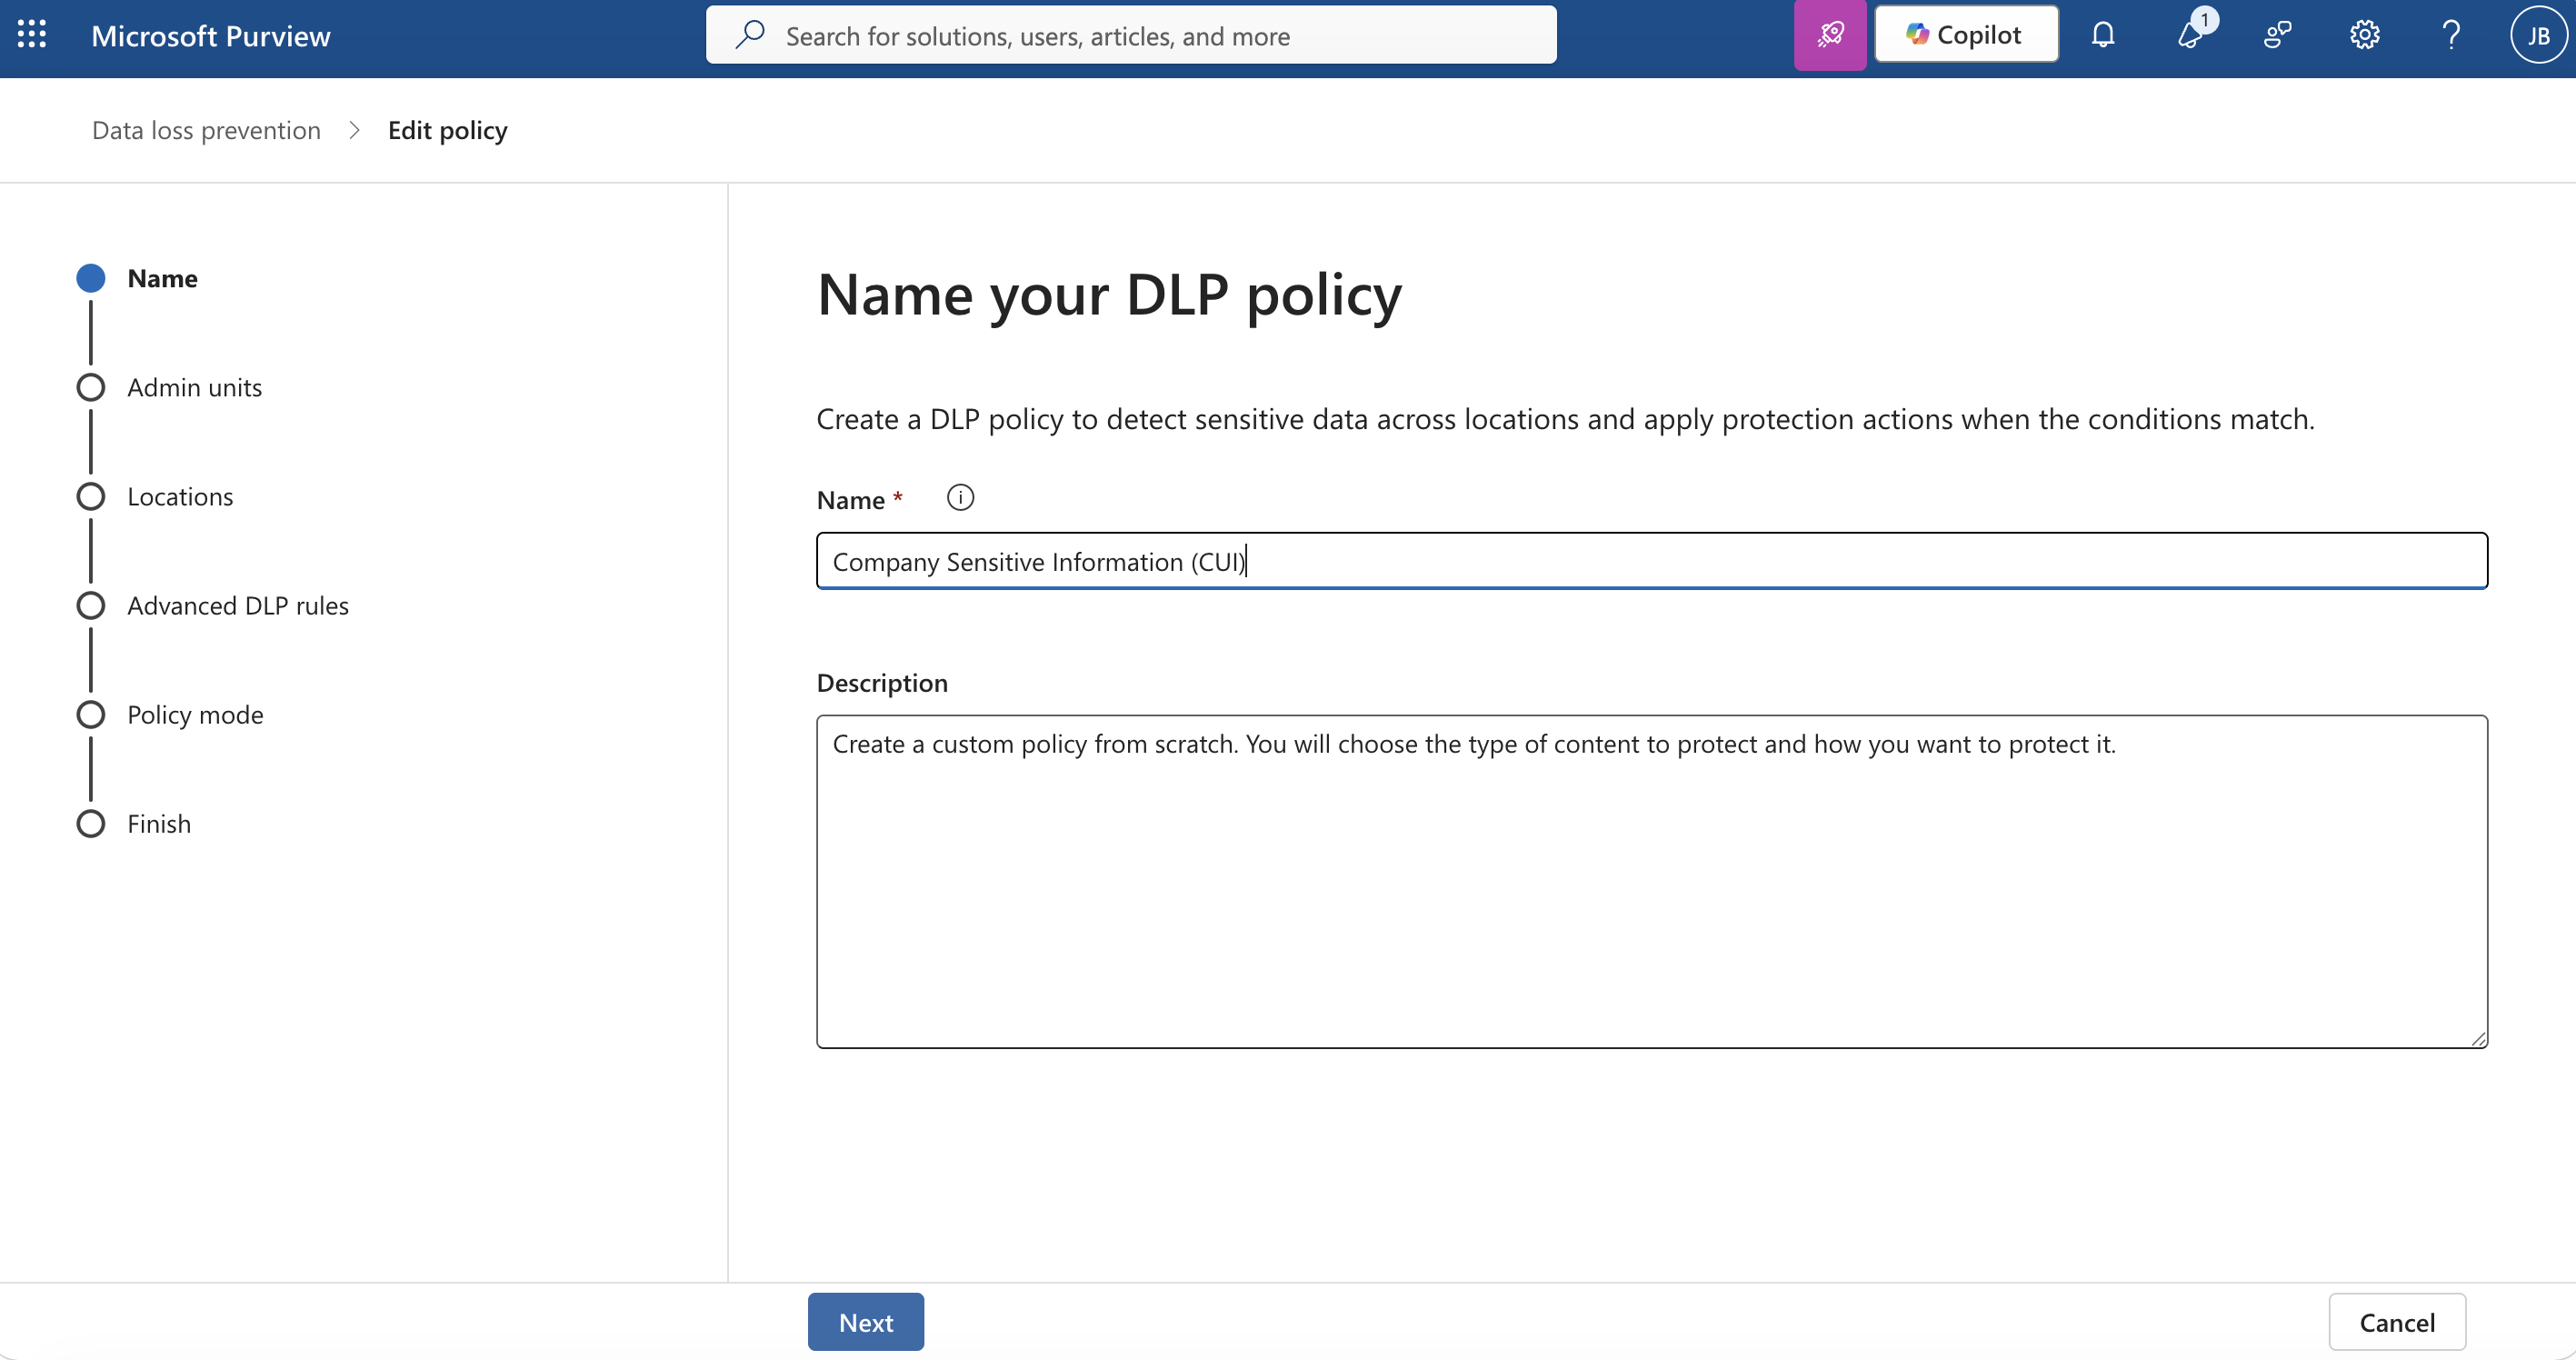
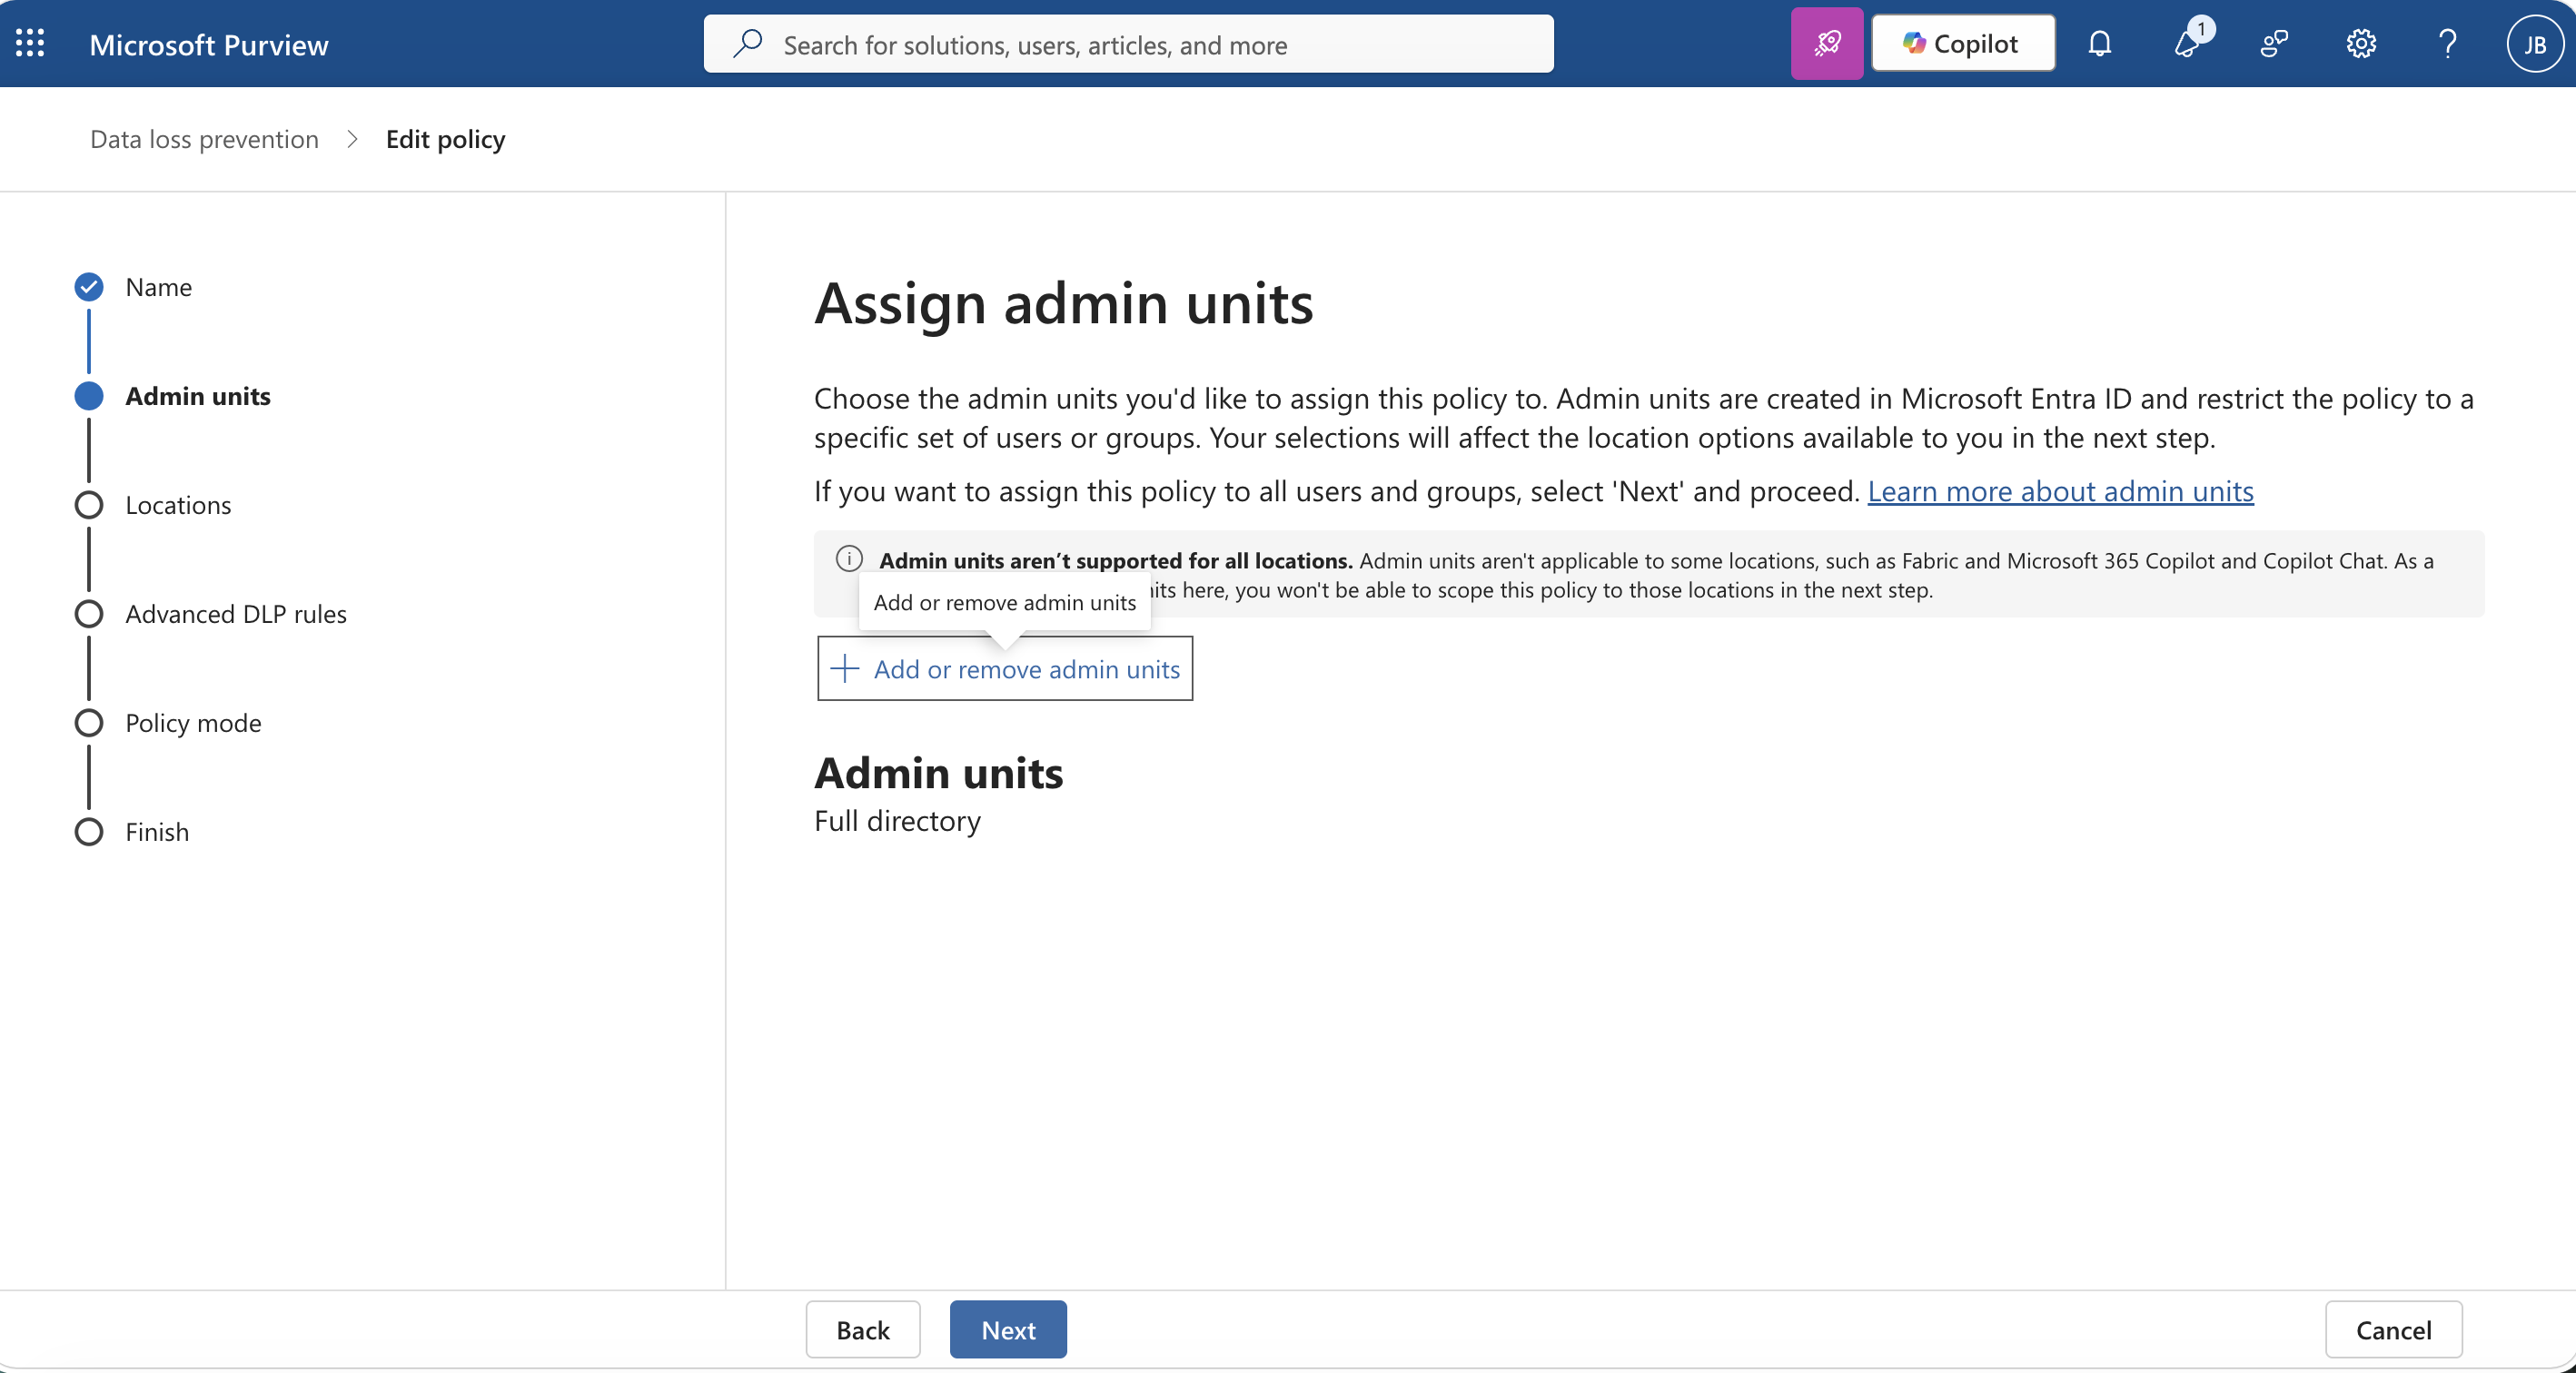
Administrative units decide whether the policy applies broadly or only inside a delegated administrative boundary. I want that visible because the report later has to be read against the same scope. If the policy only applies to part of the tenant, the override report is not a tenant-wide picture.
The locations step is where I decide which Microsoft 365 workload the policy applies to. Purview can protect multiple locations depending on configuration and licensing, but this report is about email overrides, so Exchange is the workload I care about for the script.
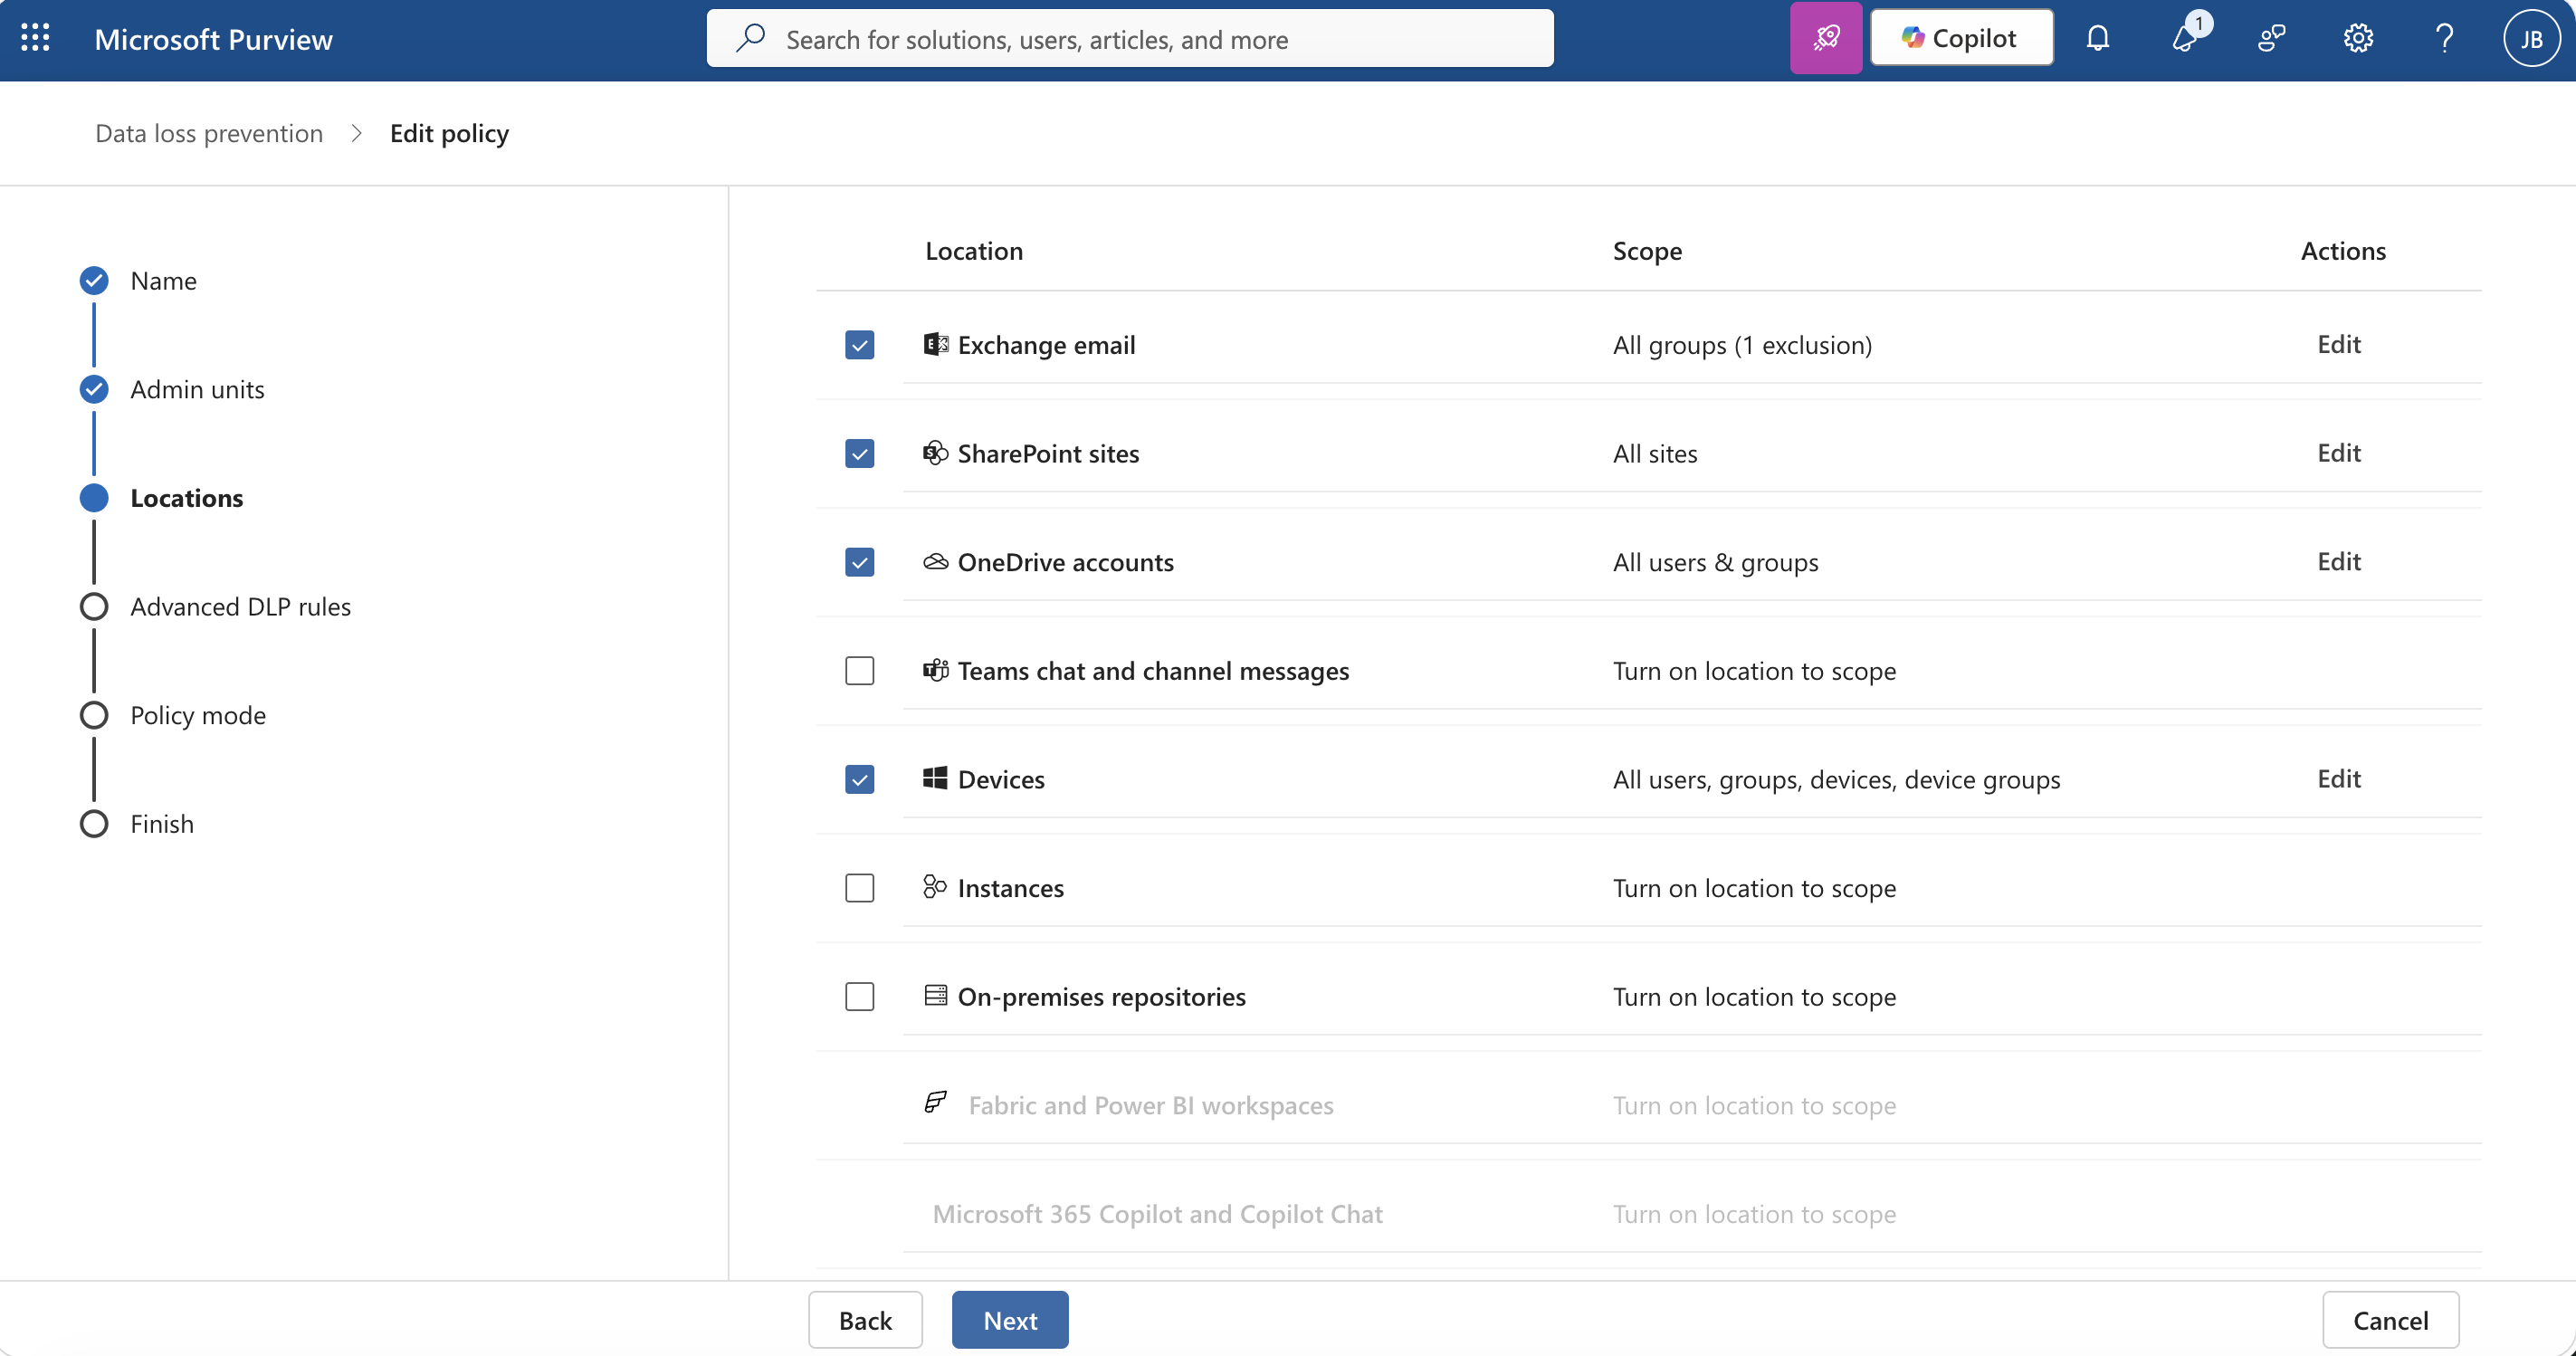
At this point the policy shell exists, but it still needs a detection rule. That is where the sensitive information type comes in.
Create the sensitive information type
Microsoft describes sensitive information types as pattern-based classifiers that detect things like financial data, health records, Social Security numbers, and custom patterns. Built-in types are useful, but the local policy I was testing needed a custom sensitive information type for CUI banners.
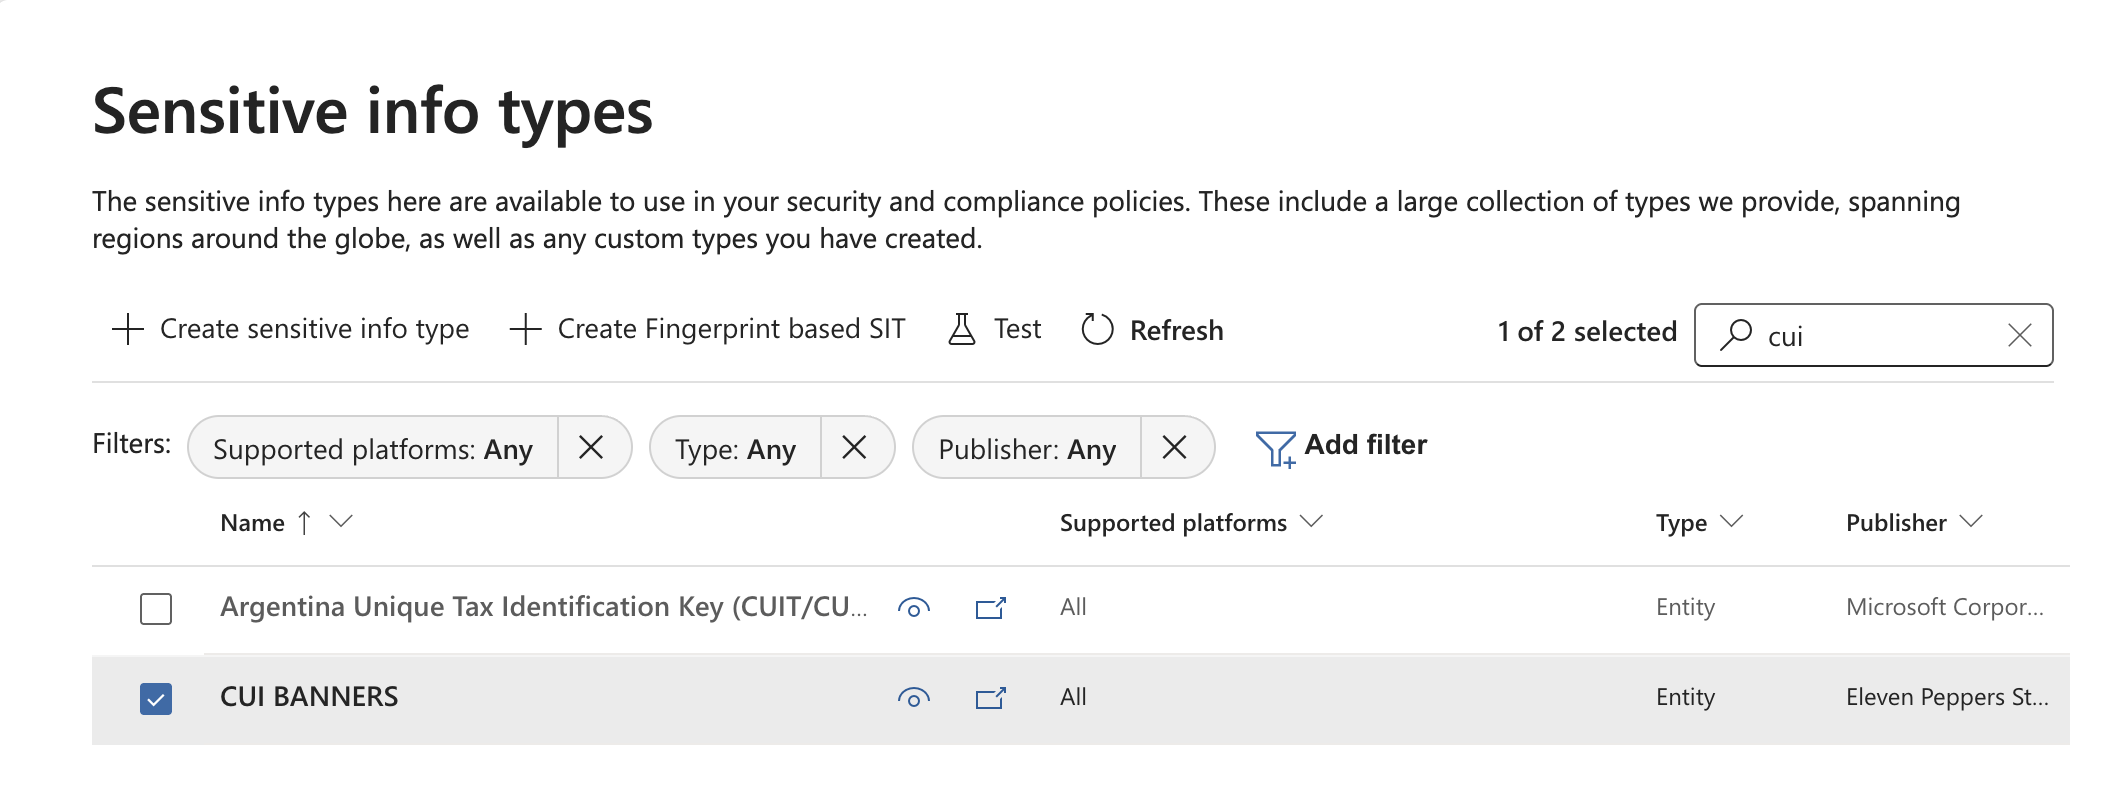
The custom type is visible under sensitive information types. This is the object the DLP policy will reference later when it decides whether a message matches the rule.
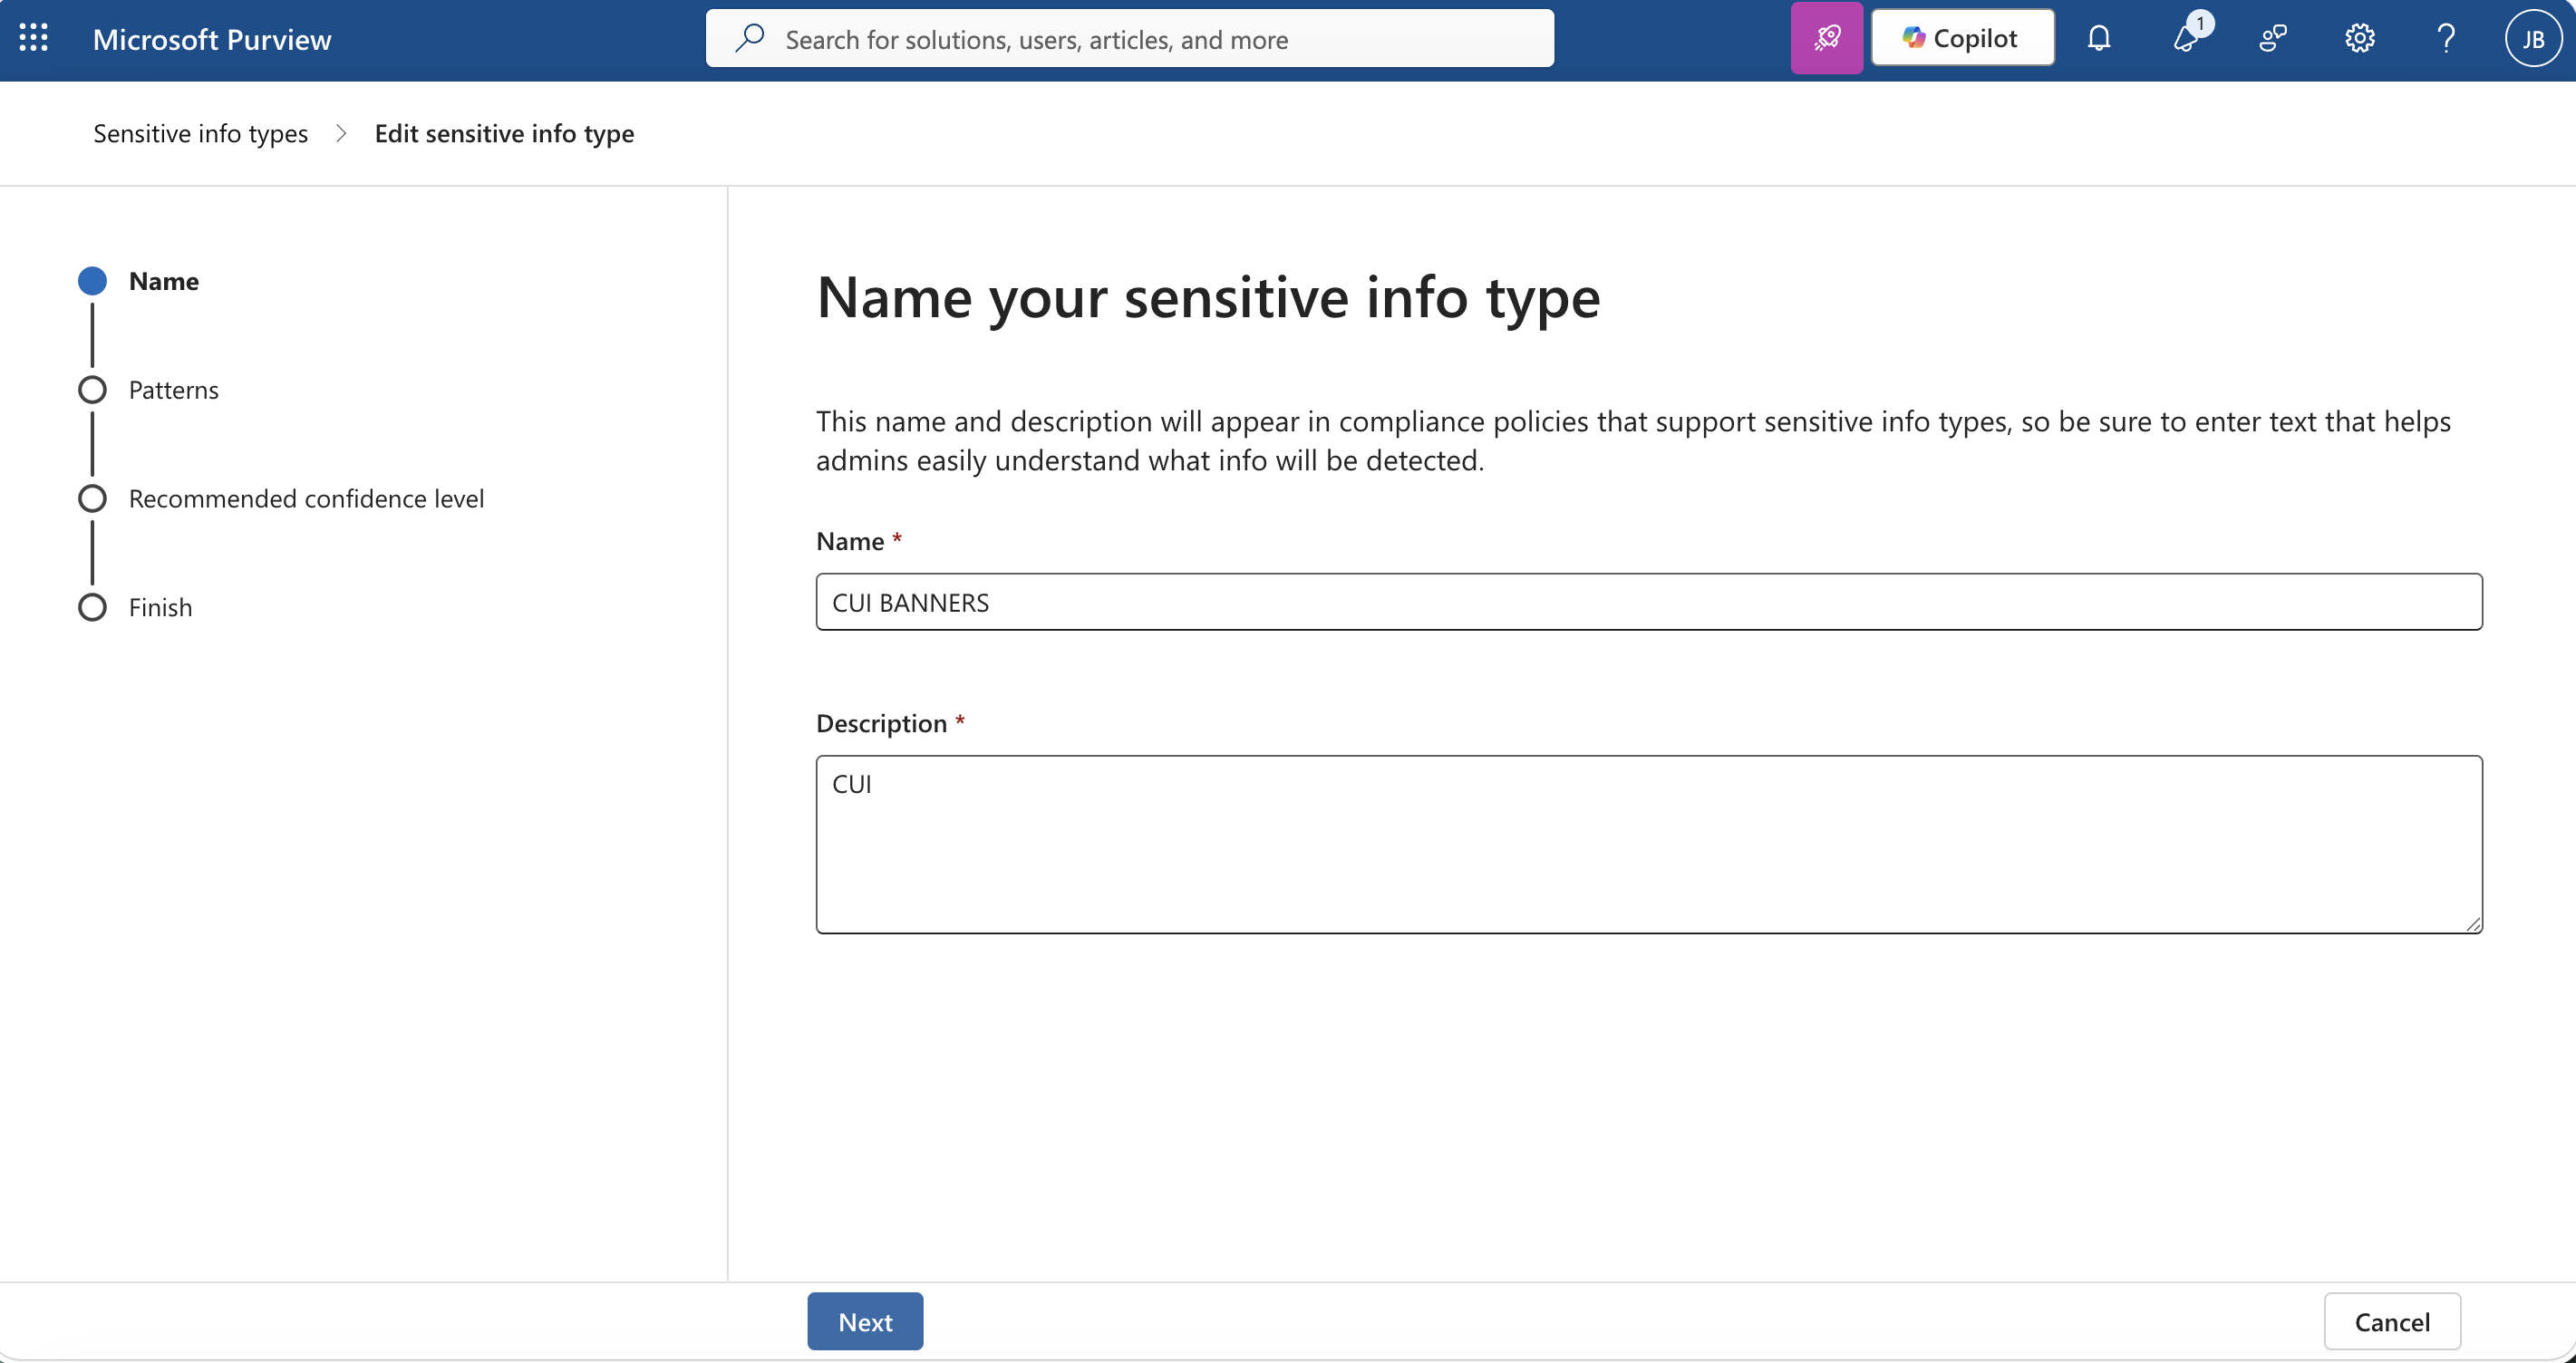
The name is not cosmetic. This is the label administrators will see when they build the rule, investigate matches, and explain why the policy fired. I want the name to describe the data pattern clearly enough that I do not have to reverse-engineer it later.
The pattern screen is where the custom type becomes real. For this test, the sensitive information type is looking for CUI banner language, not trying to guess at every possible sensitive document. If the matching logic is too broad, DLP becomes noise instead of a control.
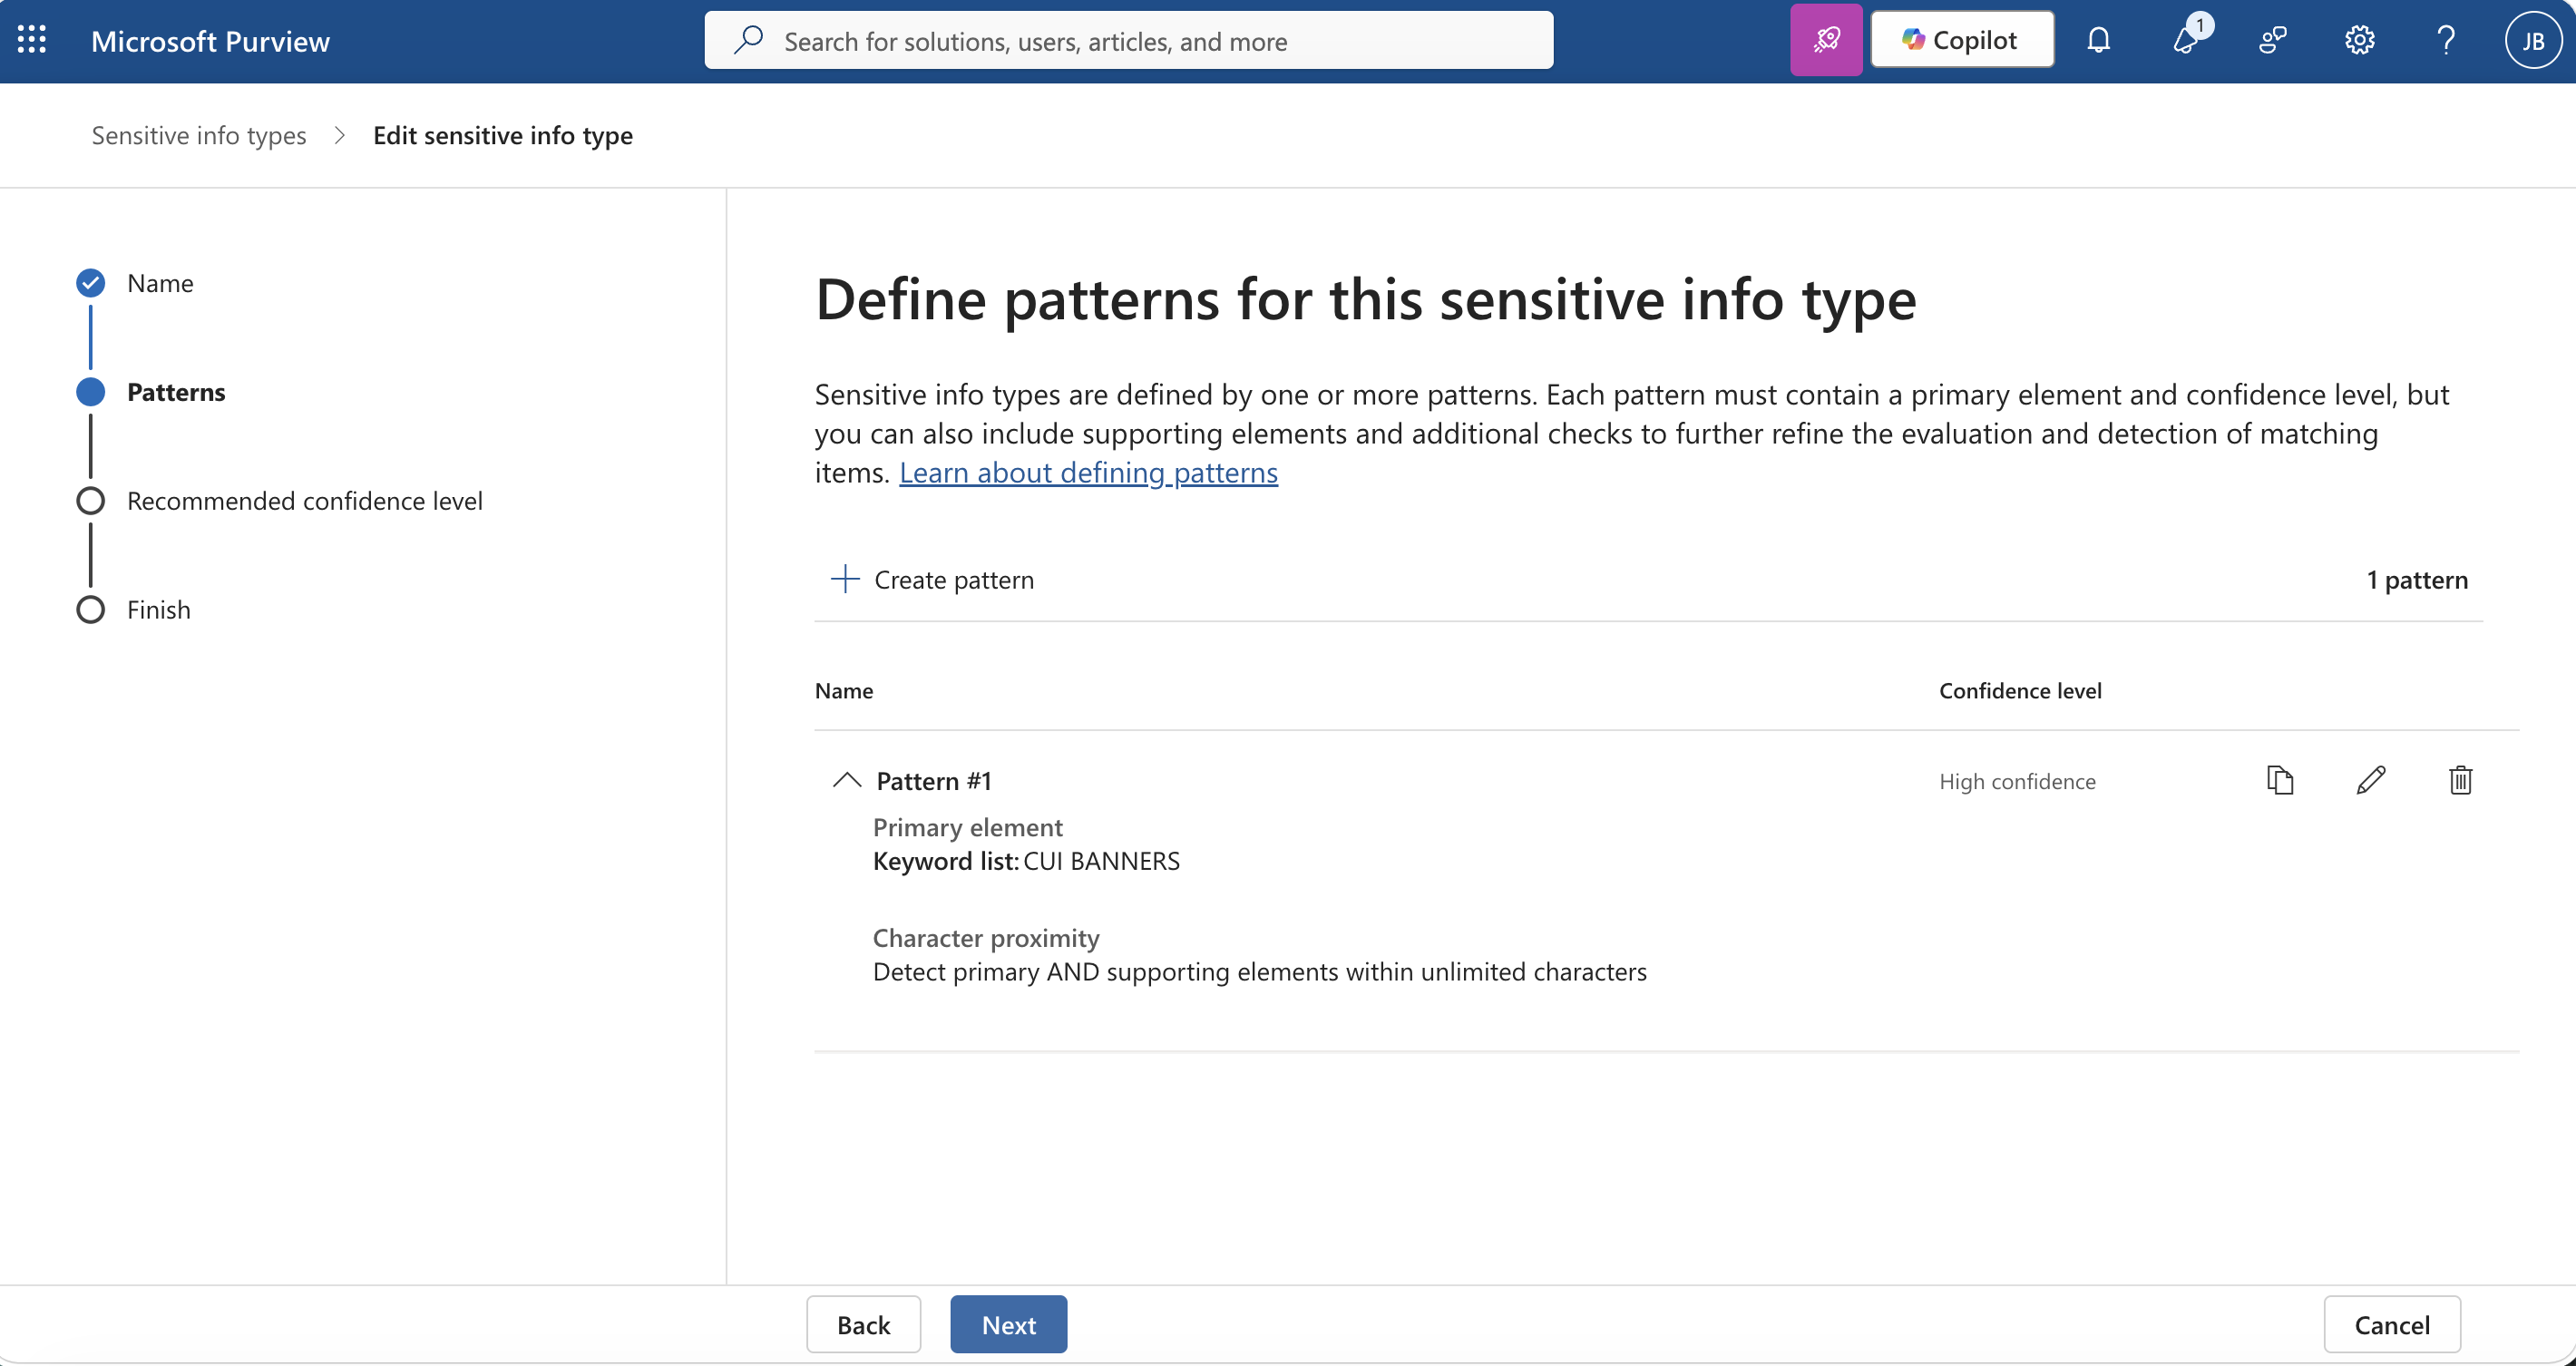
The primary element is the signal Purview has to find before the custom type can match. In a CUI banner policy, I want the match anchored to the actual banner text instead of a loose keyword that might appear in normal conversation.
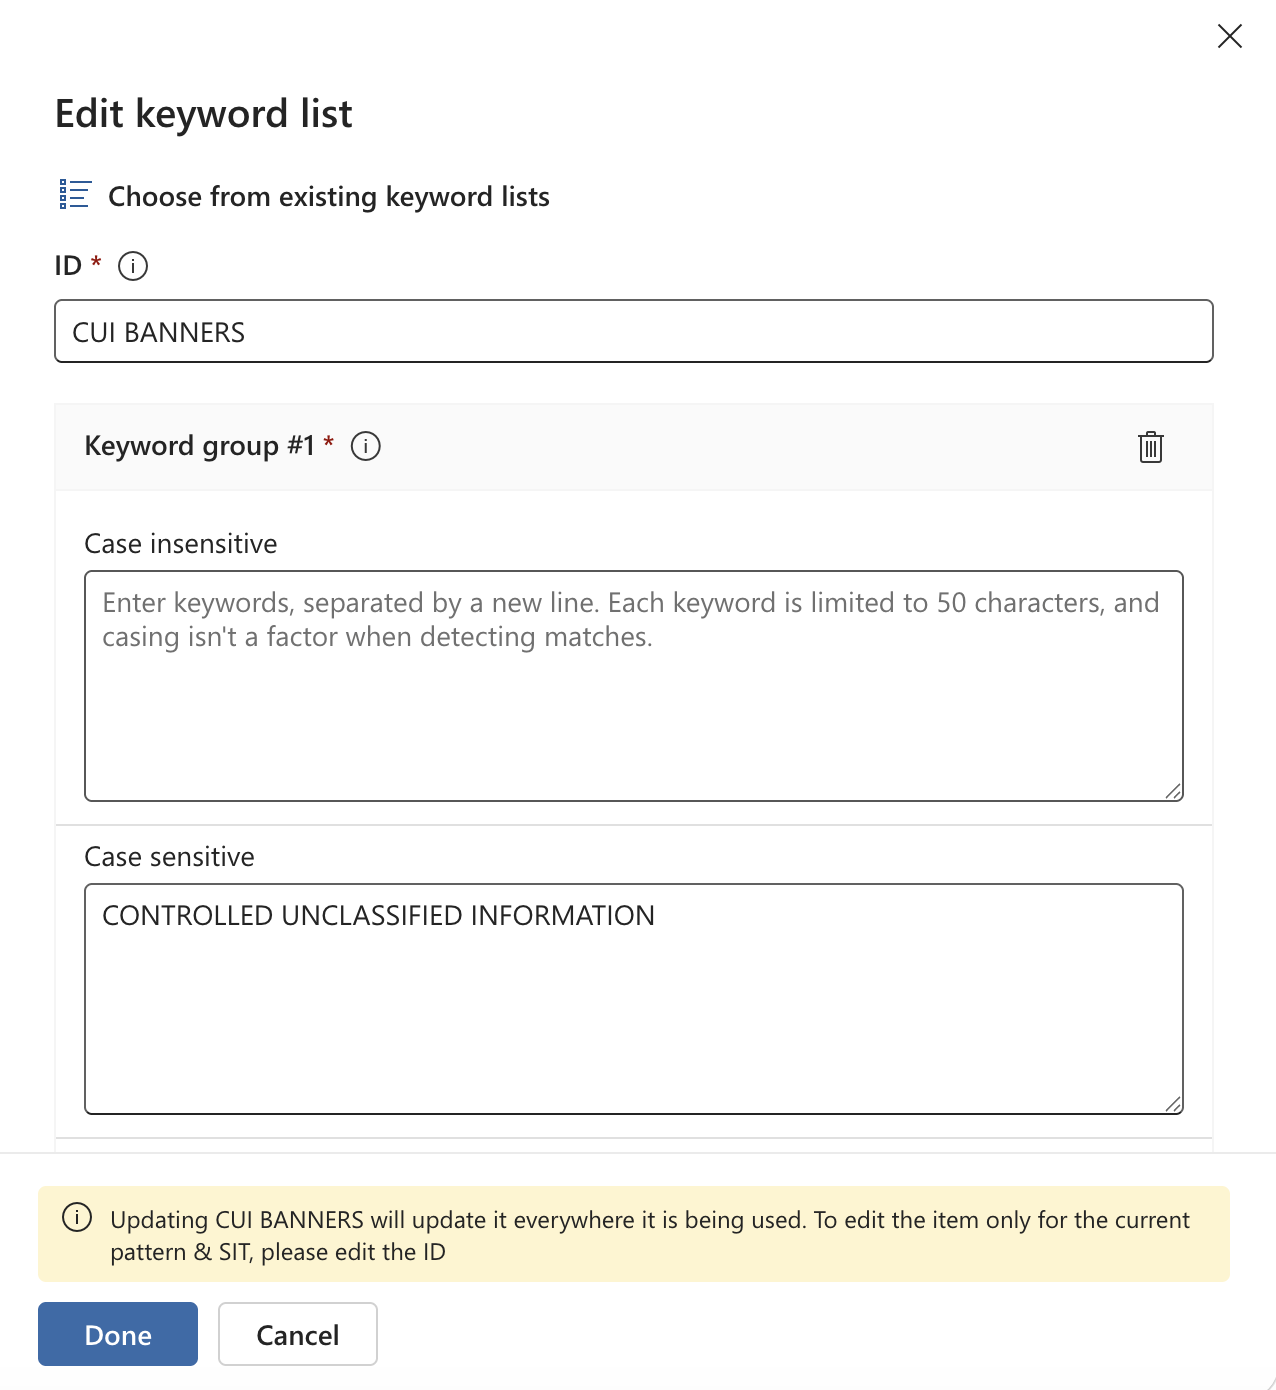
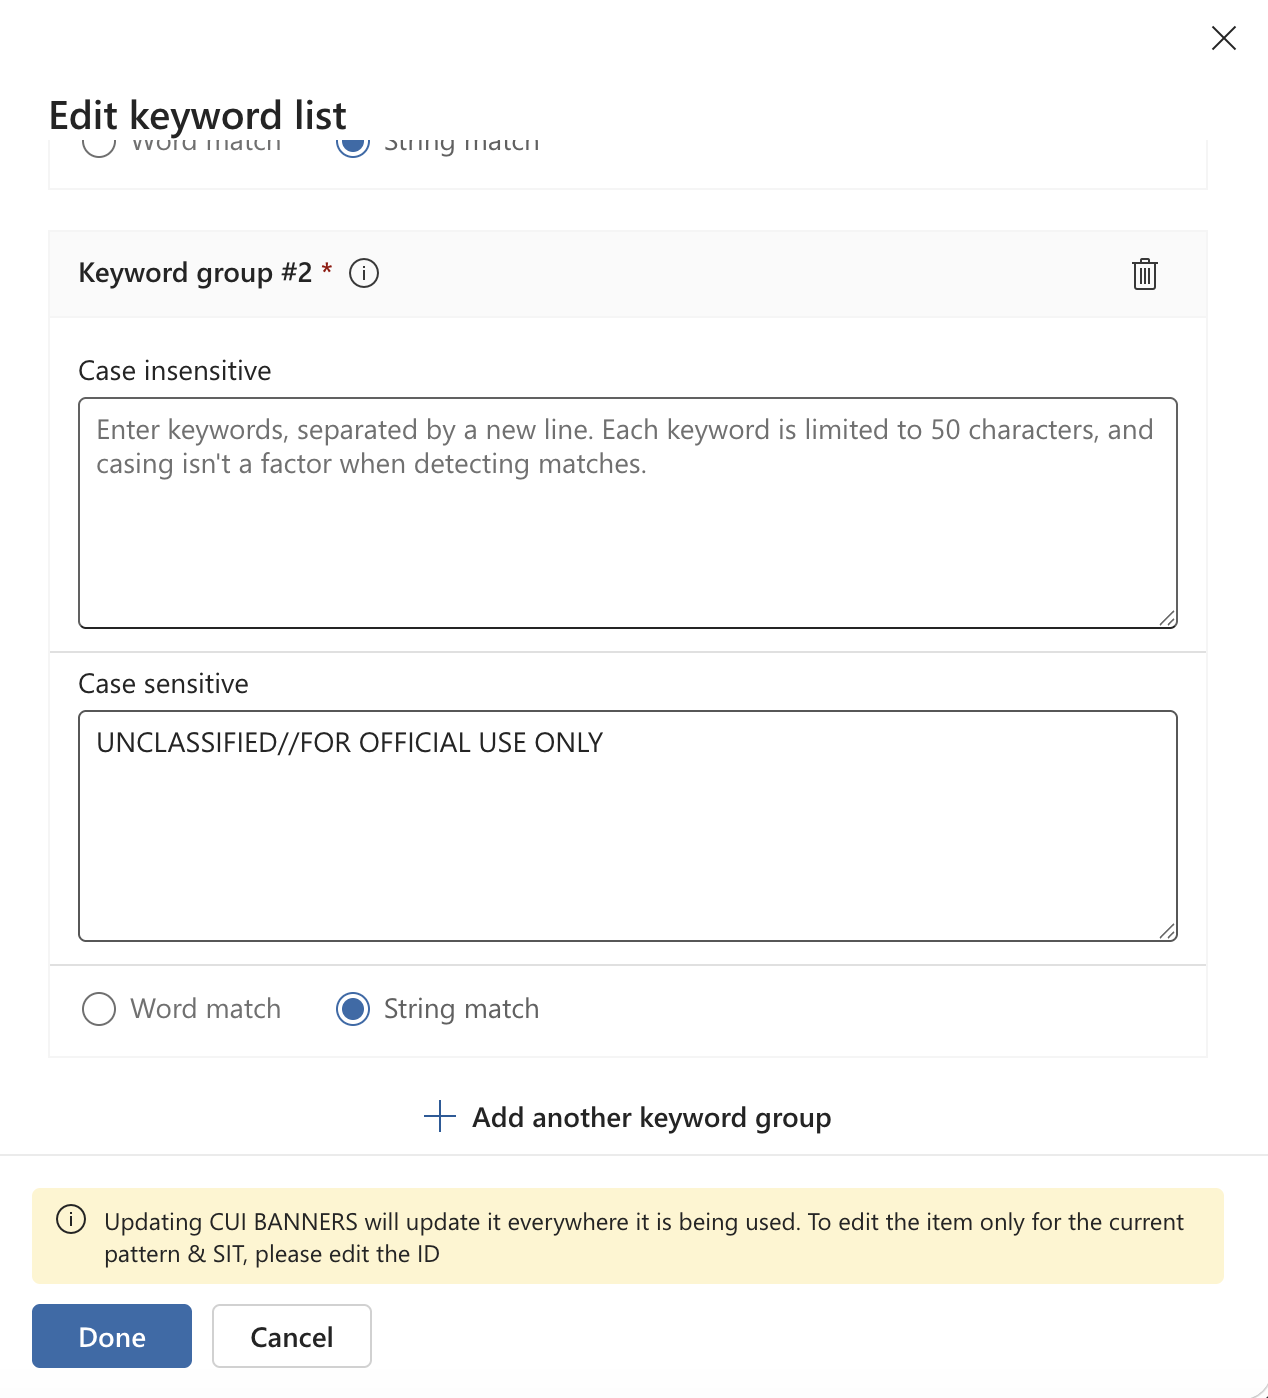
Supporting elements tighten the match. They add context so the classifier is not only reacting to one string in isolation. This is the difference between matching a real CUI marking pattern and catching random text that happens to look close.
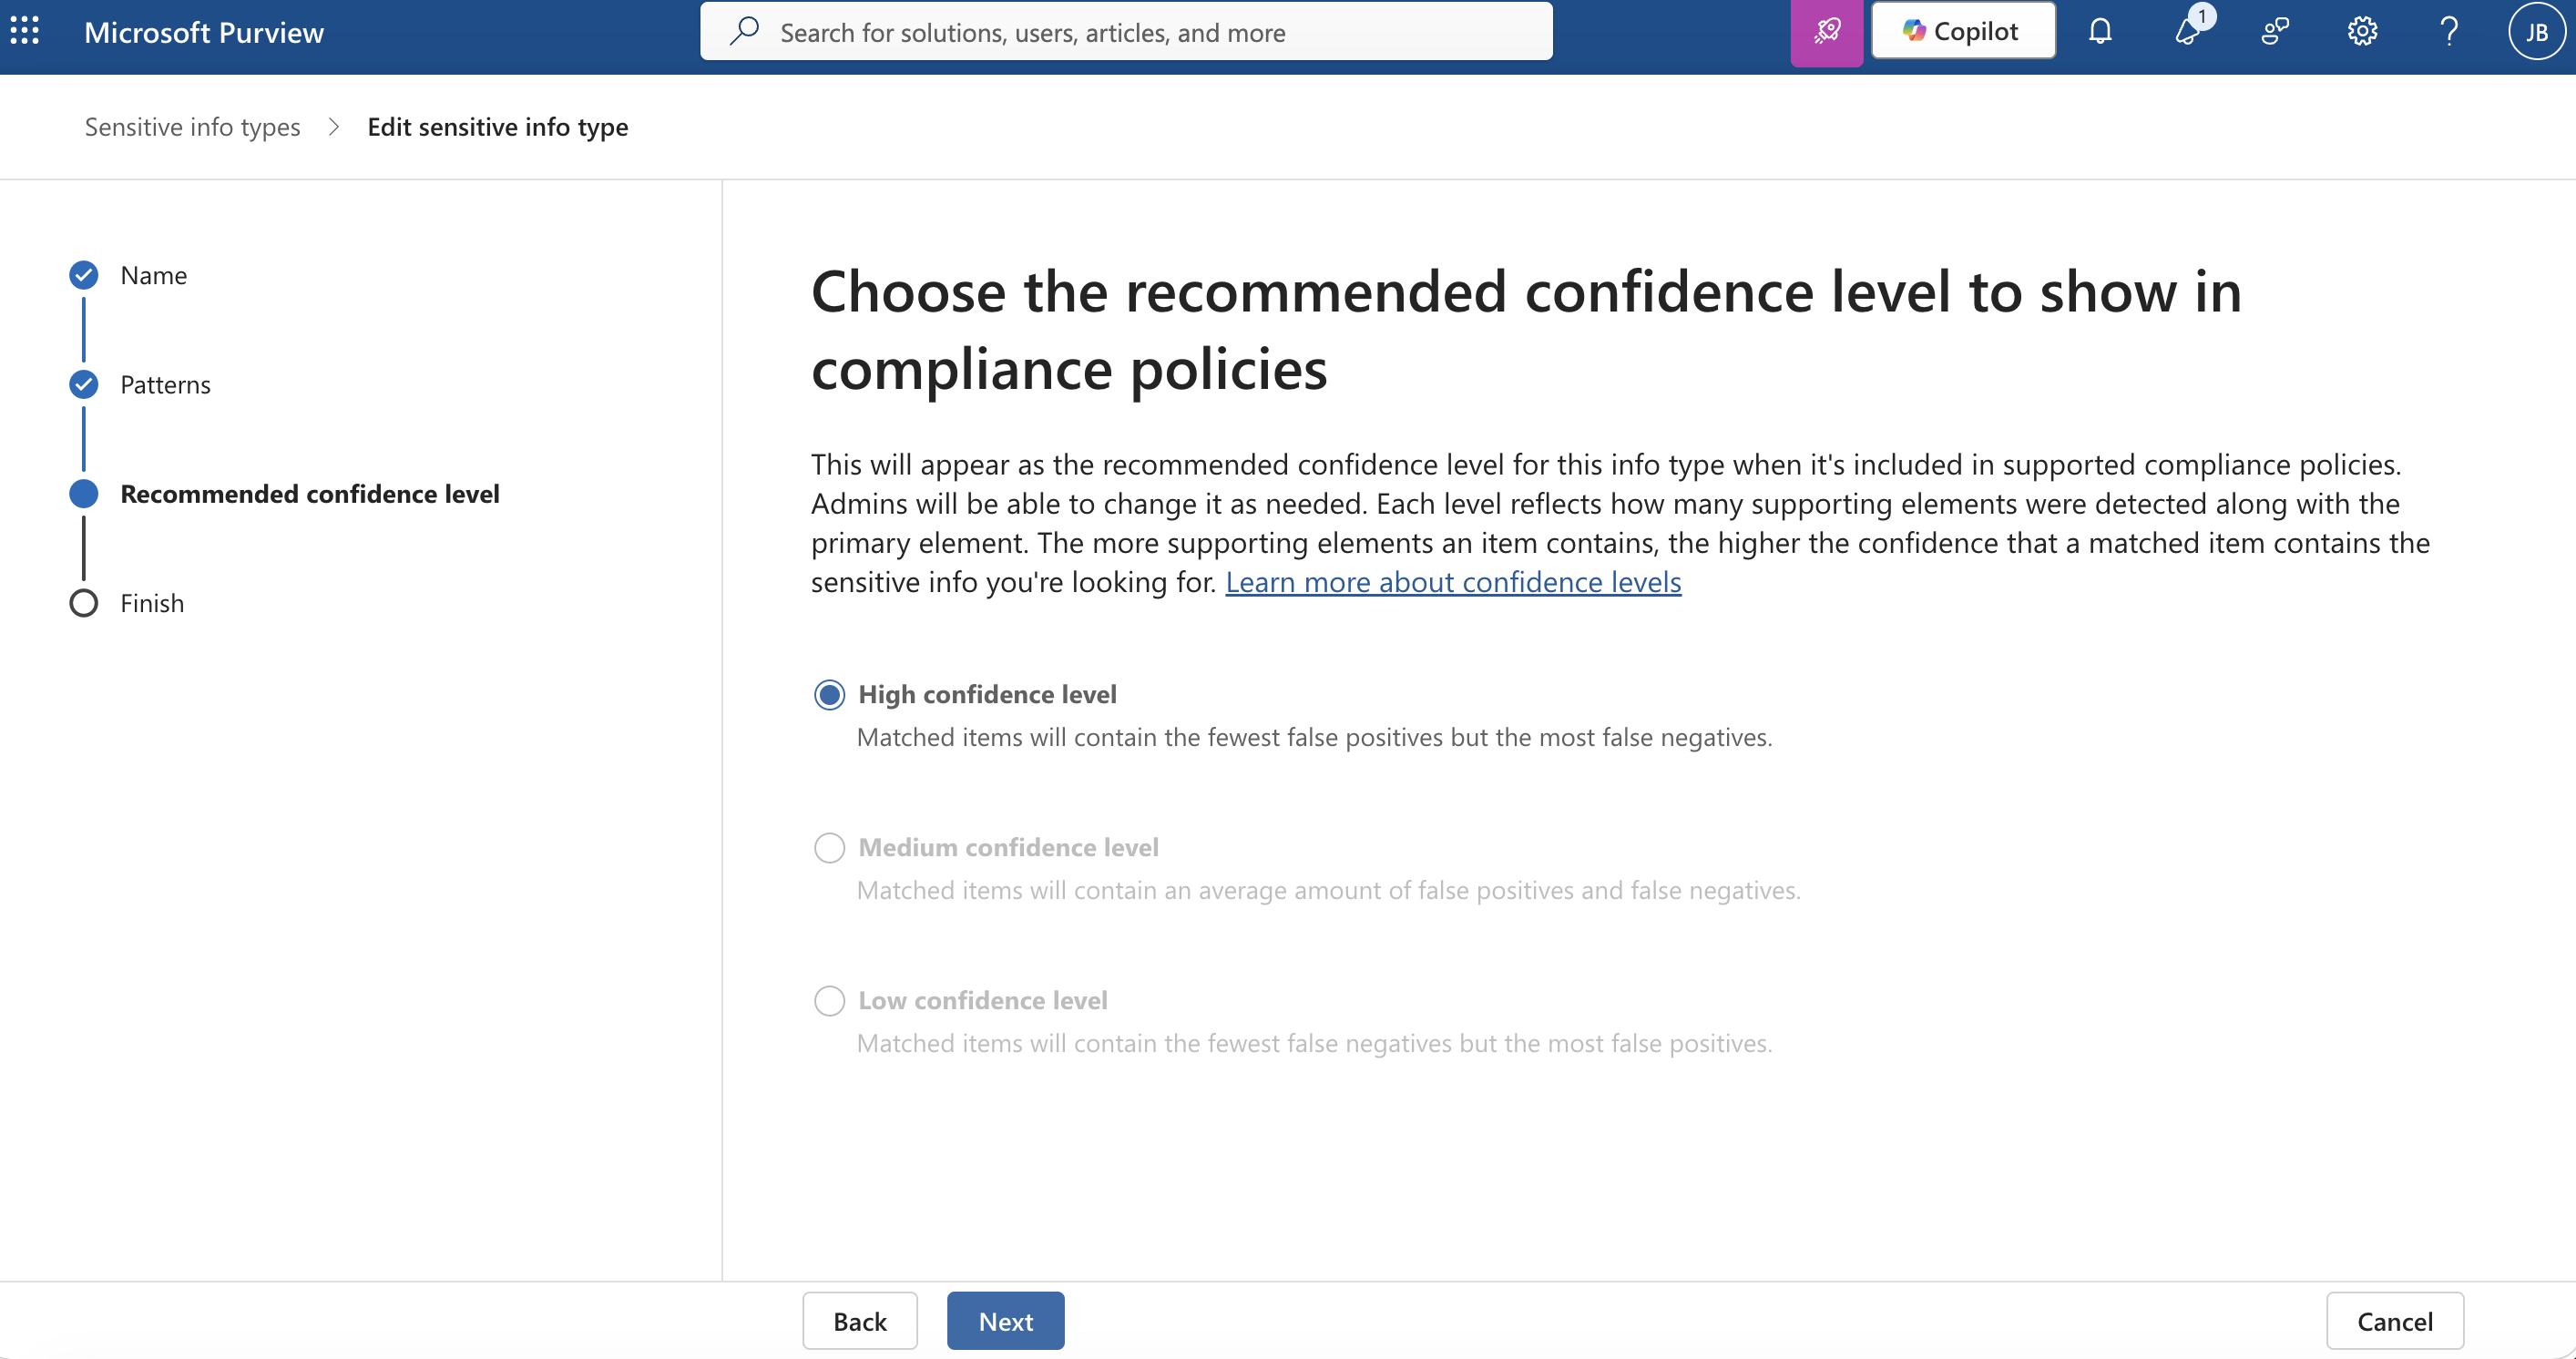
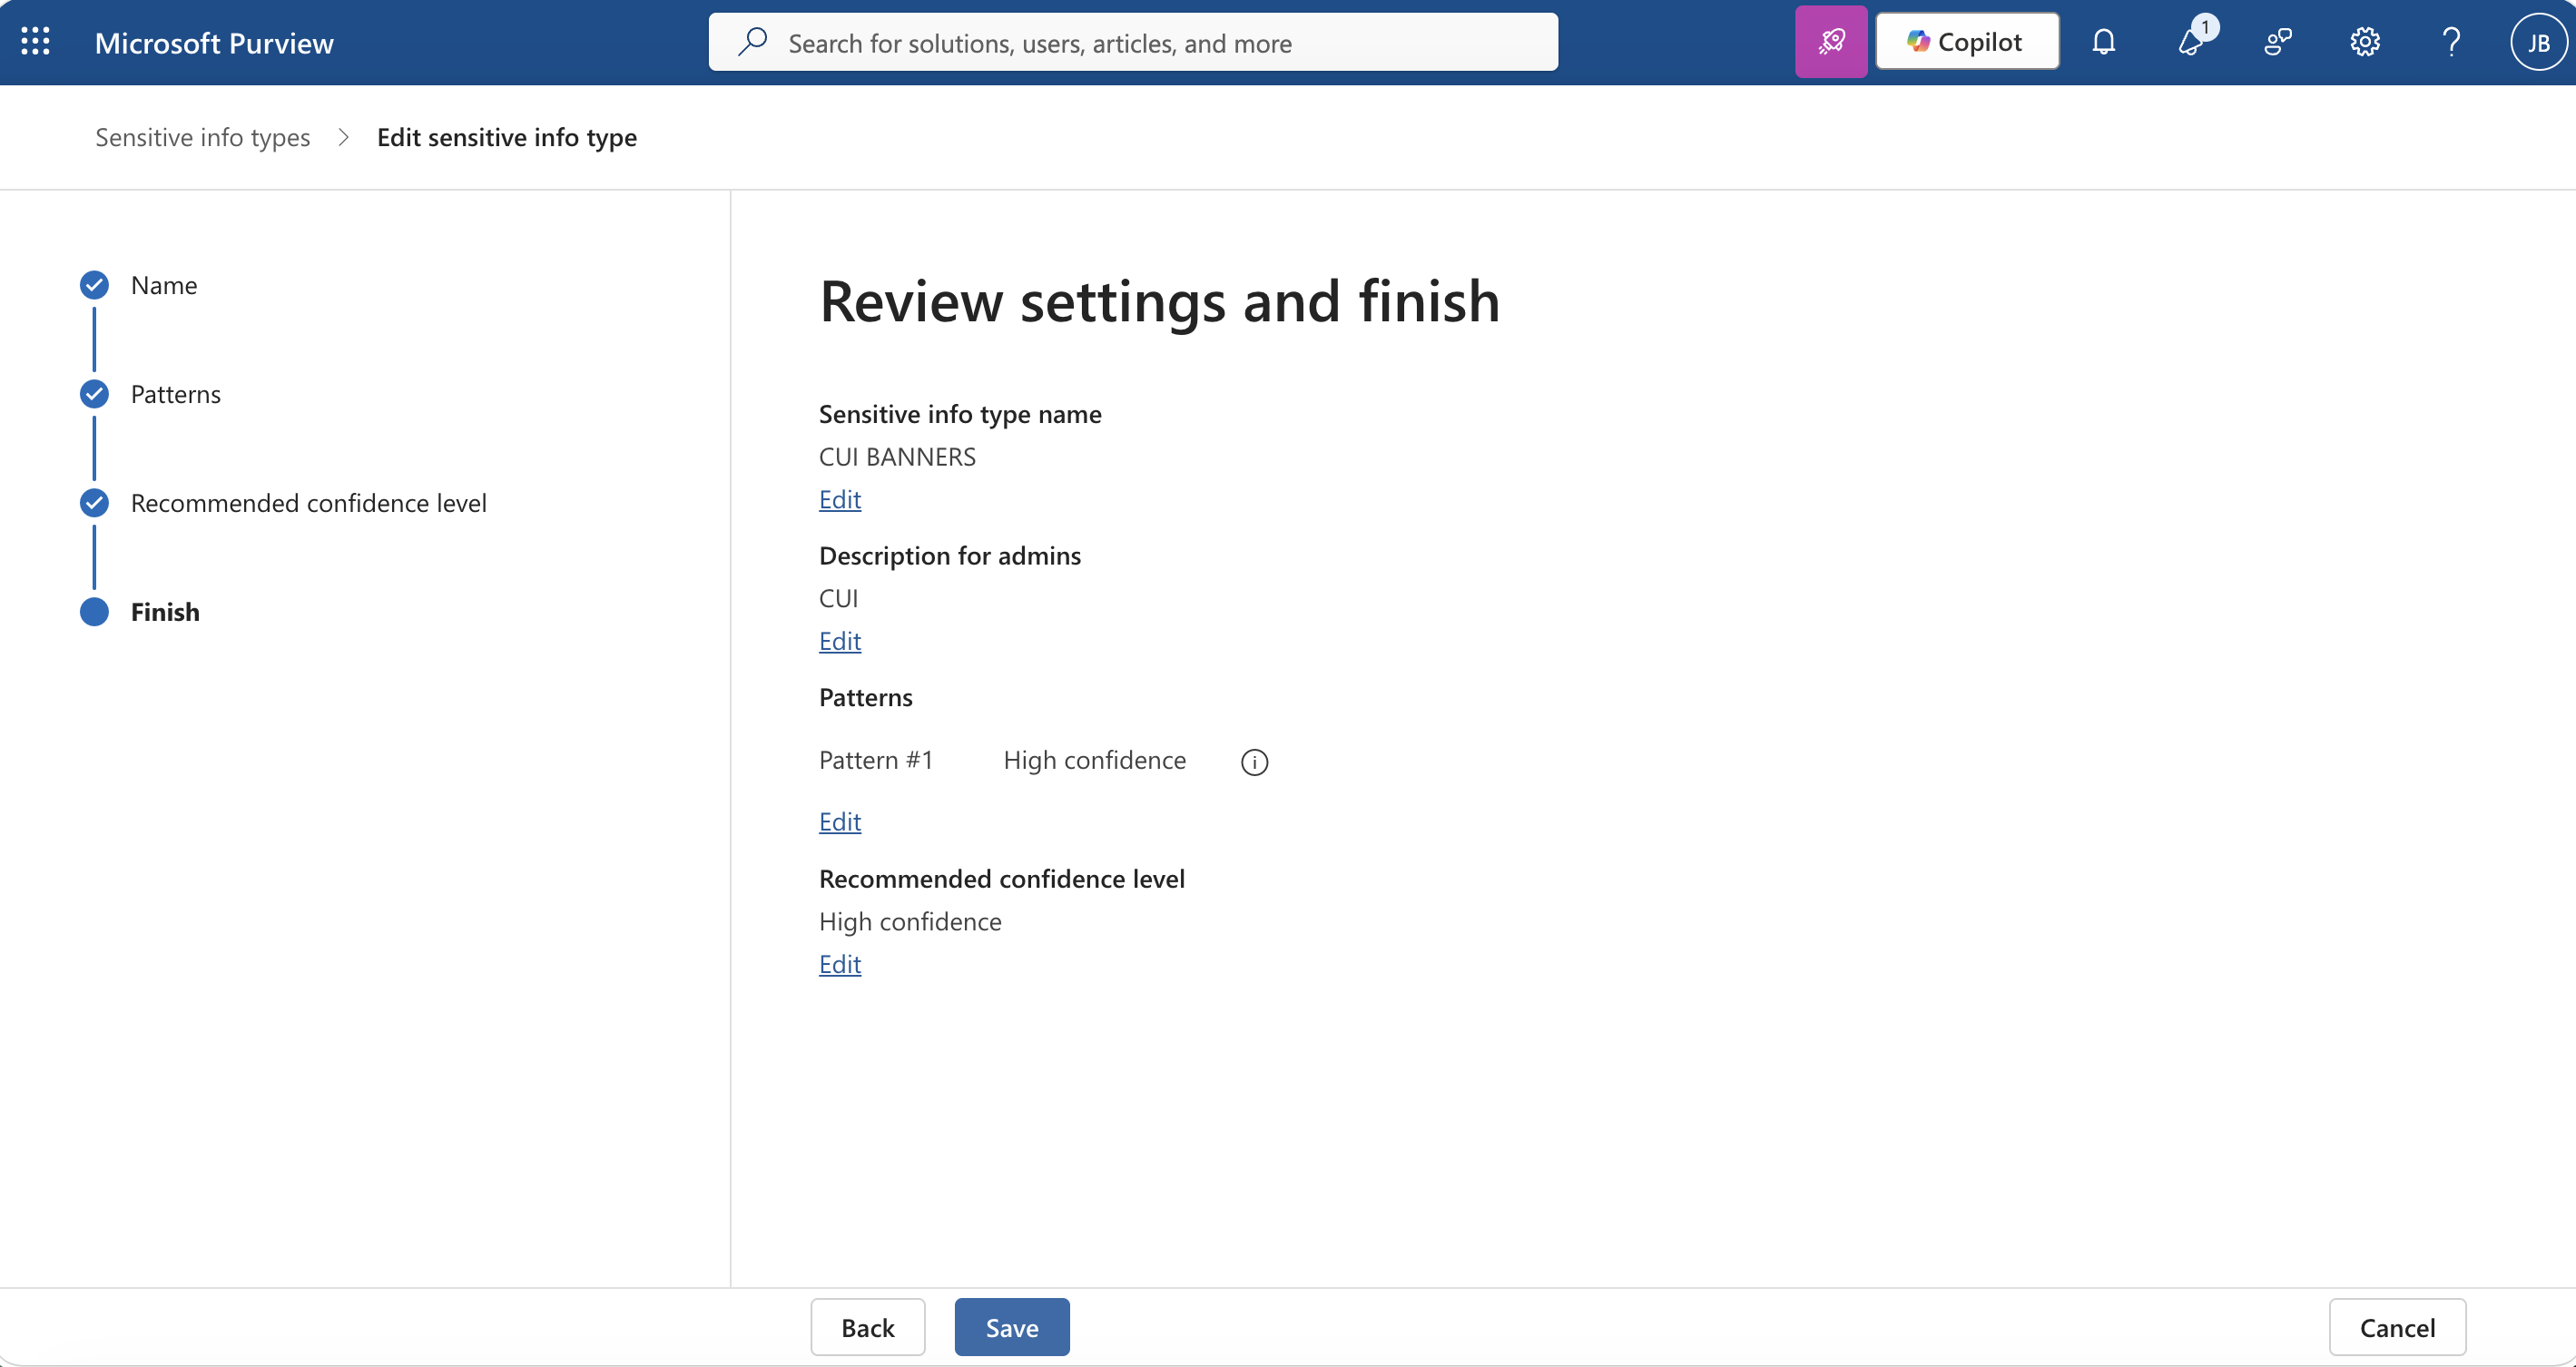
The confidence level controls how Purview treats the match. Microsoft documents confidence levels as a tradeoff between false positives and false negatives. For this kind of banner-style custom type, I would rather be deliberate than noisy because noisy DLP policies are the ones users learn to ignore.
The finish screen is the checkpoint before the classifier becomes something I can attach to the DLP policy. If the detection object is vague, misnamed, or built around the wrong signal, the policy and the report will both inherit that problem.
Link the type to a DLP rule and allow overrides
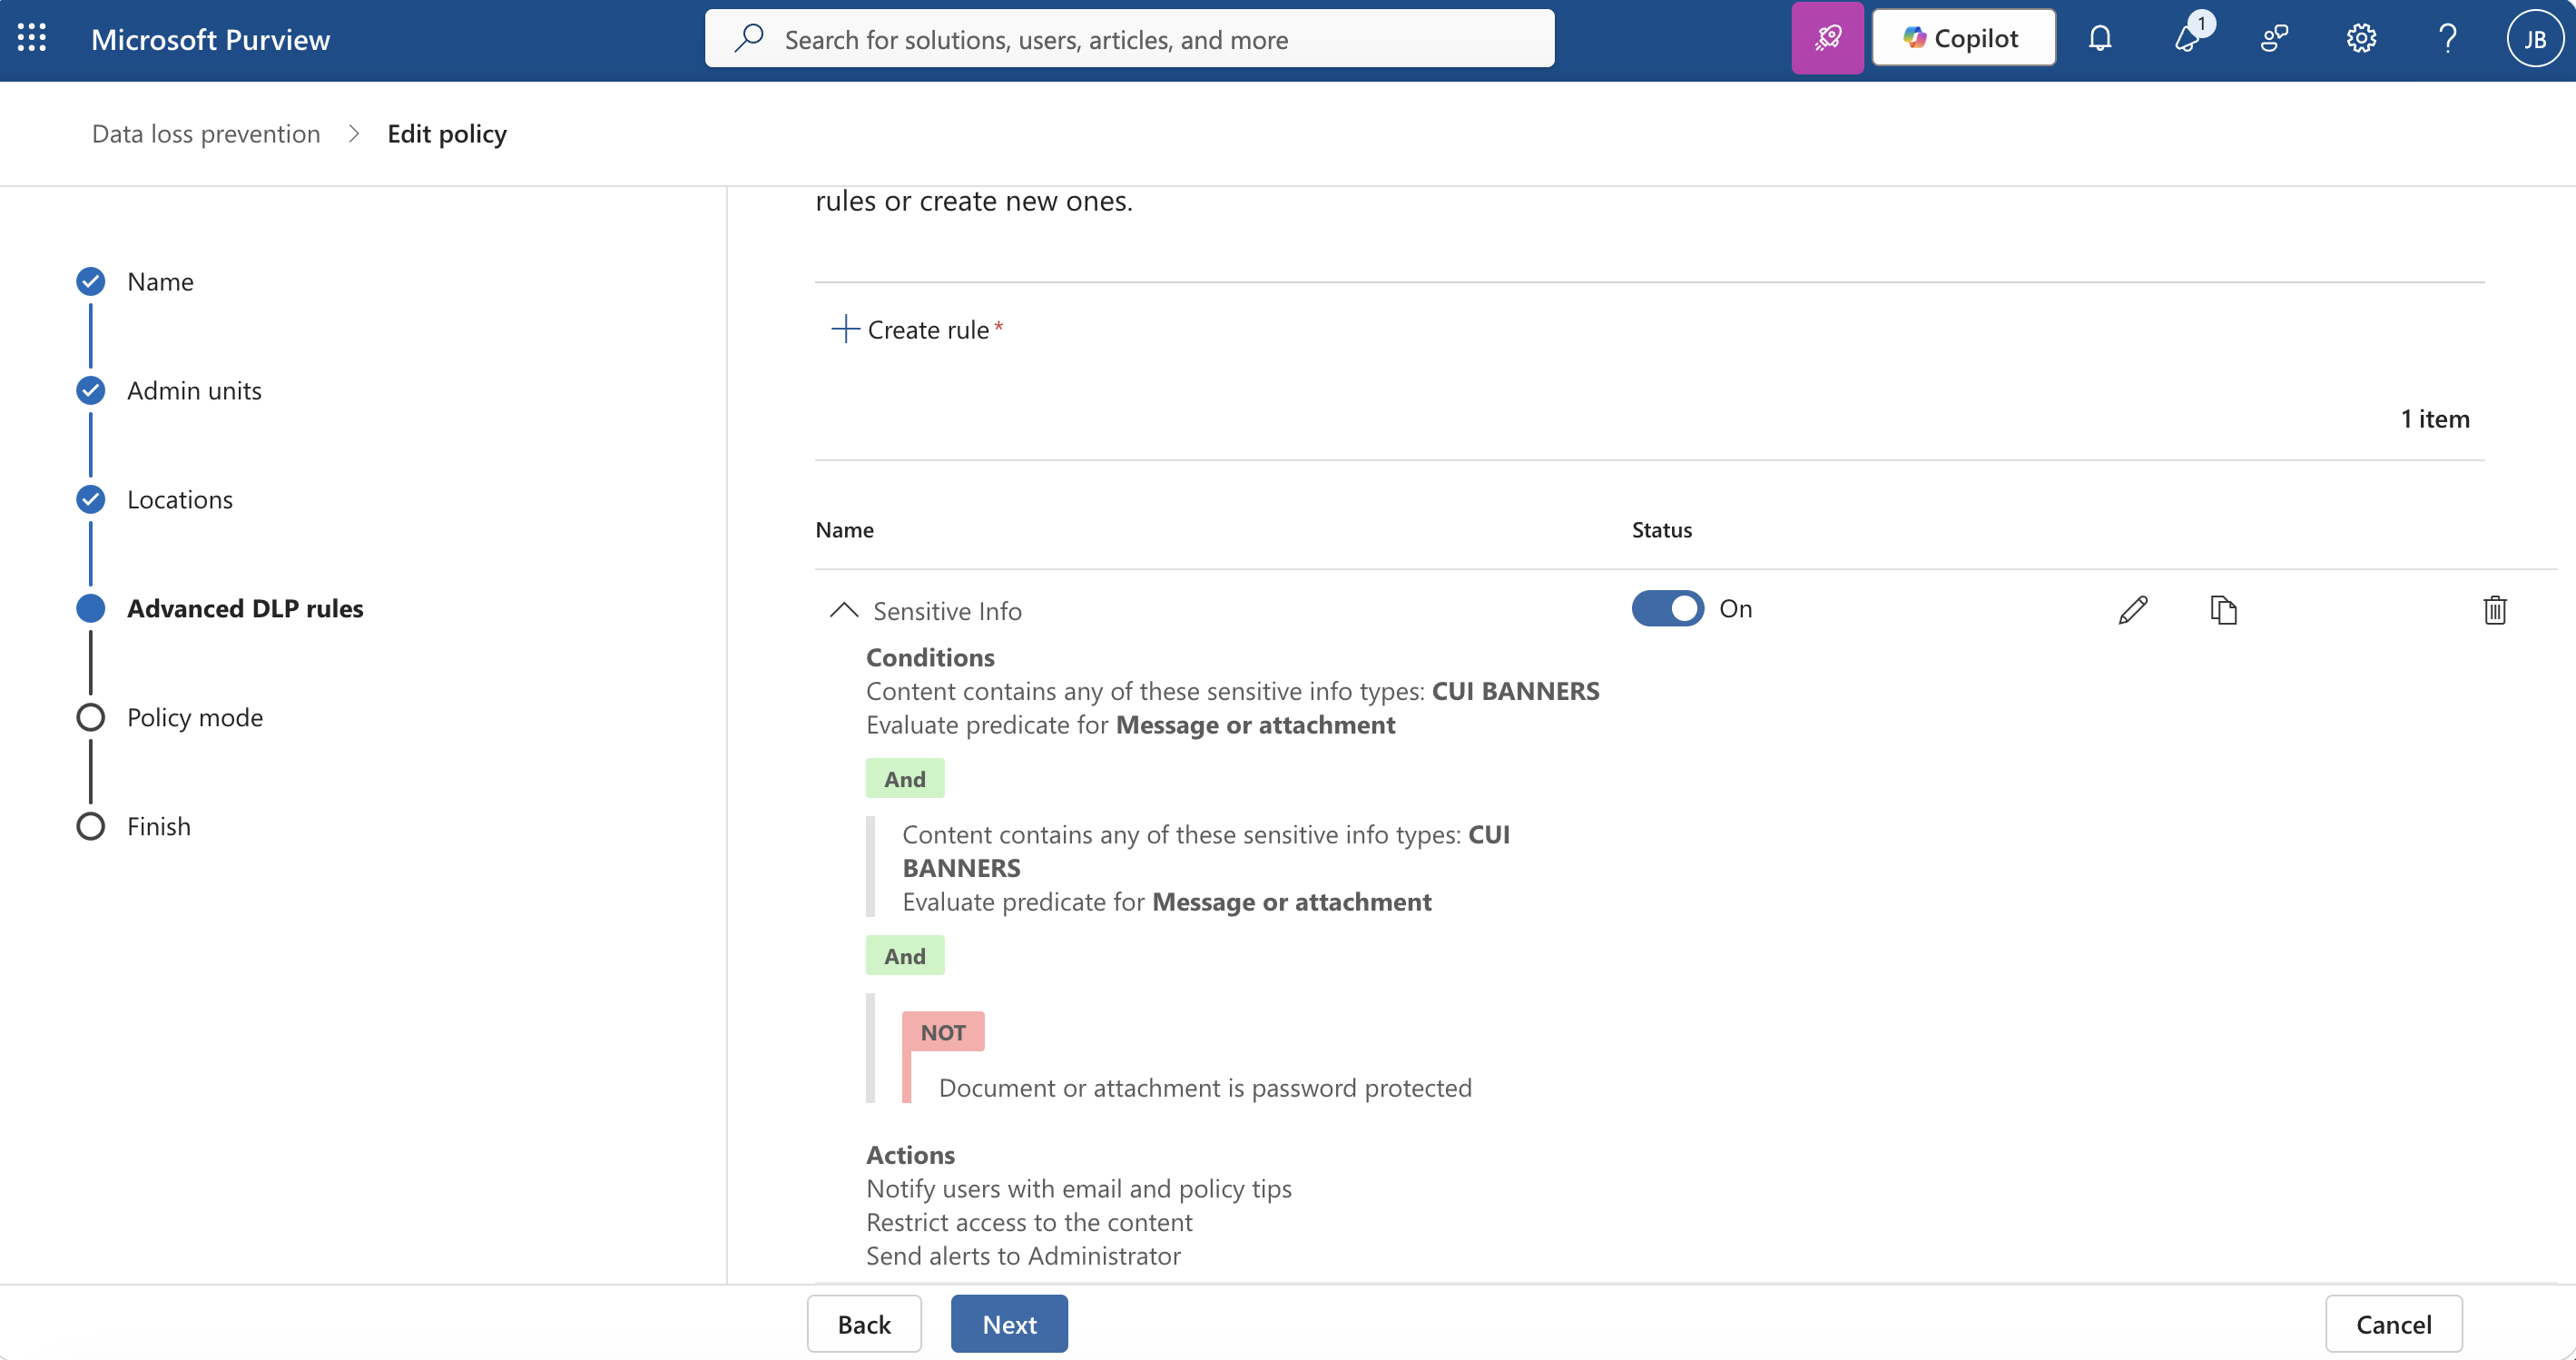
The rule is where the two pieces meet. The DLP policy controls the workflow, but the sensitive information type tells the rule what to look for. Once the CUI banner type is selected in the rule, the policy can warn on matching email instead of acting on a generic condition.
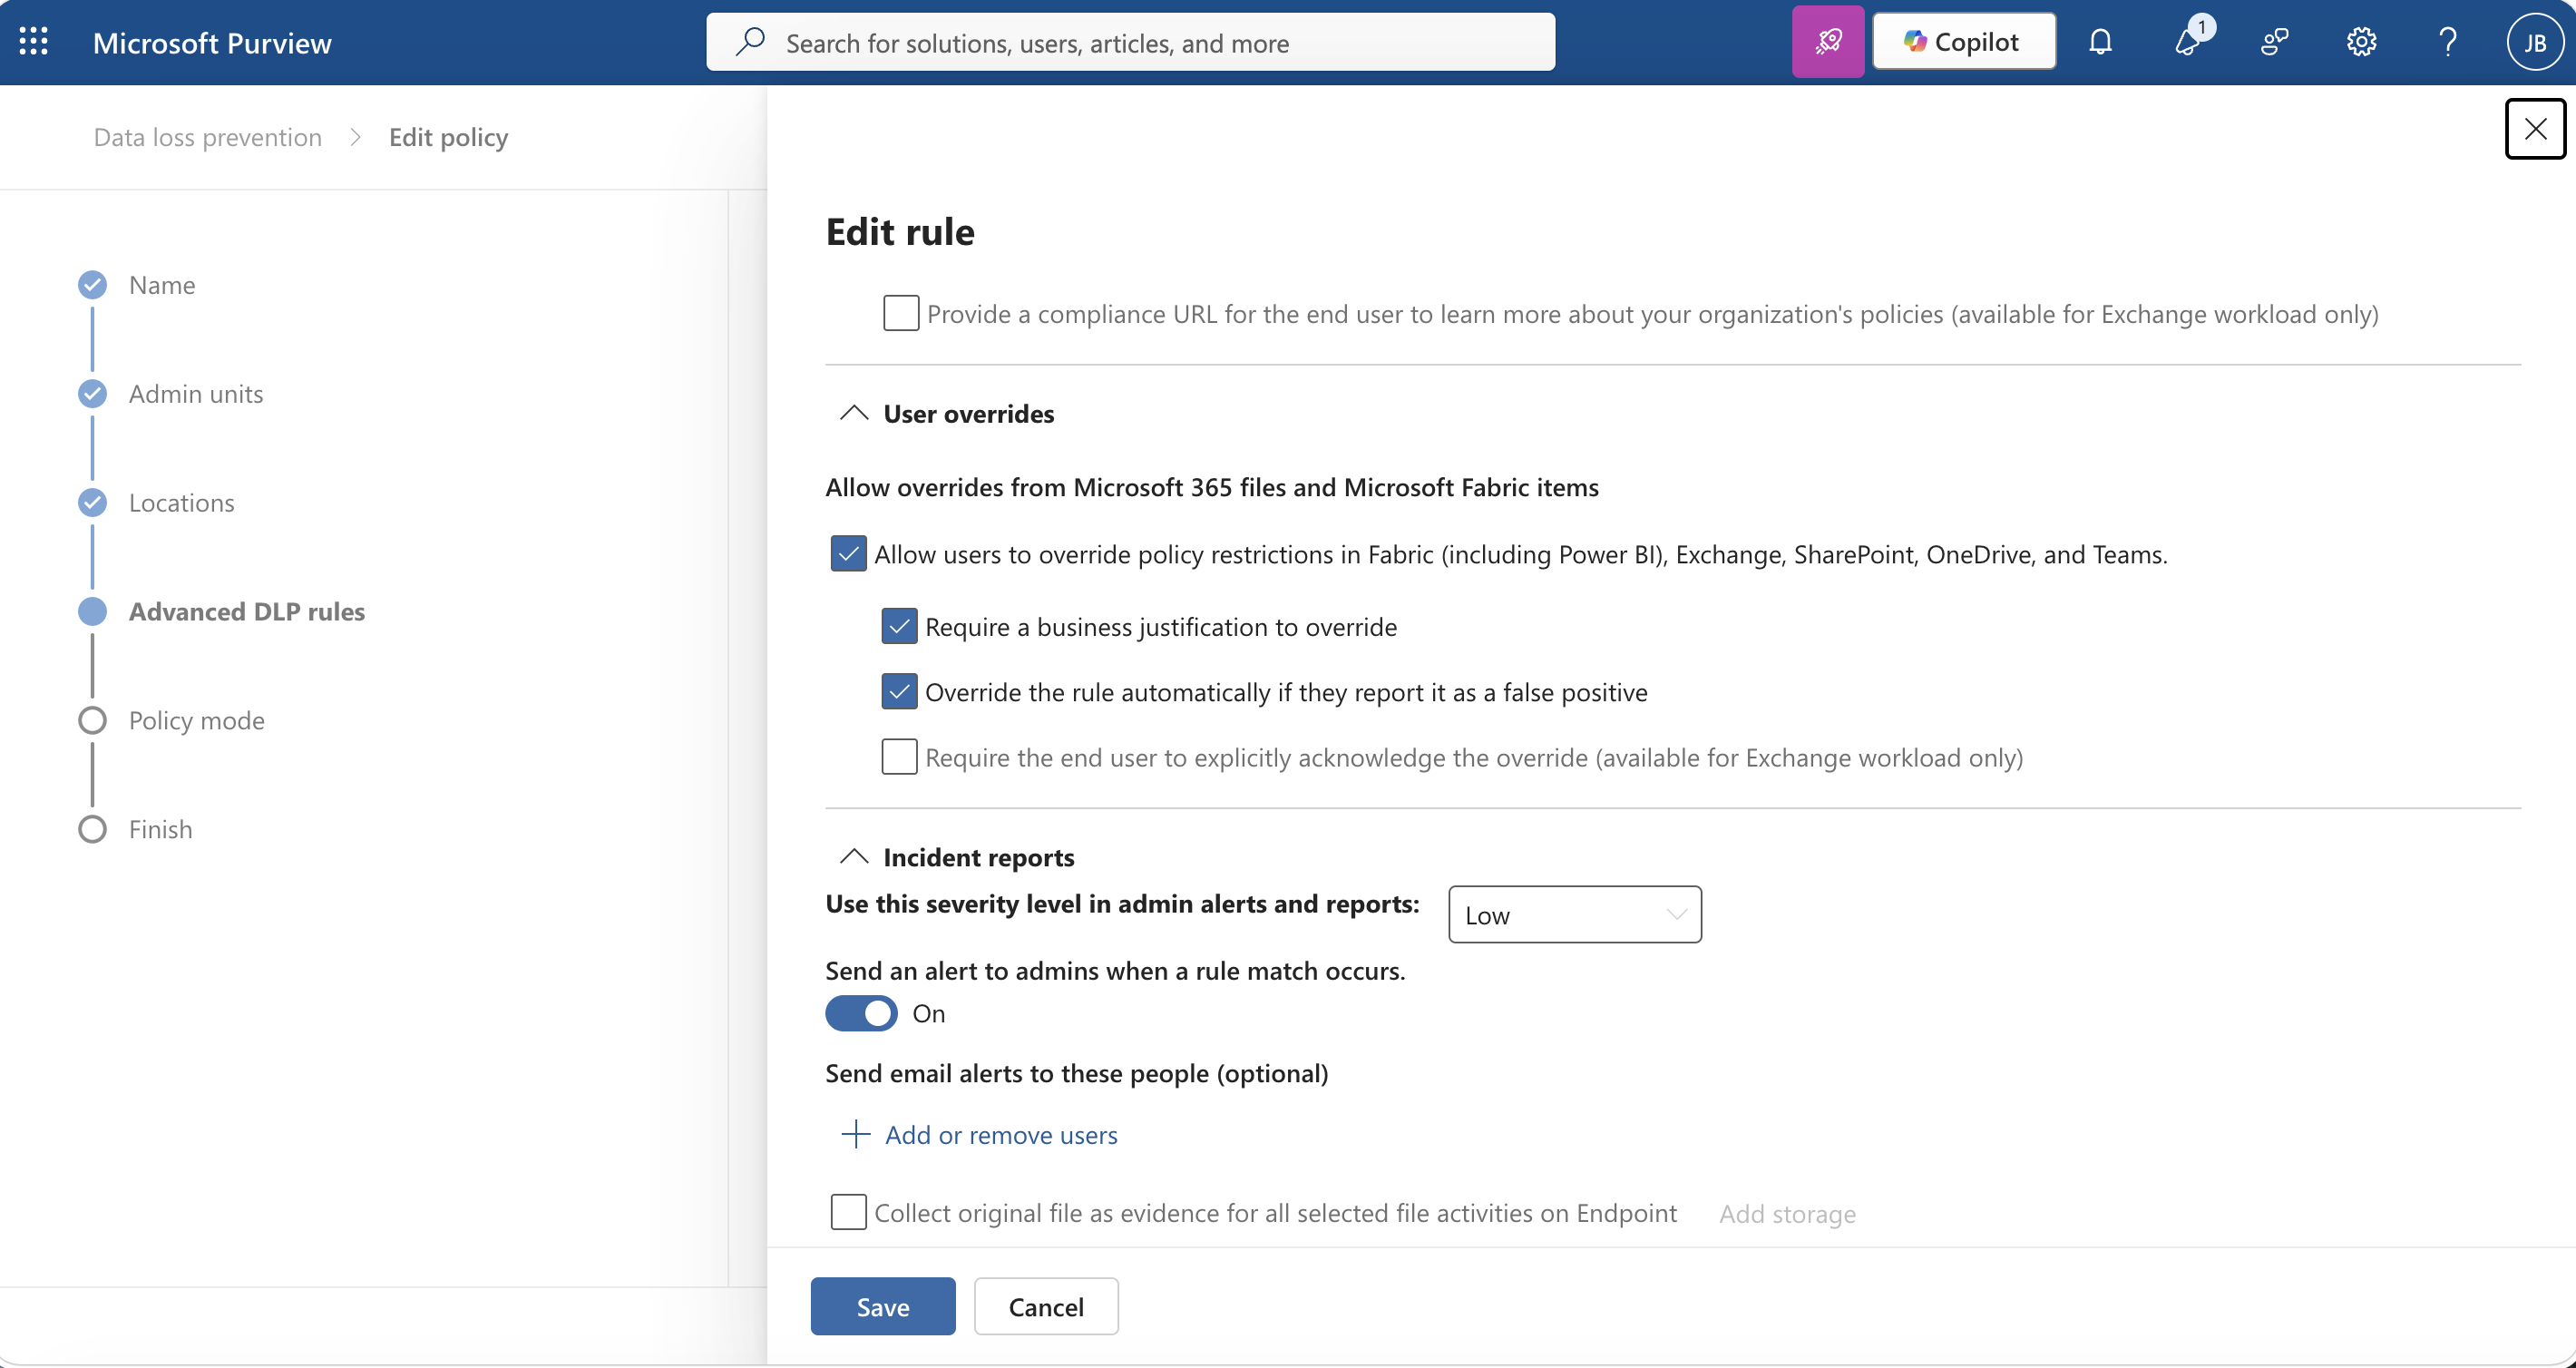
The override settings are the reason this script exists. If the policy allows the user to continue with a business justification, that justification should not disappear into a log nobody reads. The feature is only useful if the exception gets reviewed.
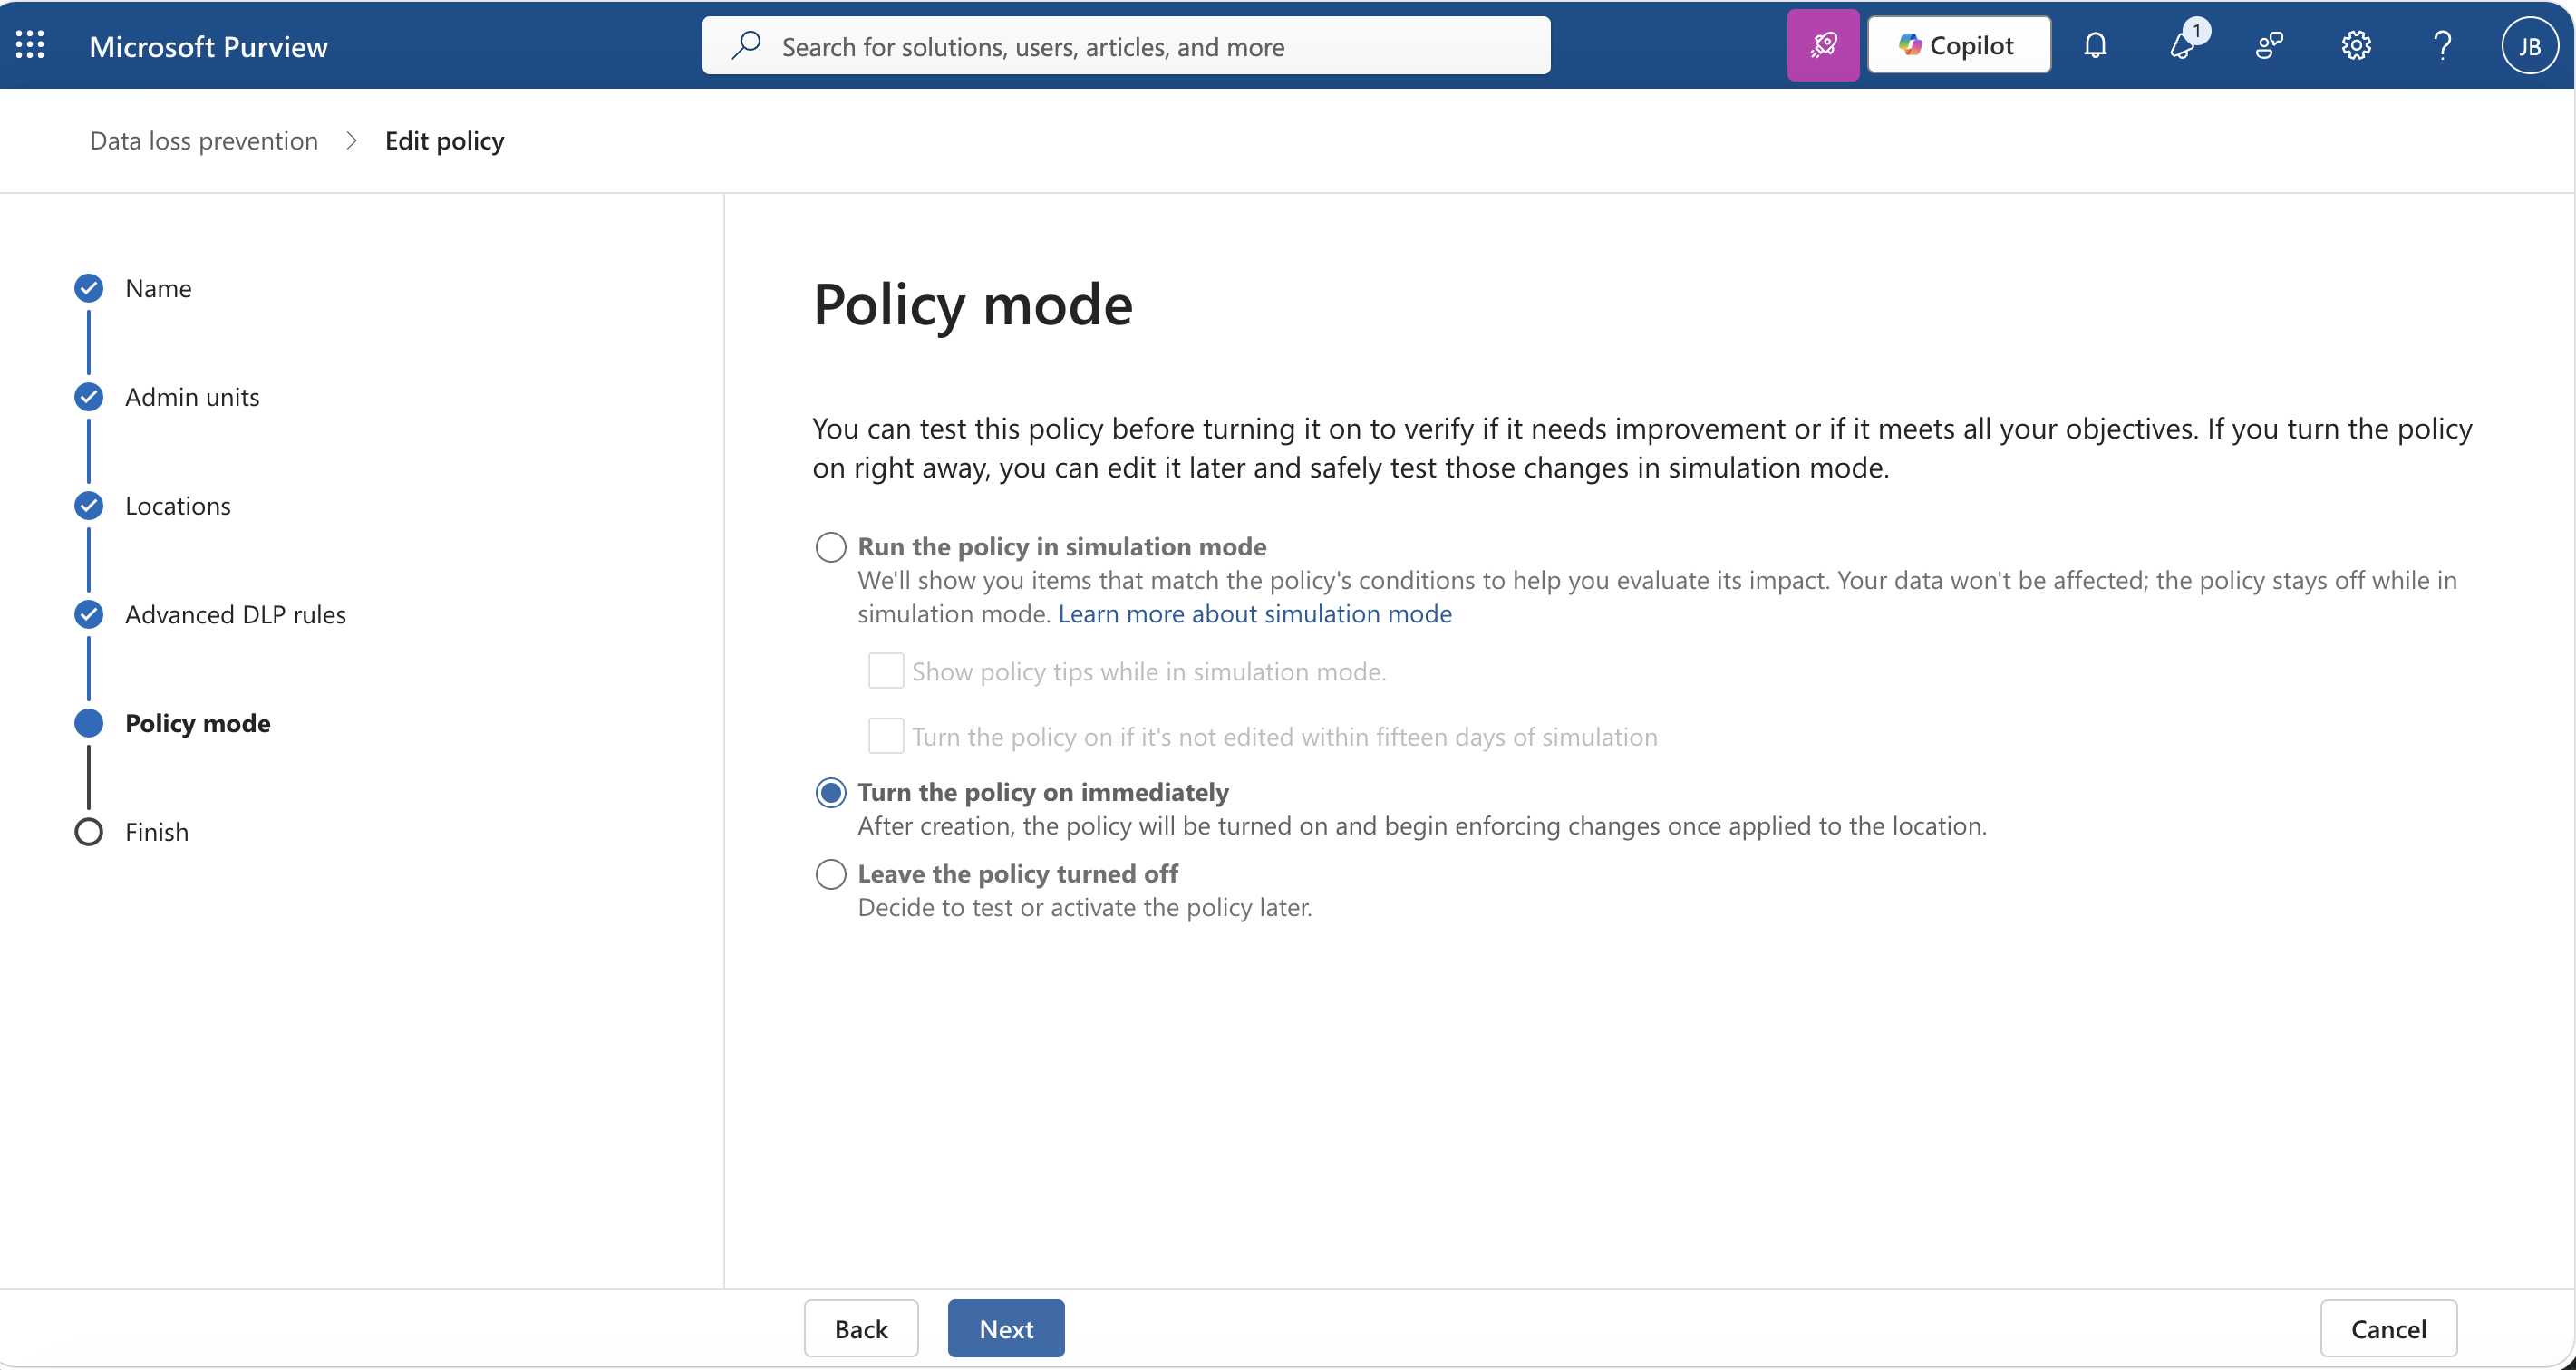
The policy mode controls how much impact this has while the rule is being tested. Audit and test modes are useful when the sensitive information type is new. Enforcement is different because users will see the warning and may be allowed to override it.
The finish screen is the last chance to confirm the whole workflow: Exchange is in scope, the rule uses the right sensitive information type, overrides behave the way the business expects, and the policy mode matches the rollout plan.
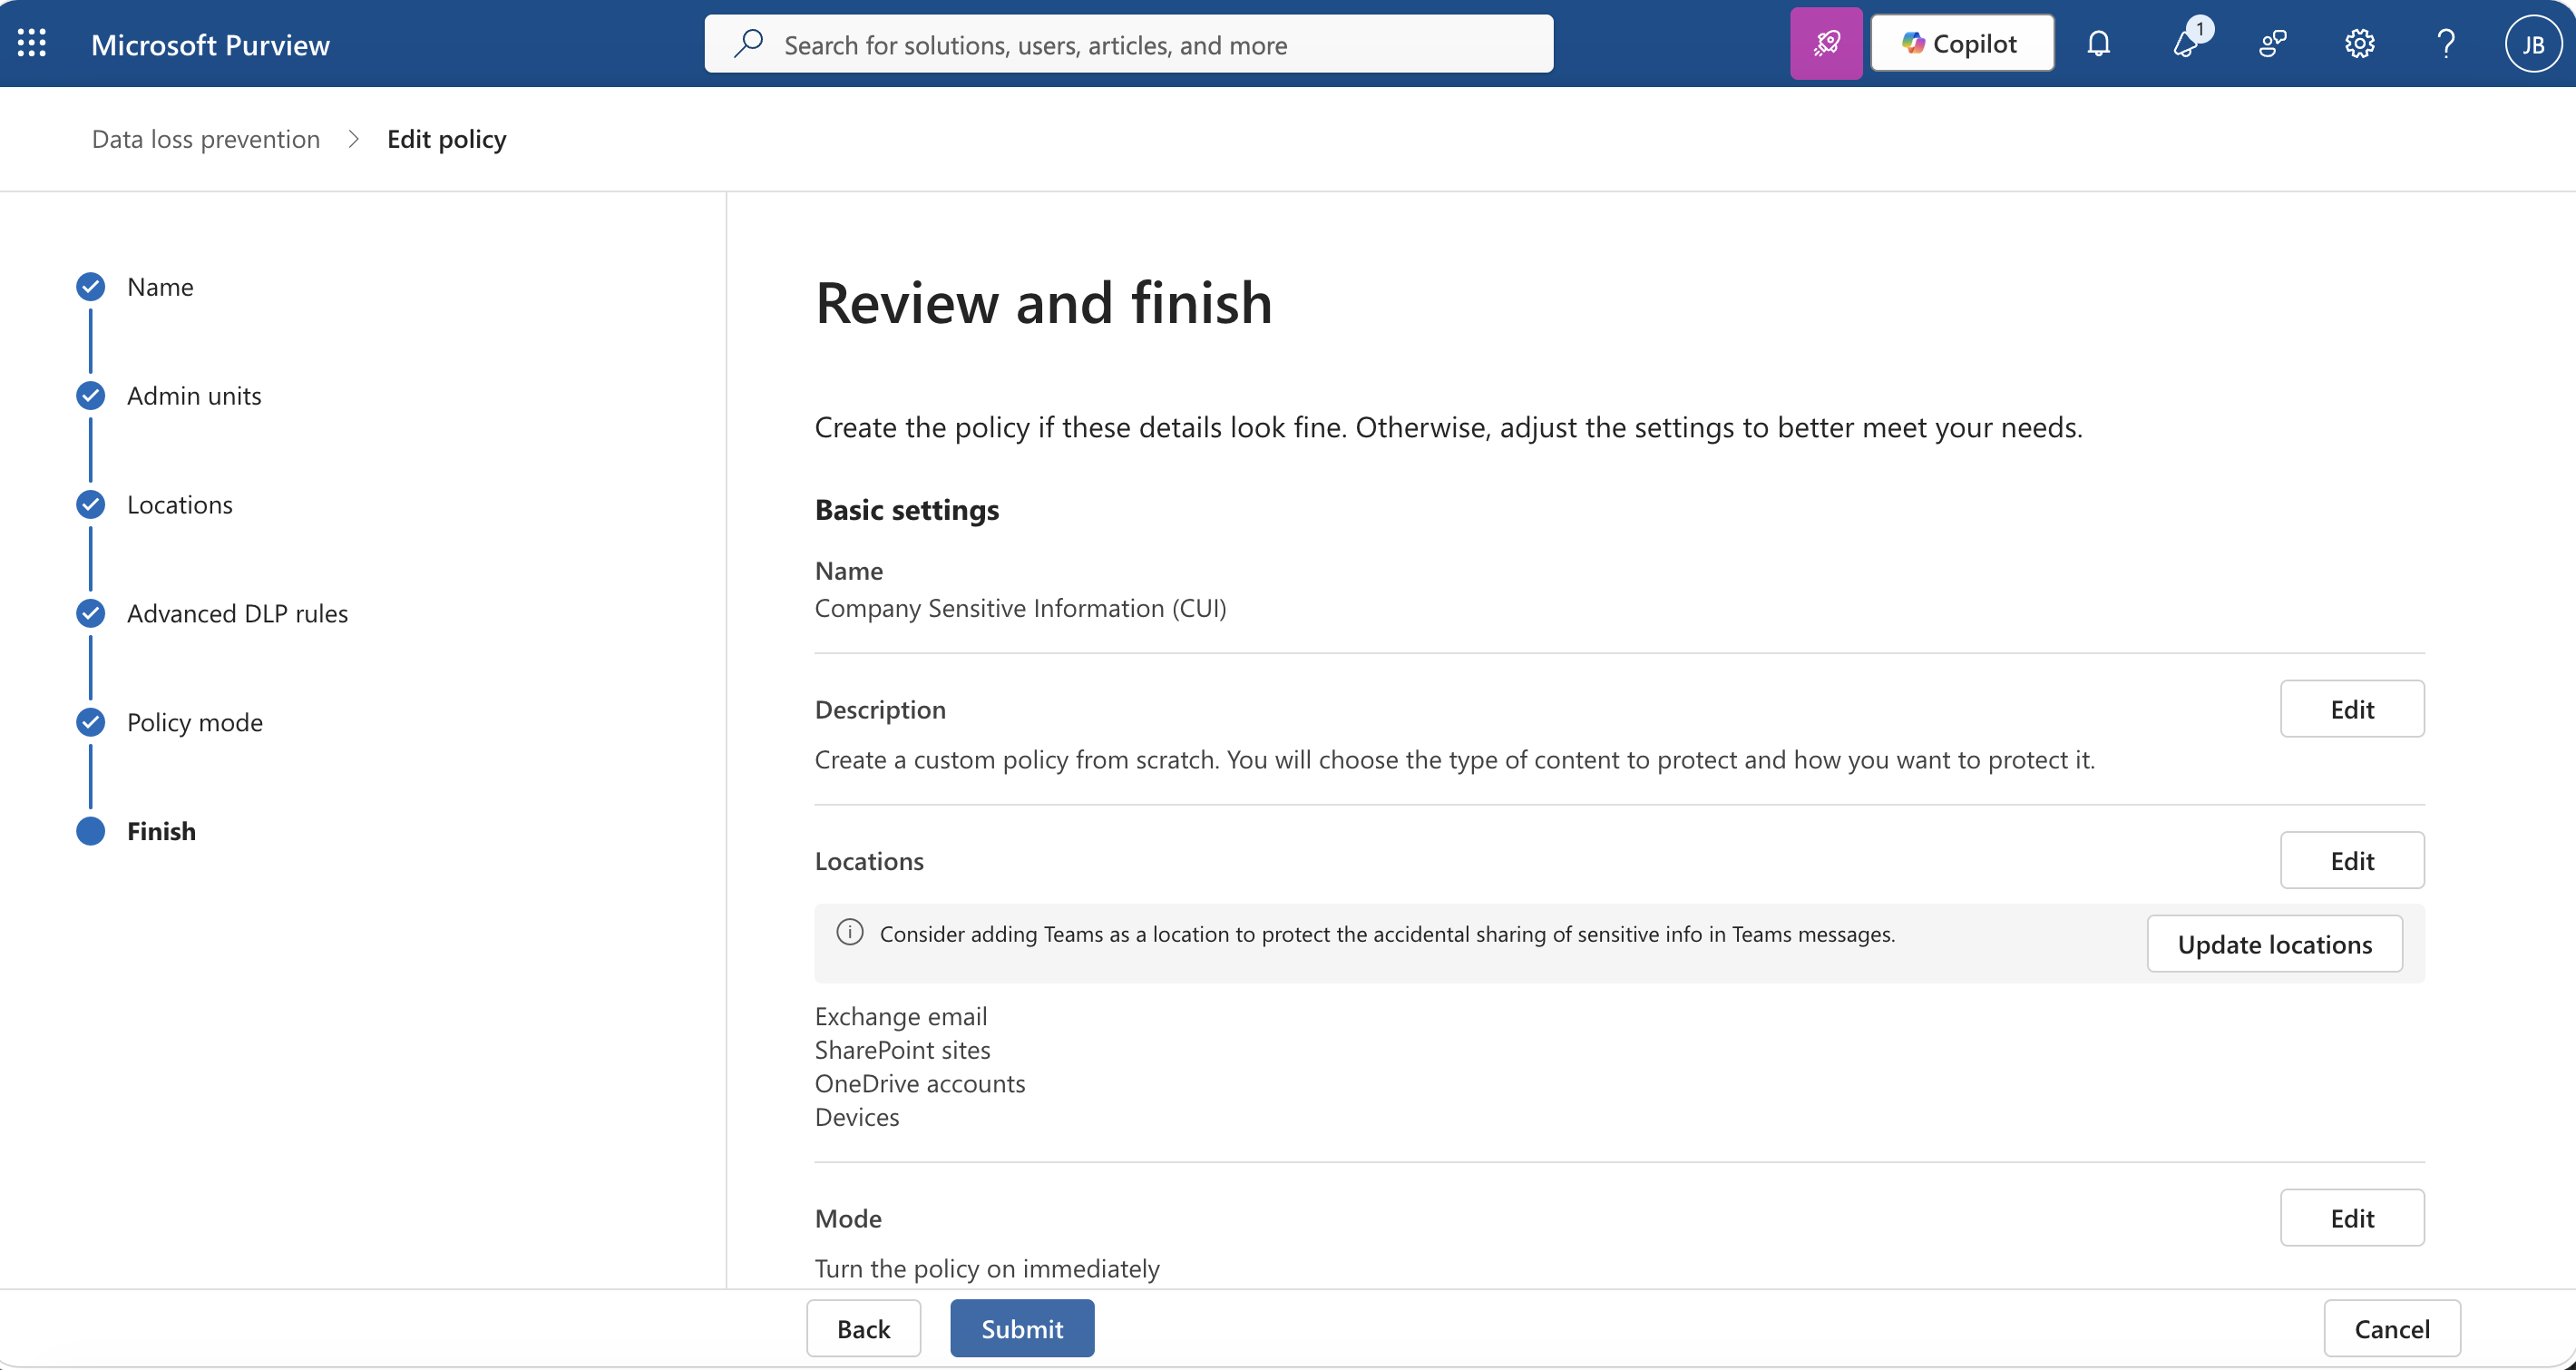
This is the point where the article moves from configuration to operations. Purview can ask the user for a justification, but the administrator still needs a practical way to review those justifications after the messages are sent.
The reporting gap
The script here uses Export-ActivityExplorerData, which Microsoft says exports activities from Data classification > Activity Explorer in the Microsoft 365 Purview compliance portal. Activity Explorer reports up to 30 days of data. The cmdlet supports activity filters such as DLPRuleMatch, workload filters such as Exchange, JSON output, page size, and result fields including FalsePositive, Justification, Sender, Receivers, Subject, PolicyName, and RuleName.
The local PowerShell script asks for a number of days, calculates the search window, exports Activity Explorer data, filters events that look like overrides, and writes a CSV to the desktop.
To run it, I use PowerShell with the Exchange Online PowerShell module installed. The account has to be able to connect to Security & Compliance PowerShell and read the Purview activity data. If the module is not installed yet, install it for the current user first:
Install-Module ExchangeOnlineManagement -Scope CurrentUser
Then save the script as something like Get-DLPOverrides.ps1, change admin@example.com to the admin account you actually use, and run it from PowerShell:
cd "$HOME\Desktop"
.\Get-DLPOverrides.ps1
The script imports the module, opens the Security & Compliance PowerShell connection with Connect-IPPSSession, prompts for the number of days to search, and then writes DLPOverrides.csv to the signed-in user’s Desktop. If you enter 0, it searches from local midnight through the current time. If you enter 7, it searches the last seven days.
Here is a sanitized version of the script with comments added:
Import-Module ExchangeOnlineManagement

# Connect to Security & Compliance PowerShell.
# Replace the UPN with an admin account that has the required Purview permissions.
Connect-IPPSSession -UserPrincipalName admin@example.com

# Ask for a whole number of days to search.
do {
    $daysInput = Read-Host "How many days ago do you want to search? Enter 0 for today (midnight through now)"
    $days = 0
    $isValid = [int]::TryParse($daysInput, [ref]$days) -and $days -ge 0

    if (-not $isValid) {
        Write-Host "Please enter a whole number that is 0 or greater." -ForegroundColor Yellow
    }
} until ($isValid)

$end = Get-Date

if ($days -eq 0) {
    # Today means local midnight through now.
    $start = $end.Date
    $rangeDescription = "today from $($start.ToString('yyyy-MM-dd h:mm tt')) through $($end.ToString('yyyy-MM-dd h:mm tt'))"
}
else {
    # For any other value, search a rolling 24-hour window per day.
    $start = $end.AddDays(-$days)
    $hours = $days * 24
    $rangeDescription = "the last $days day(s) ($hours hours), from $($start.ToString('yyyy-MM-dd h:mm tt')) through $($end.ToString('yyyy-MM-dd h:mm tt'))"
}

Write-Host "Searching $rangeDescription..." -ForegroundColor Cyan

# Pull Exchange DLP rule match activity from Activity Explorer.
$result = Export-ActivityExplorerData `
    -StartTime $start `
    -EndTime $end `
    -OutputFormat Json `
    -PageSize 500 `
    -Filter1 @("Activity", "DLPRuleMatch") `
    -Filter2 @("Workload", "Exchange")

$rows = $result.ResultData | ConvertFrom-Json

# Treat a populated justification or false positive flag as an override signal.
$overrides = $rows | Where-Object {
    ($_.Justification -and $_.Justification.Trim() -ne "") -or
    ($_.FalsePositive -eq $true) -or
    ($_.FalsePositive -eq "True")
}

if (-not $overrides -or $overrides.Count -eq 0) {
    Write-Host "No DLP override events found for $rangeDescription."
    exit
}

$report = $overrides |
    Sort-Object Happened -Descending |
    ForEach-Object {
        [PSCustomObject]@{
            Happened      = $_.Happened
            Sender        = $_.EmailInfo.Sender
            Receivers     = ($_.EmailInfo.Receivers -join "; ")
            Subject       = $_.EmailInfo.Subject
            PolicyName    = $_.PolicyMatchInfo.PolicyName
            RuleName      = $_.PolicyMatchInfo.RuleName
            Reason        = $_.Reason
            Attachment    = ($_.AttachmentDetails.Name -join "; ")
            Justification = $_.Justification
        }
    }

$report | Format-Table -Wrap -AutoSize

$outputPath = Join-Path ([Environment]::GetFolderPath('Desktop')) 'DLPOverrides.csv'
$report | Export-Csv $outputPath -NoTypeInformation
Write-Host "CSV saved to $outputPath" -ForegroundColor Green
The local test output showed the behavior I wanted. A short search returned no override events. A wider search returned override rows and wrote DLPOverrides.csv. In the public example, I would sanitize the people and recipients:
Happened              Sender                Receivers
--------              ------                ---------
2026-07-31 5:23 PM    user1@example.com     recipient1@example.com; recipient2@example.com
2026-07-30 5:42 PM    user2@example.com     recipient3@example.com; recipient4@example.com
That is enough for a review queue. If I need more, I can extend the CSV with message subject, attachment names, rule name, policy name, and justification.
Why overrides belong in the process
Overrides are useful when the business process is real and the DLP policy is tuned well.
They are a problem when the policy is noisy, the justifications are vague, or nobody reviews the exceptions. If users are overriding constantly, the sensitive information type may be too broad, the rule may be scoped incorrectly, or the business process may need a better approved channel.
The goal is not to shame users for clicking override. The goal is to know when they did it, why they did it, and whether the policy is still producing the right behavior.
Sources
Learn about data loss prevention
Create and deploy a data loss prevention policy
Learn about sensitive information types
Data loss prevention policy tip reference for new Outlook for Windows
AI Usage Transparency Report
AI Era · Written during widespread use of AI tools
AI Signal Composition
Score: 0.23 · Moderate AI Influence
Summary
Data Loss Prevention (DLP) is a part of Microsoft Purview that watches for sensitive information leaving places like Exchange, SharePoint, OneDrive, Teams, and endpoint devices.
Related Posts
Bromure Gives Codex a Room of Its Own
I installed Bromure Agentic Coding, watched it build the Linux VM, authenticated Codex, and followed a real Codex task through the workspace.

Amnesia Stealer Shows the Next Stage of ClickFix on macOS
Amnesia Stealer shows how ClickFix-style social engineering is adapting on macOS, while a public malware sample gives defenders an opportunity to study the behavior behind the campaign.

Move Entra Users Off SMS and Voice Before Microsoft Retires Them
Microsoft is retiring Microsoft-provided SMS and voice authentication in Entra ID. The migration is not passkeys for everyone; it is removing weak telecom MFA and choosing supported replacement methods such as Microsoft Authenticator, FIDO2 keys, certificate-based authentication, OATH hardware tokens, or customer-managed telecom.

macOS Tahoe 26.6.1 Fixes a High-Severity Screen Sharing Authentication Bypass
macOS Tahoe 26.6.1 fixes CVE-2026-65400, a high-severity Screen Sharing authentication issue where an attacker on the network may be able to authenticate without valid credentials.

ClickLock Shows Why Terminal Paste Is a Mac Security Boundary
ClickLock Stealer shows why Mac security teams should watch for Terminal paste lures, fake AppleScript password prompts, command-line Keychain access, LaunchAgent persistence, and Jamf Protect alerts that can route suspected Macs into Jamf Pro response groups.
CrashStealer Shows the Gap Between Notarization and Detection
CrashStealer shows the security gap between Apple's Developer ID notarization path and App Store review, and why Jamf's behavioral detection mattered.

The CMMC Pause Does Not Make a Level 2 Audit Worthless
The July 2026 CMMC Phase II pause changes the timing of third-party assessment requirements, but it does not erase DFARS, NIST SP 800-171, SPRS, or the value of a completed Level 2 audit.

How We Structured and Hashed CMMC Evidence for Auditor Review
How folder naming, control-level artifact names, spreadsheet hyperlinks, and evidence hashing made a CMMC evidence package easier for the auditor to validate.

Opening the Ollama Black Box: Understanding the Trust Boundary Behind Local AI
Installing Ollama is easy. Understanding the trust boundary behind a local AI service is what determines whether it belongs in an automation workflow.

Your Vibe-Coded App Still Needs a Trustworthy Release Path
Why vibe-coded apps still need release discipline: code signing, notarization, checksums, and GitHub artifact attestations all support integrity and user trust.