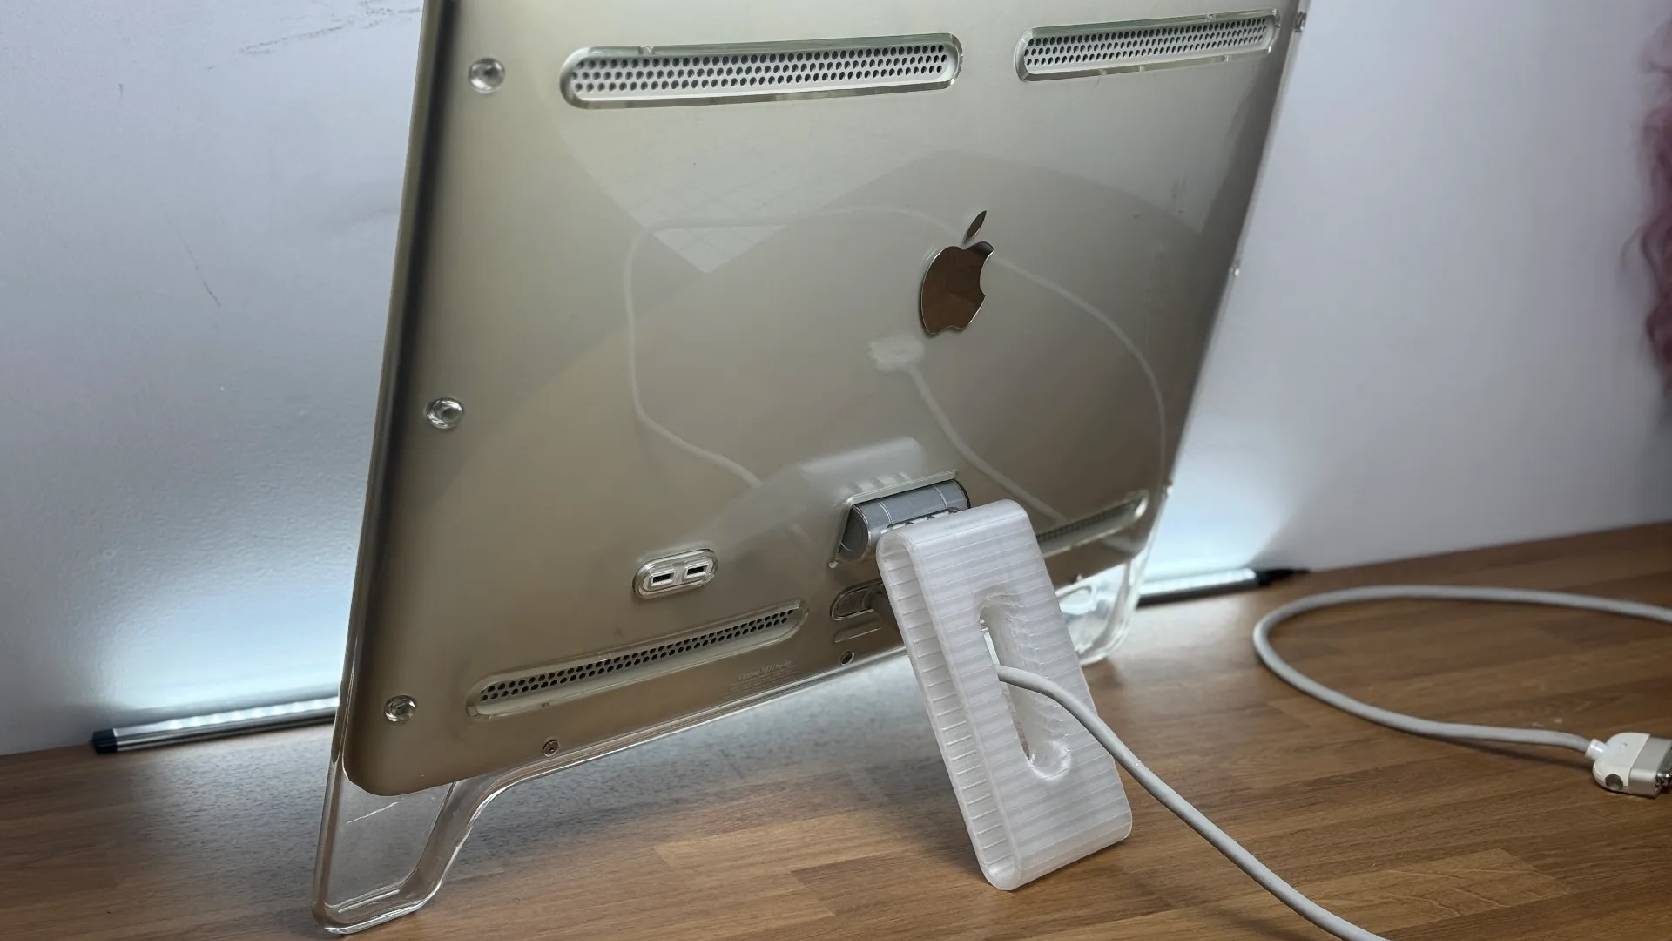

I recently found a 22-inch Apple Cinema Display online for only $14.99 plus shipping, the photos showed it with stand in tact and supporting the full weight of the display. I had no idea how heavy these displays were until it arrived. However when I unboxed it I was saddened to see that it arrived with the stand completely sheered off.
That is the risk with these clear acrylic Apple displays. The panel itself may still be worth saving, but the easel-style rear leg is a weak point after two decades of age, shipping, storage, and adjustment. I could have returned the display but for me the low cost of the display and the burden of packing and shipping back made me want to try to salvage it so instead of returning it, I started looking for a replacement leg.
Apple’s original 22-inch Cinema Display is a 1600 by 1024 LCD in the clear enclosure era, and Apple documents it as a 22-inch DVI Cinema Display. iFixit identifies the M8149 generation as the 22-inch model with the clear polycarbonate frame and rear foot assembly. More importantly for this repair, iFixit’s M8149 guide shows the rear foot as a removable part held to the hinge area with three screws.
I was able to remove the broken leg with a hex screwdriver and noticed that the leg itself was snapped at the screw heads but the rounded acrylic base that holds the stand was perfectly salvageable. The key for me was how do I get a replacement stand. I could roll the dice and see if I could buy just the stand part but almost surely it would have the same weakened acrylic problem due to age.
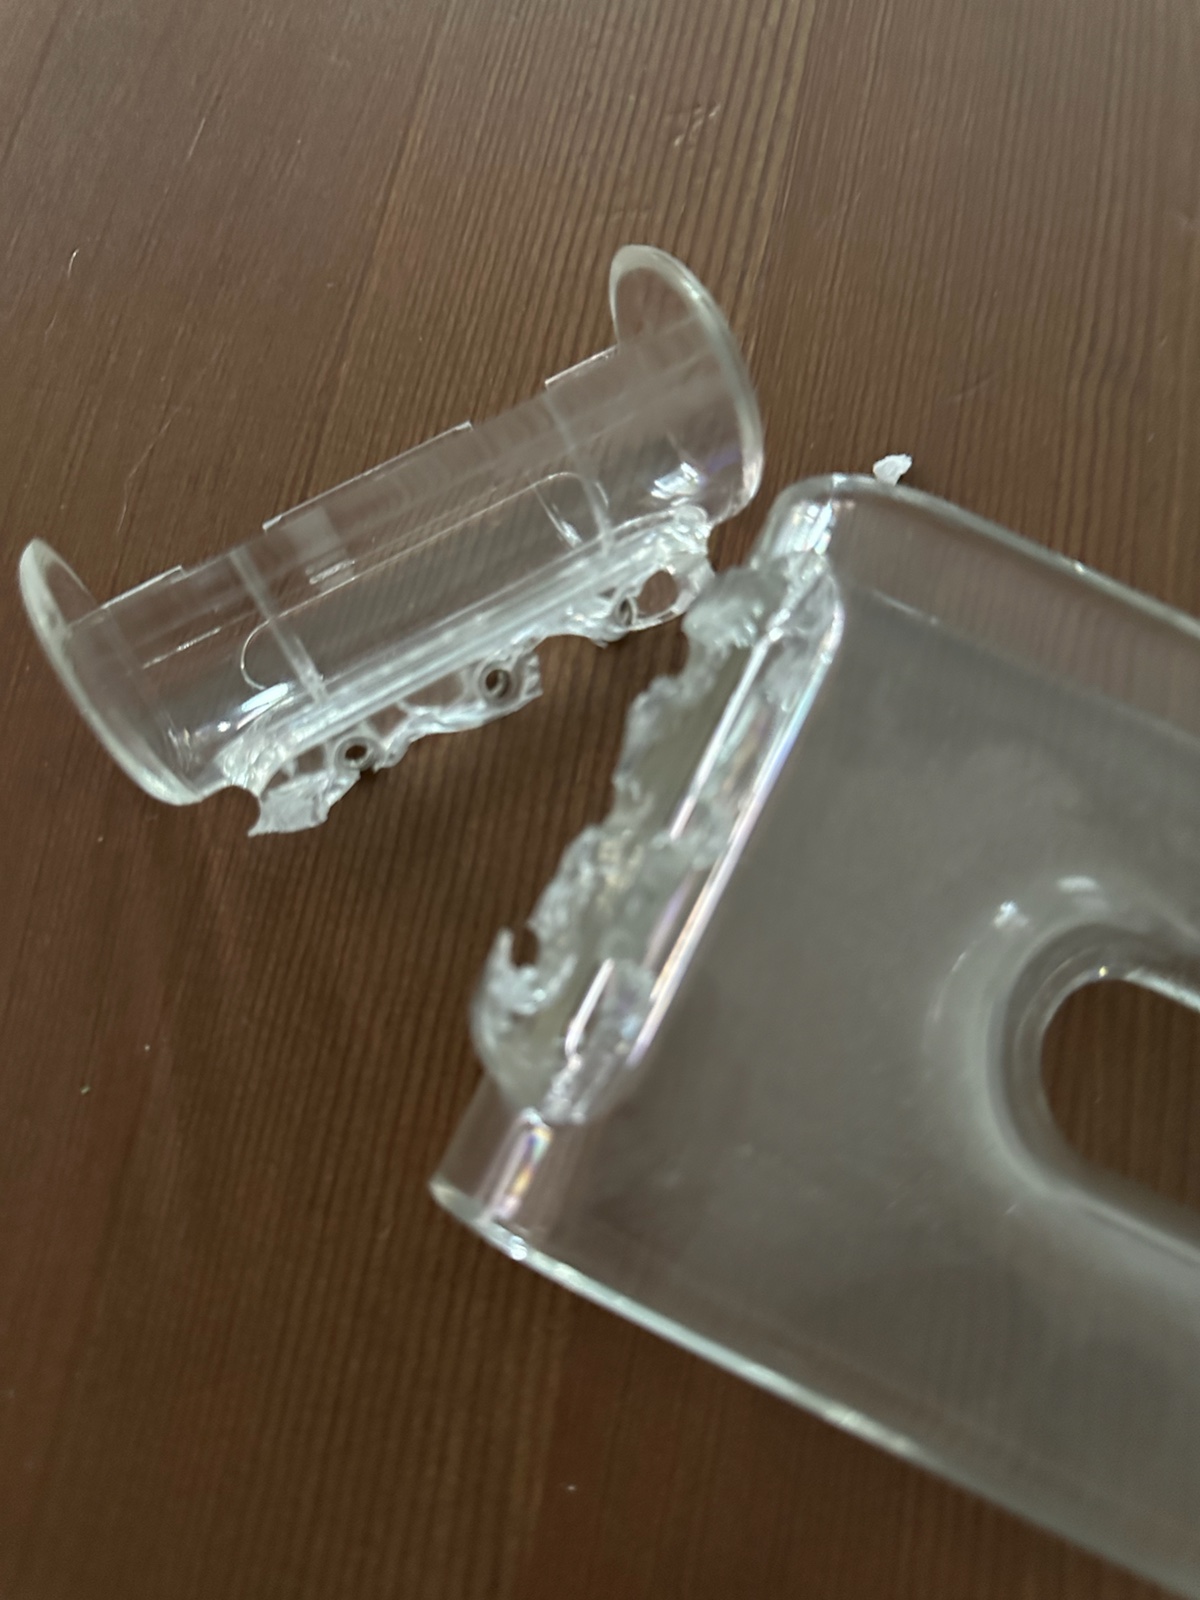
Why I did not wait for a donor stand
The better idea came from a repair video by Bijan Bowen, who repaired a broken 23-inch Apple Cinema Display stand with a 3D printed replacement leg. The display size is not identical to my 22-inch unit, and I do not want to claim every Cinema Display stand part is interchangeable without a proper mechanical check. The video inspired confidence that this problem could be approached as a printable structural part instead of a hunt for aging acrylic.
The local repair packet included an STL named ACD_Stand.stl which I downloaded from Printables as a replacement-leg package. That became the starting point for the repair. It was important to note that initially in the video they called out that printing with 20% infill is not enough to support the full weight of the leg. I decided to opt for PETG with 60% infill to be sure. I knew this would mean that the stand would not have the same clear acrylic look but for me stability was more important than aesthetics.
Remove the broken stand cleanly
iFixit’s M8149 control-board guide starts by unplugging the display, laying it face down, removing the three screws that connect the back foot to the hinge, and lifting the foot away from the hinge mount.
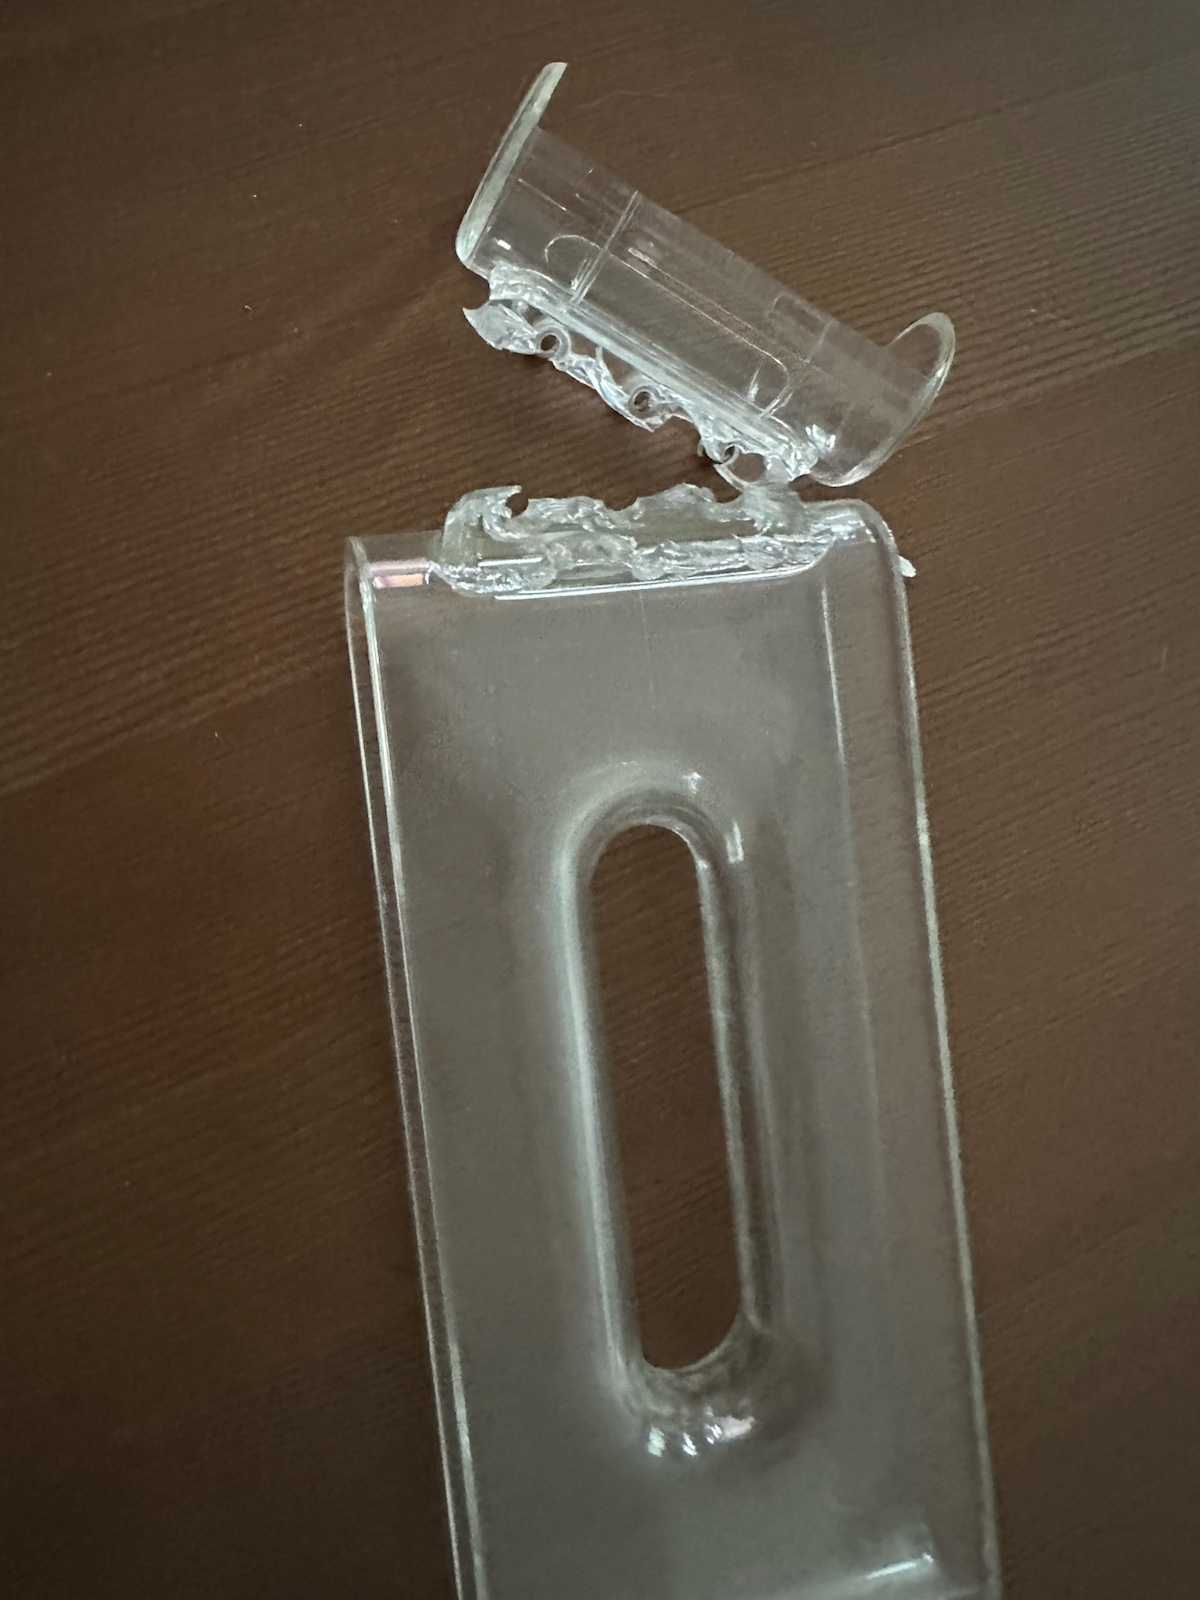
The three-screw pattern is an important part of the design, once you notice this you realize that the entire weight of the monitor rests on a very narrow and short piece of acrylic that sits into the recessed opening of its acrylic cylinder counterpart.
Print first, trust later
The display is heavy enough that material choice, layer orientation, infill, wall count, and screw pressure are all important considerations. When I got the part I was pleasantly surprised by its overall durability, and the holes needed a little clean-out which is normal, a small screw driver through each hole to push out the fragments of printed plastic cleaned it up well. Pushing this into position required a lot of physical strength which I was surprised by the fit is incredibly snug to ensure that the leg reacts to the spring loaded hinge on the back of the monitor.
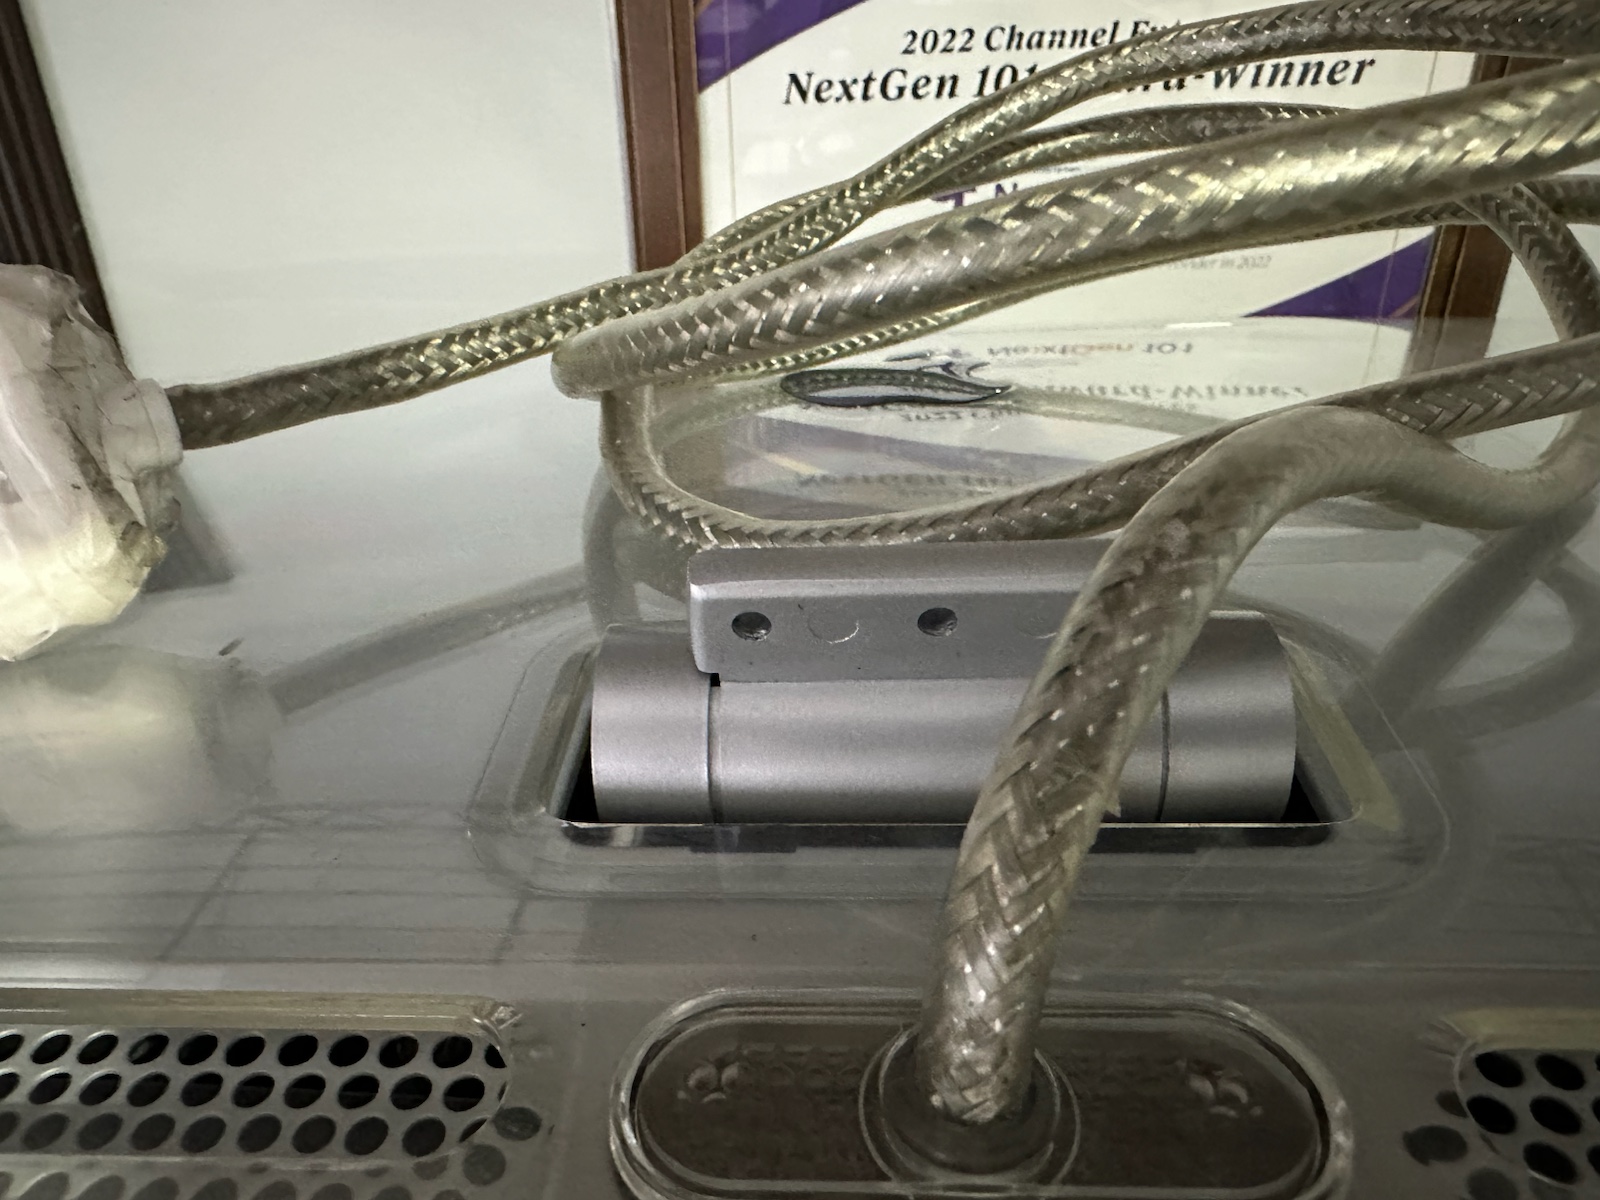
The moment of truth was taking the screws and putting them in through the replacement leg. The first one lined up and worked surprisingly well. It went right through the printed hole and into the printed recessed cavity until it fully tightened. It felt much more secure due to the durability of the PETG plastic. The other two took a bit more work my guess is there was a thin layer of printed plastic that I had to bore through with the screws themselves before they made their way all the way through but eventually I got them all secured.
The repaired display
Once the replacement leg is mounted, I setup the display and it supported the weight incredibly well.
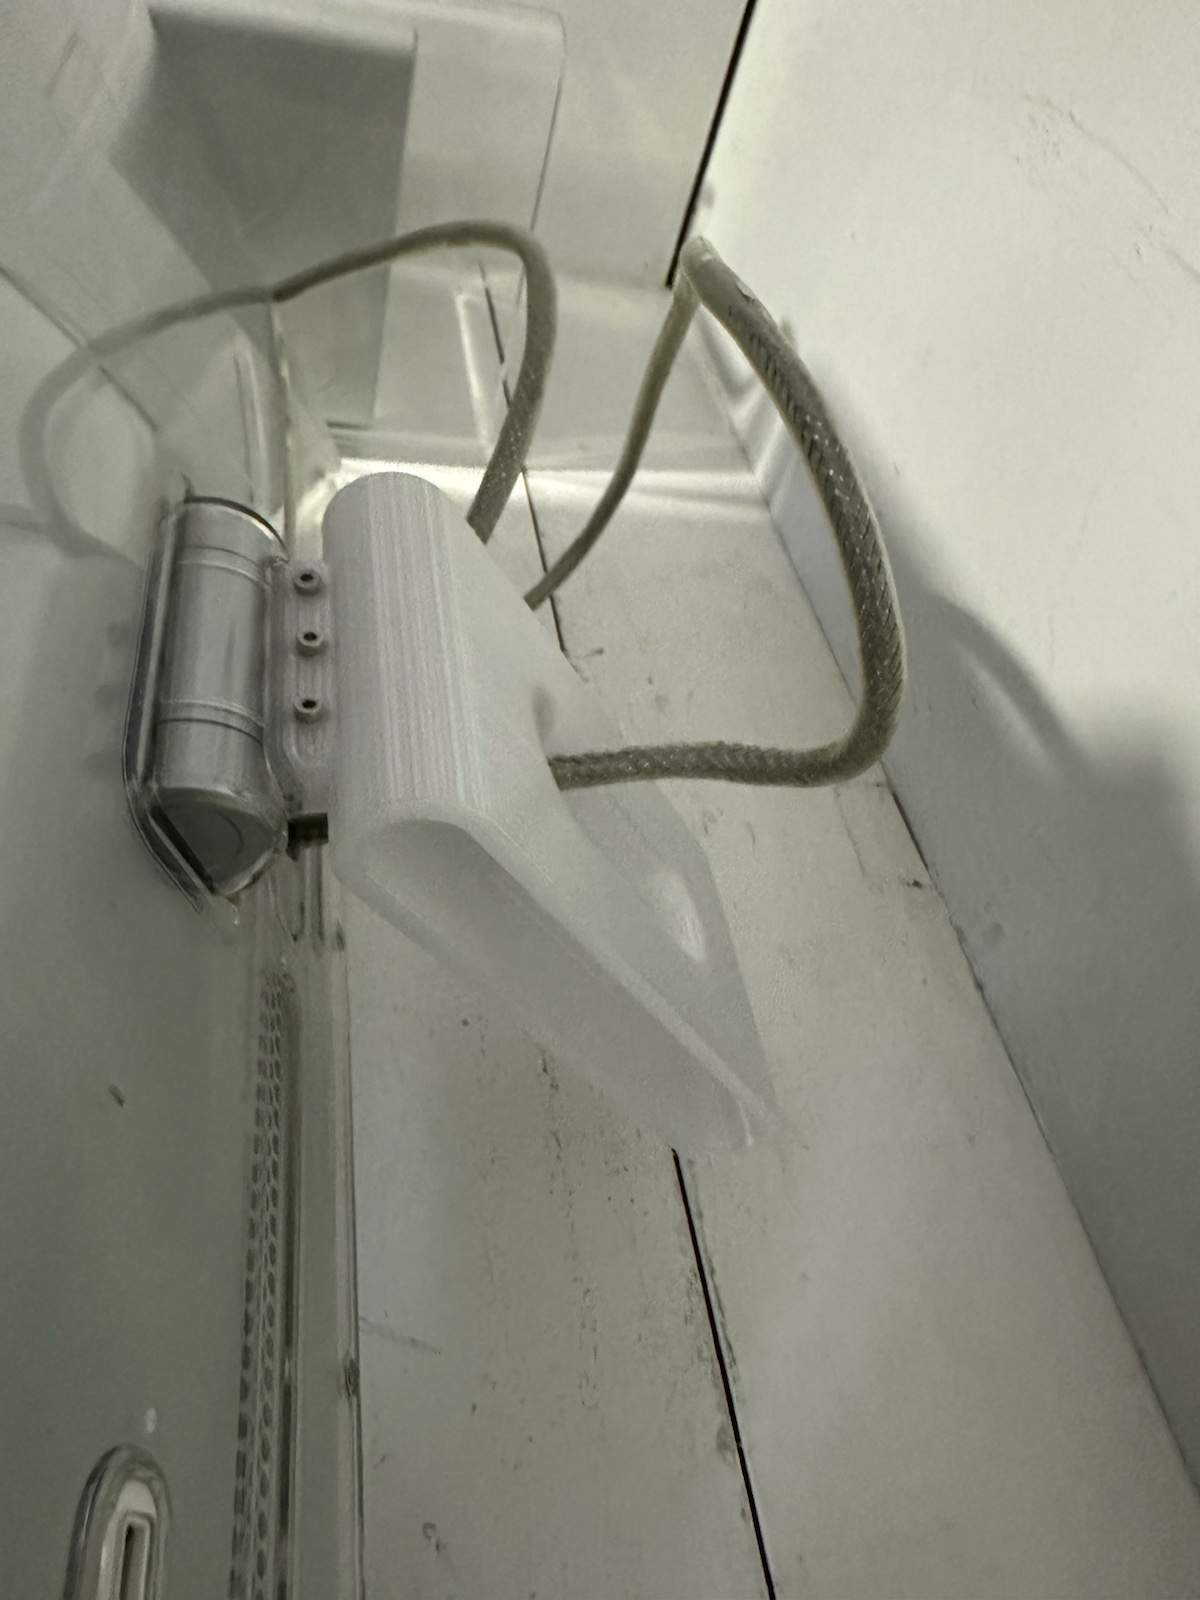
At the end of the day the monitor did not become e-waste because a clear plastic leg broke. A modern 3D printer, a shared model, and a careful fit check gave the display a second chance and I am so happy its now in my collection.
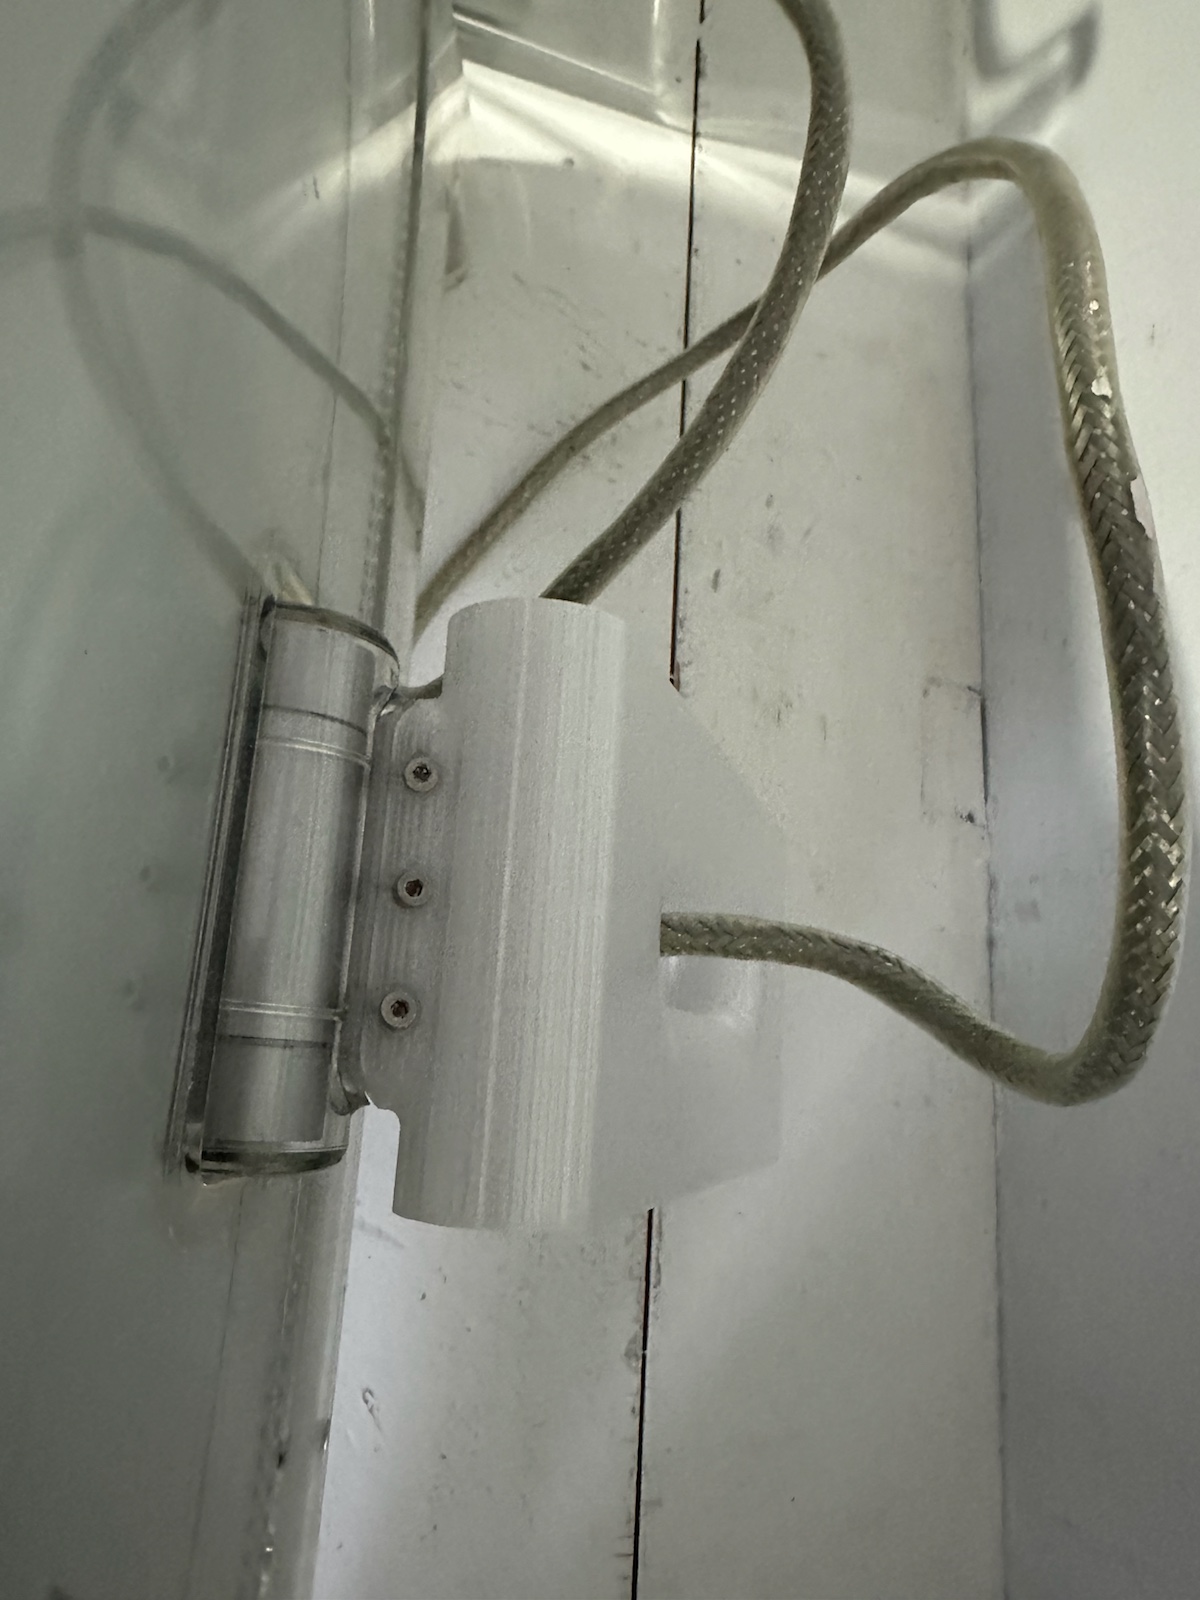
Now I know what your thinking, but I do not have a 3D Printer. Well, neither do I! I used CraftCloud to print the model and it was surprisingly affordable the leg plus shipping only came to $32.14 which is much cheaper than the cheapest original acrylic leg.
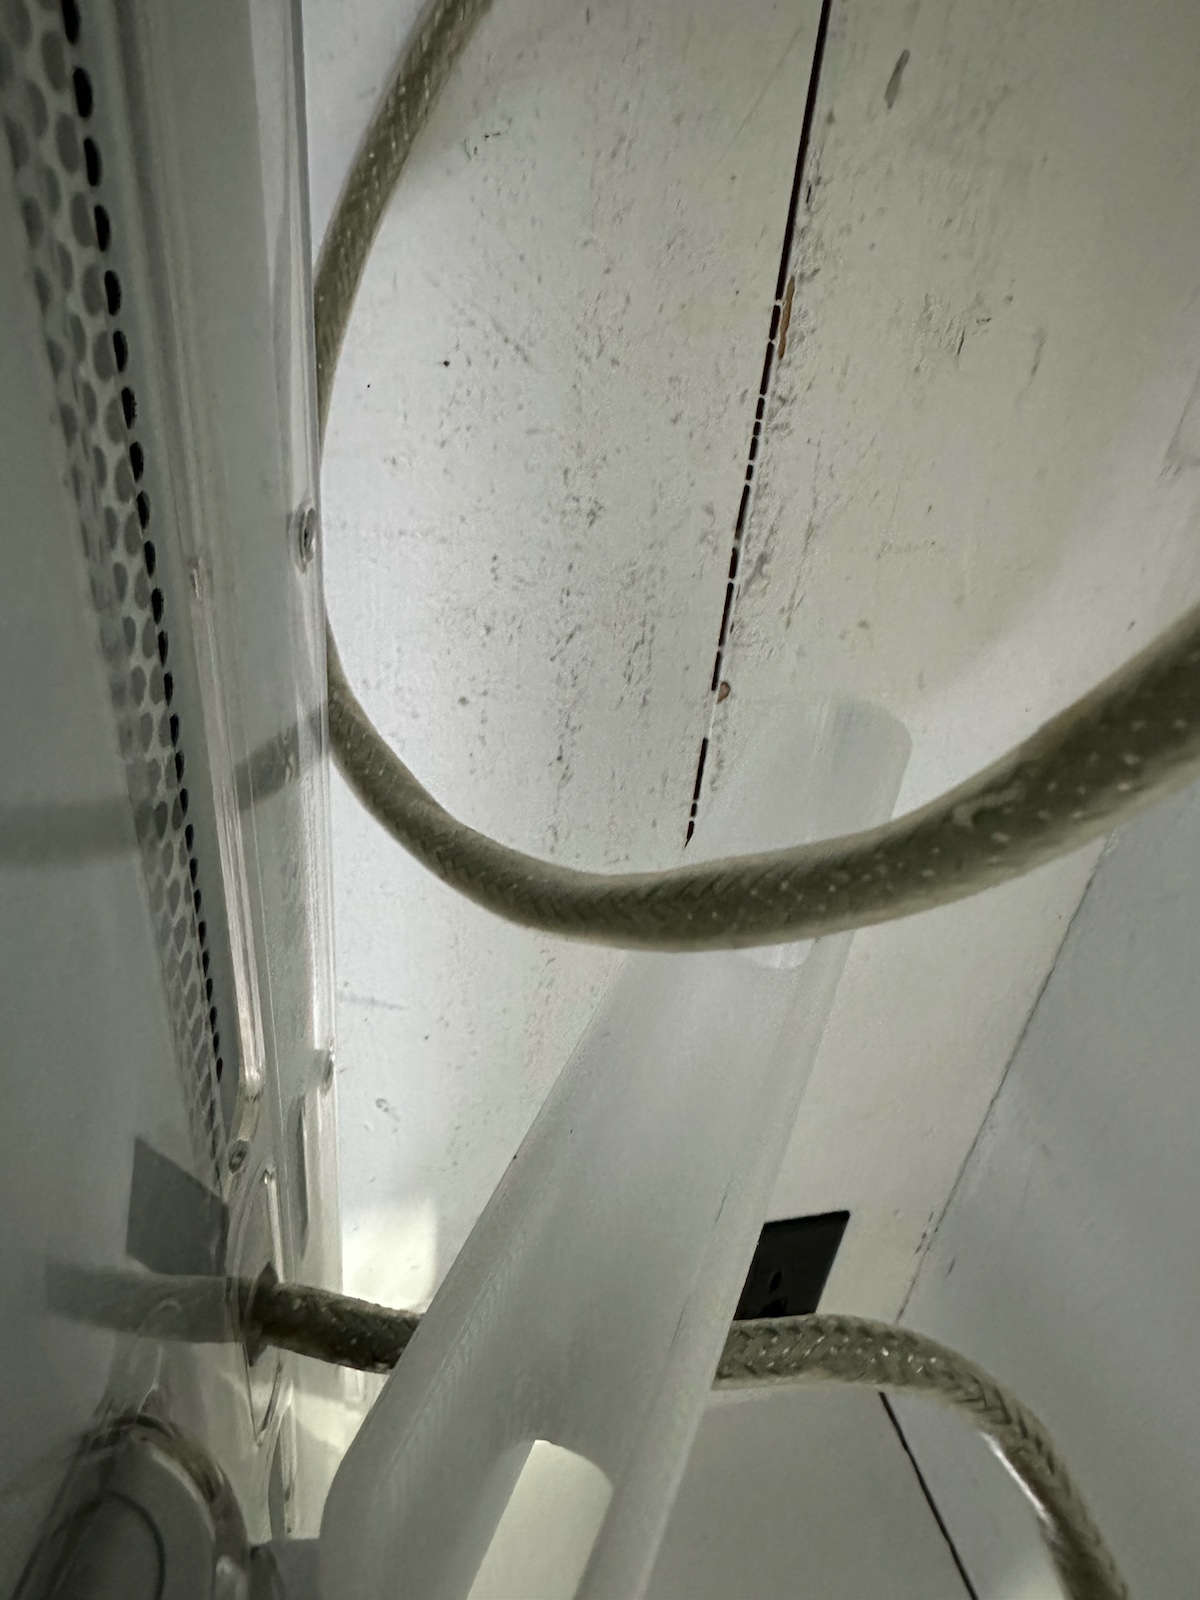
The finished repair
This repair changed what I would look for the next time I see one of these displays listed with a broken stand. A snapped acrylic leg is no longer an automatic dealbreaker. A cracked hinge cylinder, stripped screw mounts, missing hardware, or damage to the rear shell would be a much bigger problem.
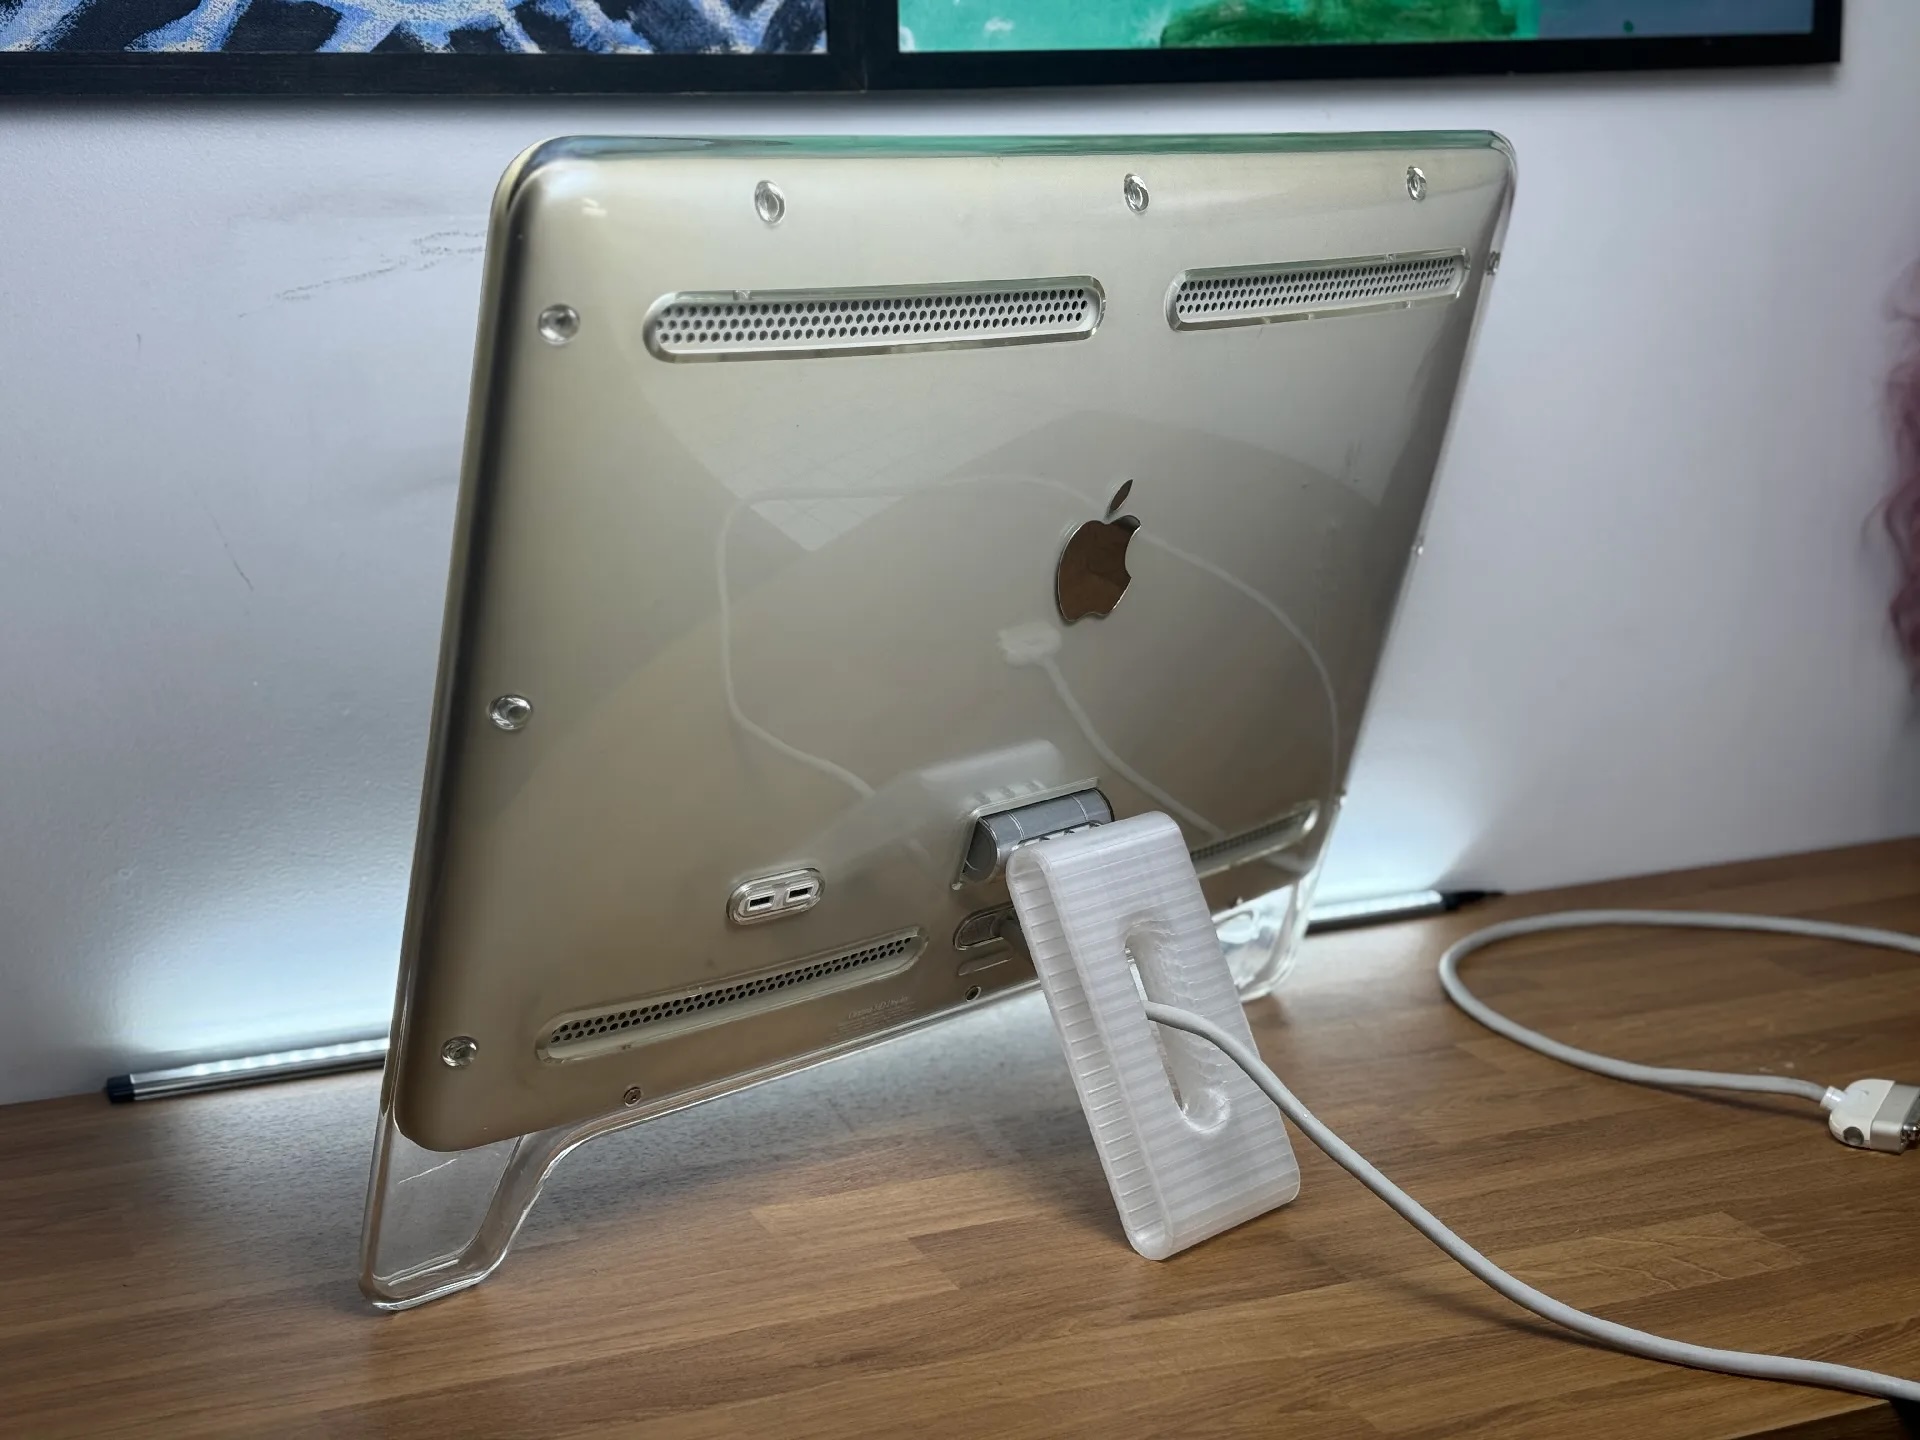
All in all I am very happy with how this all turned out and am now less skeptical about using 3D printed parts as a tool in my vintage Apple toolbox.
Sources
Apple Cinema Display - Technical Specifications
Apple Cinema Display M8149 repair information
Apple Cinema Display M8149 LCD Control Board Replacement
Fixing A Broken Apple Cinema Display With 3D Printing
AI Usage Transparency Report
AI Era · Written during widespread use of AI tools
AI Signal Composition
Score: 0.18 · Low AI Influence
Summary
A user successfully repaired a broken Apple Cinema Display stand using a 3D printed replacement leg, demonstrating the potential of 3D printing in vintage electronics repair.
Related Posts

When Chromium Mistakes Your VPN for a Local Network
Turning off Jamf Trust fixed the webinar, which normally would have sent me straight to its routing policies. This time the route was fine: Chromium was treating Jamf's ZTNA broker addresses as a local network, and an Edge and Chrome preference corrected it.
Clamshell iBook G3 Restoration, Part 1: From Broken Screen to Board-Level Repair
Part one of a Clamshell iBook G3 restoration: a broken screen, a charger detour, a blinking system folder, a full teardown, and the backlight connector mistake that paused the project.
Bromure Gives Codex a Room of Its Own
I installed Bromure Agentic Coding, watched it build the Linux VM, authenticated Codex, and followed a real Codex task through the workspace.
Claude Code Auto Mode Changes Approval Flow, Not the Safety Boundary
Claude Code Auto mode changes how approval decisions are handled. It does not expand the boundary of what the coding agent should be allowed to do.

Amnesia Stealer Shows the Next Stage of ClickFix on macOS
Amnesia Stealer shows how ClickFix-style social engineering is adapting on macOS, while a public malware sample gives defenders an opportunity to study the behavior behind the campaign.

Reporting on Microsoft 365 DLP Overrides with PowerShell
DLP overrides are not automatically bad. They are a business process that needs visibility. This walkthrough covers a Microsoft Purview DLP policy, a custom sensitive information type, user override behavior, and a PowerShell report that exports override events from Activity Explorer.

PowerBook 140 BlueSCSI Install: Cable Fixed, Battery-Bay Power, and Wi-Fi Setup
The PowerBook 140 project moved from preparing a BlueSCSI card in Basilisk II to installing the repaired internal SCSI cable, powering the BlueSCSI Pico externally from the battery bay, booting System 7.1, and fighting through DaynaPORT Wi-Fi setup.

Move Entra Users Off SMS and Voice Before Microsoft Retires Them
Microsoft is retiring Microsoft-provided SMS and voice authentication in Entra ID. The migration is not passkeys for everyone; it is removing weak telecom MFA and choosing supported replacement methods such as Microsoft Authenticator, FIDO2 keys, certificate-based authentication, OATH hardware tokens, or customer-managed telecom.

macOS Tahoe 26.6.1 Fixes a High-Severity Screen Sharing Authentication Bypass
macOS Tahoe 26.6.1 fixes CVE-2026-65400, a high-severity Screen Sharing authentication issue where an attacker on the network may be able to authenticate without valid credentials.

Three Mac Update Helpers That Fit Below a Patch Platform
Latest, Applite, and an all-in-one macOS update script each solve a different part of lightweight Mac maintenance: app update visibility, Homebrew-backed app management, and command-line package updates that can be wrapped carefully for small teams or basic MDM.