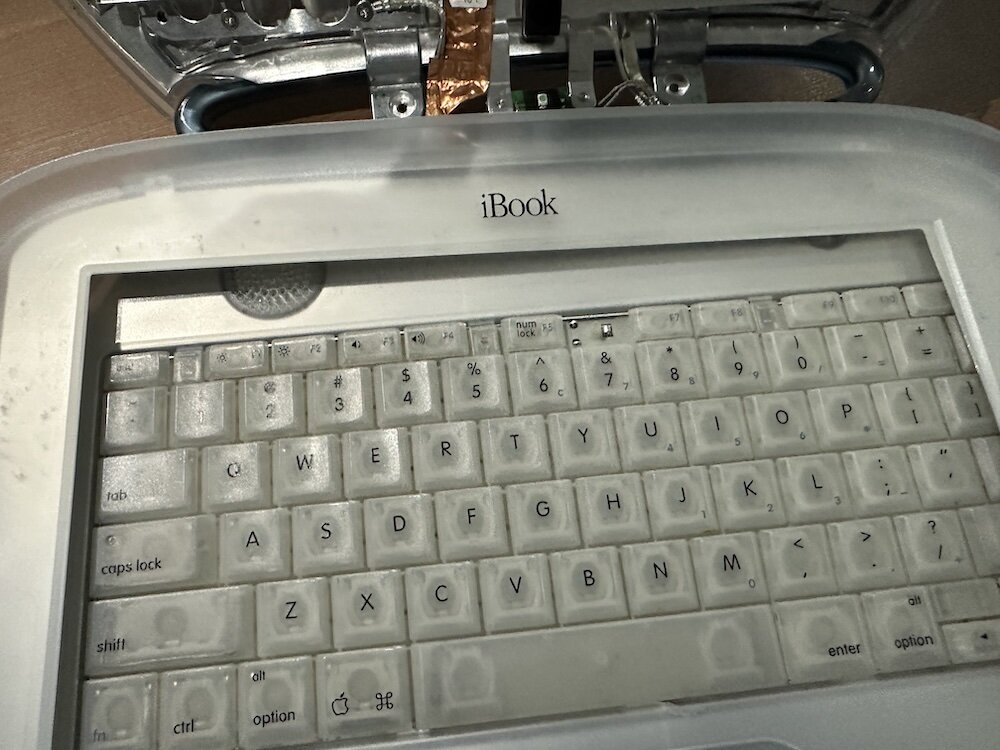

This Clamshell iBook G3 was never going to be a quick wipe-and-boot project. It came in with a busted screen, no power adapter, and just enough signs of life to make it worth chasing. The screen would display something when booted from CD, but the LCD was physically damaged. Because this is the early non-FireWire Clamshell generation, there was no easy external video path to fall back on. That changed the whole repair. I could not just plug it into a monitor, ignore the panel, and diagnose the machine from the outside.
I had to decide whether the computer was alive before I spent more money on it. Apple’s original iBook technical specifications list the early Clamshell with a G3 processor, one USB port, no FireWire, no video-out port, AirPort readiness, and a 12.1-inch display that supports 800 by 600 resolution. That matches the practical problem I ran into: if the internal panel is damaged, the machine does not give me a convenient second screen to work from. The later FireWire Clamshell models are different; EveryMac documents those models as adding FireWire and a hybrid A/V output path, while the earlier Special Edition Graphite model stayed in the original no-FireWire family.
That makes the screen matter more than it would on a later laptop. A broken LCD is not just ugly. It becomes the diagnostic bottleneck.
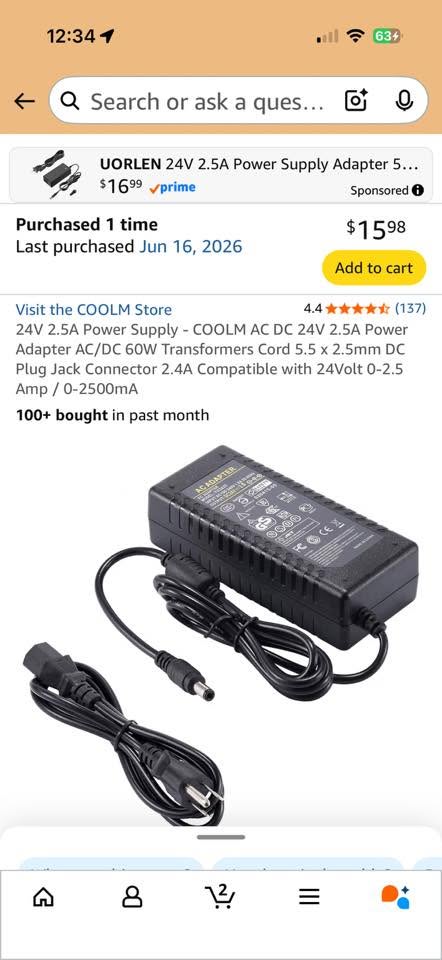
The charger was the first trap
The first surprise was the charger. I already had Apple laptop power adapters around, so I expected powering the iBook on to be easy. That was wrong. The later iBook G3, iBook G4, Titanium PowerBook G4, and other white Apple laptop adapters do not simply fit the early Clamshell. The original Clamshell uses the larger yo-yo style power connector, and the charger listings online are messy enough that model numbers and compatibility claims can become their own research project.
That is how I ended up reading community threads about Clamshell charger compatibility and the old headphone-adapter workaround. The idea sounds wrong the first time you see it: use the physical similarity between the Clamshell power jack and certain audio adapters to bridge a later Apple adapter for temporary testing. The important word there is temporary. This was not about making a permanent power solution. It was about answering the first question: does the machine live?
I also ordered a proper BixPower adapter setup because I did not want to keep gambling on a 25-year-old original adapter or a bench hack. Vintage Apple projects have a way of turning accessories into the expensive part of the repair. The computer itself can be cheap, but the one cable or power brick needed to test it can cost more than the machine.
Phase one: establish whether the machine is alive
The damaged panel was frustrating, but it gave me a useful clue: the machine was not dead. My first phase was not to restore anything. It was to collect enough evidence to decide whether the iBook was worth opening. When a panel shows backlight behavior, colored lines, partial boot activity, or a blinking system folder, that is different from a completely lifeless logic board. The display was damaged, but the computer was doing work. The optical drive could participate in boot attempts, and the hard drive behaved differently from the CD. That was enough to justify a deeper repair attempt.
That is the moment where the project shifted from “did I buy a dead iBook?” to “which parts are actually preventing a usable boot?” The screen was now a known hardware failure, not a reason to discard the whole computer.
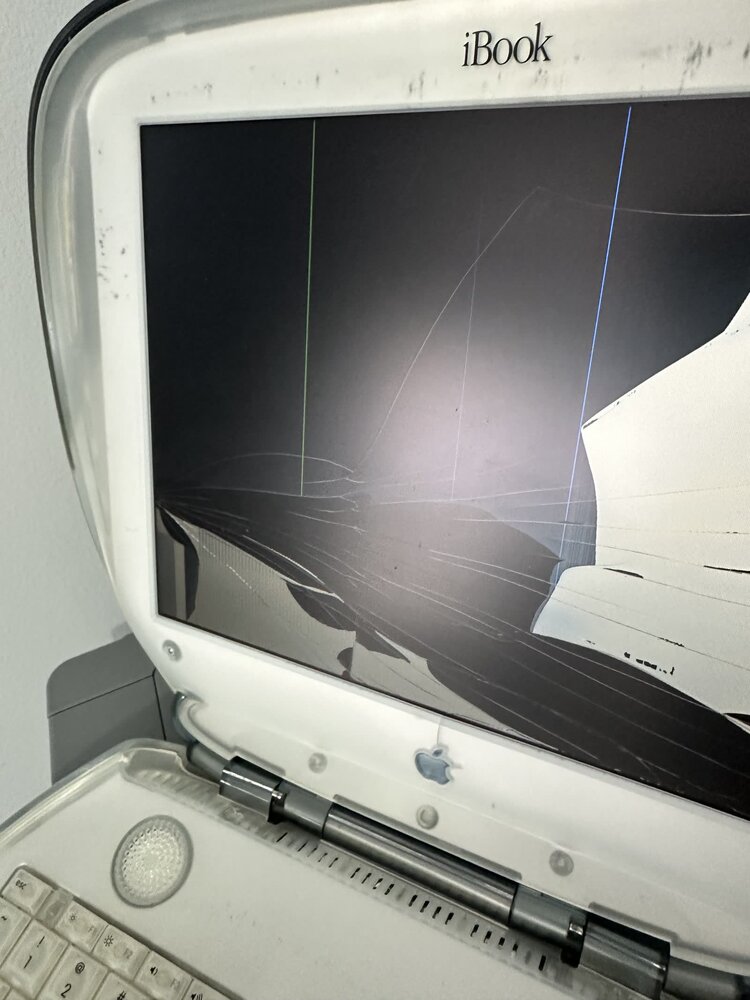
The first inspection also gave me a baseline for the rest of the repair: the case and hinge area needed to survive repeated handling, while the LCD assembly was already a confirmed replacement candidate. I did not need ten photos to make that decision; I needed one clear view of the failure and a note about what it changed.
Phase two: replace the panel and read the startup symptom
I ordered a replacement screen because the original panel was not something I could work around on this model.
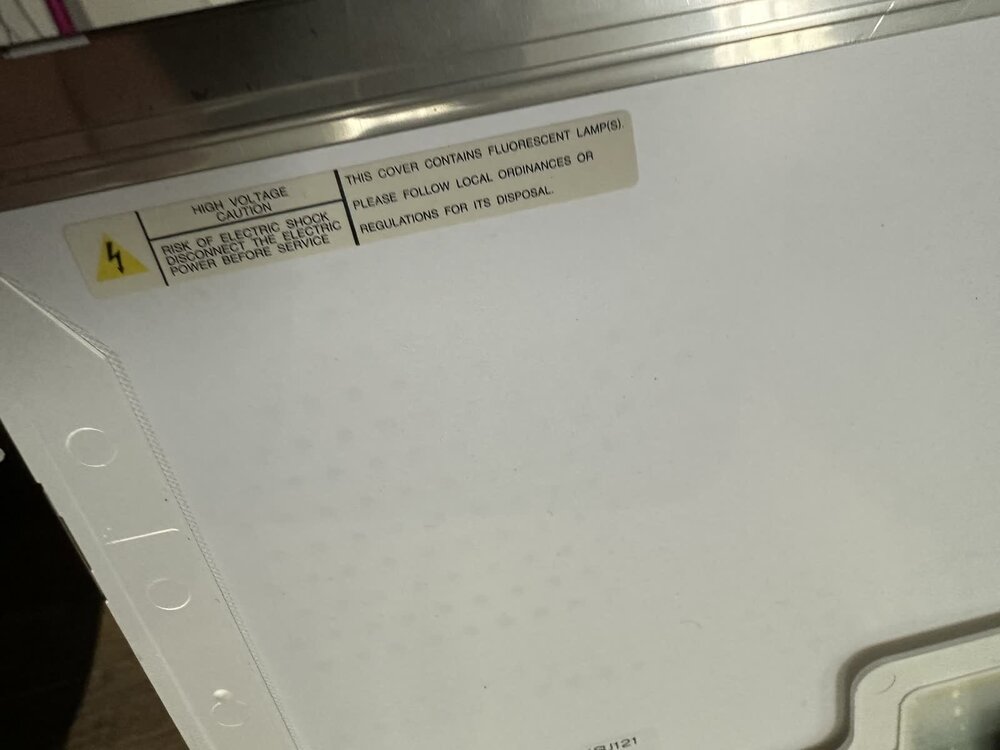
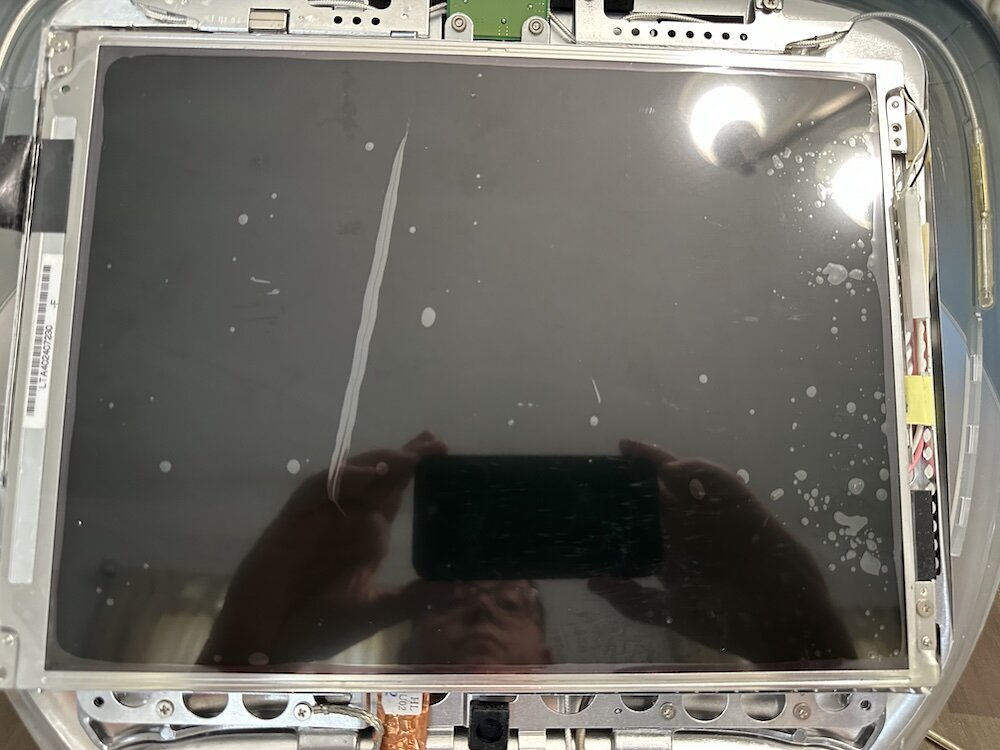
That got me past one problem and straight into the next one: the blinking system folder. On a vintage Mac, that icon is not mysterious. It means the machine is looking for a valid startup disk and is not finding one. That can be a dead drive, a missing system folder, a corrupted installation, or a drive that is not being seen correctly.
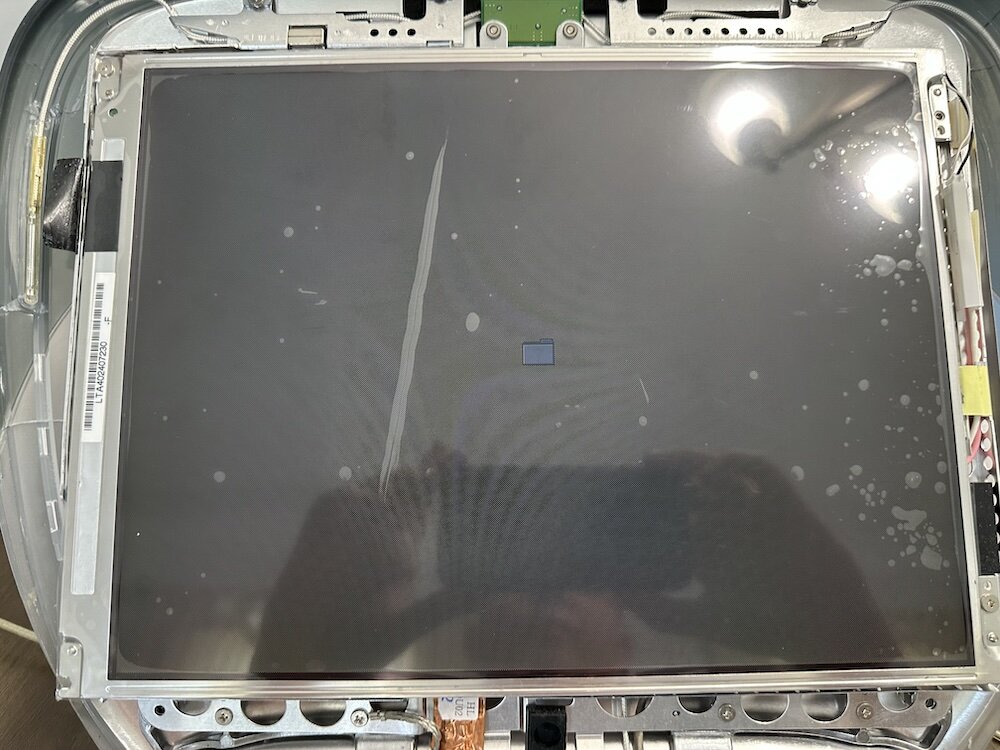
On a modern machine, I would immediately reach for an external boot path, a known-good installer, or a different display setup. On this Clamshell, the shape of the hardware makes every step a little more physical. The drive is buried. The display diagnosis depends on the panel. The case is not something I want to open casually, but eventually the repair stopped being optional.
The hard drive had to come out. That was the transition from an external diagnosis to an internal repair: remove the replacement-screen parts from the equation, then reach the storage device and determine whether the blinking folder came from the drive itself or from its system installation.
The blinking folder is useful precisely because it is specific. It says the machine reached startup far enough to look for a system, but it does not tell me whether the drive is unreadable, the installation is missing, or the connection is bad. The next step was therefore dictated by the symptom: open the machine and inspect the storage path rather than guessing at software from the outside.
Phase three: disassemble the machine to reach storage
The Clamshell is not a laptop where the drive slides out with one screw. Reaching storage means disassembly. That is the part of vintage repair that still catches me. You start with one obvious problem, then the machine teaches you the next dependency. The screen was broken, so I replaced the screen. The machine then showed the blinking folder, so now the storage path mattered. To get to the storage path, the iBook had to come apart.
At that point, the repair became less about whether I could boot it today and more about whether I could keep the machine intact while I moved through brittle old plastic, shielding, screws, cables, and connectors that were never meant to be handled every decade. I photographed each major layer as it came off so I could reverse the process later: keyboard and top case, shielding, internal frame, then the drive area. The photos are documentation of those decisions, not a separate gallery.
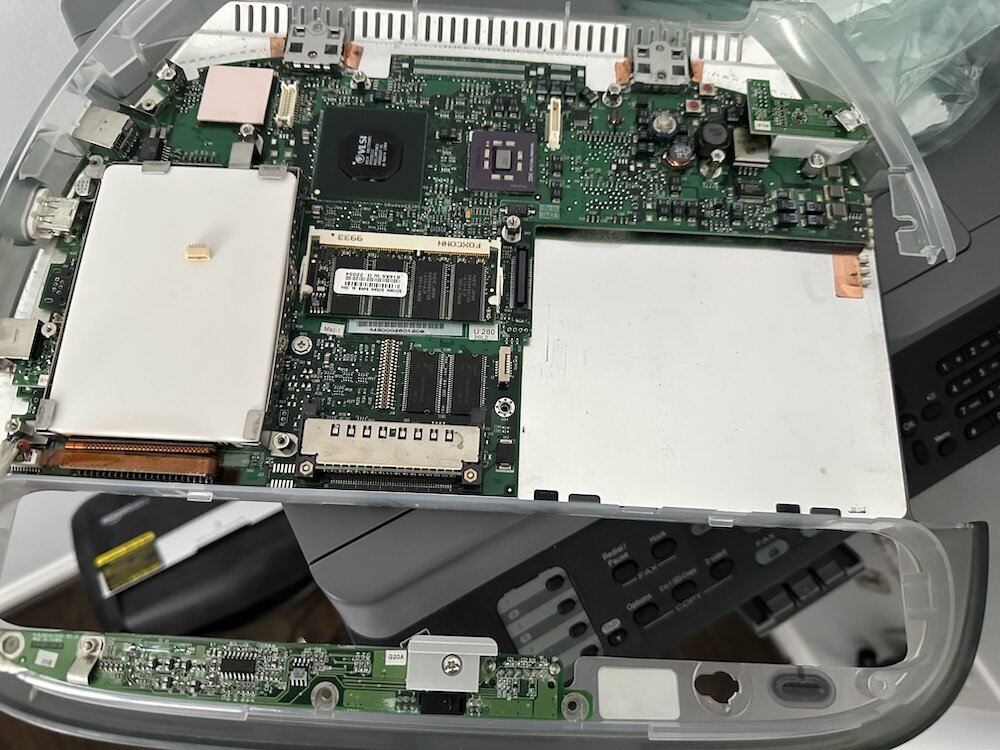
With the drive accessible, the restoration had a defined next test: inspect or replace the storage device, reinstall the case in the correct order, and boot from a known-good system. That would tell me whether the startup problem belonged to the drive or only to its contents.
Phase four: the teardown creates a board-level repair
I got deep enough into the machine to chase the drive problem, but I also created the next repair.
While taking the iBook apart, I snapped off the power clip for the monitor backlight on the logic board. That is the kind of mistake that turns a restoration into a two-part story. The machine had already shown enough life to continue. The replacement screen path made sense. The blinking folder gave me a storage problem to solve. But now the backlight connector has to be reattached before I can call the display side of the repair done.
That is where part one ends. Not with a finished Clamshell. Not with a clean Mac OS 9 desktop. With a machine that is still worth saving and a very specific connector repair standing between this teardown and the next boot test.
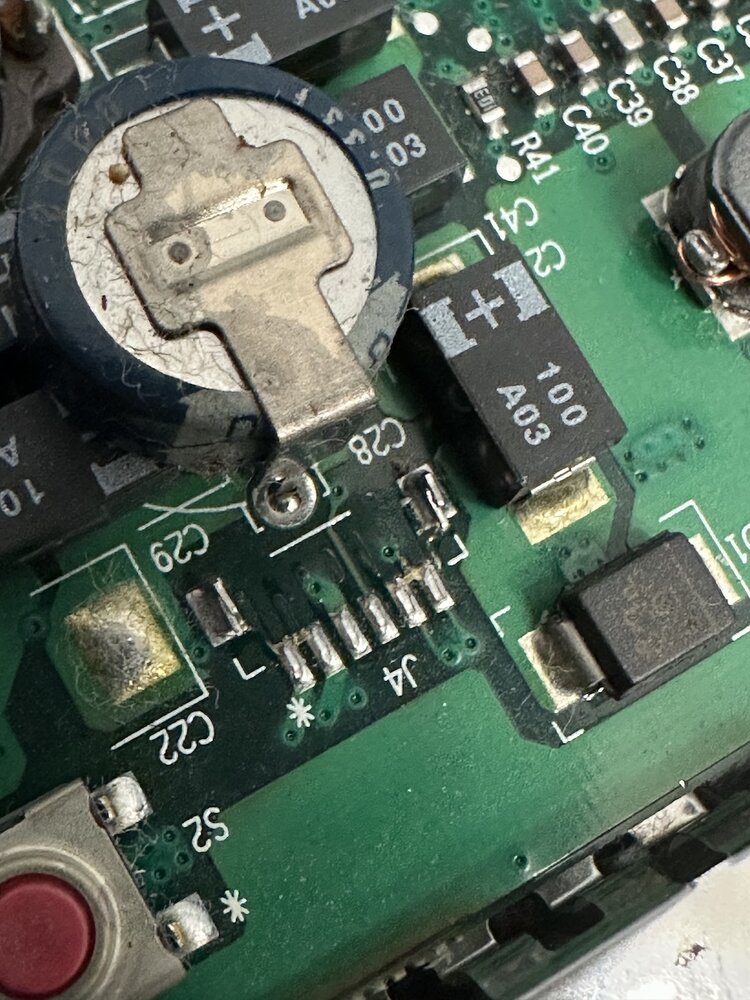
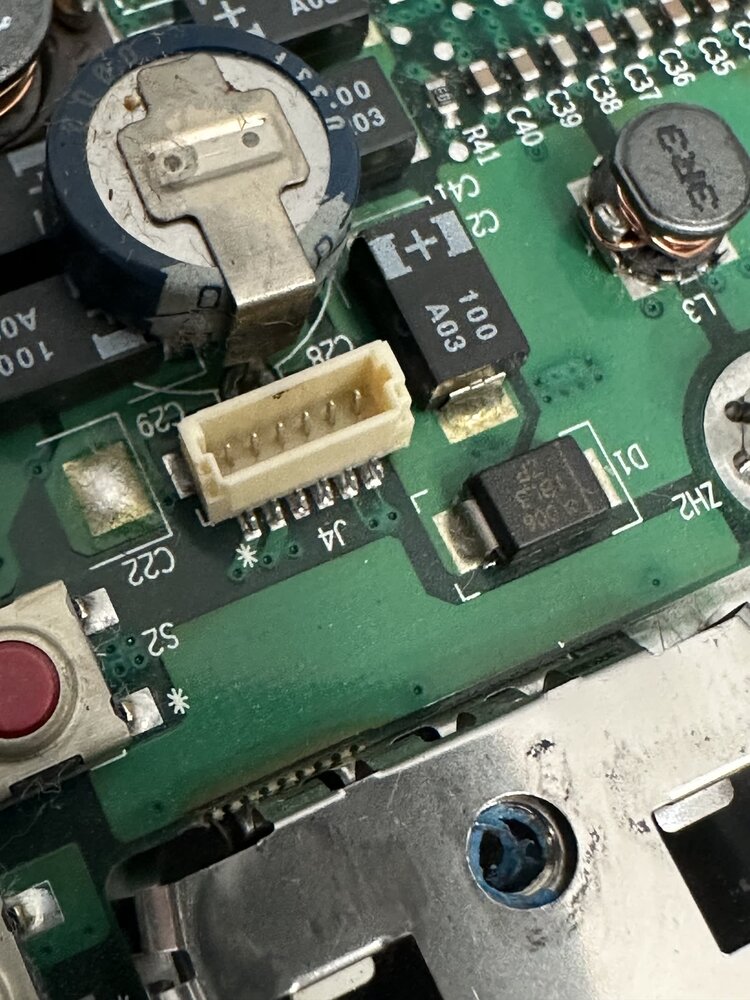
The remaining photos document the failure point: where the connector sits, what came away from the board, and why the next repair will require careful soldering rather than another part swap. That is the useful information for the reader. The fact that twenty more close-ups exist is not.
What happens in part two
The next repair is straightforward to describe and delicate to do: reattach the backlight connector, and test whether the replacement display and startup disk can get this machine back to a usable desktop. The goal is to complete the repairs, reassemble it without adding another failure, and see what it can actually do.
Sources
- Apple: iBook Technical Specifications
- Apple Newsroom: Apple Enhances iBook Line
- Macintosh Repository: iBook G3/366 SE Original Clamshell Specs
- EveryMac: iBook G3/366 FireWire Clamshell Specs
- iBook Clamshell FAQ: Video Cable for iBook FireWire
- MacRumors Forums: What chargers work with iBook G3 clamshell?
- MacRumors Forums: How to use a G3/G4 power adapter on a Clamshell iBook
AI Usage Transparency Report
AI Era · Written during widespread use of AI tools
AI Signal Composition
Score: 0.28 · Moderate AI Influence
Summary
A vintage Clamshell iBook G3 was restored after a series of repairs, including replacing the damaged screen and disassembling the machine to reach the storage path.
Related Posts

PowerBook 140 BlueSCSI Install: Cable Fixed, Battery-Bay Power, and Wi-Fi Setup
The PowerBook 140 project moved from preparing a BlueSCSI card in Basilisk II to installing the repaired internal SCSI cable, powering the BlueSCSI Pico externally from the battery bay, booting System 7.1, and fighting through DaynaPORT Wi-Fi setup.
Fixing a Broken Apple Cinema Display Stand with a 3D Printed Leg
A 22-inch Apple Cinema Display arrived with a broken acrylic easel stand, so I used a 3D printed replacement leg instead of sending the monitor back.
ClaudeChat Makes Snow Leopard Feel Useful Again
ClaudeChat-Snow-Leopard is interesting because it brings a modern Claude API workflow back to Mac OS X 10.6.8 with Objective-C, Cocoa, Keychain storage, screenshot uploads, and a native installer built for an older white MacBook.
Preparing a BlueSCSI Card for My PowerBook 145 with Basilisk II
A step-by-step walkthrough for preparing a BlueSCSI v2 PowerBook card image with Basilisk II: download the pieces, configure the emulator, boot a working classic Mac image, mount the target System 7.1 image, stage tools, and shut down cleanly before moving the image to the card.
How a Floppy Disk Turned My PowerBook 145 Around
A replacement adapter finally brought my PowerBook 145 back to life, but the storage bay had a stranger problem than I first thought: the drive inside was an IDE drive, not the SCSI storage this machine needs. The surprise was that 6 MB of RAM made a System 7.1 RAM Disk boot possible while I wait on a replacement cable and BlueSCSI.
What a Dead PowerBook 145 Still Told Me
I picked up a clean PowerBook 145 knowing it might be a gamble. What I found was a machine that looked promising on the outside, demanded the correct 7.5V power approach, revealed a torn hard drive ribbon cable inside, and still refused to chime. That first teardown ended up being less about a successful revival and more about the reality of vintage Apple restoration.
macOS Tahoe 26.6.1 Fixes a High-Severity Screen Sharing Authentication Bypass
macOS Tahoe 26.6.1 fixes CVE-2026-65400, a high-severity Screen Sharing authentication issue where an attacker on the network may be able to authenticate without valid credentials.

LibrePods Turns AirPods Into an Interoperability Question
LibrePods is interesting because it turns AirPods into an interoperability question: what happens when open-source software implements Apple's private AirPods protocol so Android and Linux users can reach features normally reserved for Apple's ecosystem?
Check Encrypted HFS+ Drives Before macOS 28
Apple says macOS 28 will not support encrypted Mac OS Extended volumes, so older encrypted HFS+ external drives need to be identified, backed up, decrypted, converted, or reformatted before that upgrade.
AppleCare One Just Became a Better AppleCare Deal
AppleCare One looks more valuable after AppleCare+ price increases for Macs and iPads, especially for people with several Apple devices and older eligible hardware.