
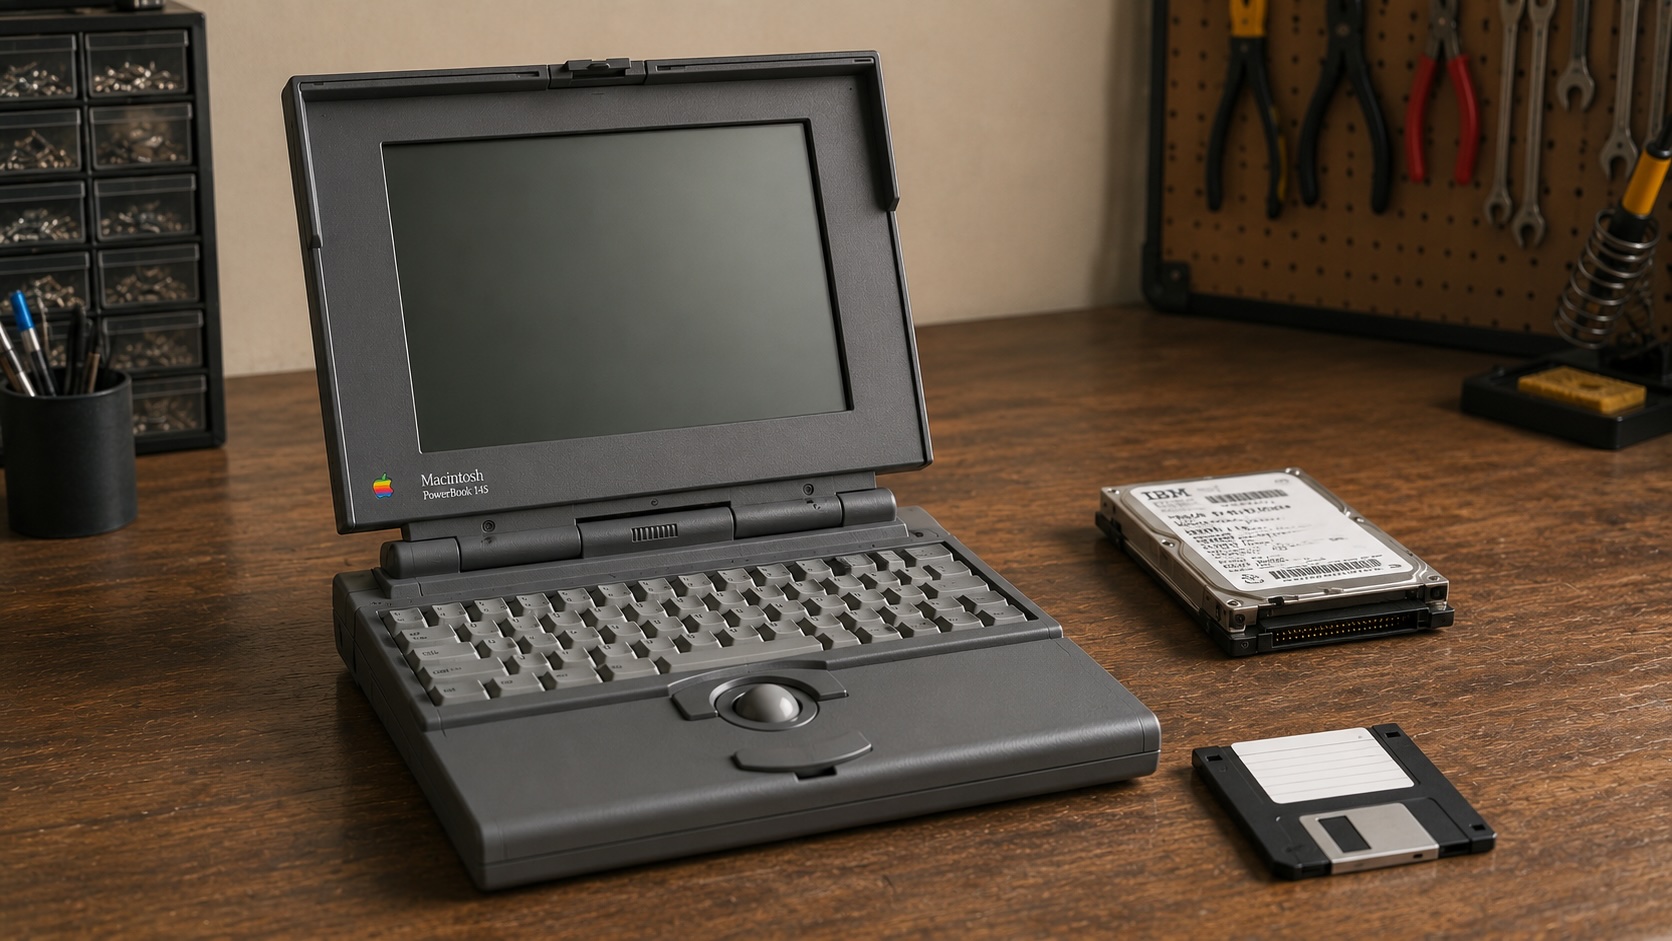
The PowerBook 145 is past the first big question. It powers on, it boots System 7.1 from floppy, and it can even boot from a RAM Disk. The next job is internal storage, and for this machine that means the BlueSCSI v2 PowerBook version from Joe’s Computer Museum.
That card is not just a replacement hard drive. The PowerBook version is built for internal-SCSI PowerBooks, and the product page explicitly draws a line around the machines it supports. It is not for later IDE/ATA PowerBooks such as the 150, 190, 1400, 2400, or 5300. That boundary matters because the PowerBook 145 belongs on the SCSI side of the family.
The card also changes what an old PowerBook can do. A BlueSCSI v2 with WiFi support can present storage images and, with the right software stack, act like a DaynaPORT-style network device. That is a very modern idea for a black-and-white 68k laptop. It also means I do not want to throw a blank card into the PowerBook and start guessing. I want the storage image prepared, verified, and loaded with the tools I need before the card goes inside the machine.
Basilisk II is the workbench for that job. Instead of asking the PowerBook to do every copy, install, and test from floppy, I can boot a known-good classic Mac environment on my modern Mac, mount the target BlueSCSI image, copy the tools into it, shut the emulator down cleanly, and then move the prepared image back to the SD card.
What I Downloaded First
The working folder on my Mac had to contain four kinds of things before Basilisk II was useful:
- Basilisk II GUI and the BasiliskII emulator application.
- A compatible Macintosh ROM file for the emulator.
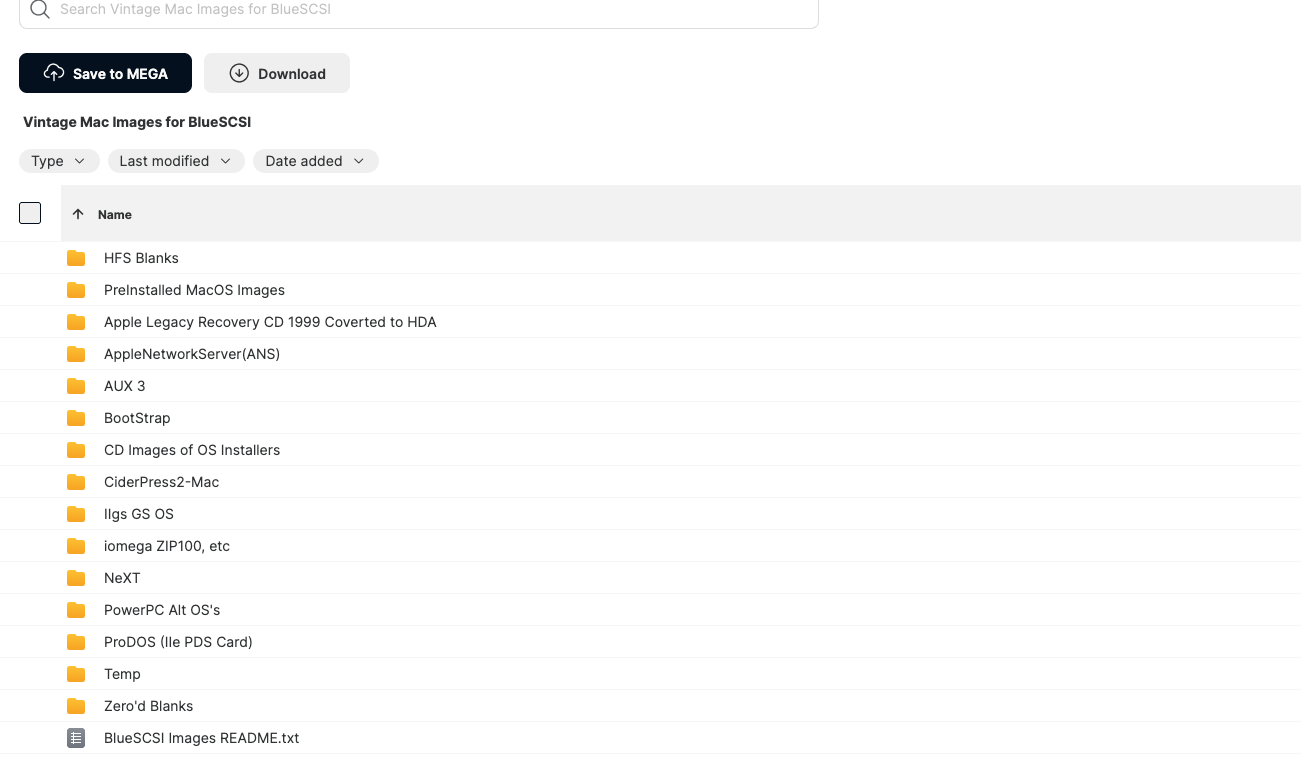
- A working classic Mac boot disk image from the BlueSCSI image resources or the Vintage Mac Images for BlueSCSI MEGA folder.
- The target BlueSCSI image I wanted to prepare for the PowerBook.
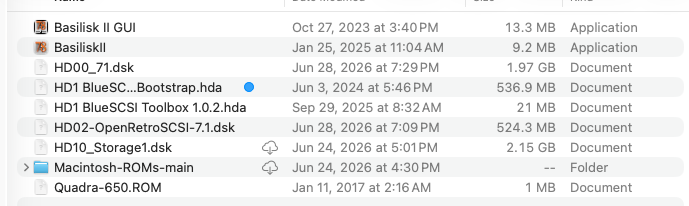
I downloaded Basilisk II from E-Maculation and used the GUI build because it makes the emulator settings visible instead of hiding them in a preferences file. My working folder also included the BlueSCSI Bootstrap and Toolbox images, an OpenRetroSCSI System 7.1 image, blank storage images, a 7.5.5 working image, and a local ROM folder.
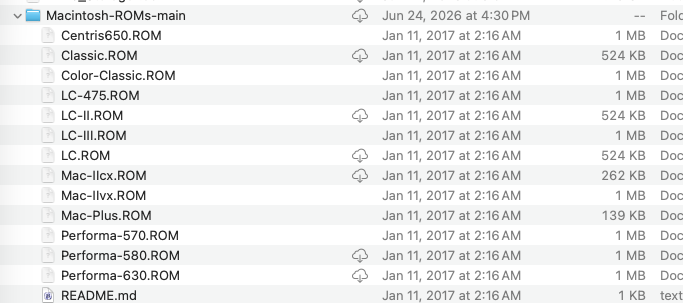
The ROM folder matters because Basilisk II will not boot by itself. It needs a compatible Macintosh ROM file. I used a Quadra 650 ROM for this emulator setup, from the local ROM folder shown here and tracked back to the macmade Macintosh-ROMs repository. That does not make this a ROM distribution guide. Use ROM and system software you are allowed to use; the point here is the workflow, not redistributing Apple software.
Configure The Basilisk II Volumes
Open Basilisk II GUI and start on the Volumes tab. This is where the whole method becomes clear: the boot disk and the target disk do not have to be the same image.
In my setup, I added two disk images:
755_2GB_drive.dskas the working boot environment.HD2-OpenRetroSCSI-7.1.dskas the target image I wanted to prepare for the PowerBook.
The 7.5.5 image gives me a comfortable emulator desktop. The OpenRetroSCSI 7.1 image is the one I care about preparing for the PowerBook. Mounting both at once lets me use the better workbench image to modify the target image.
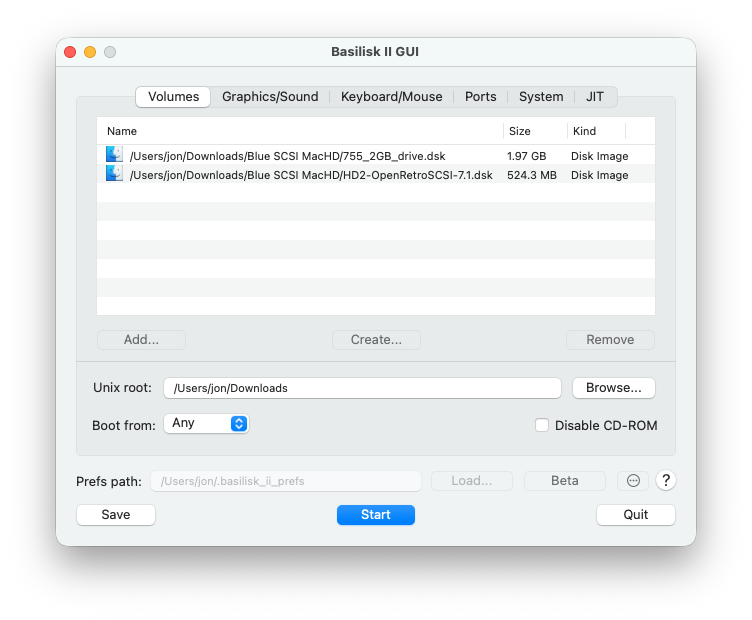
At the bottom of that same tab, set the Unix root to the folder that should appear inside the emulator as the Unix disk. I used my Downloads folder because that is where the Blue SCSI MacHD working folder lived. This gives the emulated Mac a bridge back to files on the modern Mac.
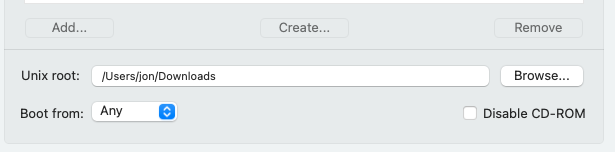
Leave Boot from set to Any unless you need to force a specific image. For this prep pass, I wanted Basilisk II to boot from the working image and mount the target image beside it.
Set The Emulator Display
On the Graphics/Sound tab, use a windowed display with a practical size. I used a 1024 pixel wide window and a 768 pixel high window. That is large enough to manage Finder windows and copy files without making the classic Mac desktop feel cramped.
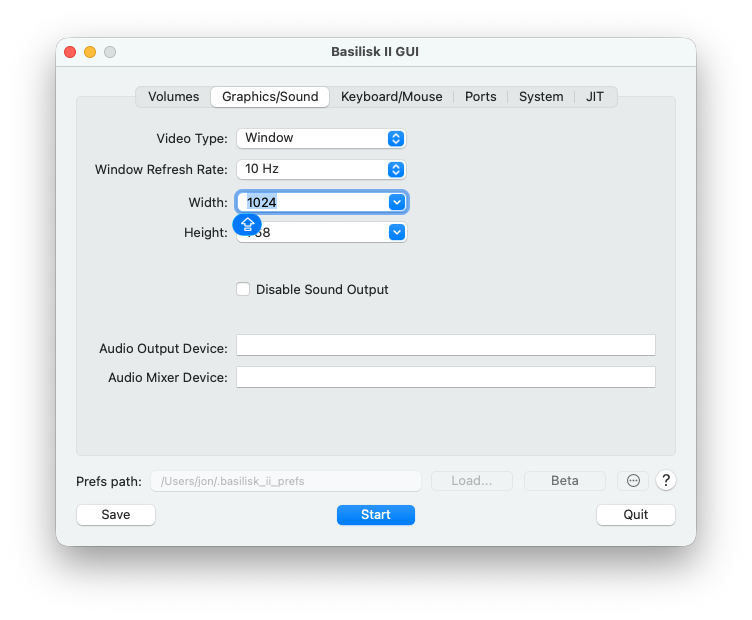
The exact size is not sacred. The important part is that this is a workbench, not a performance test. I want enough room to see the boot disk, the target disk, and the Unix shared folder at the same time.
Leave Keyboard And Mouse Simple
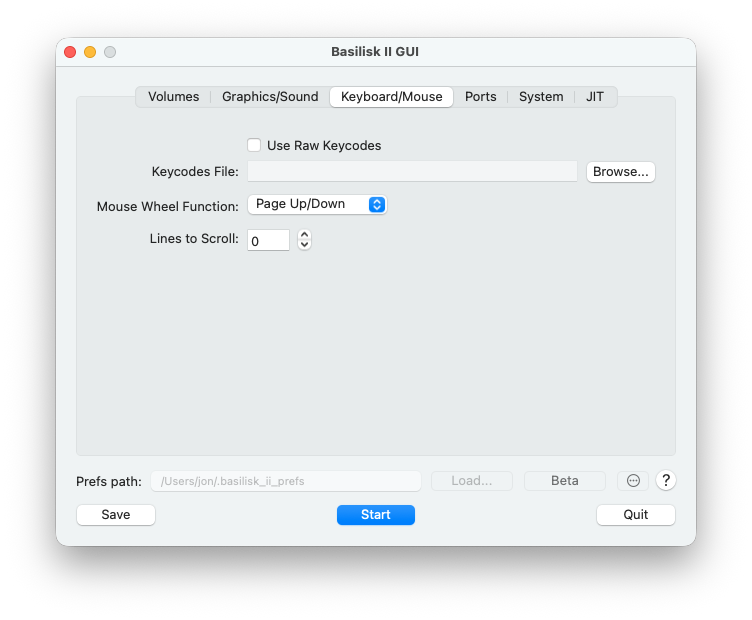
On the Keyboard/Mouse tab, I left the setup simple. I did not enable raw keycodes, and I left the mouse wheel behavior at Page Up/Down. This is one of those settings pages where changing less is better unless something is actually broken.
Set Ports For The Emulator, Not The PowerBook
On the Ports tab, I used slirp for the emulator Ethernet interface. That setting belongs to Basilisk II on the modern Mac. It does not prove anything about the PowerBook’s eventual BlueSCSI WiFi or DaynaPORT setup.
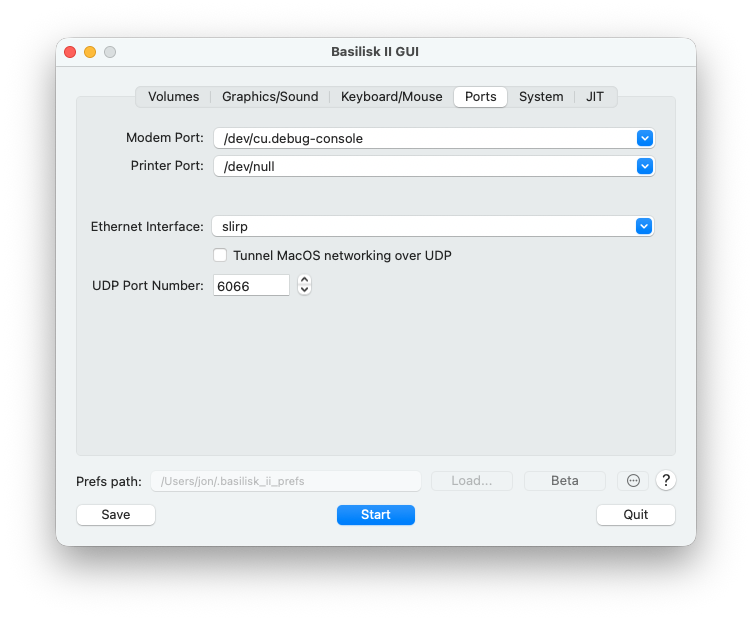
That distinction matters. Basilisk II networking is not the same thing as the BlueSCSI WiFi feature. For this article, the emulator is here to prepare a disk image. The PowerBook network work is a separate layer after the card boots reliably.
Pick The System Profile
On the System tab, I used 64 MB of RAM, the Mac IIci model setting, a 68040 CPU type, and the Quadra 650 ROM file.
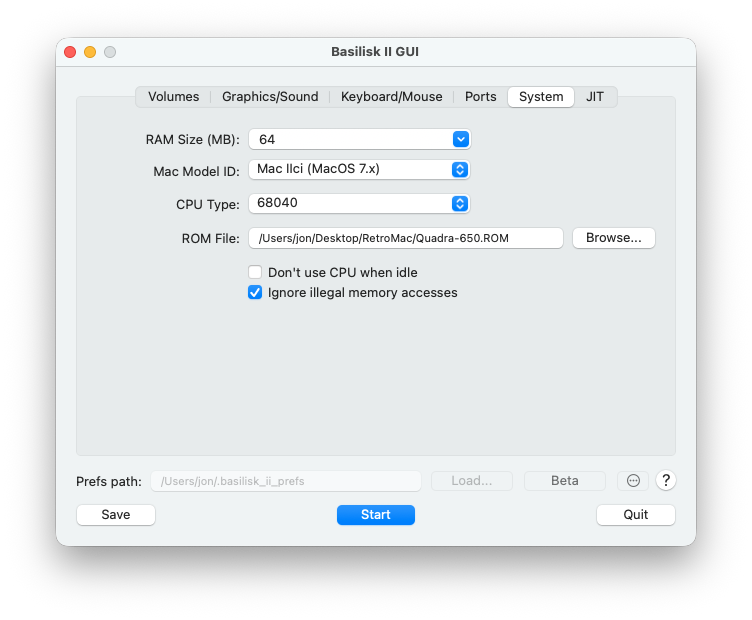
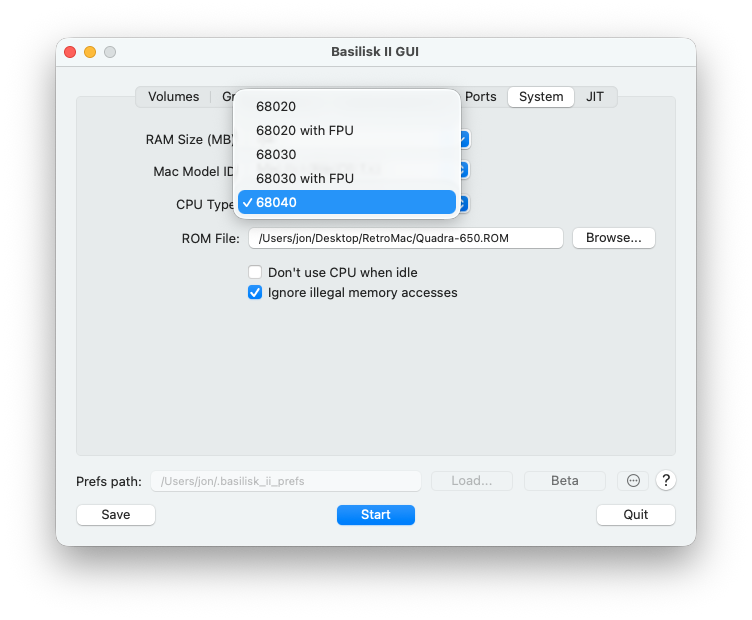
The CPU dropdown shows the available 68k options. I used 68040 because this Basilisk II setup was meant to run the emulator comfortably on the modern Mac, not to perfectly impersonate the PowerBook 145.
The model dropdown is the same idea. I used Mac IIci (MacOS 7.x) for this prep environment. The target disk still needs to be appropriate for the PowerBook, but the emulator profile only has to be stable enough to mount the images and copy files cleanly.

After those settings are in place, save the configuration. Then press Start.
Boot The Emulator
When Basilisk II starts correctly, the classic Mac desktop appears with the working boot disk, the Unix shared folder, and the target OpenRetroSCSI image visible as mounted volumes.

Open the 7.5.5 boot disk first. This verifies that the emulator booted from the workbench image and that the Finder is usable before touching the target image.
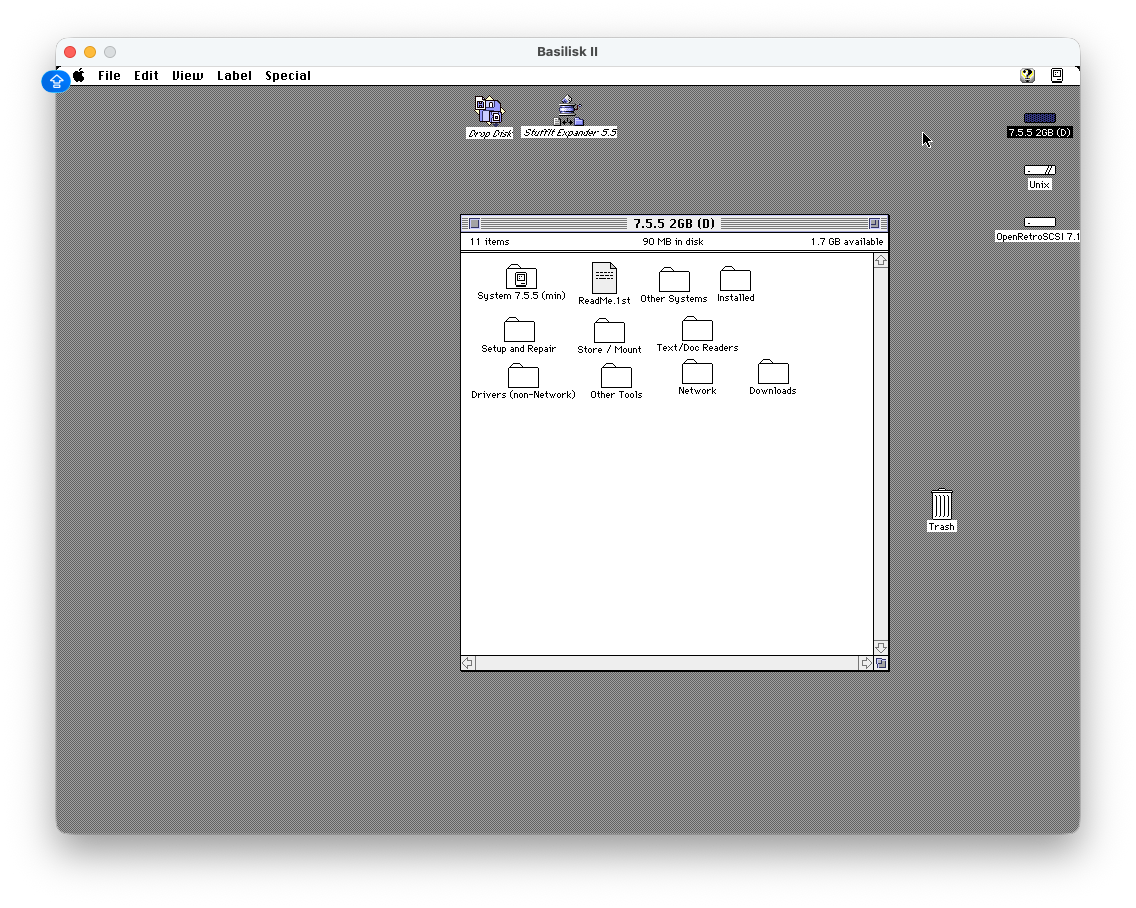
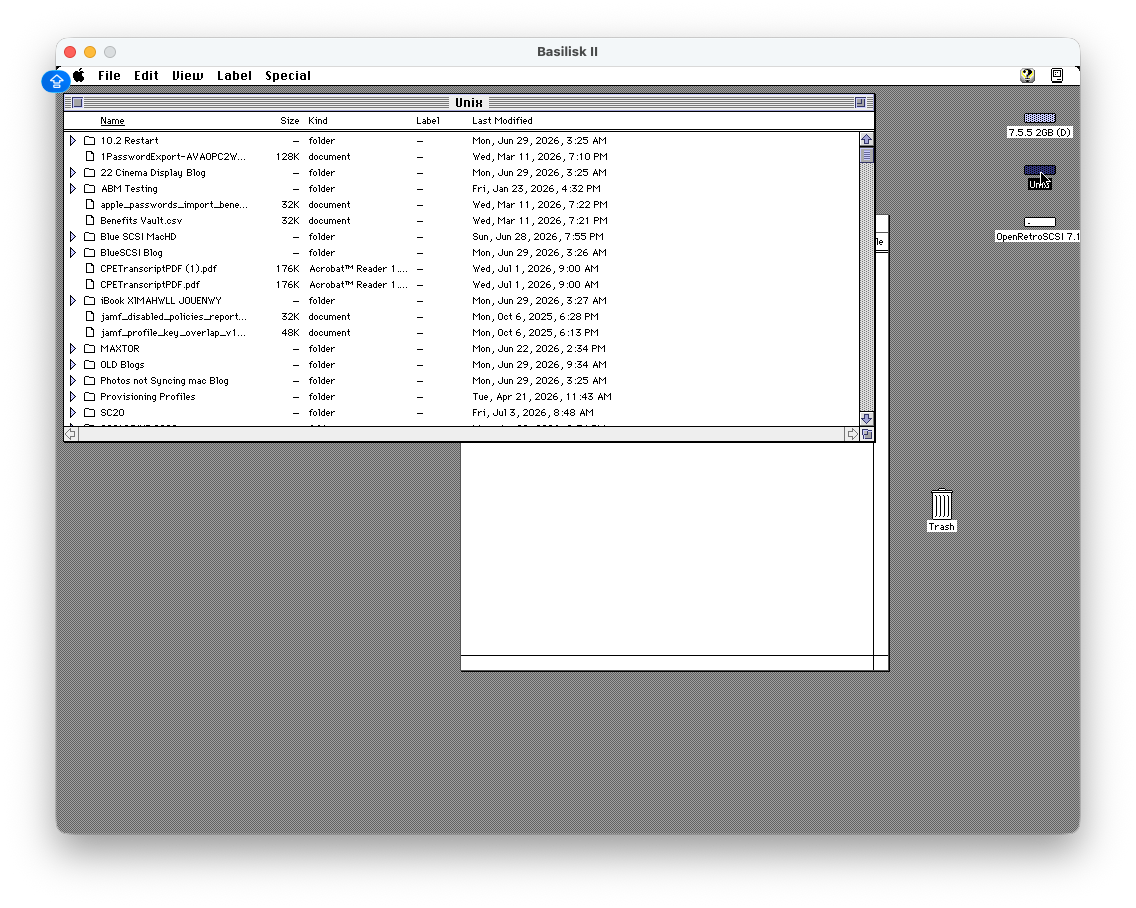
Next, open the Unix shared folder. This is the bridge back to the modern Mac. In my case, it exposed the Downloads folder, including the Blue SCSI MacHD folder that held the disk images, apps, and support files.
Then open the OpenRetroSCSI 7.1 target image. This is the disk I want to prepare for the PowerBook. Seeing it mount in Basilisk II is the first real verification step. If it does not mount here, I do not want to discover that failure after installing hardware in the laptop.

Stage The Apps The PowerBook Will Need
The PowerBook 145 has 6 MB of RAM and a passive-matrix black-and-white screen. It is not going to be fun to build the whole software environment on the laptop itself. The target image needs the basics ready before the card goes in: StuffIt, Disk Copy, BlueSCSI tools, network utilities, transfer tools, and a small set of known-good classic applications for testing.
In my Apps folder, I staged tools and software including DropDisk, GraphicConverter 3.2.1, iCab 1.1 PPC, MacWeb 0.98a, HyperCard, MacPaint, StuffIt Expander 5.5, QuickTake software, Newton Connection utilities, Fetch, games, and the wifi_da-1.4 folder for the later DaynaPORT work.
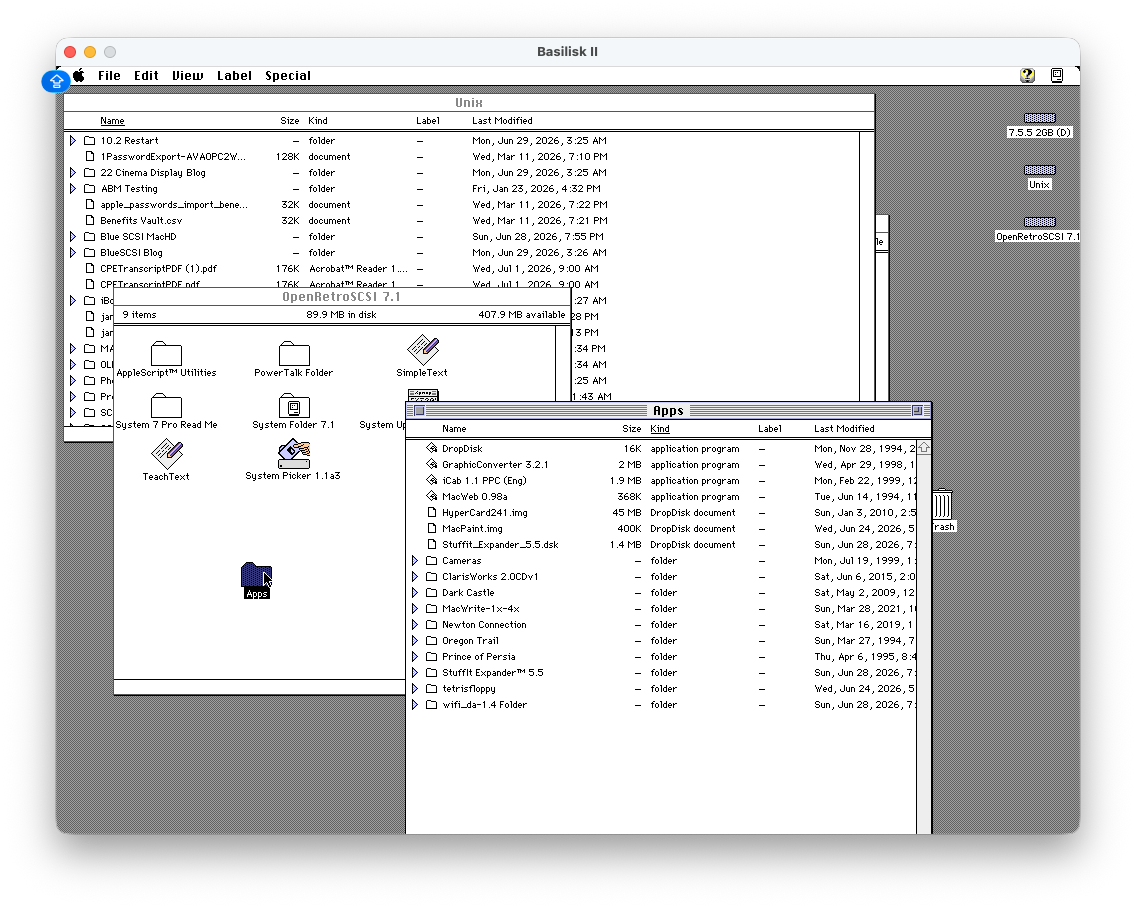
This is the point of doing the work in Basilisk II. I can drag files from the Unix shared folder into the target image, organize them in Finder, and make sure the target disk still behaves like a normal classic Mac volume.
Verify The Boot Environment
Before shutting anything down, I checked the running emulator environment. About This Macintosh showed System Software 7.5.5 with the emulator’s larger memory allocation. Behind it, the Blue SCSI MacHD folder shows the staged downloads and disk images I was using for the prep.
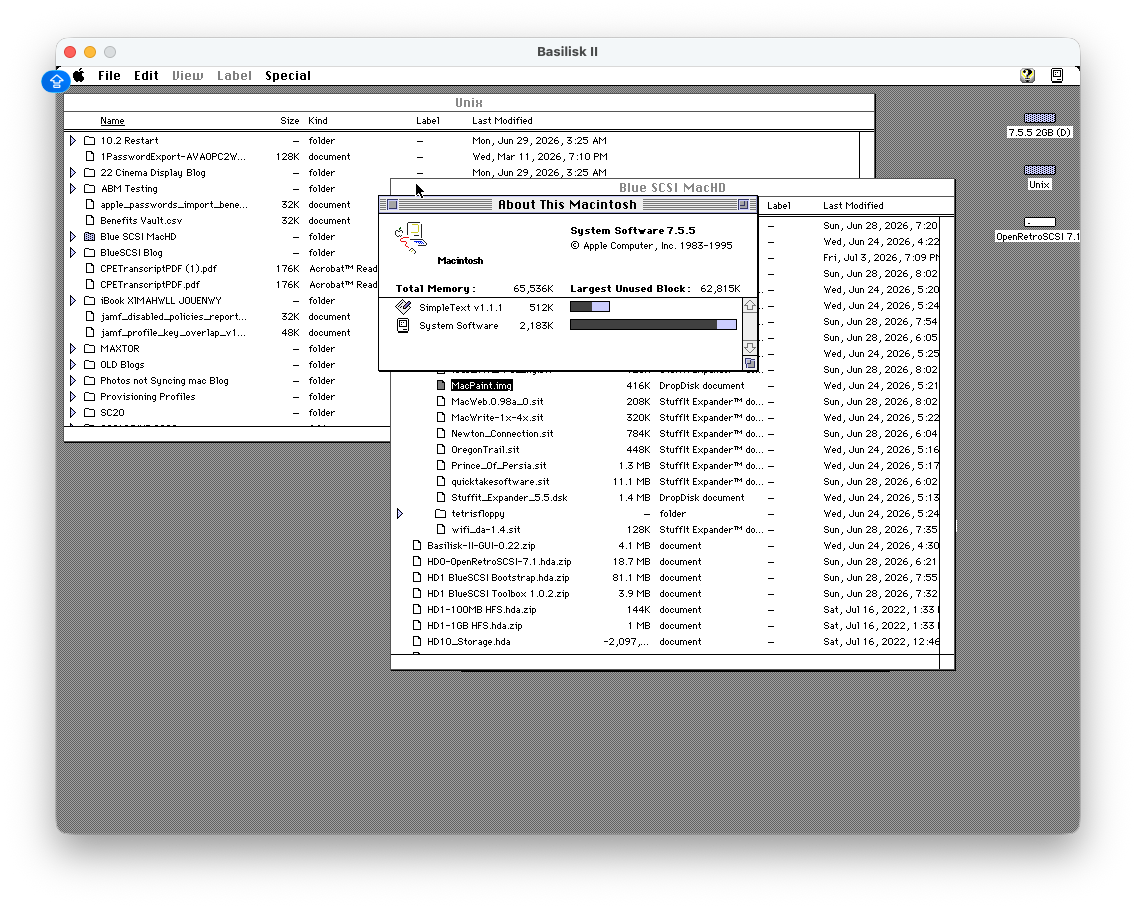
That screenshot is a useful sanity check. The emulator is not the PowerBook, but it proves the workbench is alive, the target disk is mounted, and the files I care about are present before I move the image back to the SD card.
Prepare The BlueSCSI Card Carefully
BlueSCSI uses filename conventions to decide what kind of SCSI devices to present. The usage documentation explains the basic idea: hard disk images live at the root of a FAT32 or exFAT SD card, and names beginning with HD identify disk images and SCSI IDs.
For example, the docs show patterns like:
HD10_512.hda
HD6 - System 7 Quada 700.hda
HD50_512 System 6.0.8L LC.hda
For this tutorial, the important rule is not to blindly copy a guessed layout. The final card should match the actual working images I intend to boot. My earlier mistake was putting a disk in the wrong slot and then mixing that with DaynaPORT troubleshooting. That made the card state harder to trust.
The screenshots show my local working folder, not a finished SD card root. That distinction matters. The folder can hold multiple images, downloads, zip files, and experiments. The card root should only contain the images I actually want BlueSCSI to present, and two active disk images should not claim the same SCSI ID.
The final working card layout for this PowerBook is much more specific:
bluescsi.ini
HD00-7.1.dsk
HD10_Storage1.hda
HD20_Storage2.hda
HD30 BlueSCSI Toolbox 1.0.2.hda
HD50 BlueSCSI Bootstrap.hda
shared/
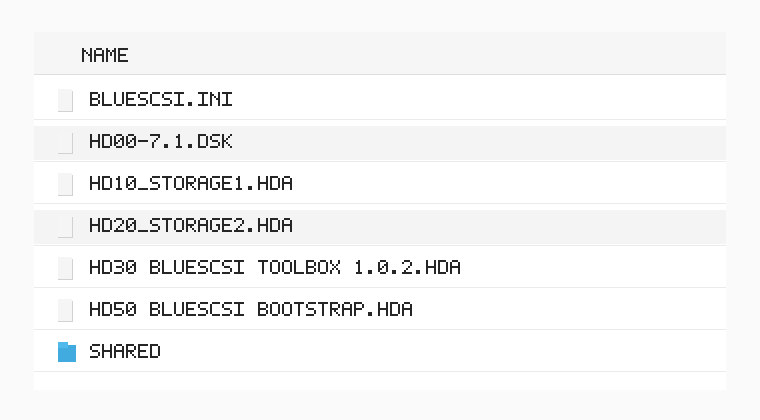
That layout is the version that matters for this article. The boot image is HD00-7.1.dsk. The two blank storage images are HD10_Storage1.hda and HD20_Storage2.hda. Those blank images are useful because once the card boots, they appear to the Mac as additional external hard drives. They give me space for tools, installers, transfers, and experiments without constantly rebuilding the boot image.
The blank images came from the BlueSCSI image resources, especially the BlueSCSI Images page and the linked Vintage Mac Images for BlueSCSI MEGA folder. That MEGA folder is not a minor footnote. It is where the HFS blank images, zeroed blanks, premade system images, Bootstrap images, and other BlueSCSI-ready image sets are organized.
The ID layout is the part I do not want to get wrong again. The PowerBook card is using the DaynaPORT/WiFi path on SCSI ID 4, so I do not put a normal hard disk image in that slot. In practical terms, this final card uses disk IDs 0, 1, 2, 3, and 5, and skips the 4-series disk slot. If I am thinking in shorthand, the rule is: do not use the HD04/HD4 slot for a normal drive when WiFi is configured for SCSI ID 4. The HD30 BlueSCSI Toolbox 1.0.2.hda image occupies ID 3. The HD50 BlueSCSI Bootstrap.hda image occupies ID 5. ID 4 is left for the WiFi/DaynaPORT device configured in bluescsi.ini.
Treat WiFi As A Capability, Not The First Test
The PowerBook BlueSCSI v2 can do more than storage. With the WiFi-capable hardware and the DaynaPORT software path, it can make network access possible on a machine that was never designed around modern wireless networking.
That is exactly why I do not want WiFi to be the first thing I test. Storage has to be stable first. The target image should boot. The Finder should open. The tools should be present. The card should not be carrying stale log files from a failed network experiment.
There is also a modern-router trap here. The PowerBook BlueSCSI v2 is made with modern components, but that does not mean it can join every modern WiFi network. For this setup, I need a real 2.4 GHz network. Not a 5 GHz network with a compatibility checkbox, not a combined smart SSID that decides band steering for me, and not a “modern router will figure it out” assumption. The safest setup is a separate, stand-alone 2.4 GHz SSID with its own name and password, then put that exact SSID and password in bluescsi.ini.
The BlueSCSI WiFi DaynaPORT documentation uses a root-level bluescsi.ini file. The final working file on my card uses a [SCSI] section for WiFi credentials and a [DaynaPORT] section that points the DaynaPORT device at SCSI ID 4. Sanitized, it looks like this:
[SCSI]
WiFiSSID="YOUR_2_4_GHZ_WIFI_NAME"
WiFiPassword="YOUR_WIFI_PASSWORD"

[DaynaPORT]
Enabled=1
SCSIID=4
If the WiFi password contains ; or #, the BlueSCSI WiFi DaynaPORT documentation says to wrap the password in double quotes. I am keeping the quotes in the sanitized example because the final working file used quoted values.
The important correction from my own troubleshooting is that I am not treating NE4.hda or NE4 as a required step in this tutorial. Creating or renaming that placeholder sent my card into a bad state. The working setup reserves the network path through the [DaynaPORT] block with SCSIID=4, and the storage layout avoids putting a normal disk in that same slot. The safer lesson is to keep the storage-prep pass clean, follow the current BlueSCSI documentation for the exact firmware and hardware in hand, and clear generated log.txt and lastlog.txt files after failed config attempts so stale failures do not steer the next test.
Shut Down And Move The Image
When the target image has the files I need, do not just quit Basilisk II from the host Mac. Shut down the emulated Mac from the Special menu so the mounted images close cleanly.
After the emulator exits:
- Copy the prepared target image back to the BlueSCSI SD card.
- Keep the image filename consistent with the BlueSCSI naming rules.
- Keep
shared/at the root for BlueSCSI Toolbox transfers. - Keep
bluescsi.iniat the root if WiFi credentials are being configured. - Leave the SCSI ID 4 disk slot unused for normal hard drive images when DaynaPORT/WiFi is configured for ID 4.
- Remove stale
log.txtandlastlog.txtfiles from prior failed tests. - Eject the SD card cleanly from macOS.
That gives the PowerBook a narrow first test. I am not asking it to become a wireless networked Mac on the first boot. I am asking it to boot a storage image that I already mounted, opened, filled, and shut down cleanly in Basilisk II.
Once that works, the WiFi and DaynaPORT work can happen as its own follow-up. That is the right order: prove storage, then prove networking.
Sources
- What a Dead PowerBook 145 Still Told Me
- How a Floppy Disk Turned My PowerBook 145 Around
- BlueSCSI v2 Usage
- BlueSCSI Images
- BlueSCSI Images documentation
- Vintage Mac Images for BlueSCSI MEGA folder
- BlueSCSI Toolbox
- BlueSCSI Toolbox download
- BlueSCSI WiFi DaynaPORT
- BlueSCSI for PowerBooks - Joe’s Computer Museum
- Basilisk II - E-Maculation wiki
- Setting up Basilisk II - E-Maculation wiki
- macmade Macintosh-ROMs GitHub repository
- Macintosh Garden
- Macintosh Repository
AI Usage Transparency Report
AI Era · Written during widespread use of AI tools
AI Signal Composition
Score: 0.24 · Moderate AI Influence
Summary
A step-by-step walkthrough for preparing a BlueSCSI v2 PowerBook card image with Basilisk II: download the pieces, configure the emulator, boot a working classic Mac image, mount the target System 7.1 image, stage tools, and shut down cleanly before moving the image to the card.
Related Posts
CrashStealer Shows the Gap Between Notarization and Detection
CrashStealer shows the security gap between Apple's Developer ID notarization path and App Store review, and why Jamf's behavioral detection mattered.

AppleCare One Just Became a Better AppleCare Deal
AppleCare One looks more valuable after AppleCare+ price increases for Macs and iPads, especially for people with several Apple devices and older eligible hardware.
Why Apple's iPhone Financing Lock Change Matters for Business Buyers
Apple's U.S. carrier financing change makes locked versus unlocked iPhones an operational buying decision for small businesses, BYOD users, and Apple fleet planners.

The CMMC Pause Does Not Make a Level 2 Audit Worthless
The July 2026 CMMC Phase II pause changes the timing of third-party assessment requirements, but it does not erase DFARS, NIST SP 800-171, SPRS, or the value of a completed Level 2 audit.
How We Structured and Hashed CMMC Evidence for Auditor Review
How folder naming, control-level artifact names, spreadsheet hyperlinks, and evidence hashing made a CMMC evidence package easier for the auditor to validate.
How I Keep Up With ISC2 CPE Credits Without Making It a Second Job
Keeping up with ISC2 CPE credits is easier when you treat it like a normal professional habit instead of a renewal emergency. Here is the system I use across CISSP, CCSP, SSCP, and CSSLP, with free and low-friction sources for webinars, books, training, and work-based credits.

When AI Agents Trust the Wrong Tool Description
Microsoft's MCP tool-poisoning research shows why AI agent security has to treat tool descriptions, schemas, and metadata as part of the control plane instead of harmless documentation.

Jamf Was My Mac Evidence Layer for CMMC
How Jamf Compliance helped support the Mac portion of a CMMC assessment, and why I added a small read-only CSV summary script for auditor-ready failed-result evidence.
How a Floppy Disk Turned My PowerBook 145 Around
A replacement adapter finally brought my PowerBook 145 back to life, but the storage bay had a stranger problem than I first thought: the drive inside was an IDE drive, not the SCSI storage this machine needs. The surprise was that 6 MB of RAM made a System 7.1 RAM Disk boot possible while I wait on a replacement cable and BlueSCSI.

What I Check Before I Trust a Homebrew Formula or Cask
Homebrew gives Mac admins a useful first-pass inspection workflow before trusting a formula or cask: check the source, checksum, version, tap state, availability, and upstream maintenance story.
