

It’s inevitable—your Time Machine backup drive is going to fill up. Time Machine is smart about backing up only files that have changed, but after months or years of usage, the drive will run out of space. What happens then?
Before we explain, some background. On its first backup, Time Machine copies everything on your startup drive to the backup drive. After that, Time Machine keeps hourly backups for the past 24 hours, daily backups for the past month, and weekly backups for all previous months. If you modify the same file multiple times per day, every day, you’ll have numerous versions of it in your backup set so that you can go back to any particular version.
So the first thing that Time Machine does when your backup drive fills up is start deleting those older versions, beginning with the oldest ones. It warns you when this starts happening and tells you what your oldest remaining backup is. In general, this approach works well, since you probably don’t need all the older versions of changed files as long as Time Machine always retains the most recent version in the backup.
Eventually, however, even this technique runs into the wall of hard drives having only so much capacity. When that happens, backups will start failing, and this notification will appear after every backup attempt.

Click the Details button in that notification to open the Time Machine pane of System Preferences, and you’ll learn more.
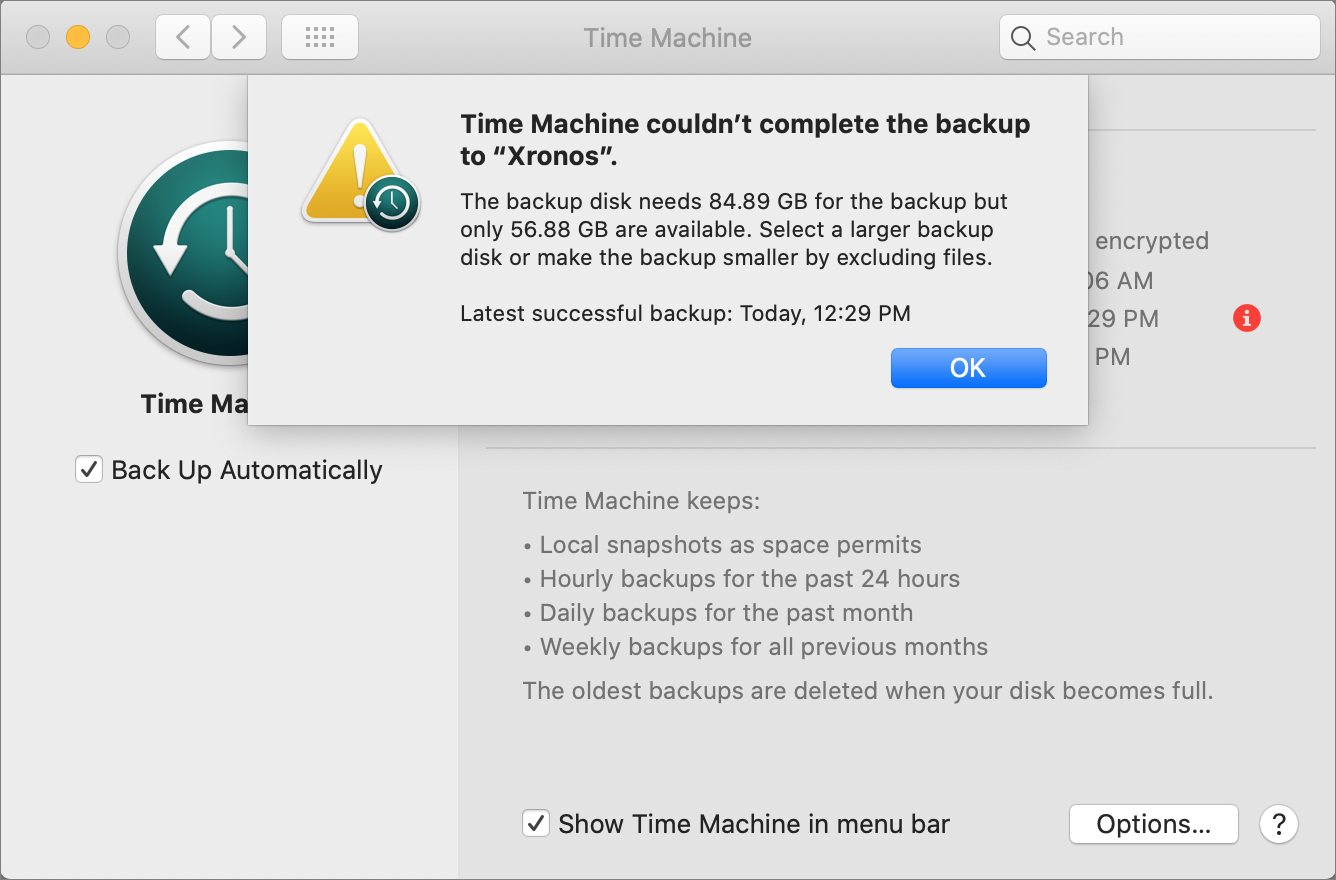
You have four options at this point, but two of them may not be all that helpful.
Delete Old Backups
One possible solution—albeit likely a short term one—is to delete old backups. You might be tempted to look in the Backups.backupdb folder on your Time Machine drive and delete some of the dated folders inside. Don’t. You have no idea what you’ll be deleting, and you’ll likely corrupt the entire Time Machine backup, rendering it useless.
Instead, use a utility like GrandPerspective or OmniDiskSweeper to identify folders or files that are both large and unnecessary. Navigate to one of those items in the Finder, select it, and then choose Enter Time Machine from the Time Machine menu bar icon. Once in Time Machine, click the Action menu (the gear icon) in the toolbar and choose Delete All Backups of Item.
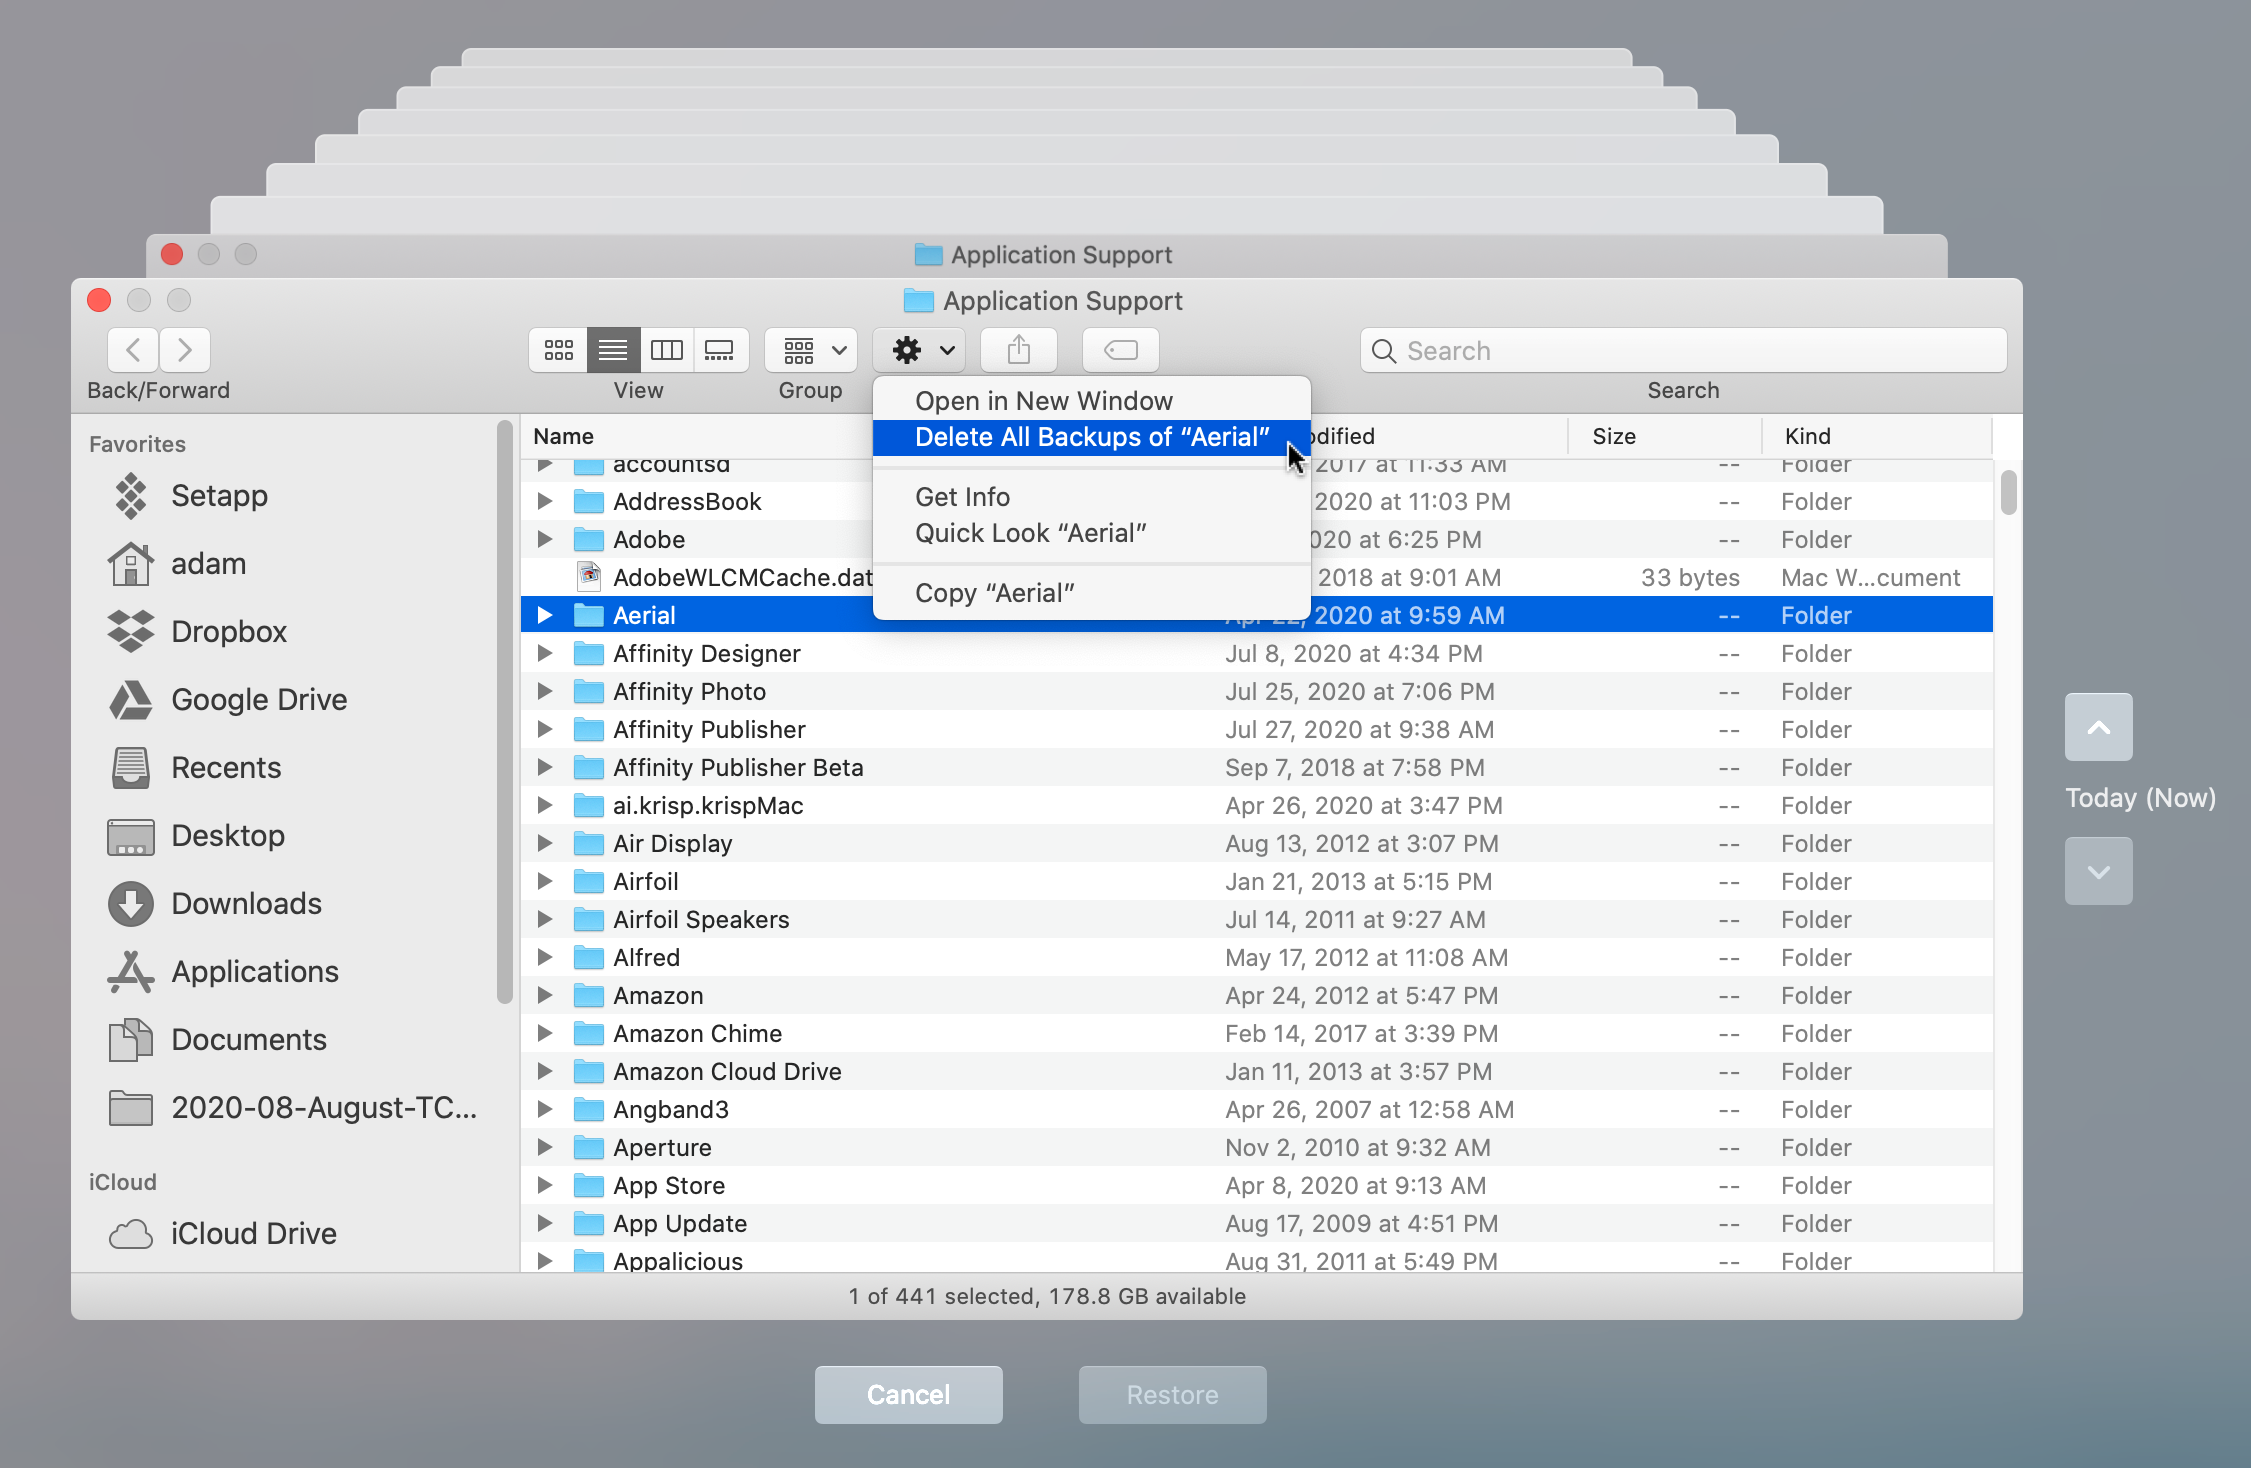
Alas, this approach may not have much of an effect, since it’s difficult to know how many backups Time Machine has stored.
Exclude Large Folders from the Backup
Another approach that Apple mentions is excluding items from the Time Machine backup. To do this, open System Preferences > Time Machine and click the Options button. Then drag the desired file or folder into the “Exclude these items from backups” list and click Save.
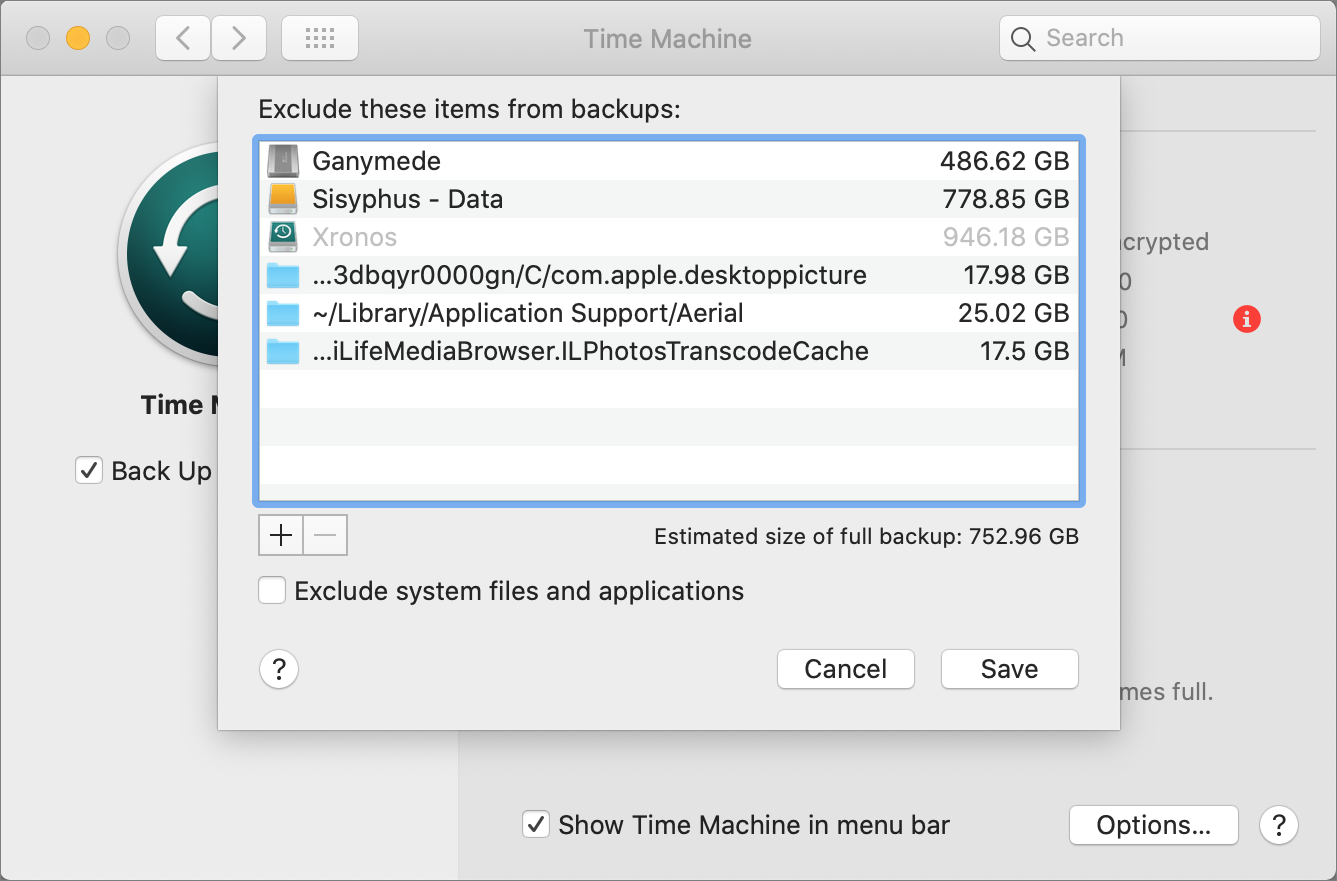
The only problem with this advice is that it’s helpful only before your backup drive fills up. Time Machine won’t reclaim space used by newly excluded items that already exist in your backup.
Start Over, Either on a New Drive or after Erasing Your Existing Backup Drive
One of the great features of Time Machine is that it stores previous versions of files, as we’ve discussed. But you probably know if you’re the sort of person who needs to go back to such previous versions, or if you just use Time Machine so you can restore all your data in the event of a drive failure. If the latter is true and you don’t much care about previous versions of files, a good solution is just to start over, either on a new drive or after erasing your current drive.
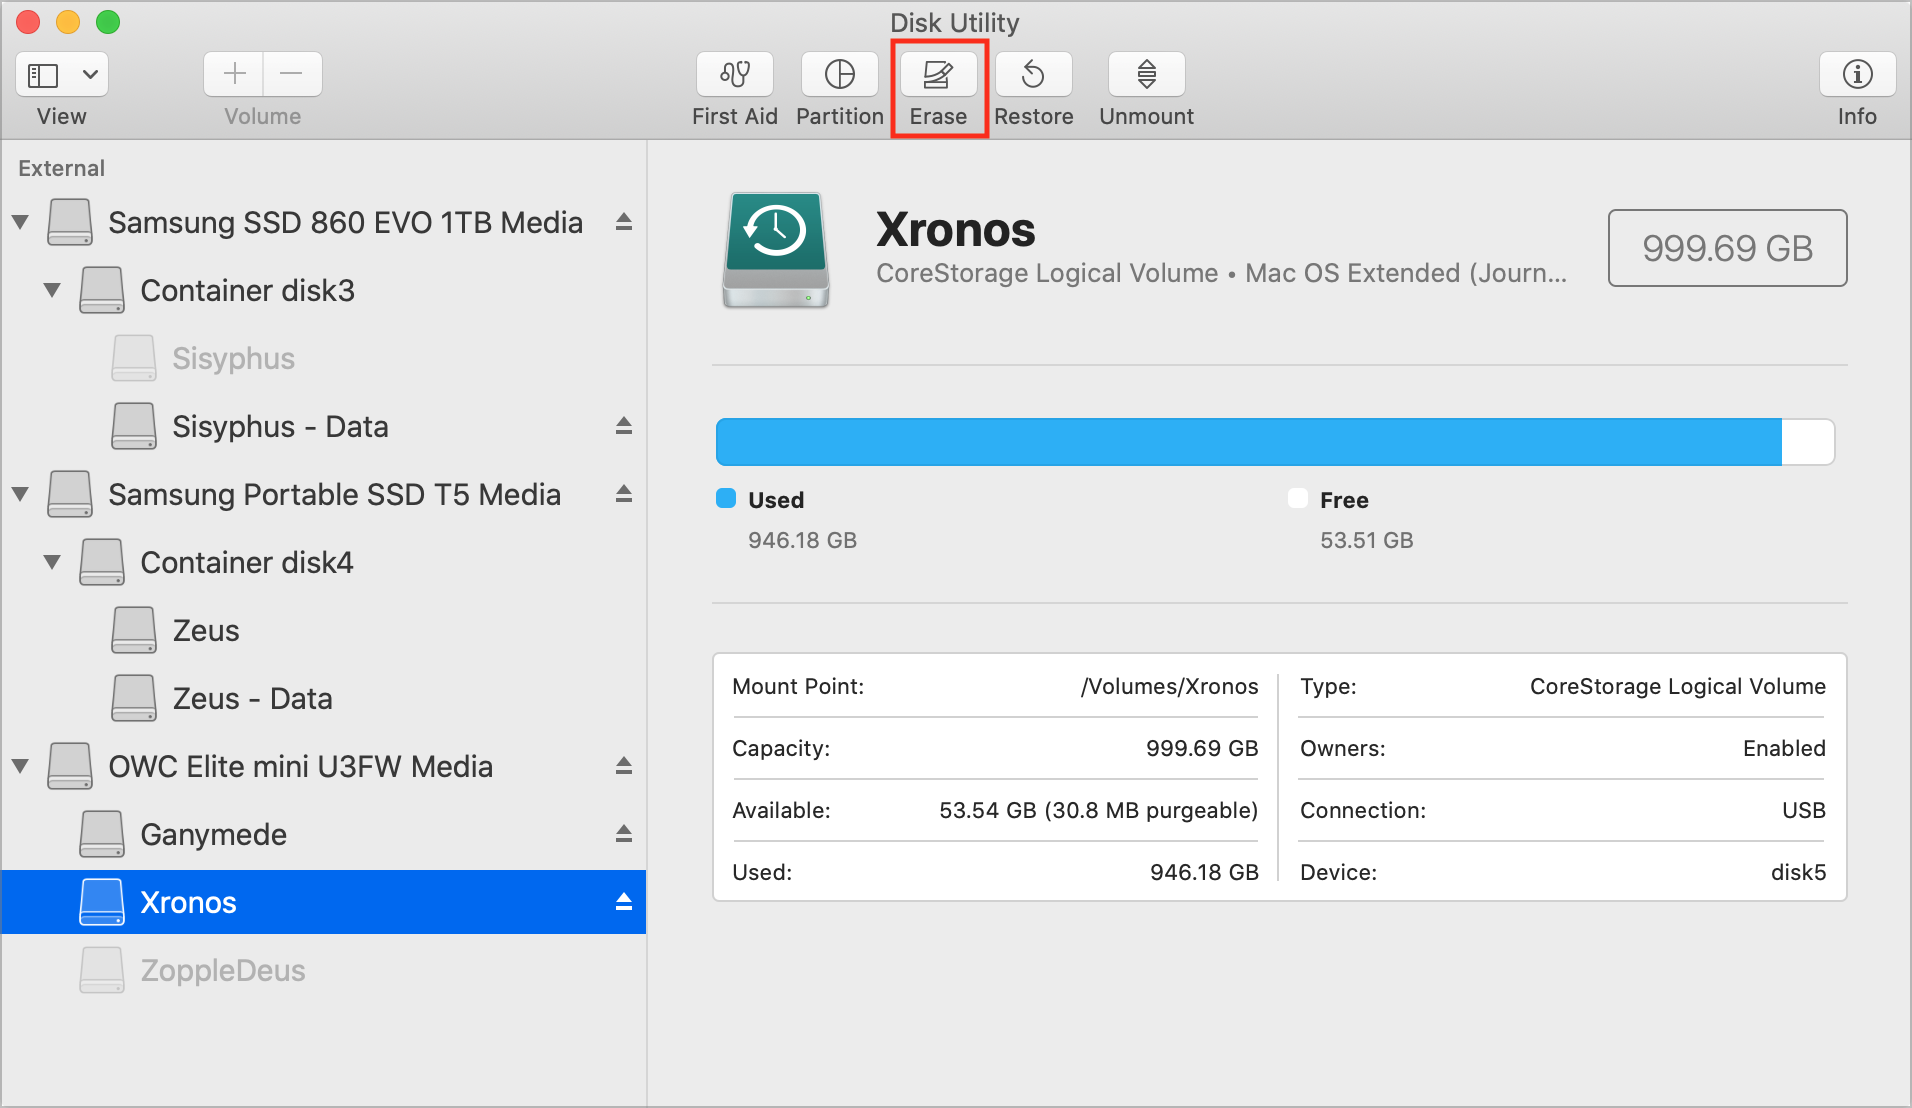
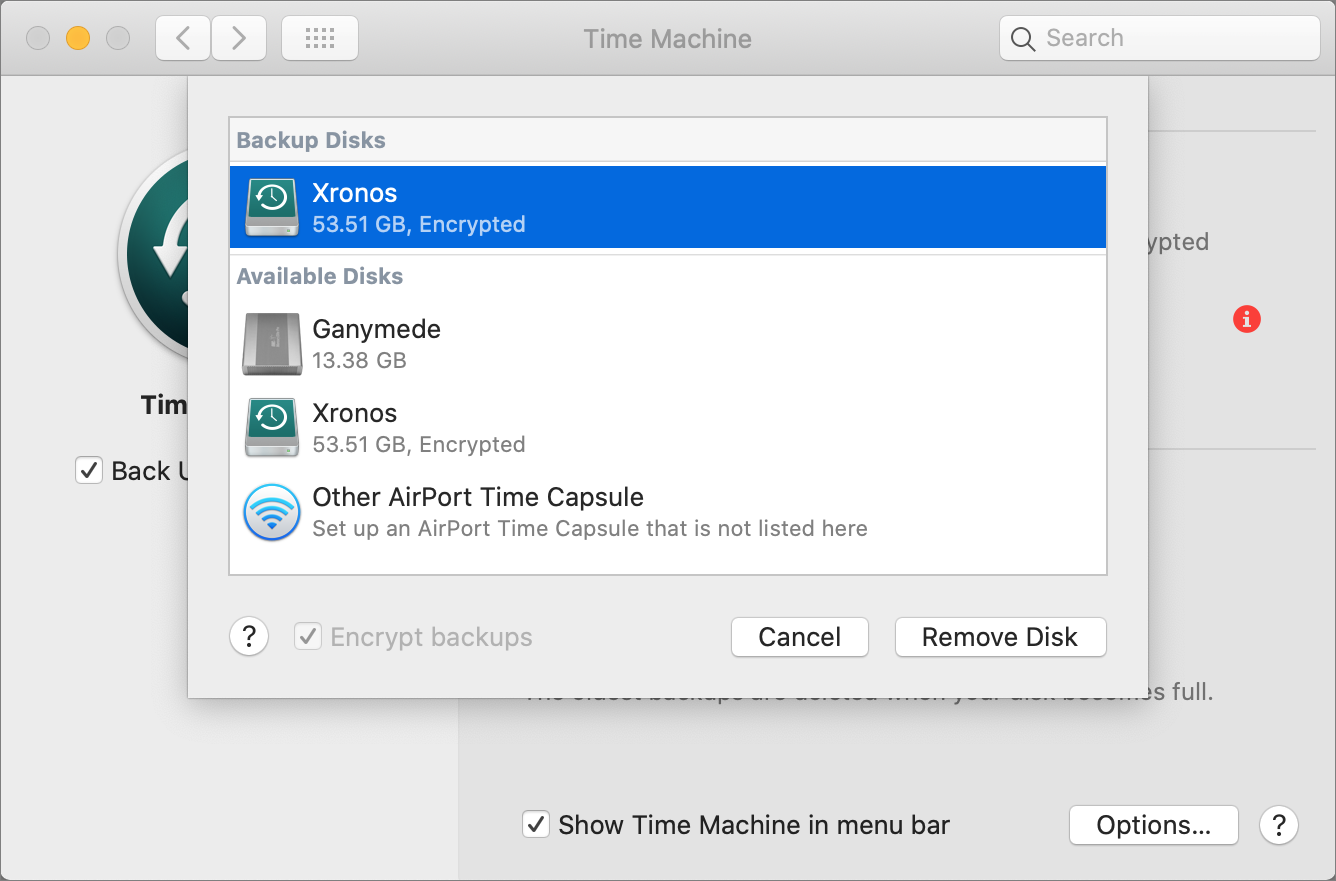
Obviously, erasing your current drive means that you won’t have any Time Machine backup at all until a new one completes, which is a risk. And, of course, if that drive filled up once, it will do so again, potentially fairly quickly unless you exclude some large folders. But, if you want to go down that path, open Disk Utility, select your Time Machine drive in the sidebar, and click Erase. Then go into the Time Machine preferences again, click Select Disk, and pick your newly erased drive. You may have to select it under Backup Disks and click Remove Disk first.
Getting a new, larger backup drive and starting over with it is easier and more sensible, though more expensive. Once you’ve connected the new drive, just open the Time Machine preferences, click Select Disk, and select the new drive.
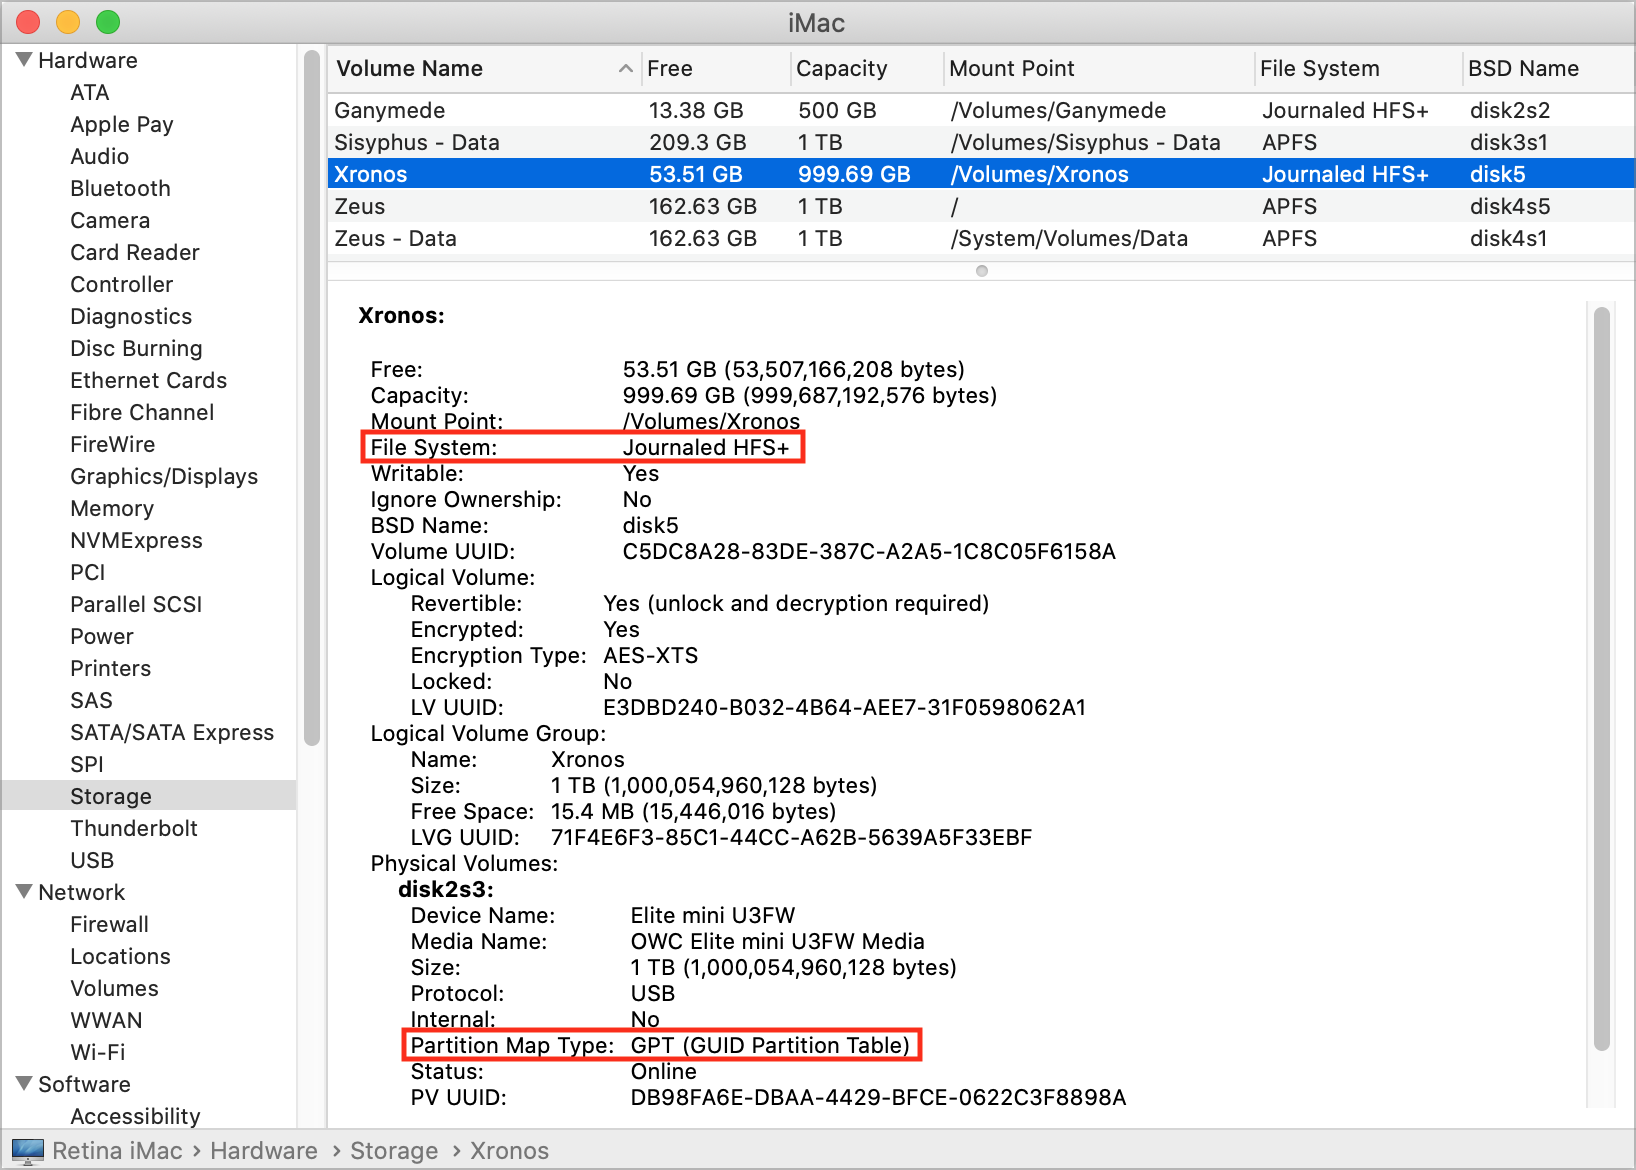
Or, rather, in an ideal world that would be true. You need to make sure that the new backup drive is formatted properly for Time Machine. Choose About This Mac from the Apple menu, and then click System Report to open the System Information app. In its sidebar, click Storage, select the drive at the top, and make sure File System is Journaled HFS+ and Partition Map Type is GPT (GUID Partition Table).
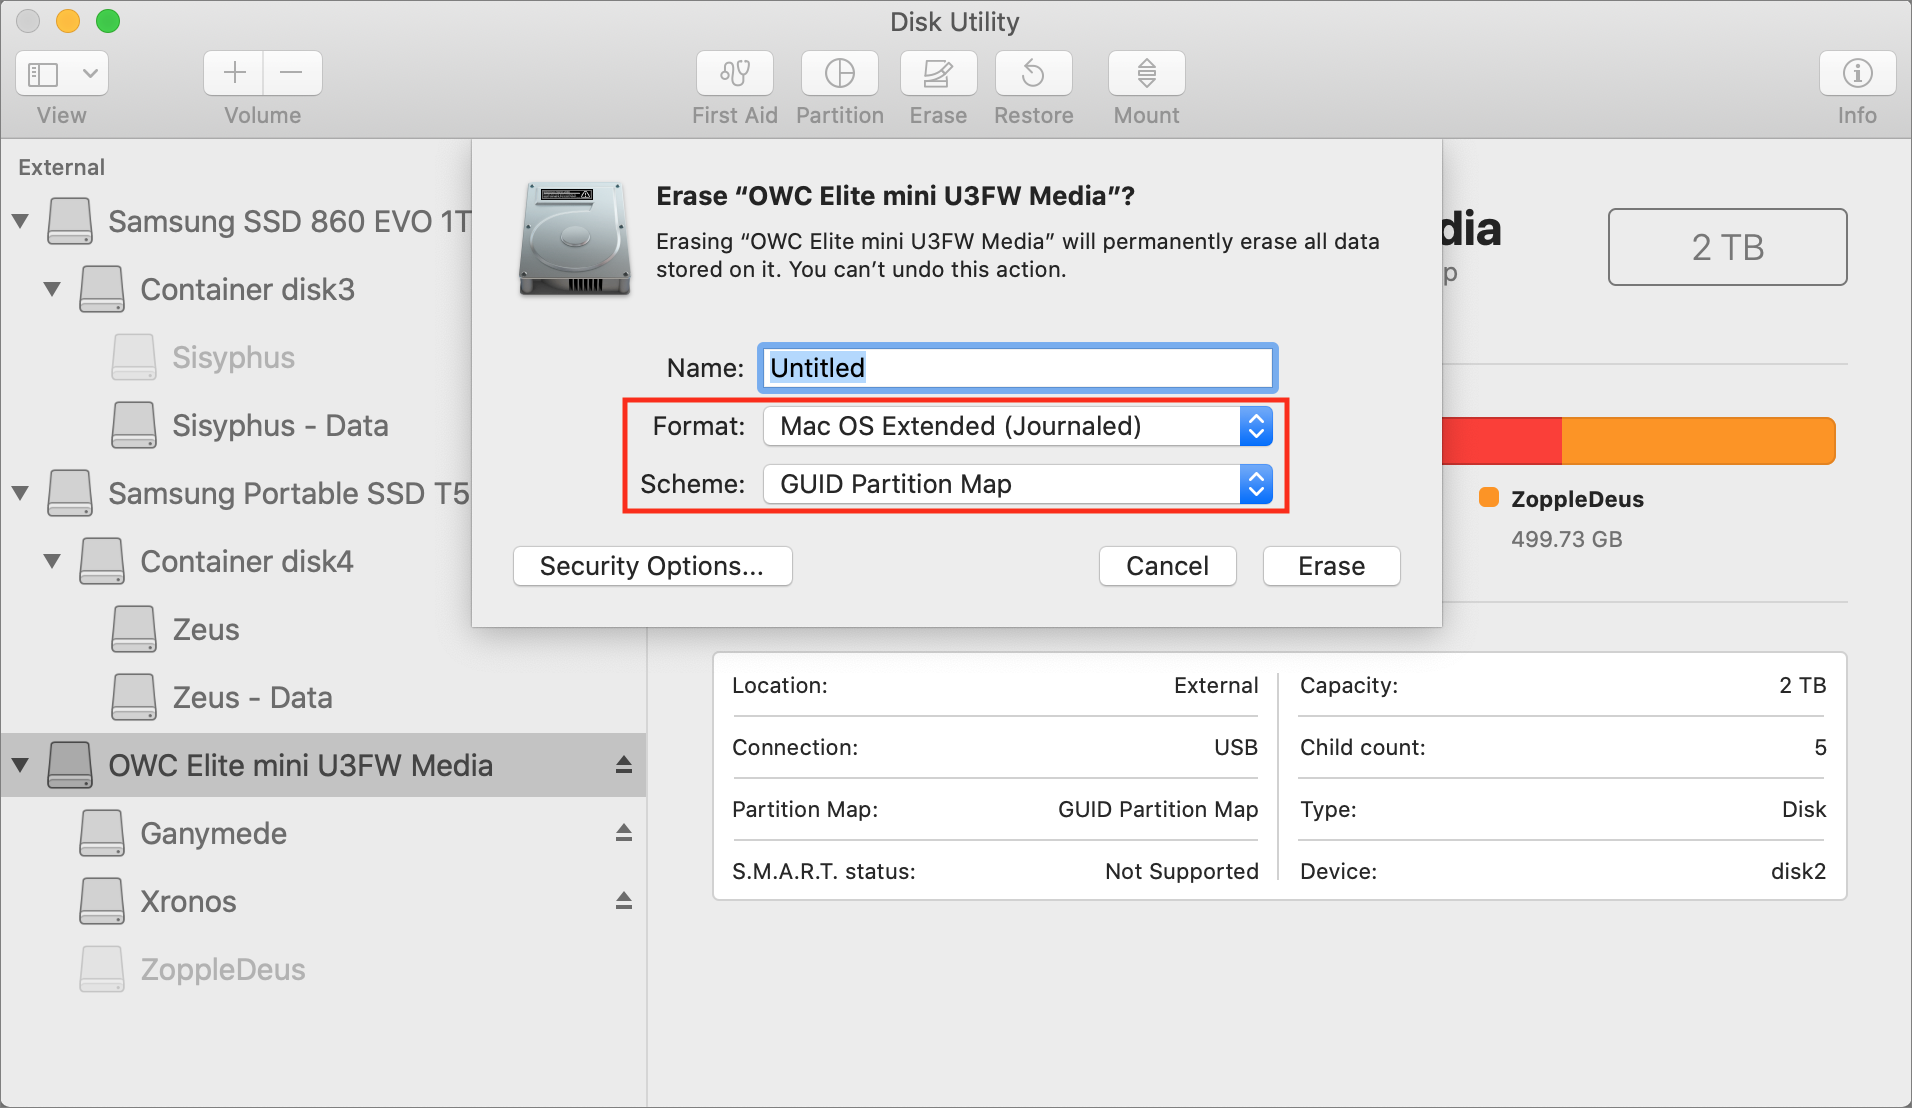
If the drive isn’t formatted correctly for Time Machine, open Disk Utility, select the drive in the sidebar, click Erase, and choose Mac OS Extended (Journaled) from the Format pop-up menu and GUID Partition Map from the Scheme pop-up menu. Then click Erase to ready it for Time Machine use. (This will, of course, delete all the data on the drive, so make sure that’s OK first!)
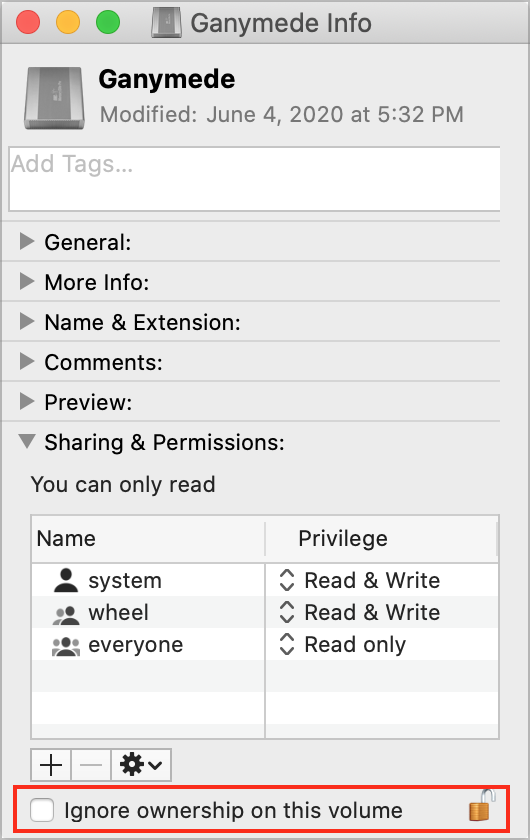
Finally, make sure the permissions on the new drive are set correctly. Select the drive icon in the Finder, choose File > Get Info, click the triangle next to Sharing & Permissions, and make sure the “Ignore ownership on this volume” checkbox is unselected. You may need to click the lock icon and enter an administrator username and password.
Copy Your Existing Backup to a New, Larger Drive
What if you want to retain all those old backups? That’s entirely possible, though it will take a long time to copy. Follow these steps:
- Connect both the old and the new backup drive to your Mac via Thunderbolt, USB, or Firewire.
- Make sure the drive is formatted properly for Time Machine, and if it’s not, reformat it in Disk Utility as noted above. Also, verify that the permissions are set correctly, as above.
- Turn off Time Machine so it doesn’t try to back up while you’re copying its data. In the Time Machine preference pane, deselect Back Up Automatically, or click the Off/On switch, depending on what version of macOS you’re running.
- Drag the Backups.backupdb folder from the old drive to the new one to copy it. You may be prompted for your administrator name and password.
- When it finishes, a day or two later, follow the instructions above to select the new drive in the Time Machine preferences and make sure to turn Time Machine back on.
One final note. It may be tempting to use an alternative method of copying the Backups.backupdb folder, but resist the urge. Time Machine uses special drive structures to work its magic, and only the Finder is guaranteed to copy them correctly.
AI Usage Transparency Report
Pre-AI Era · Written before widespread use of generative AI tools
AI Signal Composition
Score: 0.09 · Low AI Influence
Summary
Time Machine backup drive filling up due to large files and versions of changed files. Solutions include deleting old backups, excluding large folders from the backup, starting over with a new drive or erasing the existing one, and copying the existing backup to a new larger drive.
Related Posts

When Chromium Mistakes Your VPN for a Local Network
Turning off Jamf Trust fixed the webinar, which normally would have sent me straight to its routing policies. This time the route was fine: Chromium was treating Jamf's ZTNA broker addresses as a local network, and an Edge and Chrome preference corrected it.
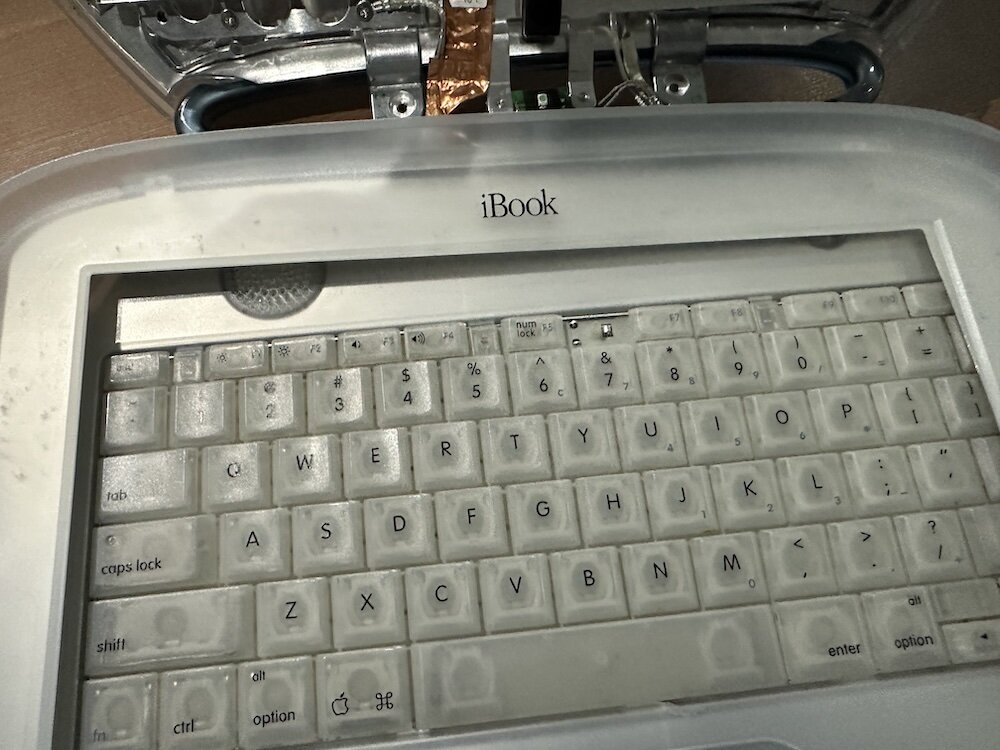
Clamshell iBook G3 Restoration, Part 1: From Broken Screen to Board-Level Repair
Part one of a Clamshell iBook G3 restoration: a broken screen, a charger detour, a blinking system folder, a full teardown, and the backlight connector mistake that paused the project.
Bromure Gives Codex a Room of Its Own
I installed Bromure Agentic Coding, watched it build the Linux VM, authenticated Codex, and followed a real Codex task through the workspace.
Claude Code Auto Mode Changes Approval Flow, Not the Safety Boundary
Claude Code Auto mode changes how approval decisions are handled. It does not expand the boundary of what the coding agent should be allowed to do.

Amnesia Stealer Shows the Next Stage of ClickFix on macOS
Amnesia Stealer shows how ClickFix-style social engineering is adapting on macOS, while a public malware sample gives defenders an opportunity to study the behavior behind the campaign.
Reporting on Microsoft 365 DLP Overrides with PowerShell
DLP overrides are not automatically bad. They are a business process that needs visibility. This walkthrough covers a Microsoft Purview DLP policy, a custom sensitive information type, user override behavior, and a PowerShell report that exports override events from Activity Explorer.

PowerBook 140 BlueSCSI Install: Cable Fixed, Battery-Bay Power, and Wi-Fi Setup
The PowerBook 140 project moved from preparing a BlueSCSI card in Basilisk II to installing the repaired internal SCSI cable, powering the BlueSCSI Pico externally from the battery bay, booting System 7.1, and fighting through DaynaPORT Wi-Fi setup.

Move Entra Users Off SMS and Voice Before Microsoft Retires Them
Microsoft is retiring Microsoft-provided SMS and voice authentication in Entra ID. The migration is not passkeys for everyone; it is removing weak telecom MFA and choosing supported replacement methods such as Microsoft Authenticator, FIDO2 keys, certificate-based authentication, OATH hardware tokens, or customer-managed telecom.
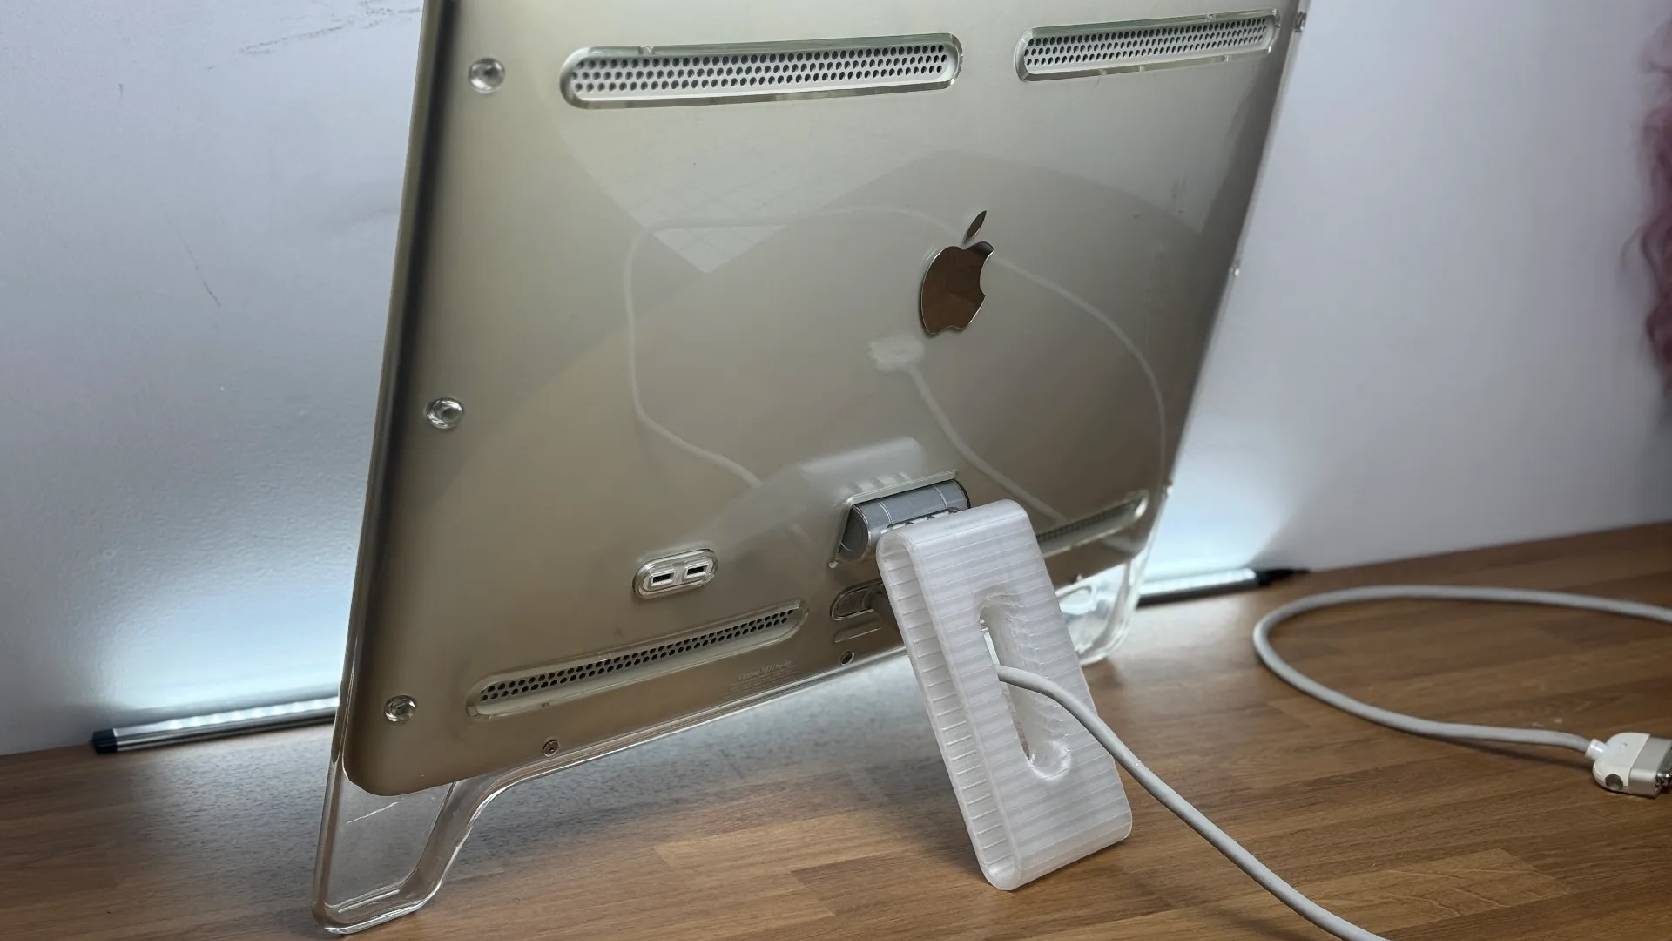
Fixing a Broken Apple Cinema Display Stand with a 3D Printed Leg
A 22-inch Apple Cinema Display arrived with a broken acrylic easel stand, so I used a 3D printed replacement leg instead of sending the monitor back.
macOS Tahoe 26.6.1 Fixes a High-Severity Screen Sharing Authentication Bypass
macOS Tahoe 26.6.1 fixes CVE-2026-65400, a high-severity Screen Sharing authentication issue where an attacker on the network may be able to authenticate without valid credentials.